How to Add a Minimum Required Size for Images Uploaded by Shoppers
Last updated: April 28, 2026
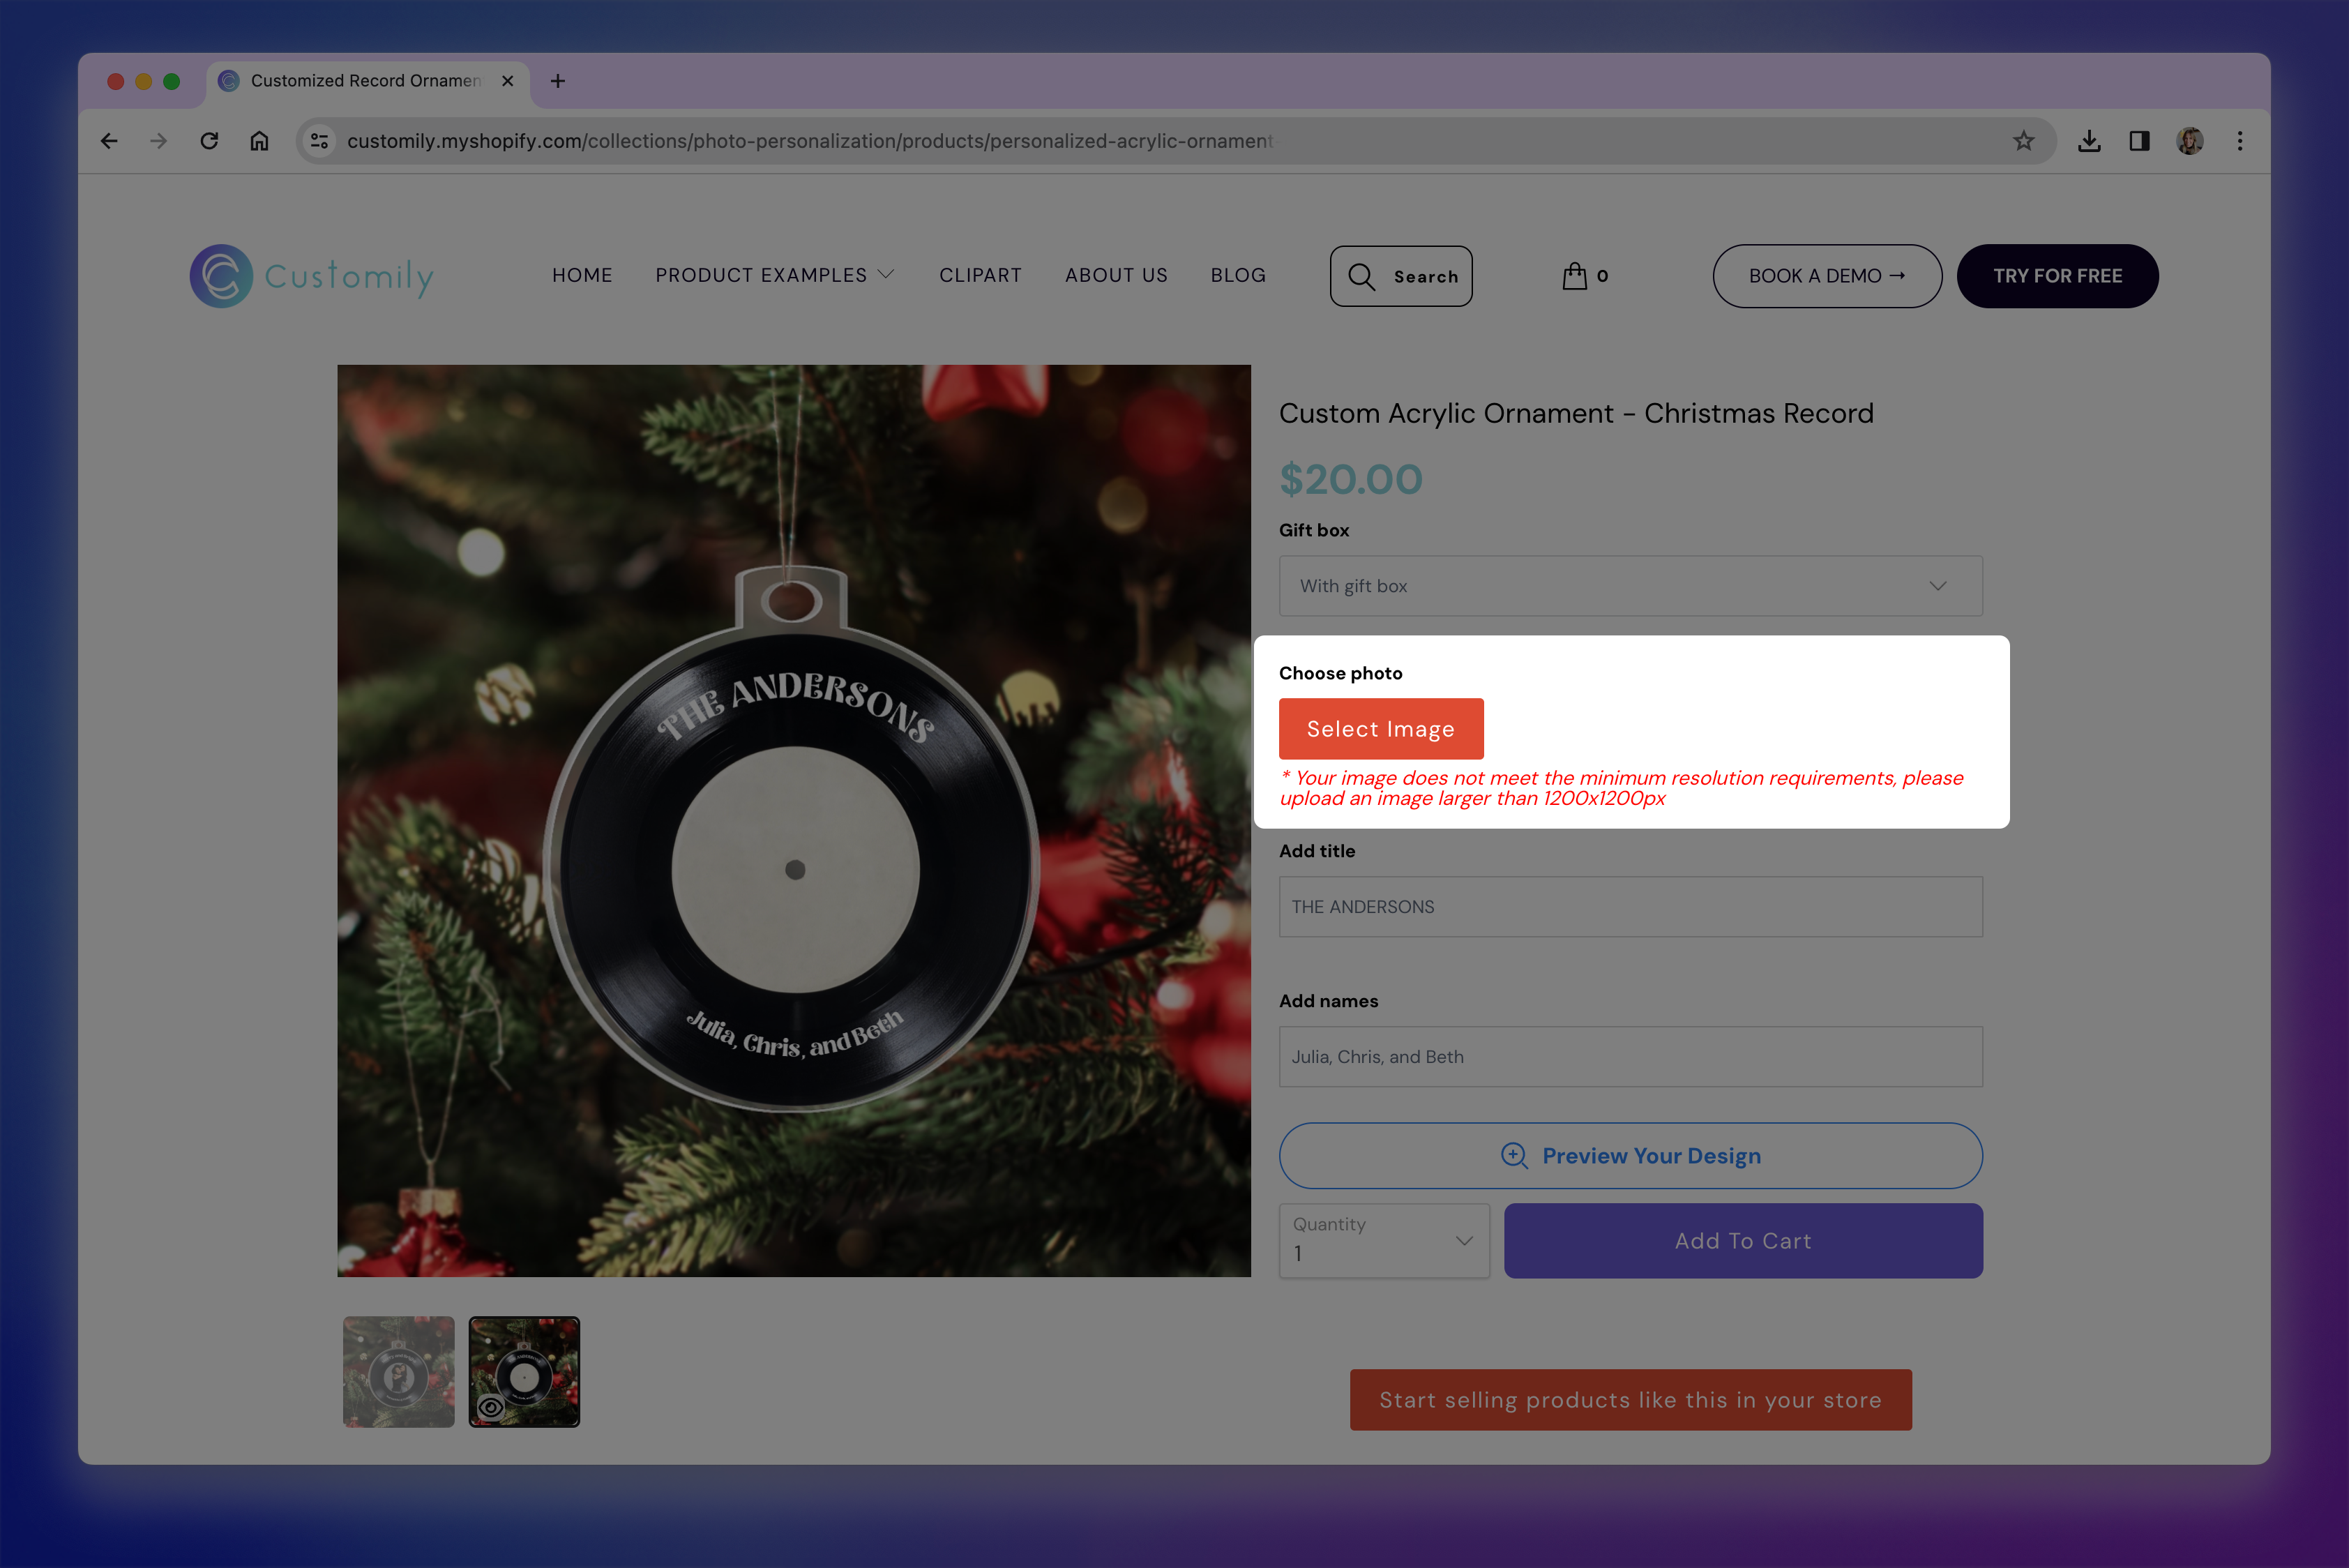
If your design requires a high-quality print, you can set a minimum width and height (in pixels) for any image shoppers upload. This ensures the image won’t appear blurry or pixelated when printed.
If a shopper tries to upload an image smaller than the minimum size you set, they’ll see an error message prompting them to upload a larger file.
Adding a minimum required size for image uploads
Go to your Option Sets panel and select the set you want to edit.
Click on the Image Upload Option you want to edit to expand its settings.
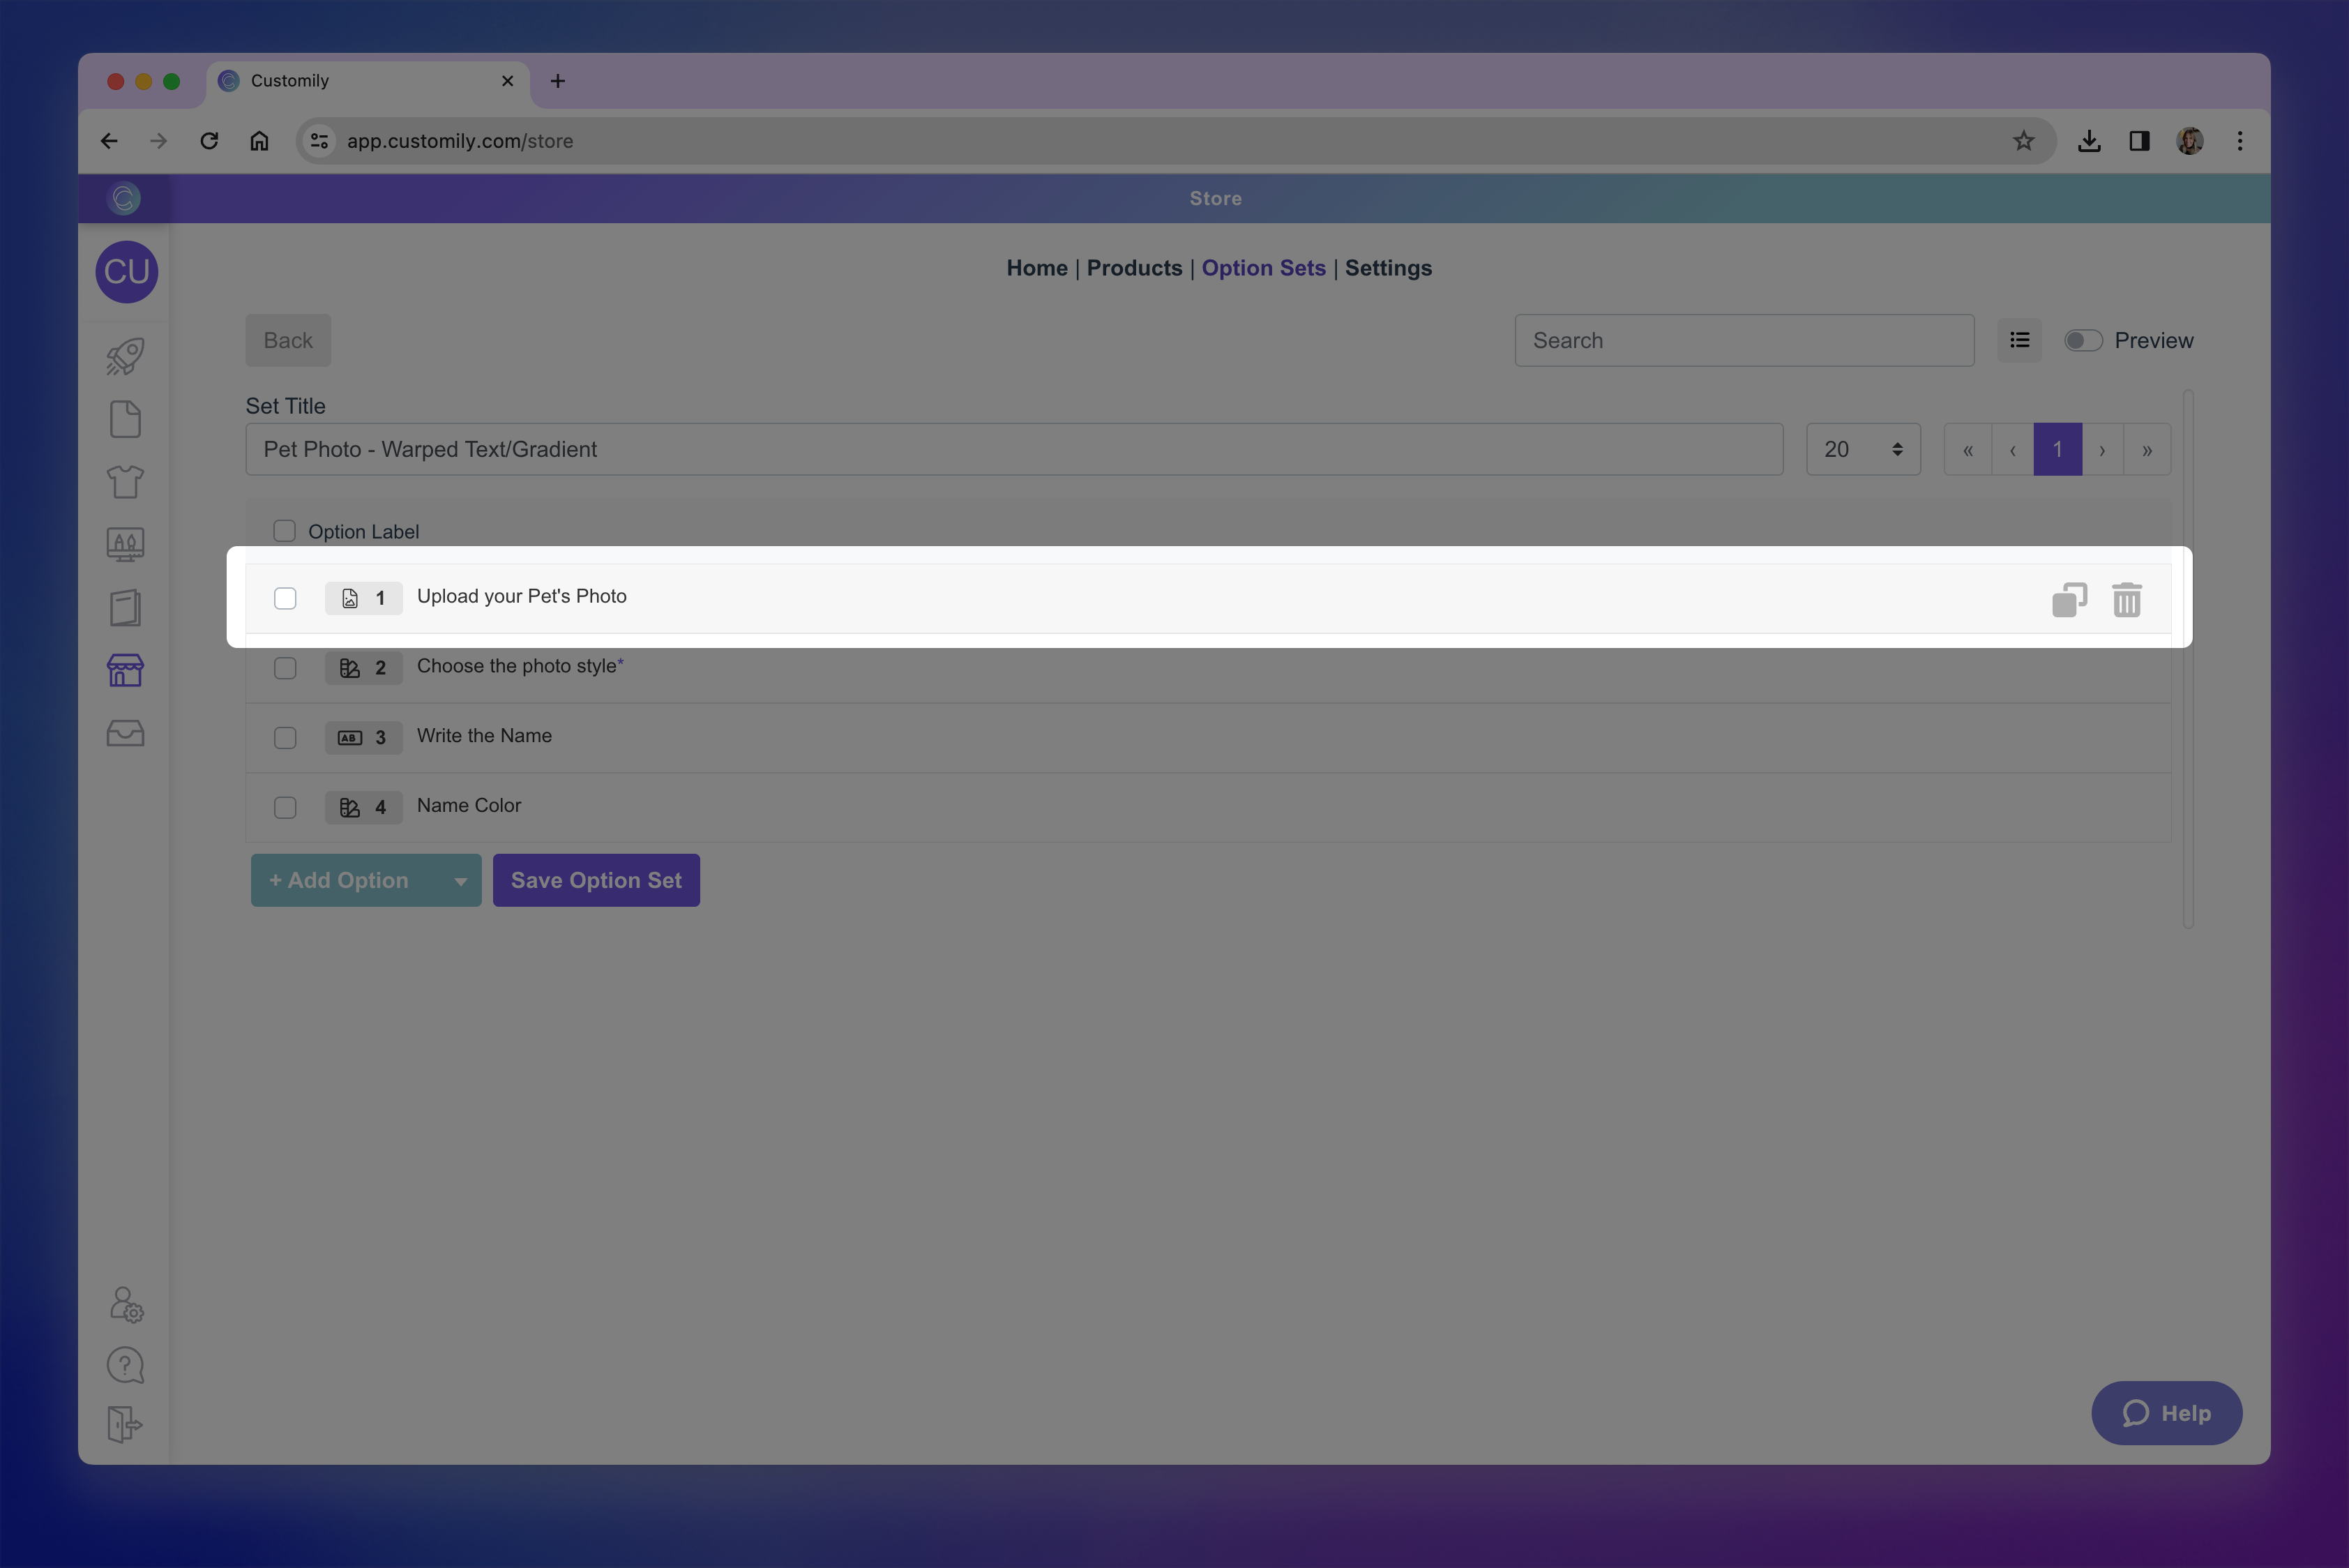
Find the “Minimum image size” section and enter the minimum width and height in pixels.

Save your changes.
How to Know What Minimum Size to Use
For most print products, aim for at least 150 DPI (dots per inch) to ensure good print quality. You can calculate the minimum pixel dimensions like this:
Photo Print Width in inches × DPI = pixel width
Photo Print Height in inches × DPI = pixel height
Example:
An 8×10 inch print at 150 DPI would need at least 1200×1500 px.
Here’s a quick reference guide:
| Photo Print Size (inches) | MinPixels @150 DPI | Min Pixels @300 DPI |
|---|---|---|
| 5x7 | 750x1050 | 1500x2100 |
| 8x10 | 1200x1500 | 2400x3000 |
| 12x16 | 1800x2400 | 3600x4800 |
| 16x20 | 2400x3000 | 4800x6000 |
| 20x24 | 3000x3600 | 6000x7200 |
Keep in Mind
Setting very high pixel requirements may cause shoppers’ uploads to be rejected, especially if they’re uploading from mobile devices.