Amazon Custom print file generation
Last updated: May 26, 2026
Amazon offers a live preview tool called Amazon Custom, which allows customers to personalize products directly on Amazon. However, this tool doesn't generate a print-ready production file.
Customily bridges that gap by allowing store owners to import customers' personalization data from Amazon Custom and automatically generating a print-ready file for production.
For this new workflow to work:
The product on Amazon must have an Amazon Custom personalization set up for it.
The product on Customily must have a template connected, with the same customization inputs as Amazon Custom.

The product on Customily must have the Connect Amazon Custom Personalization turned on.

Merchants must import the customization data into Customily to generate the corresponding print files.
Important
When an order comes from this product, Customily will not send out the PDF with a customization link.
How to correctly configure the template
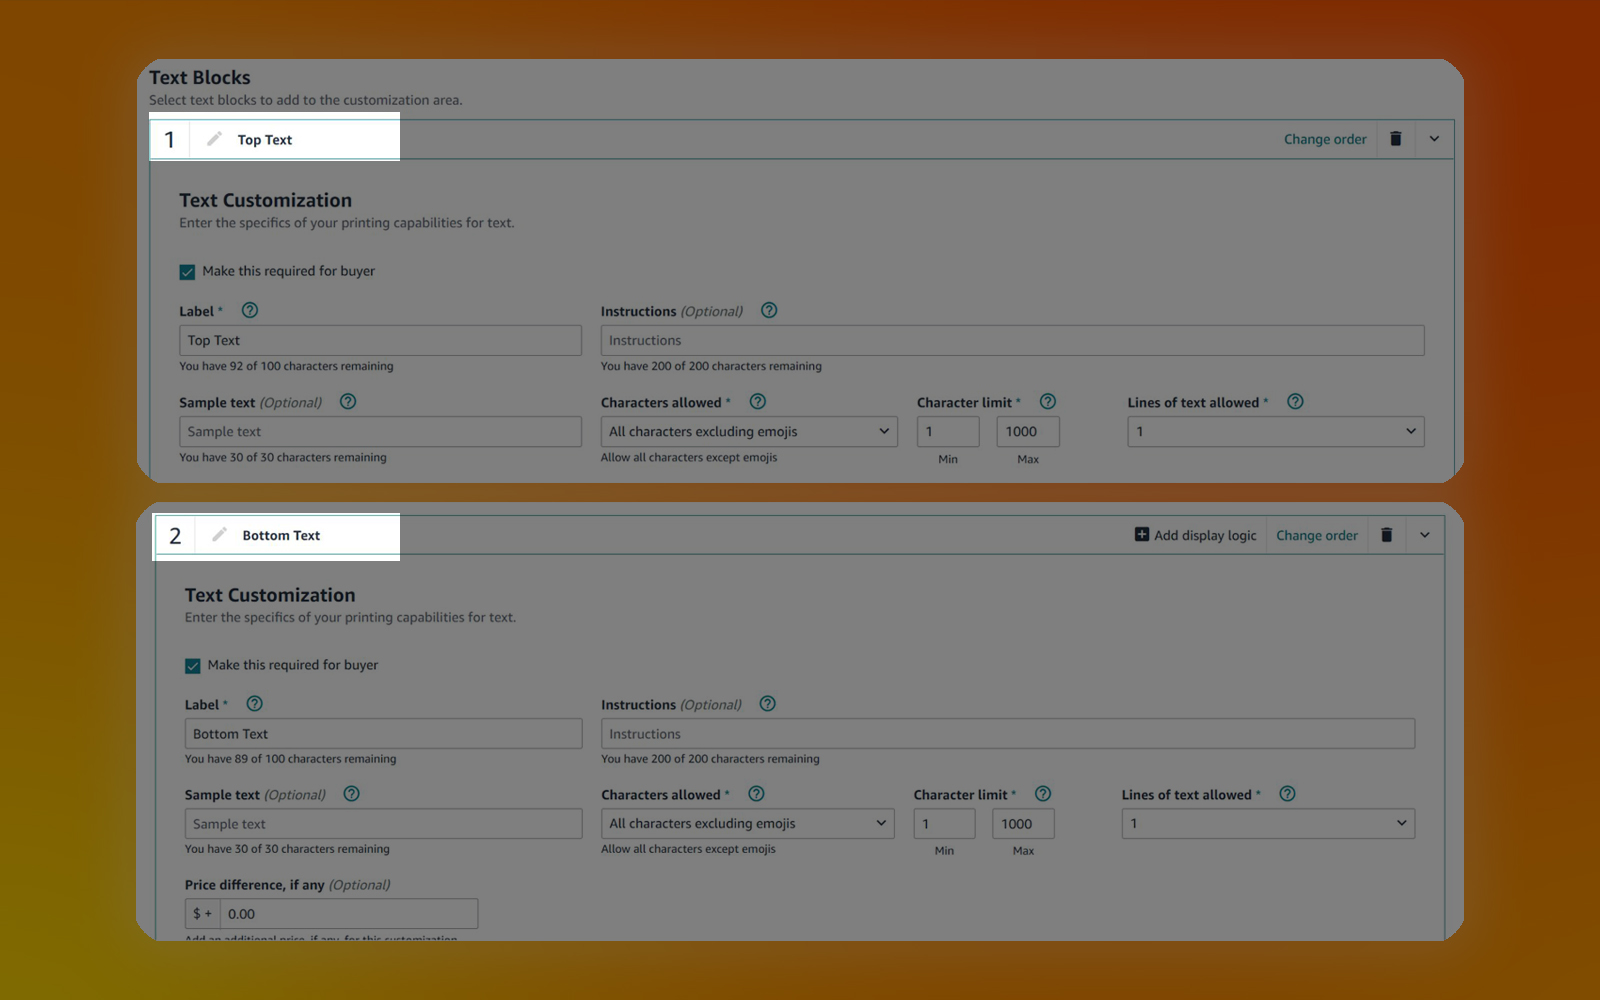
When creating the template in Customily, ensure that all layer names match the option labels used in Amazon.
Amazon Custom options
Customily Template

Compatible elements:
Layouts and groups
Moon Phase
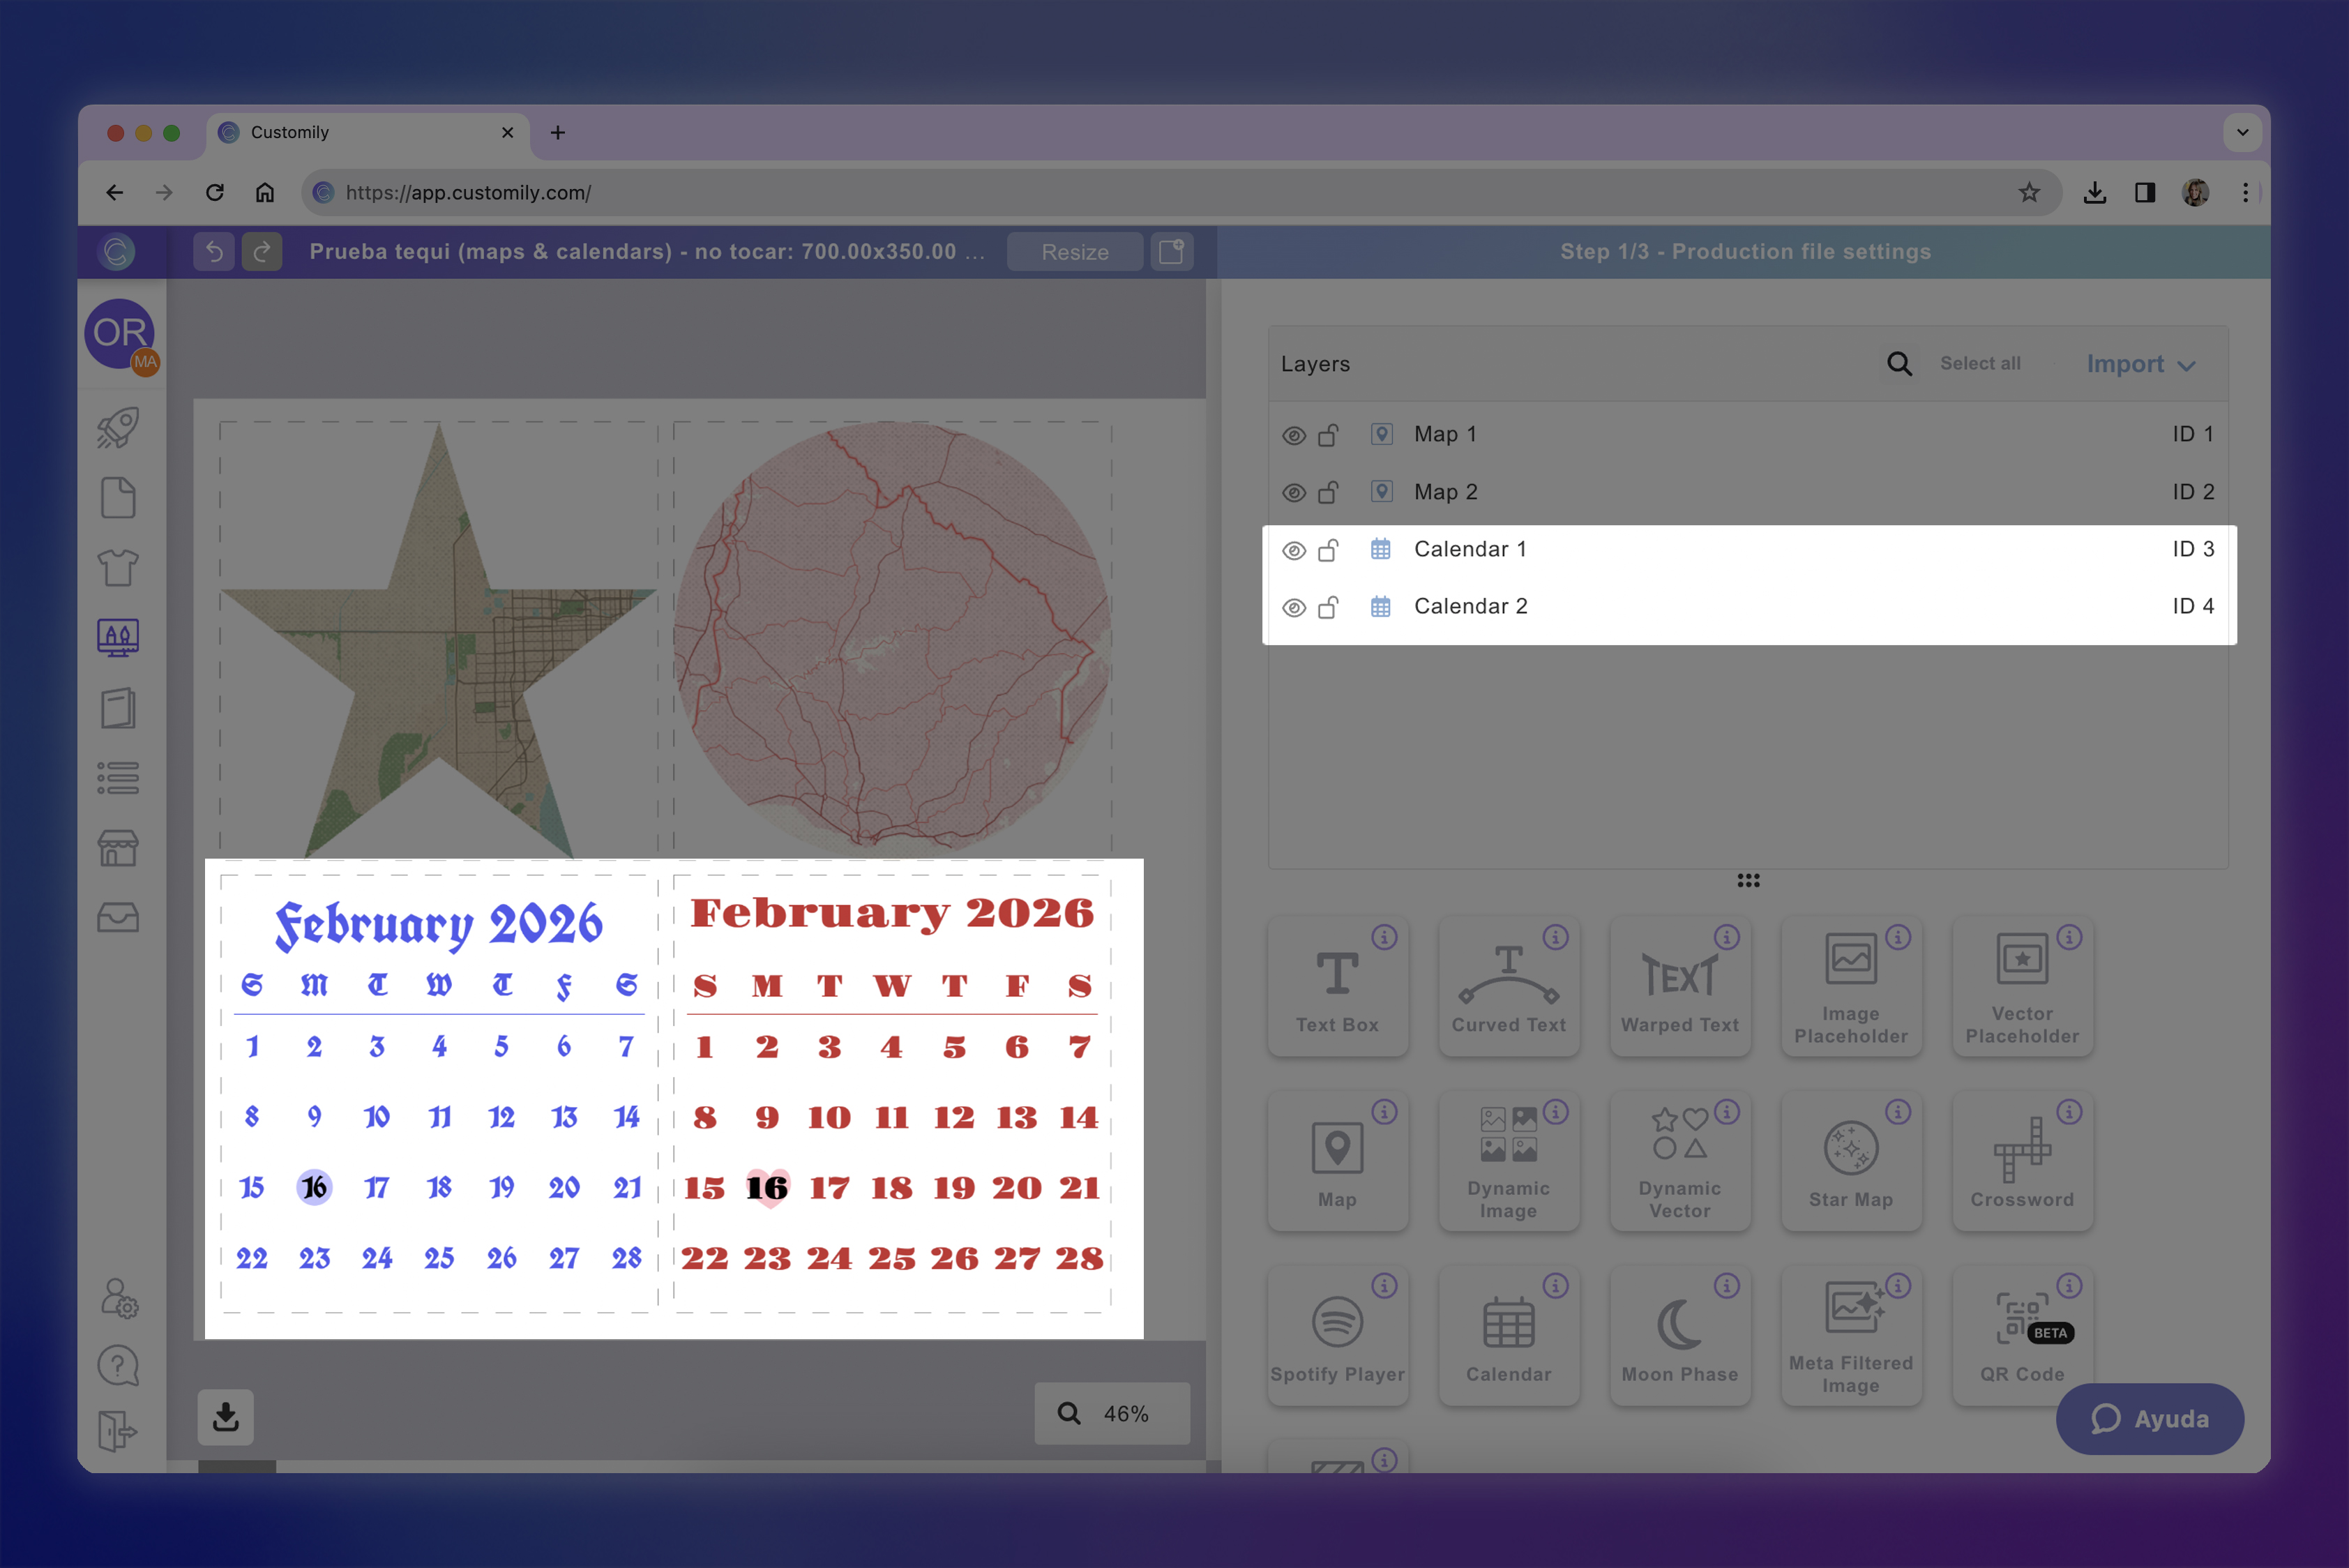
Calendar
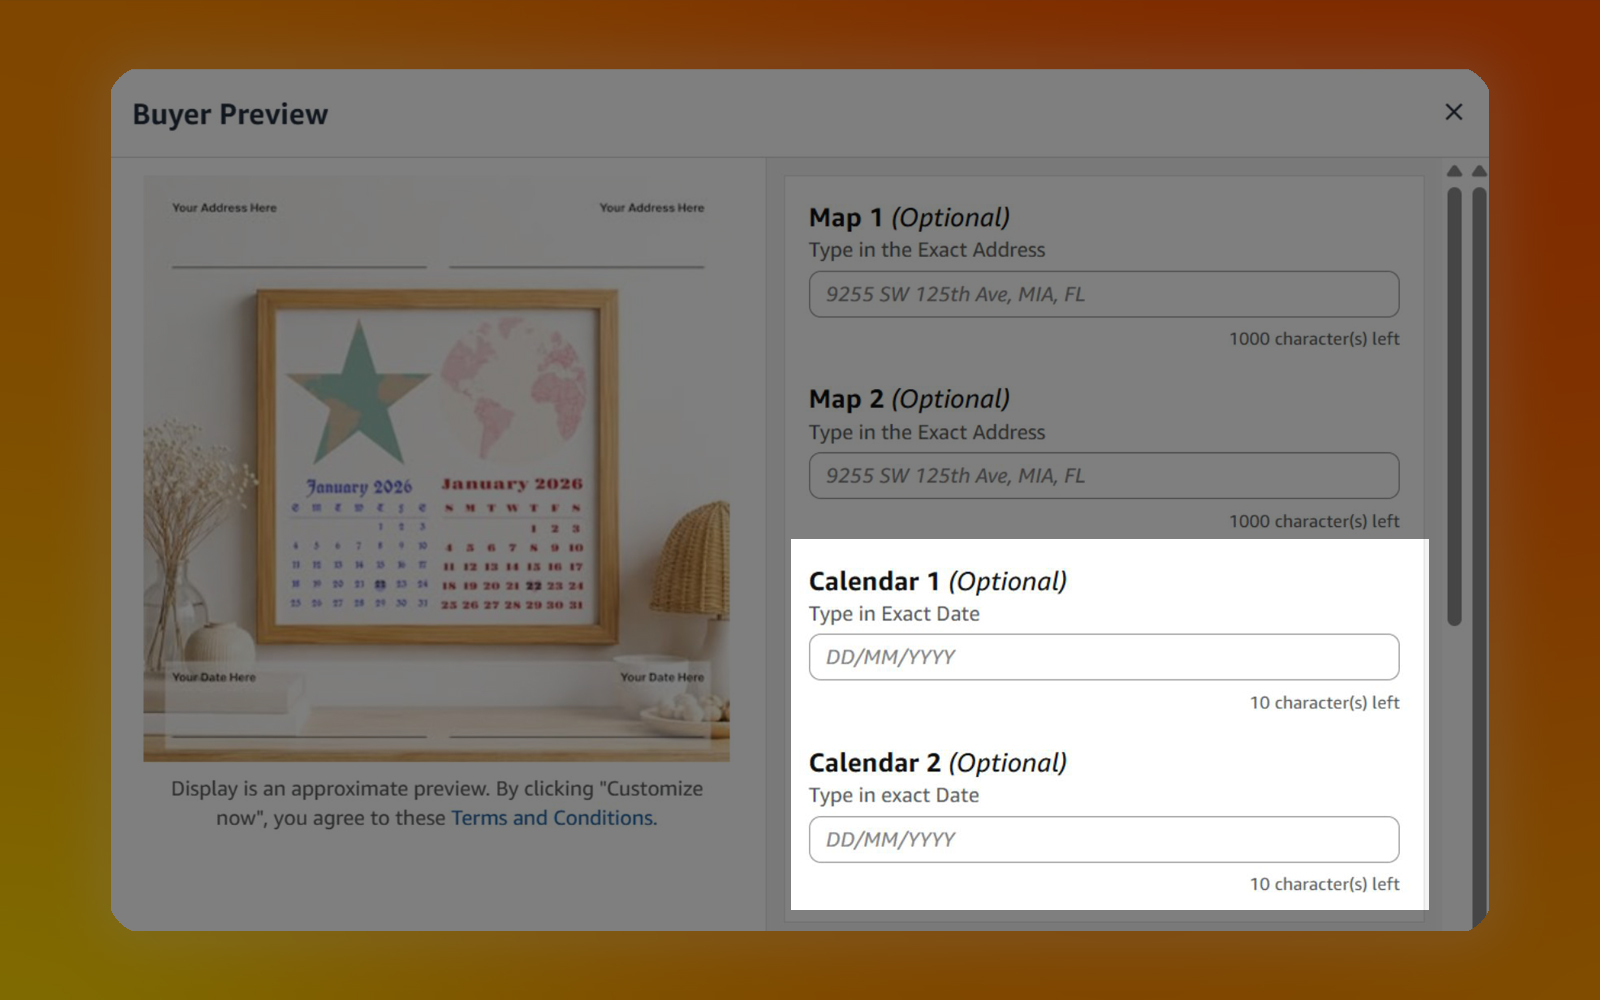
Calendars in Customily can receive information entered by shoppers as text inputs or data inputs in Amazon Custom.
Amazon Custom input configuration
Amazon Option Name must include the word Calendar.
How it works
Calendar elements will match the entered text to a valid date and generate a stylized image on the calendar for the selected date.
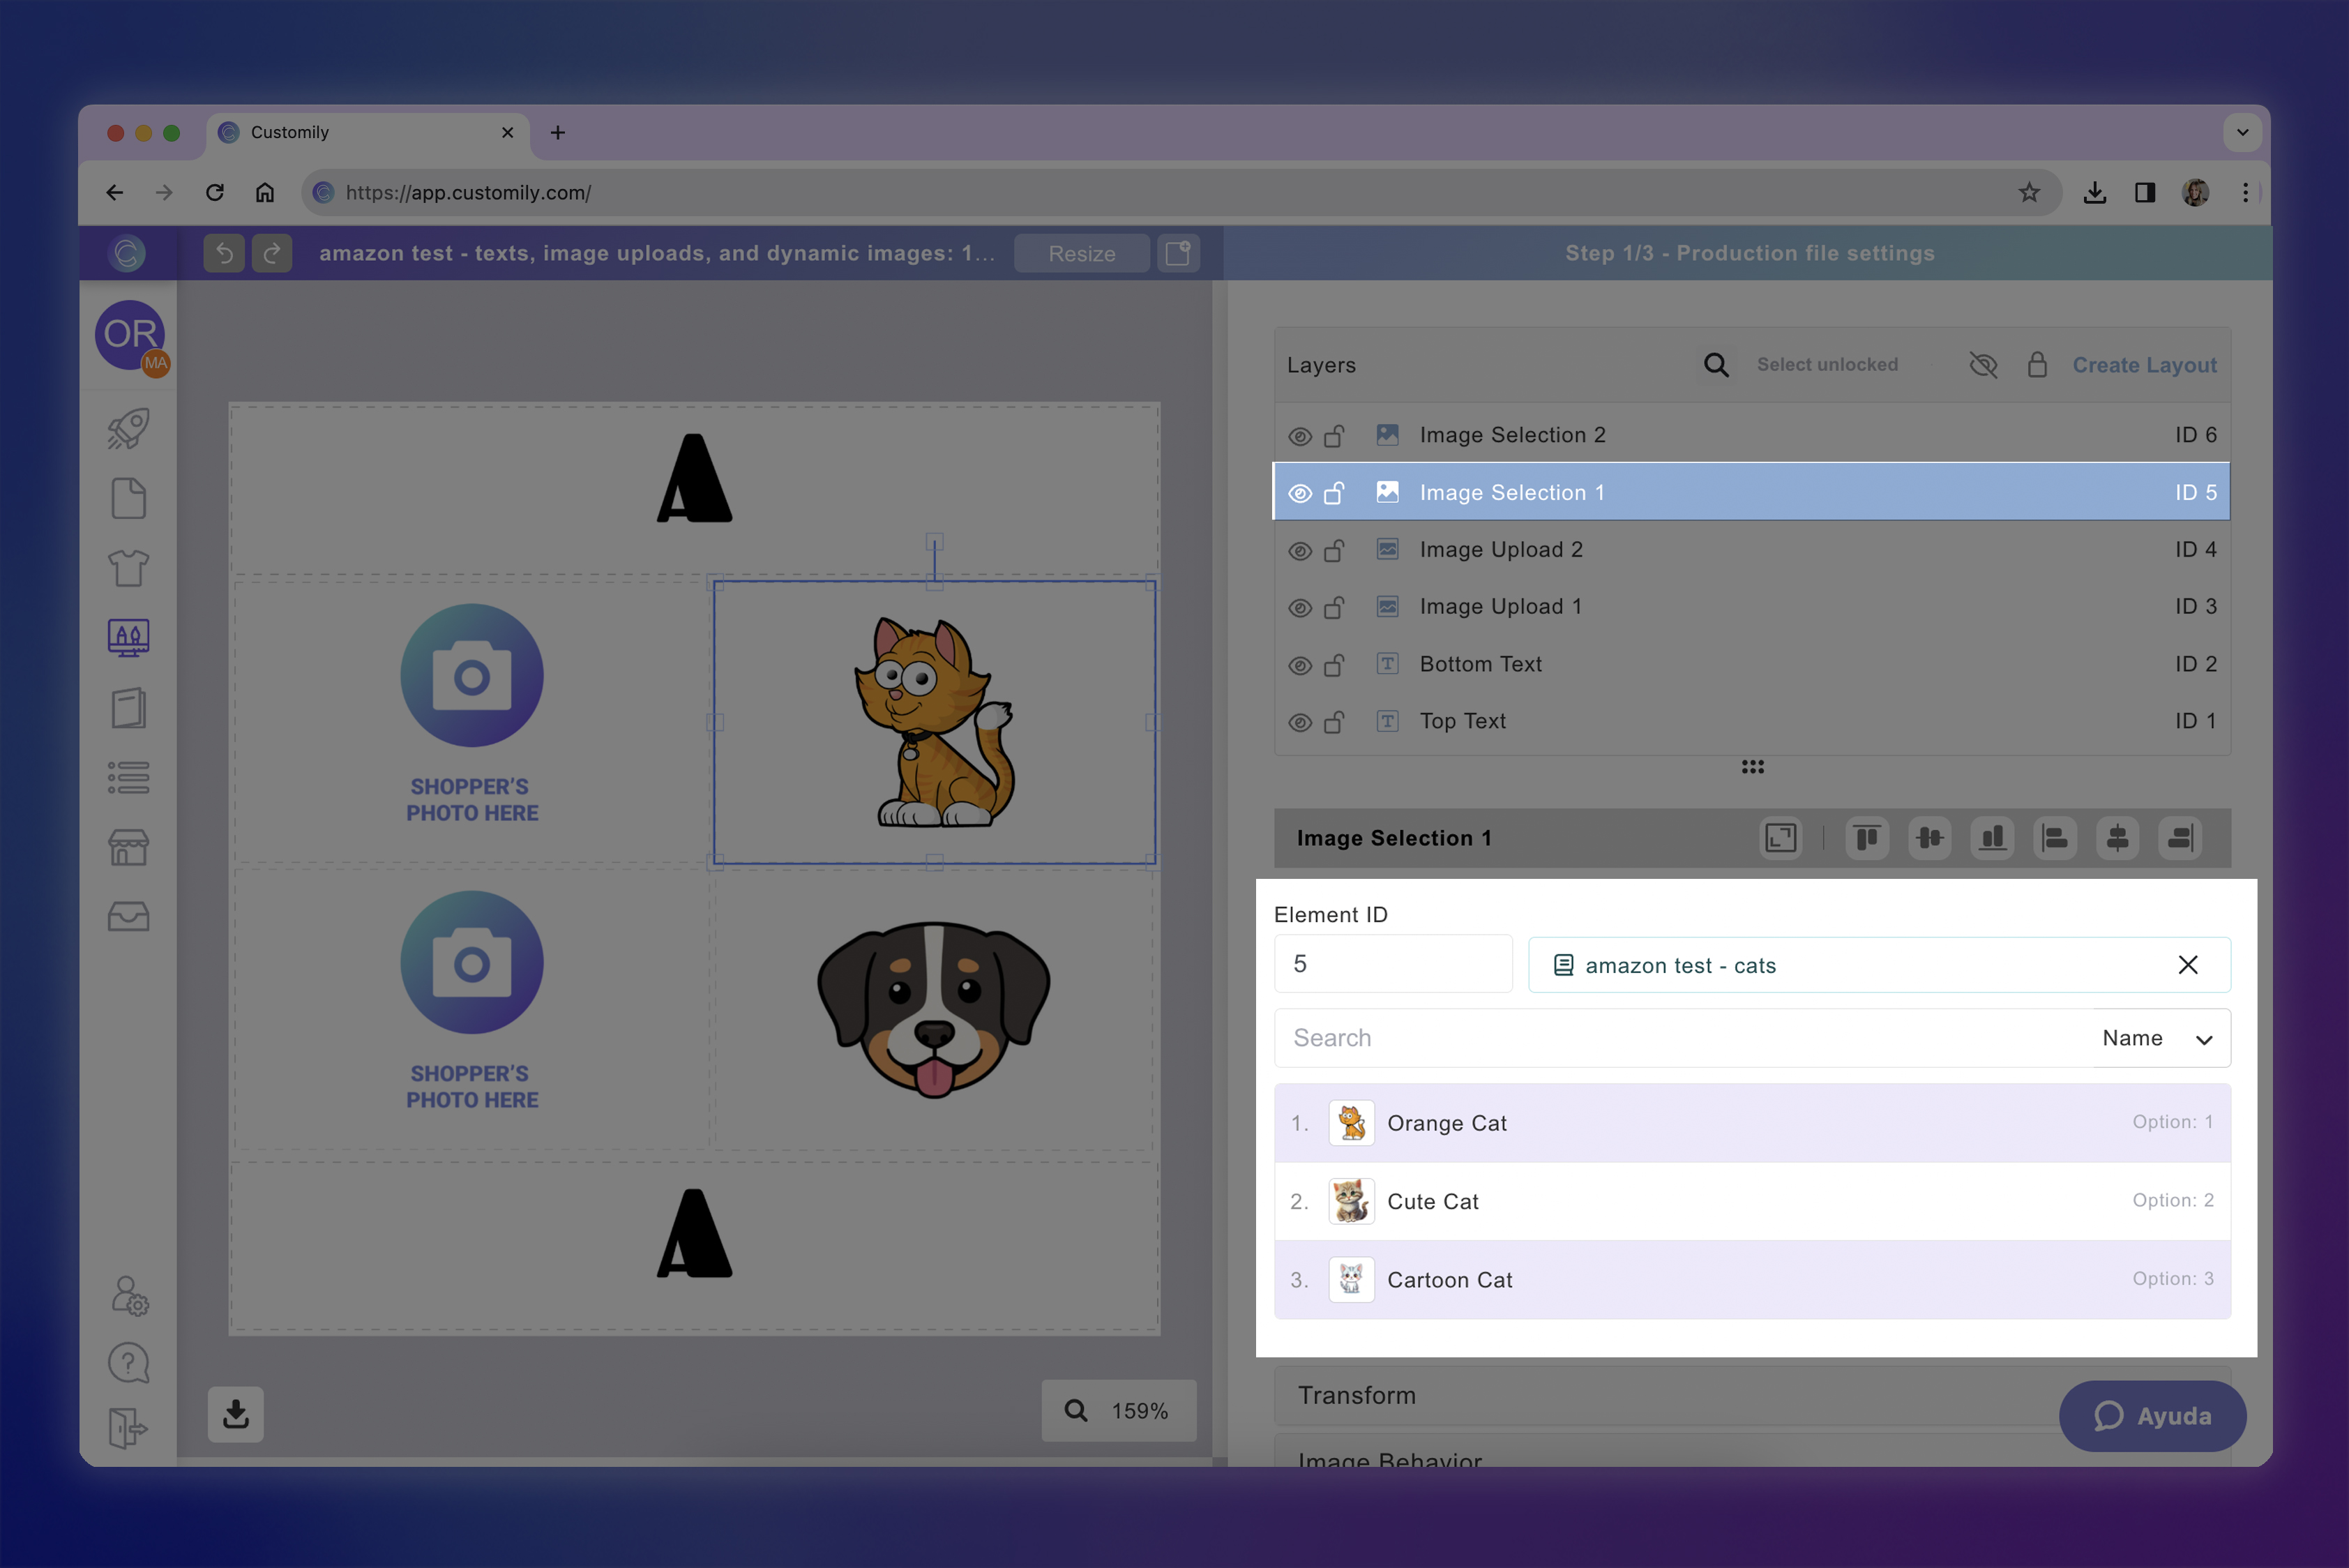
Dynamic Image

Dynamic images are compatible with the Amazon Custom option dropdown input. Image options must match exactly and appear in the same order on both platforms. In Customily, these options must be configured as an Image Library.
Important
Categories aren’t supported at the moment
Image Placeholder

Image placeholders are compatible with Amazon Custom Image input.
Amazon Custom image editing is fully compatible with Customily image placeholders.
Any advanced edits customers apply to their uploaded images in Amazon Custom are preserved when generating print files in Customily.
This includes:
Transforms
Applied filters
Image adjustments
Focus settings
Text added to photos
Stickers applied
Important
Since the image can be fully customized within Amazon Custom, we recommend not applying any additional settings in Customily’s Image Behavior or Image Effects toolboxes, except for masks. This ensures that the final generated output accurately reflects the customer’s personalization without unintended modifications.
Street Maps
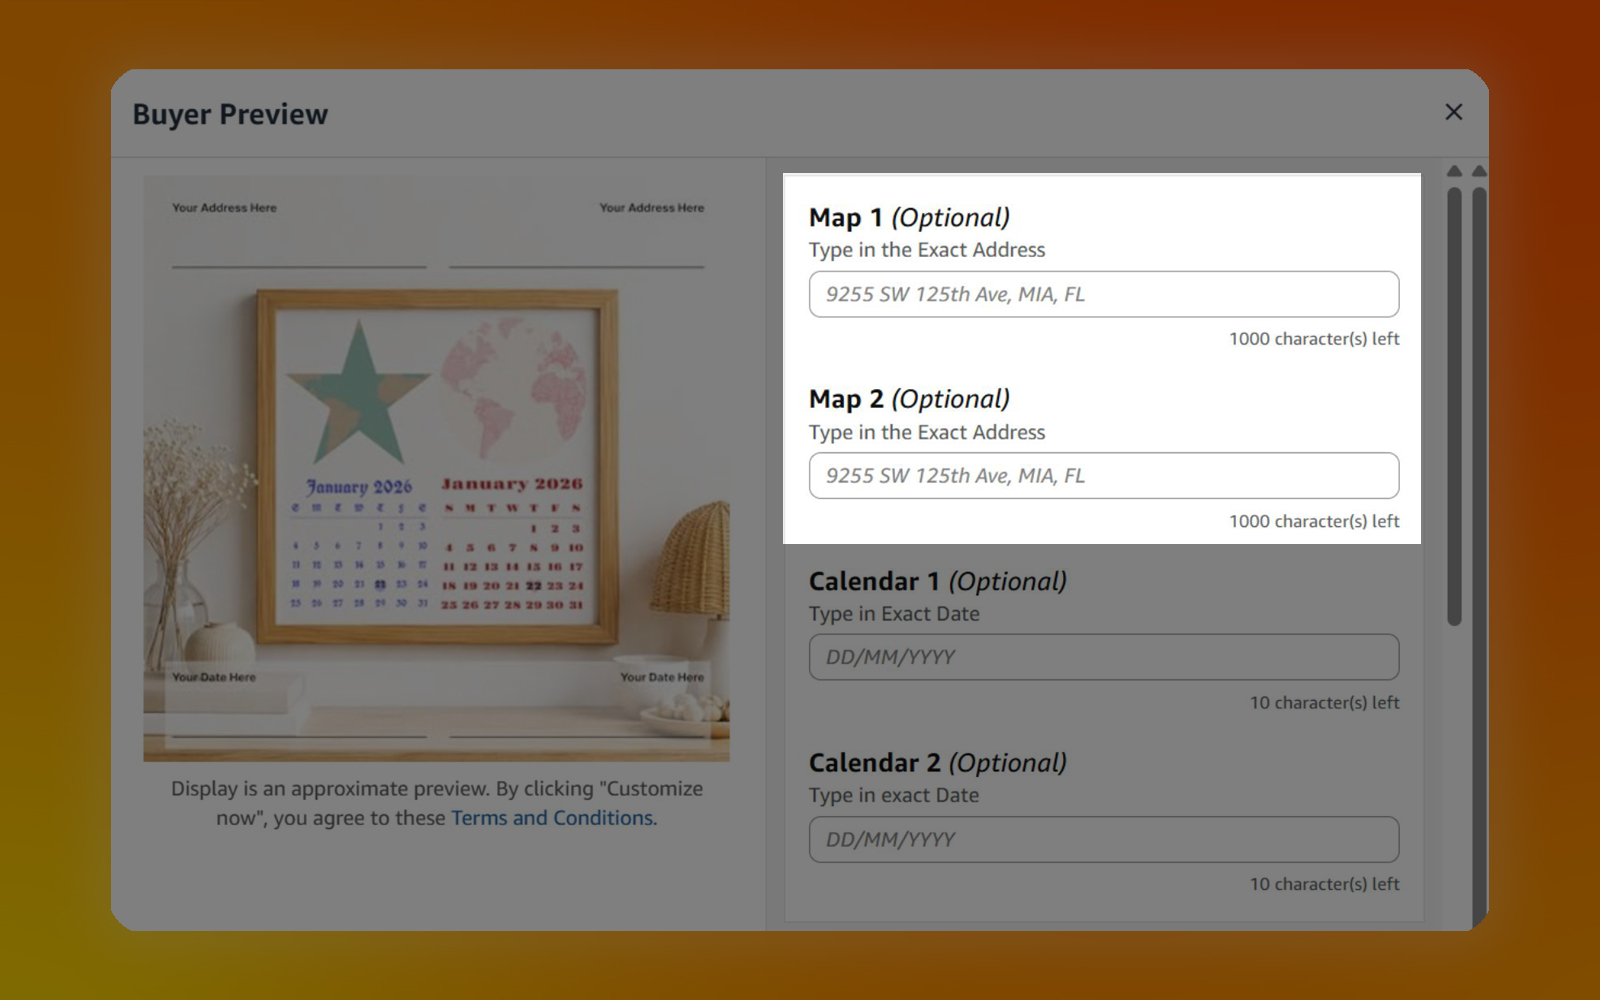
Street Maps in Customily can receive information entered by shoppers as text inputs or data inputs in Amazon Custom.
Amazon Custom input configuration
Amazon Option Name must include the word Map.
How it works
Mapbox will search for the address entered by the shopper in Amazon Custom and generate a map image using the first matching result.
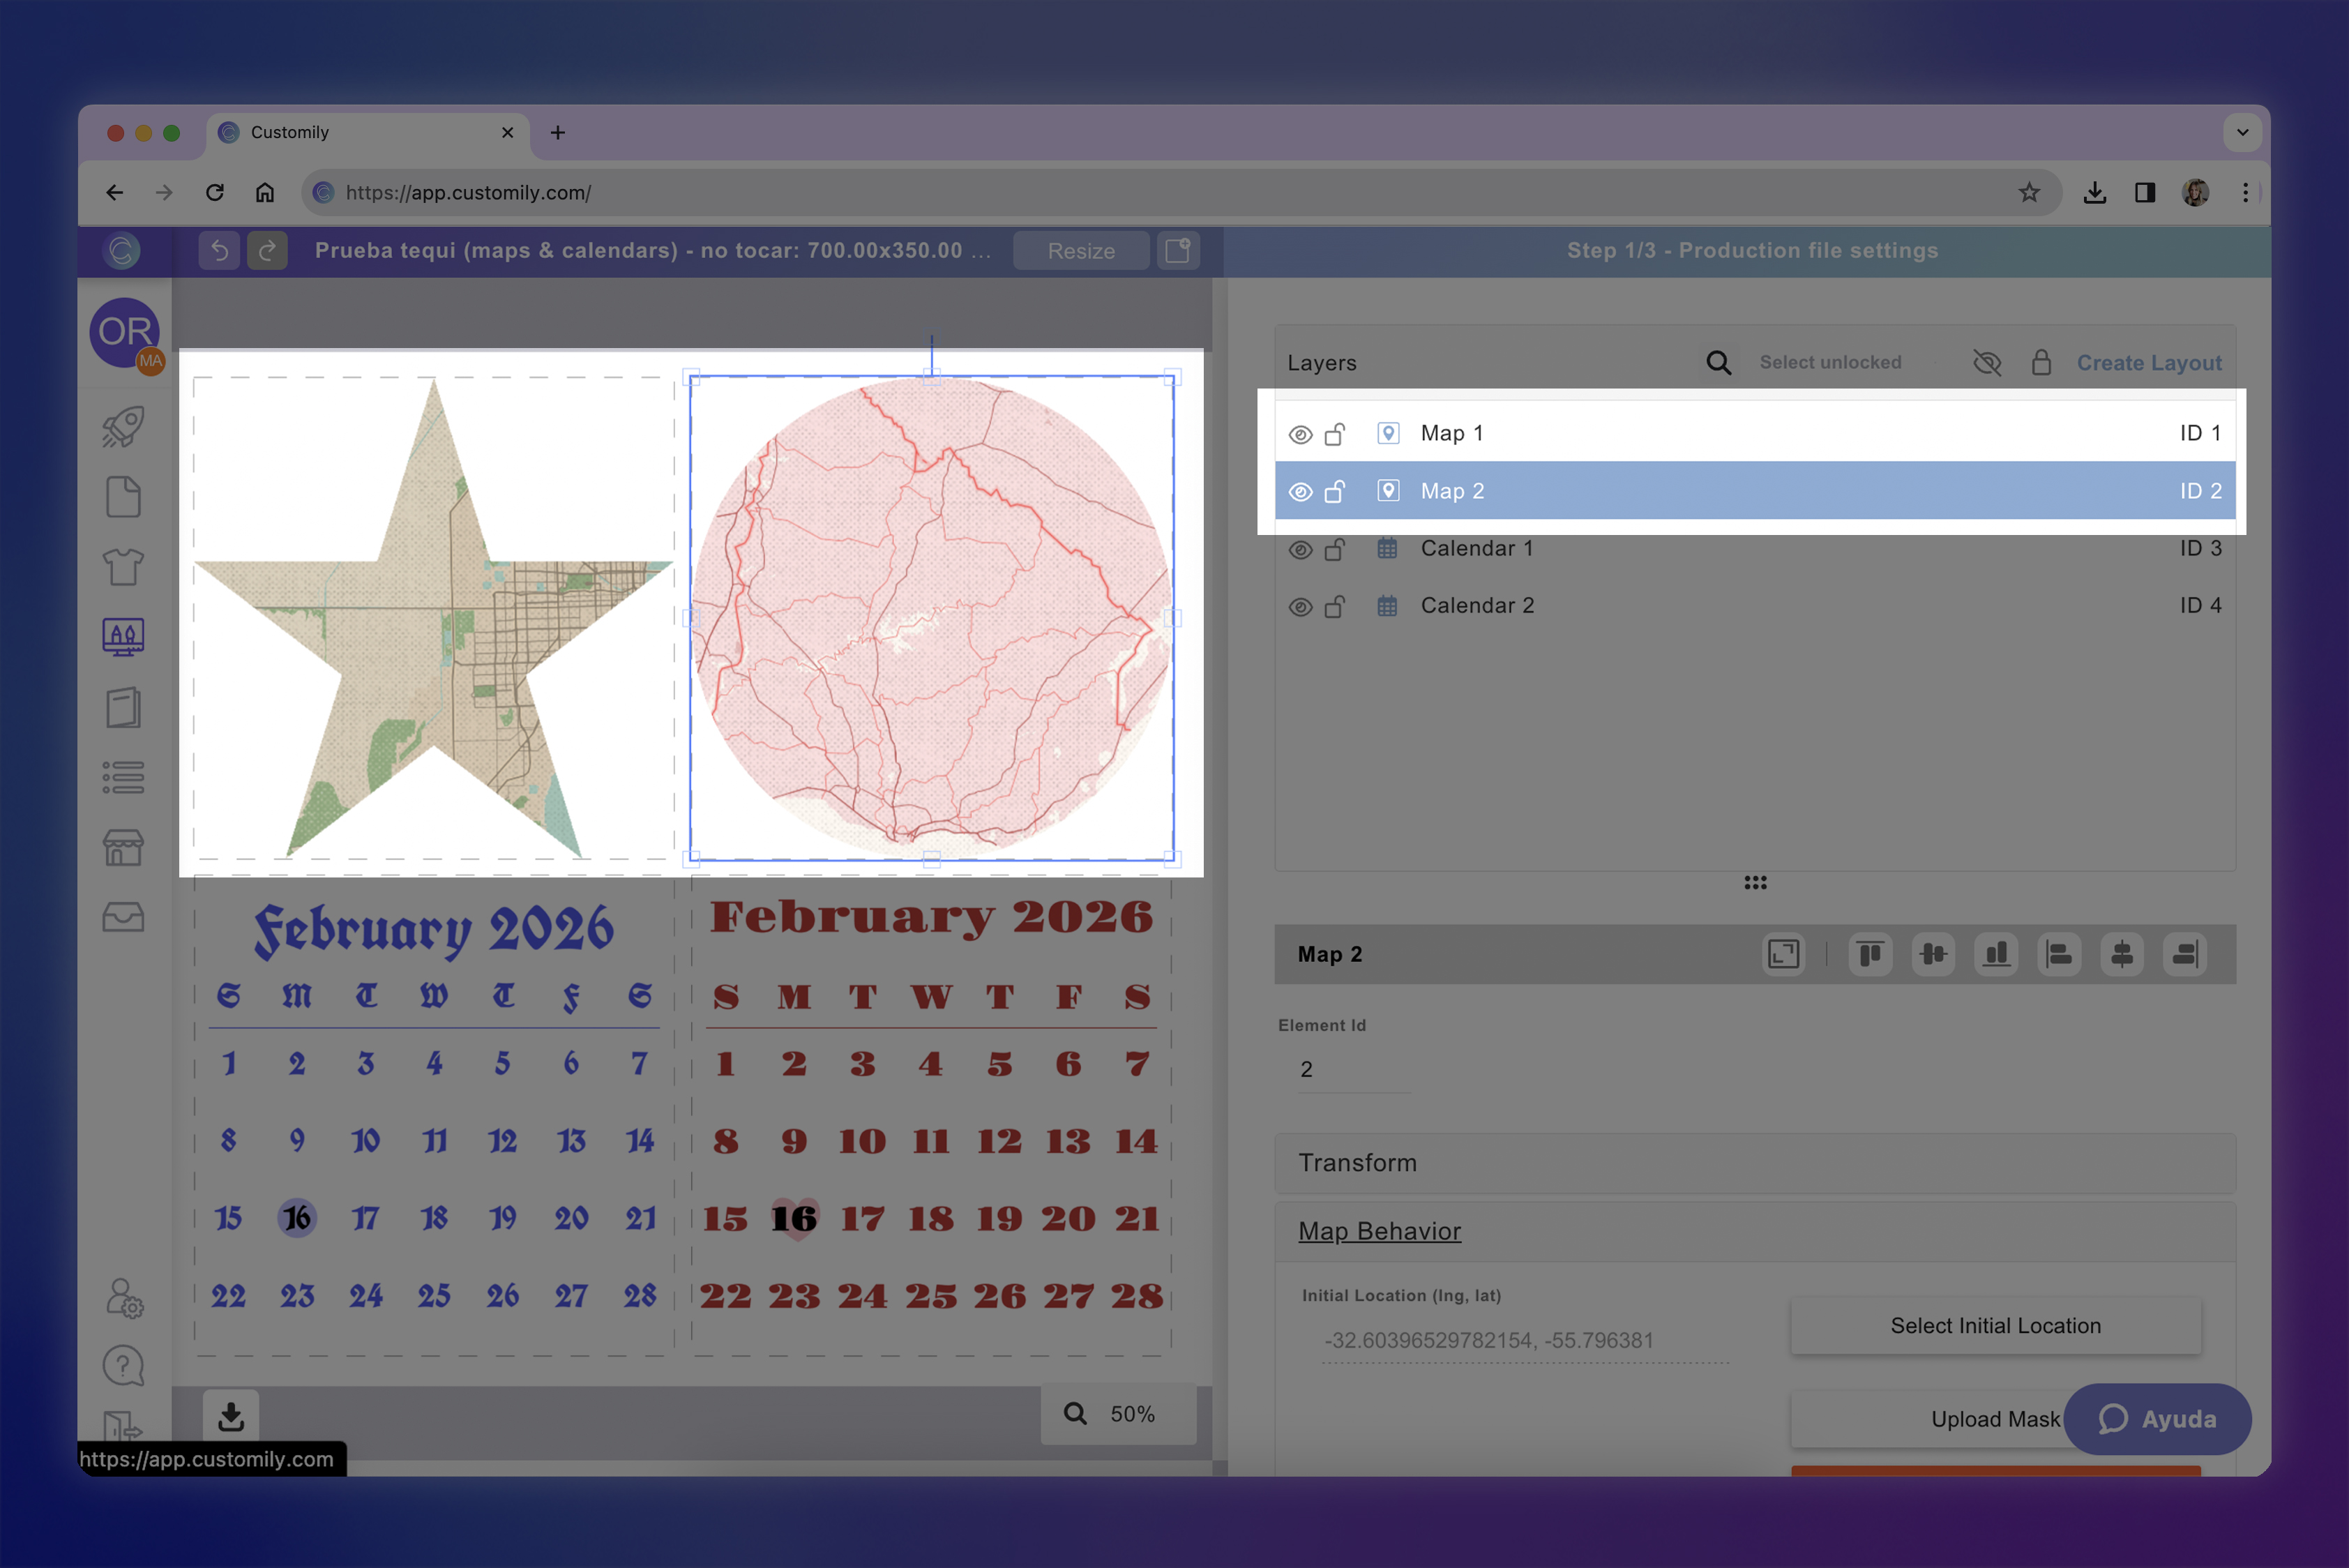
Map settings
Map Style: Select one map style from our selection, or use a custom map style from your Mapbox account.
Map Zoom: You can define this by setting an Initial Location. When configuring the Initial Location, adjust the map zoom to your desired level. Keep in mind that the zoom set there will be used as the default zoom for all generated print files.
Important
To ensure Mapbox matches the exact location your customer intends, we recommend asking shoppers to enter the full address, including Street Name, City, State, and Country. The more detailed the address, the higher the likelihood of an accurate match.
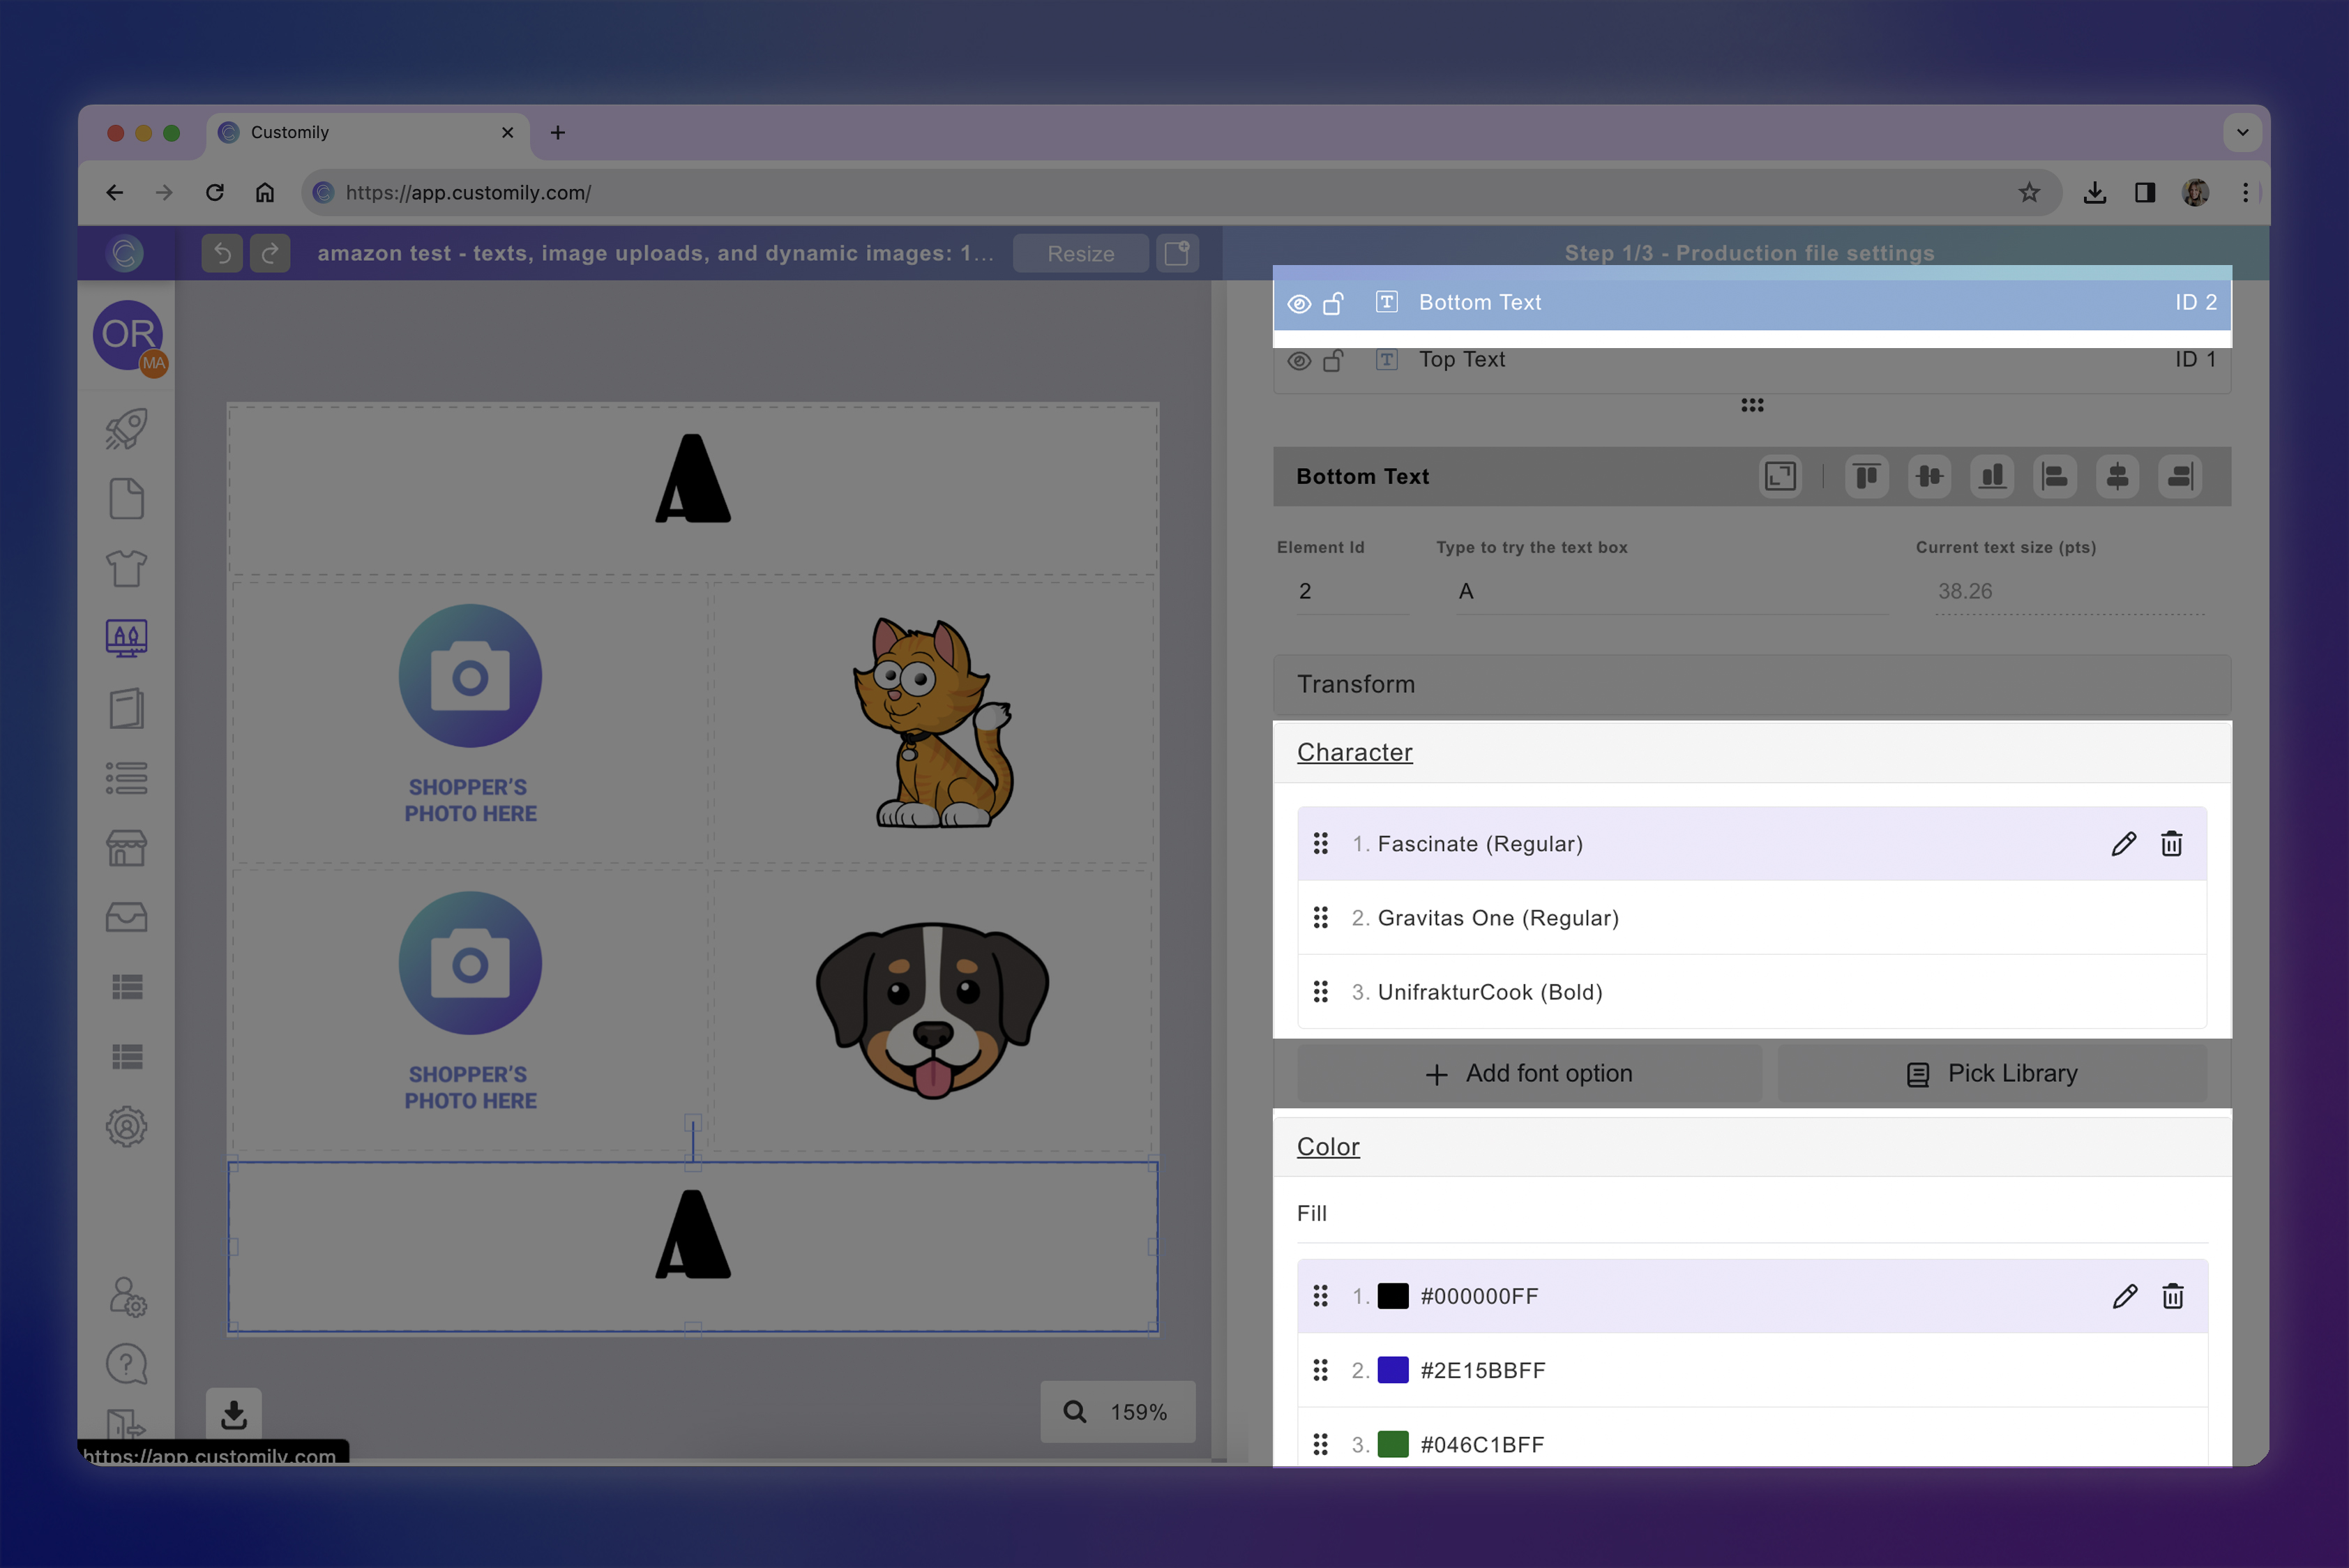
Text box
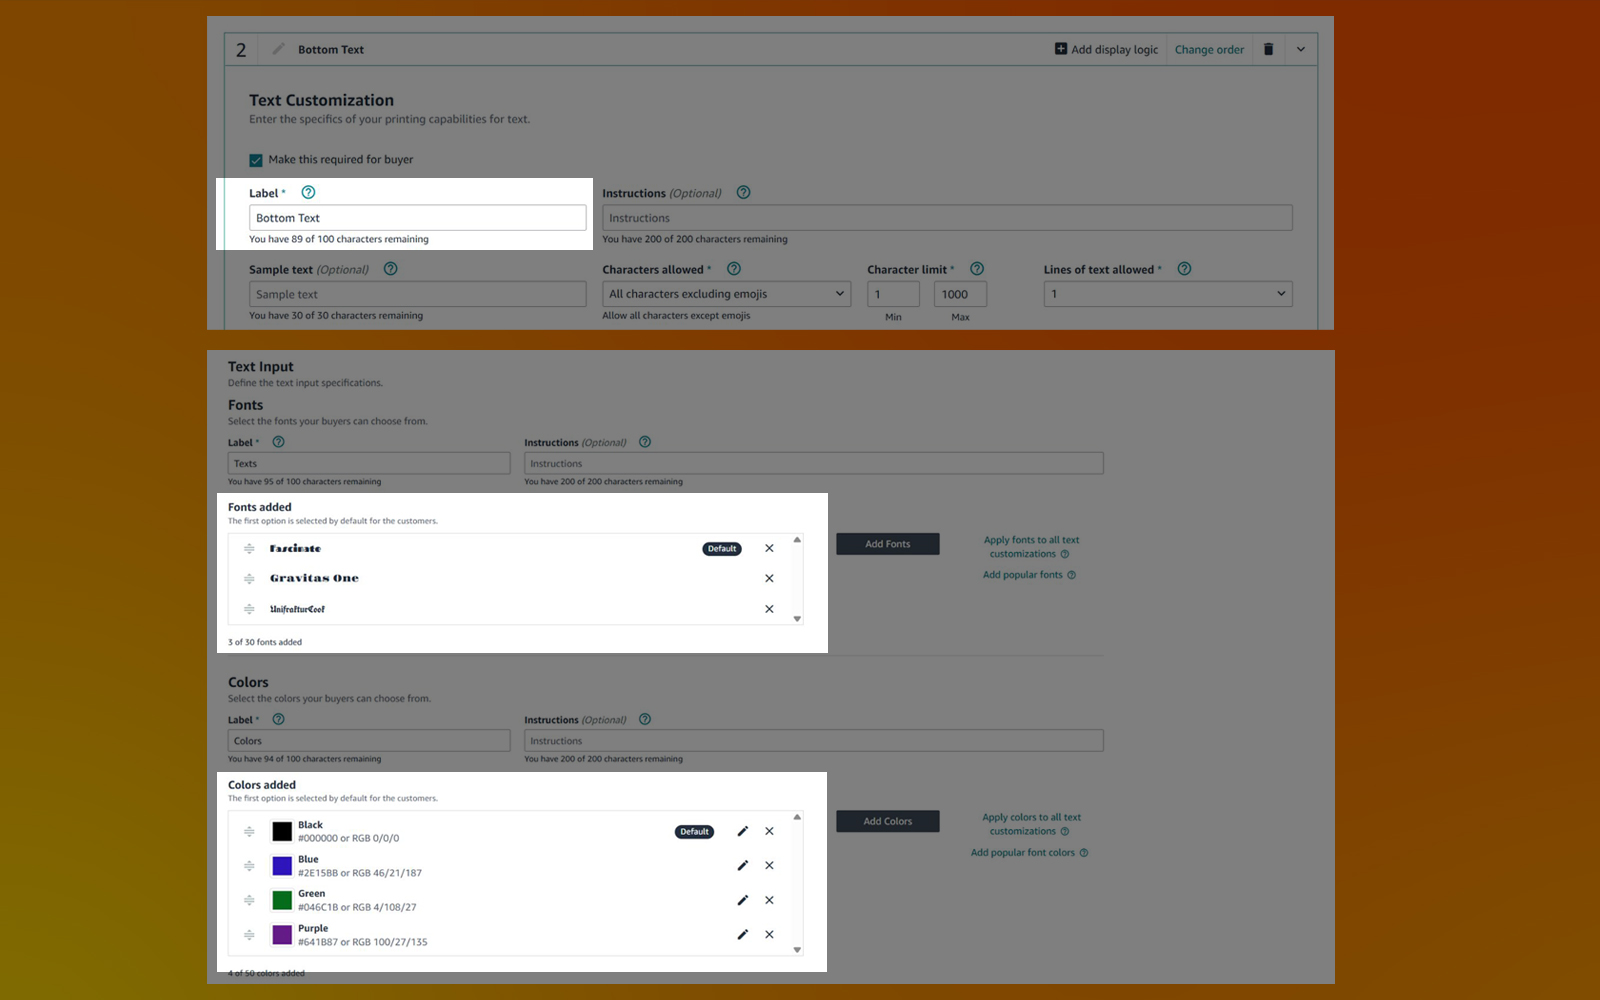
Font and color options must match those offered in Amazon Custom and appear in the same order on both platforms.
Layouts and groups
Amazon Custom’s display logic is fully compatible with Customily’s Grouped Layouts feature. This allows you to dynamically show the correct personalization fields based on the shopper’s selection in Amazon Custom.
In order to connect Amazon Custom options with the correct Layout inside your Customily Template, you must create a Dropdown Option in Amazon Custom that matches the Group Label from your template.
In the example below, the Group Label on Customily is: How Many Kids?
.png")
On Amazon, each option inside that dropdown must exactly match the name of each Layout Layer inside the Group: Two Kids / Three Kids / Four Kids

Once the dropdown is configured, you can build Amazon Custom display logic rules based on the selected option.
For example:
If the shopper selects Two Kids, set up display logic on Amazon so your product only displays the text and image elements required for the Two Kids layout. Later repeat for all the elements required for the Three Kids & Four Kids layouts.
This means that the text inputs and image upload elements created in Amazon Custom must be conditionally shown or hidden depending on the shopper’s selection in the first dropdown option, using the Display Logic function on Amazon.
Moon Phase
Moon Phase elements in Customily can receive information entered by shoppers as text inputs or data inputs from Amazon Custom.
Amazon Custom input configuration
Amazon Option Name must include the word Moonphase.

How it works
Moon Phase elements will match the entered text to a valid date and generate a stylized image of the moon phase for the selected date.
Important
To ensure the calendar feature correctly matches the date your customer intends to enter, shoppers must use the following format: DD/MM/YYYY (e.g., 25/12/2026).
To help guarantee accurate input, we recommend adding a placeholder with the correct format and setting minimum and maximum character limits in Amazon Custom.

How to import the customization data into Customily to generate print files
Download the Order Report from Amazon
In Amazon Seller Central, navigate to Order Reports.
Request a new report and ensure the required checkbox is selected.
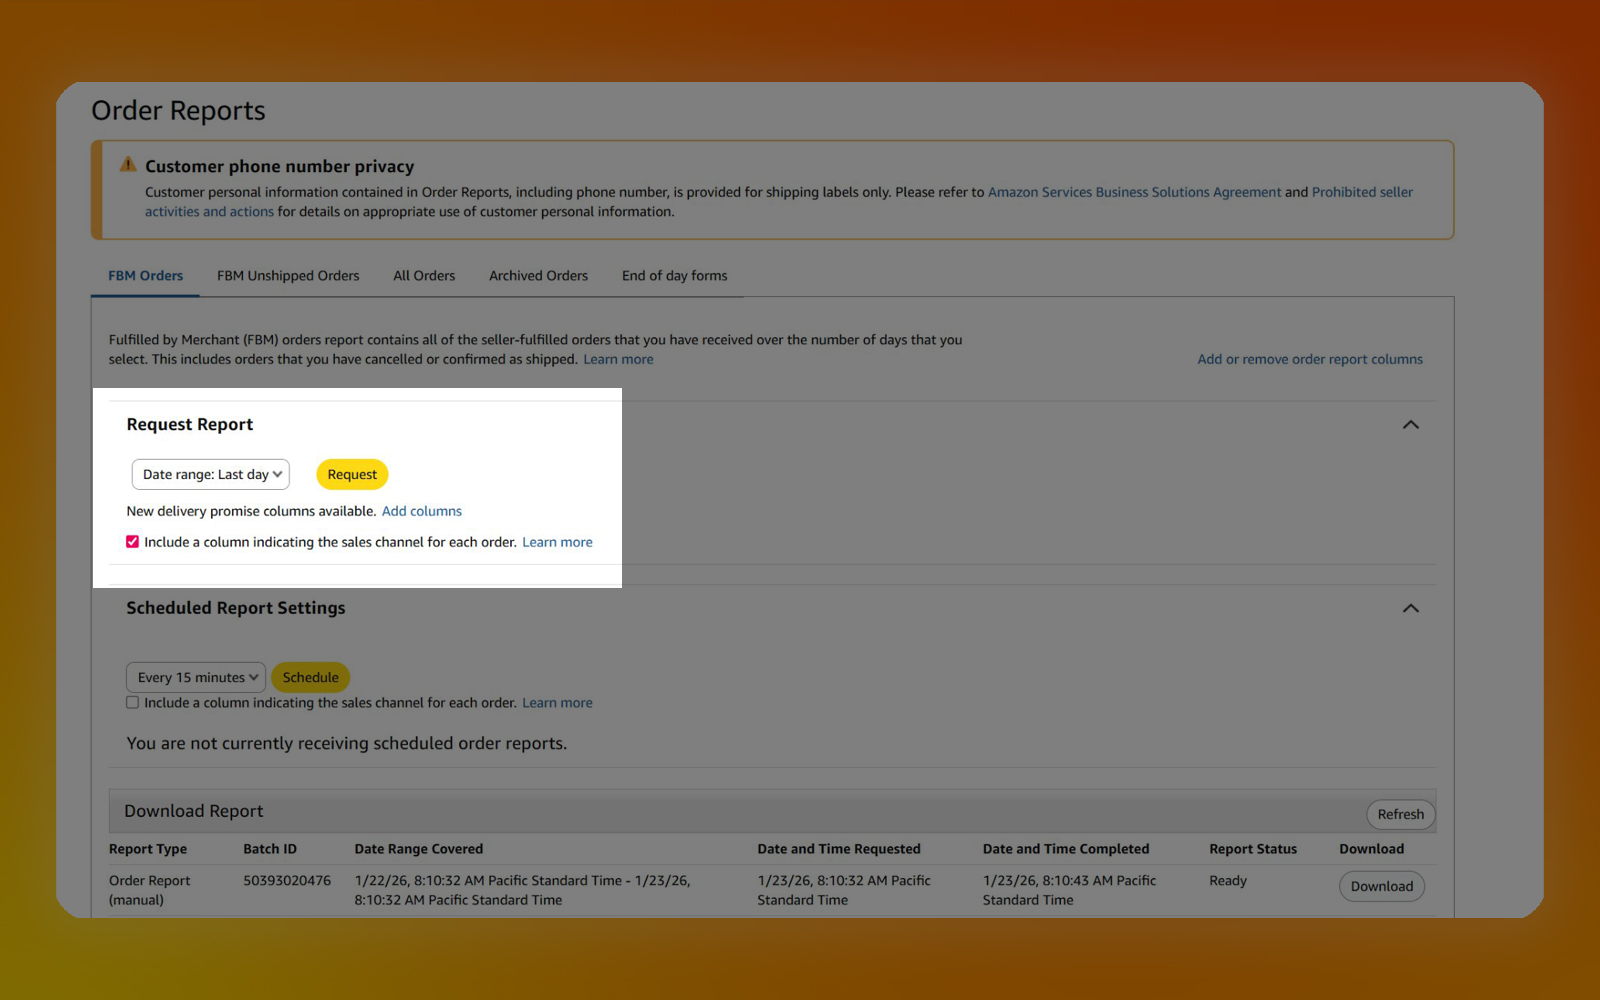
Once the report status shows as ready, download the generated file.
Import the Order Report into Customily
In your Customily Admin, navigate to the Orders page.
Click Import Customization and upload the previously downloaded Order Report file.
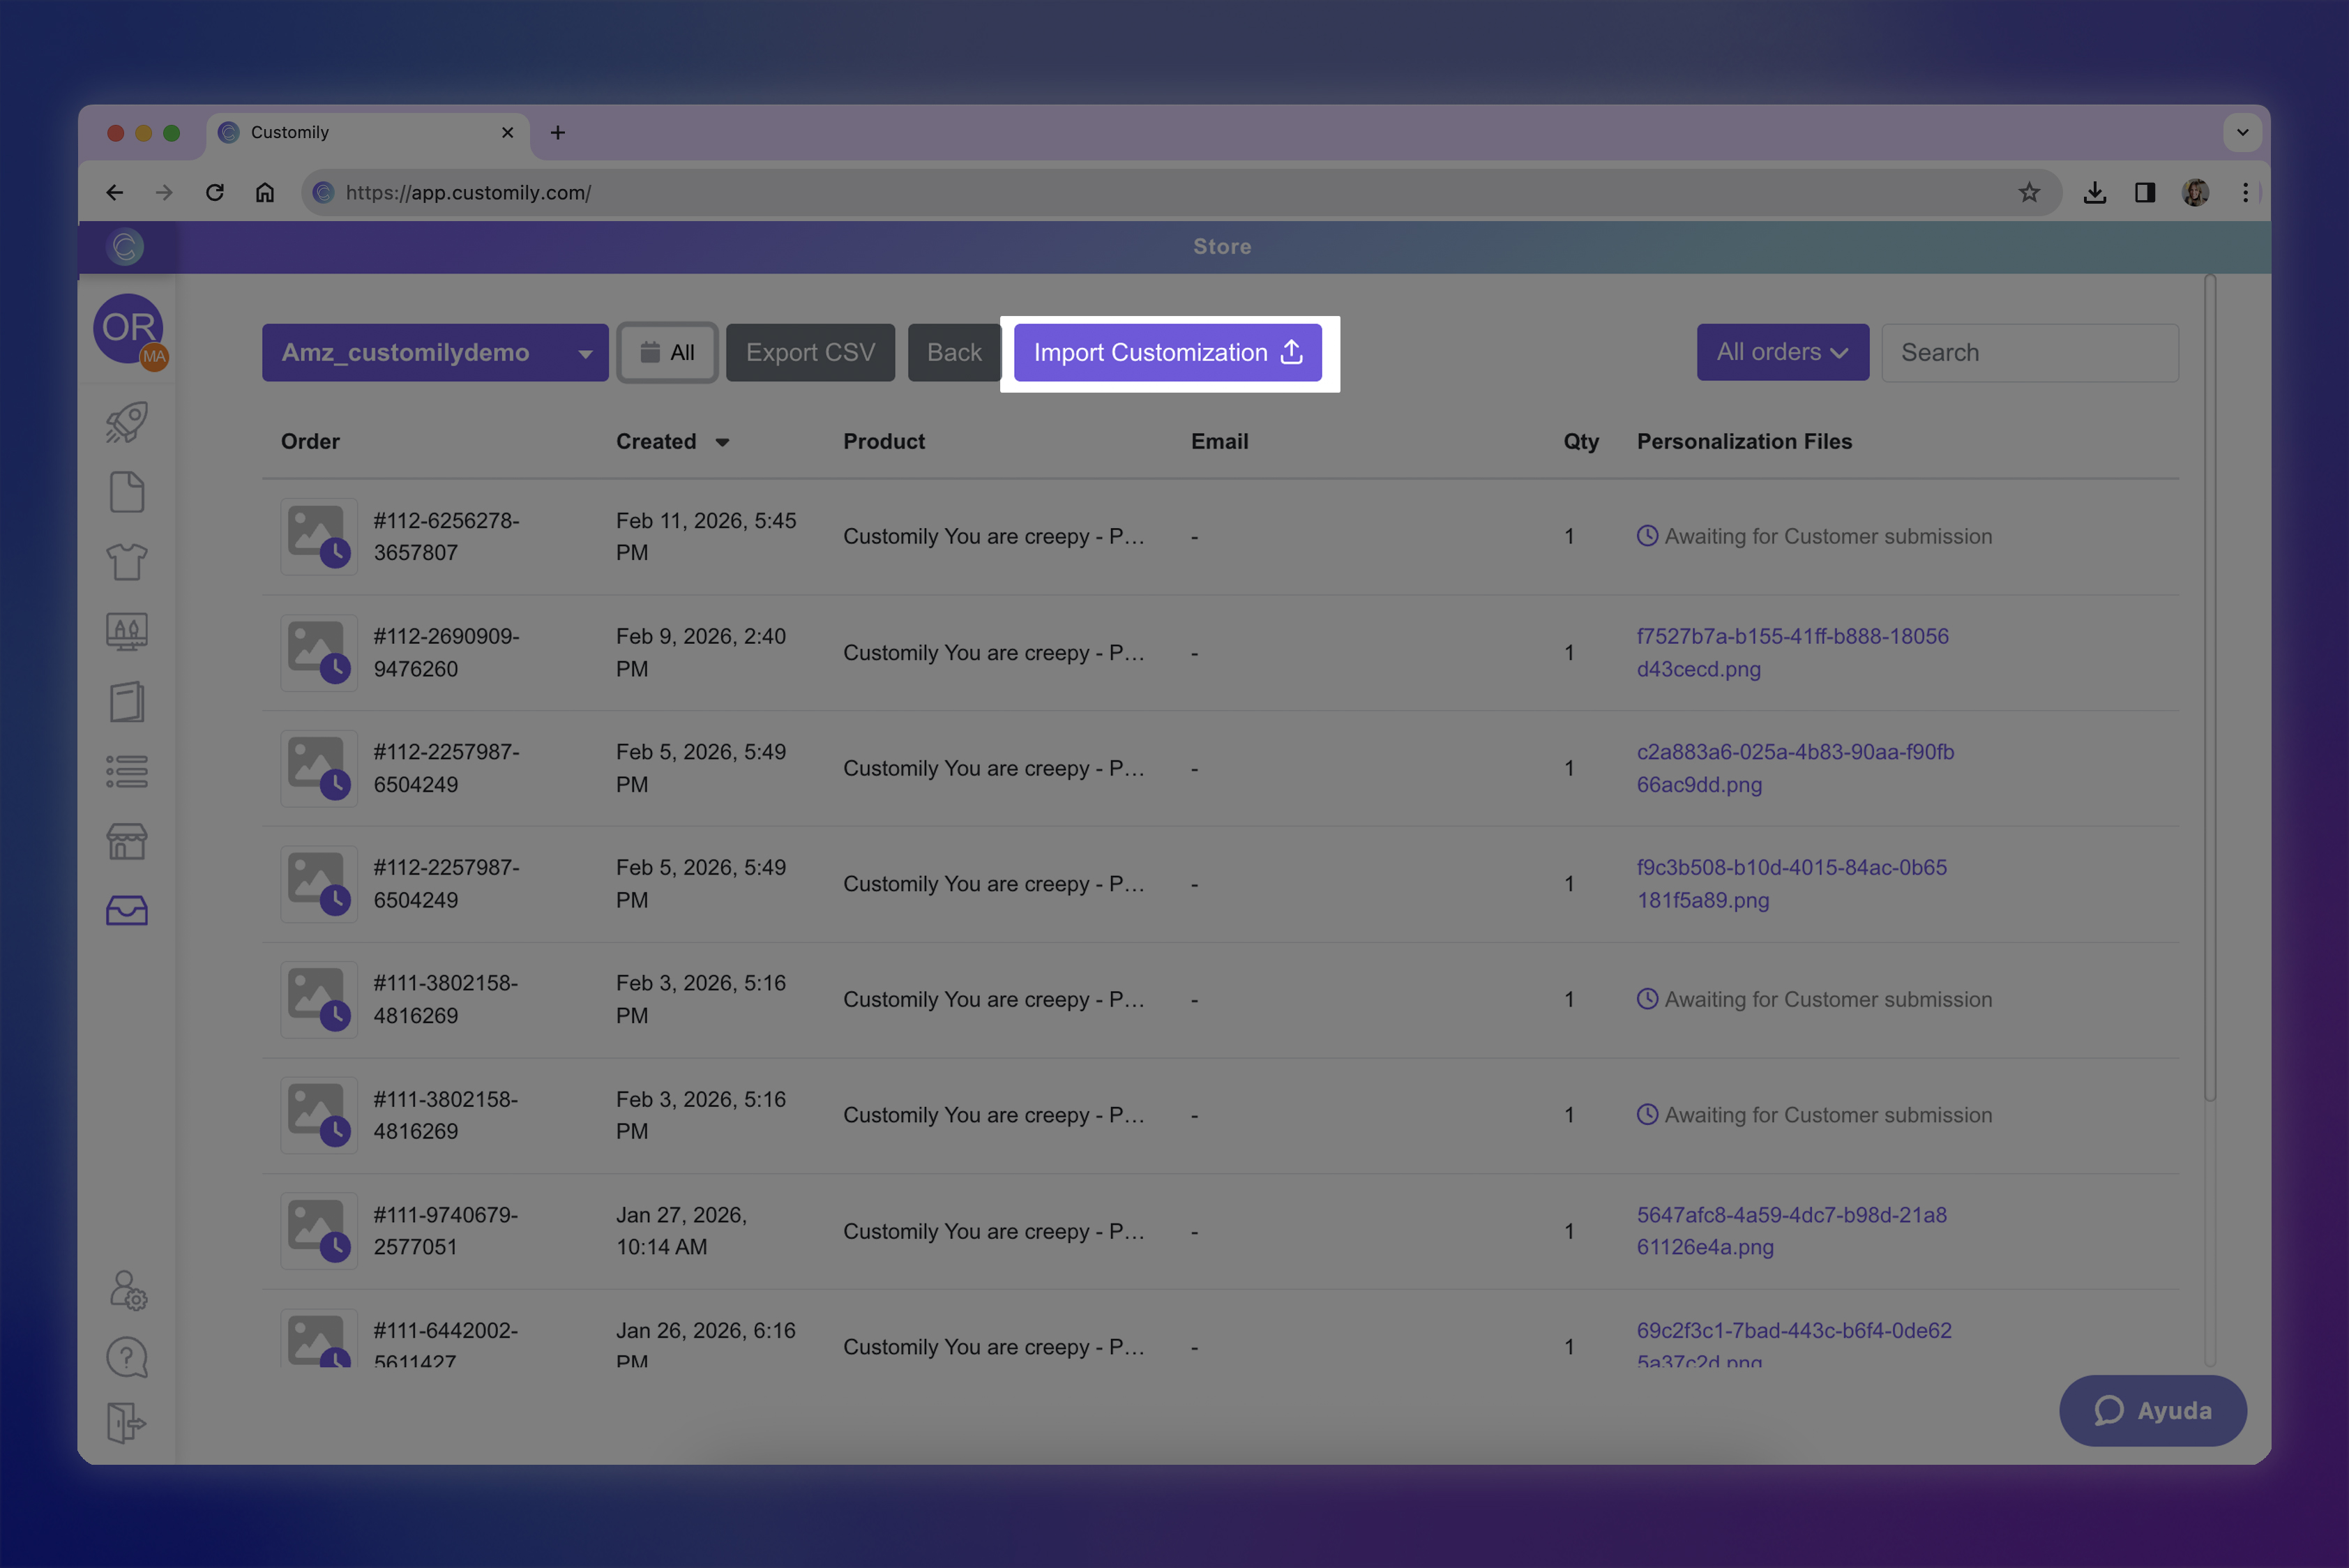
Imported orders will be listed with the status Awaiting Customer Submission.

The system will automatically begin generating the corresponding print files.
Once processing is complete, the generated print files will be available within the order details.