Map
Last updated: April 28, 2026
With custom maps, you can let customers immortalize a special place. By choosing a location the map will show the area so customers can pick their favorite spot. You can format maps in different ways to offer customers further personalization options.
How It Works
When you add a Map element to your design:
Shoppers will type an address or location, and a live map will be generated instantly.
You customize the style, size and shape of the map.
Shoppers can change the map locations and zoom level.
If multiple style options are added, shoppers will see options to pick from them.
In this article:
To add a map
You can add maps on Designs and on Templates, by clicking the Map button.

Each map you add will have a Name that you can edit, and a Unique Id for you to easily identify it.
Transform the map
Directly on the canvas or by expanding the Transform toolbox, you can transform the map:

Change the map style and behavior
Changing the behavior of the map will affect what options are available for customers to further personalize it. You can configure different behaviors:

Initial location
Changing the initial location will affect what the map displays when loading. The location is an option that customers always need to fill in, so whatever you choose here will only apply to the initial loading of the map.
Select the map
Expand the Map Behavior toolbox
Click Select Initial Location
Type a desired location. You can type a specific address, a city, or a country
Zoom in or out and move around to get the exact view you want to load
Click select

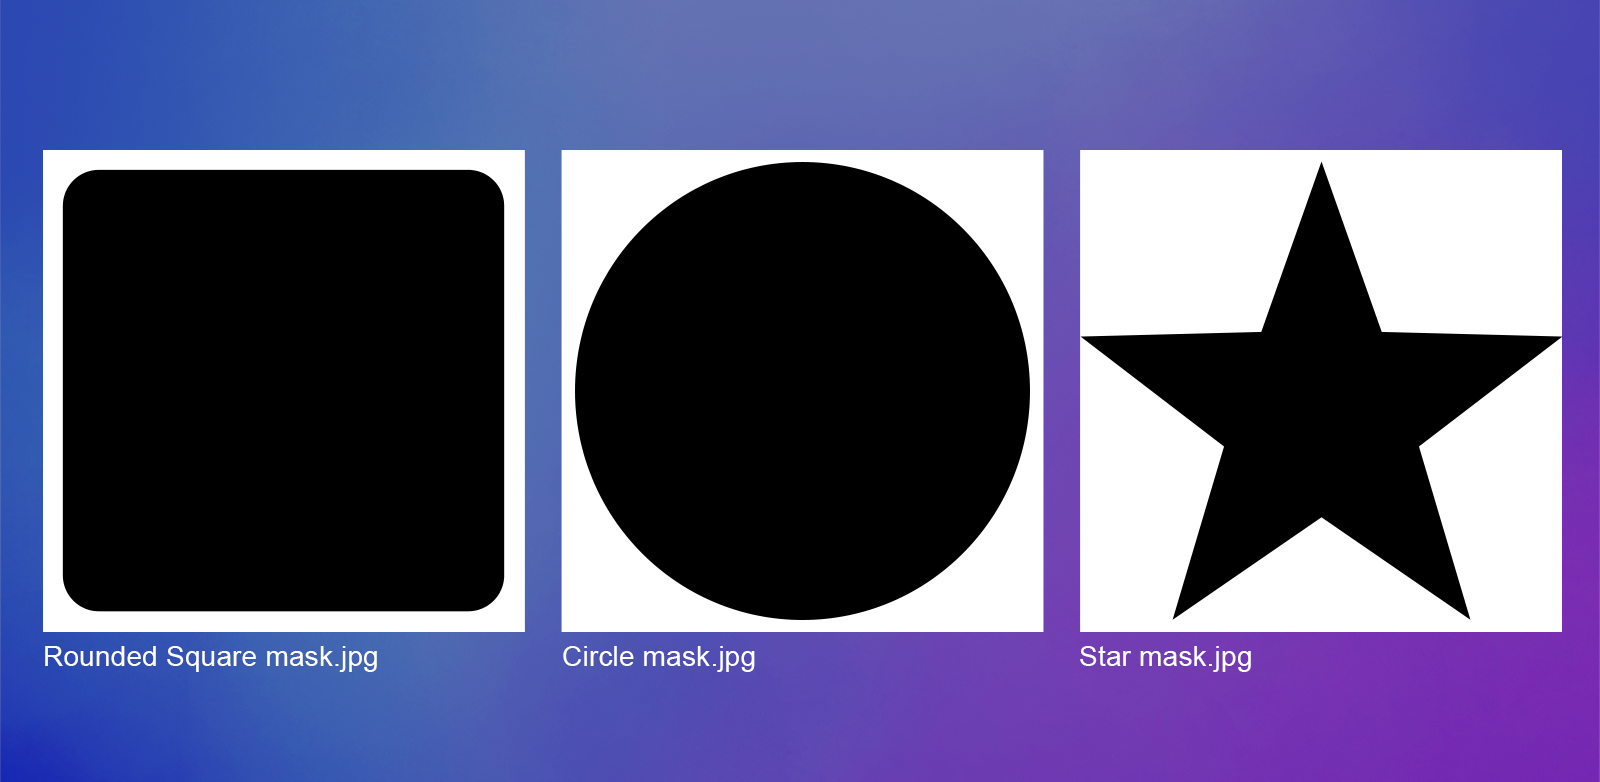
Add a mask to the map
Masks let you give the map a particular shape (other than a square or rectangle!).
Select the map
Expand the Map Behavior toolbox
Click Upload mask
Select the JPG file you want to use as a mask.

For masks to work, the file needs to be a black-and-white image of the mask, where the shape you want the placeholder to have is black and the background of the image is white, in good quality (we recommend at least 1000x1000 px), since the better the quality the smoother the mask. Here are some examples of masks:
Tip
You can also create masks simply by layering elements on top of each other. This is especially helpful if you want to mask images with a specific design on top of them. To achieve this add a PNG on top of the map using a dynamic image, or a vector using a dynamic vector.
Choose Map Style
You can choose one or multiple styles for your map. By default, the street style comes selected, but you can choose as many styles as you want. When choosing more than one style, they will be available for shoppers to pick while personalizing.
Select the map
Expand the Map Behavior toolbox
Click Add Map Style
Choose the style you want to add
Repeat to add as many styles as you want

Tip
Use the star to select the map style that will be loaded by default on your design.
Adding your own Map Styles
Customily comes with several pre-defined map styles, but you can also upload your own. Our maps run on Mapbox, so you can use any custom style created there.
Mapbox styles control the visual appearance of the map—such as colors, labels, and visible features—and are created in Mapbox Studio.
To add your own Map Styles
Create your style on Mapbox Studio
Copy the style URL to use in Customily
Go to Customily, select your map element and click Add Map Style
Choose Custom Style

Paste yout Mapbox Style URL here and press save.
Your added style will appear on the Map Styles list.
