How to Set Up Etsy Personalization Mode for your Etsy Product
Last updated: July 21, 2026
With Etsy Personalization Mode, shoppers personalize your products directly on Etsy using Etsy's native personalization fields. Once an order is placed, Customily automatically reads the personalization data and generates the production files.
How to Set Up
Before enabling Etsy Personalization Mode, make sure you have configured both your Etsy listing and your Customily Product.
You'll need:
An Etsy listing with Personalization Fields configured
A Customily Template
A Customily Option Set
Etsy Personalization Mode enabled for the product
Each Etsy Personalization Field must be mapped to a compatible Customily Option and Template Element.
Step 1: Create your Template
Create your Template as you normally would, using the Customily Elements that will receive the personalization data from Etsy.
Only supported elements can be used with Etsy Personalization Mode. Refer to the compatibility table below for the complete list.
Text Elements: Text Box / Curved Text / Warp Text
Font Options
Color Options
Dynamic Images
Image Placeholders
Step 2: Create your Option Set
Create an Option Set that matches the personalization inputs you'll offer on Etsy.
Each Option should be linked to the corresponding Template Element so Customily knows where to apply the shopper's personalization.
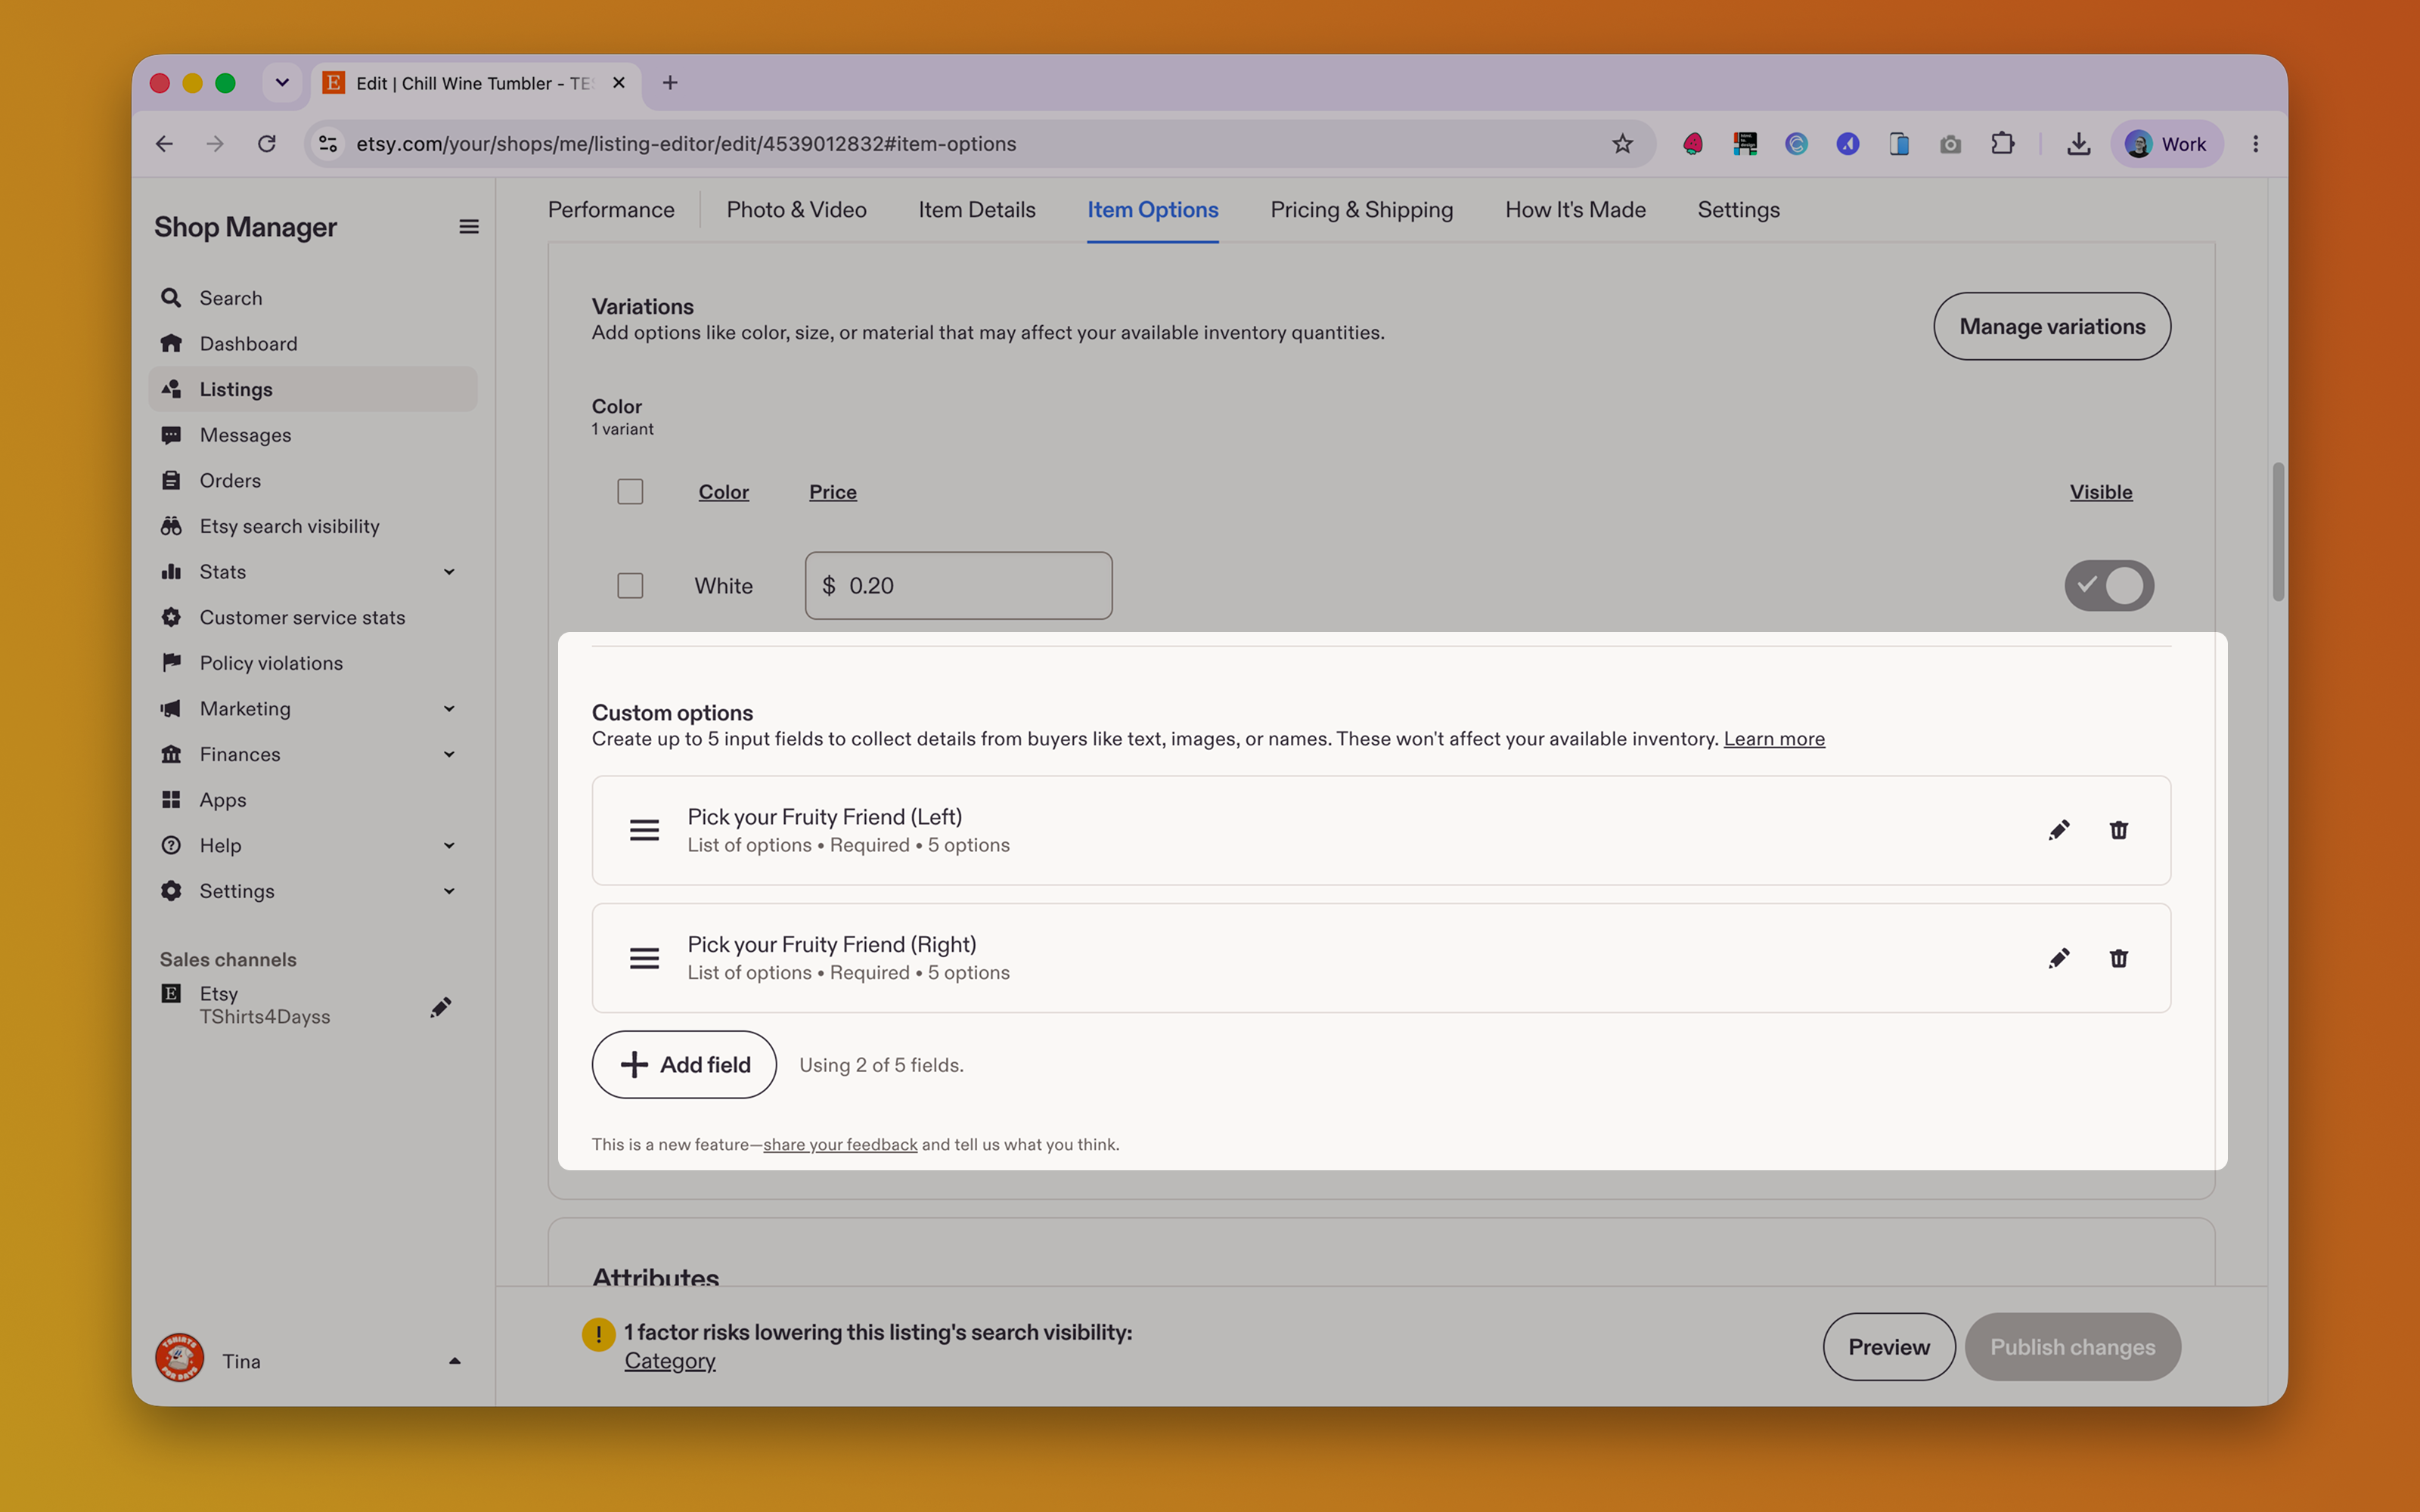
Step 3: Configure your Etsy Personalization Fields
In your Etsy listing, enable Personalization and create the fields your shoppers will interact with before purchasing.
Etsy currently supports three field types:
Text Box
List of Options
File Upload
These fields should correspond to the Options configured in your Customily Product.
Keep in mind, Etsy has a limit of 5 personalization fields per listing.
Step 4: Enable Etsy Personalization Mode
Open your Product in Customily and:
Assign your Template.
Assign your Option Set.
Select Etsy Personalization as the Personalization Mode.
Save your Product.
Once enabled, shoppers will personalize the product directly on Etsy, and Customily will automatically generate the production files when the order is received.
Supported Element Mappings
Etsy Personalization works by mapping an Etsy Personalization Field to a Customily Option, which then updates a specific element in your Template.
The table below shows the currently supported combinations. Each supported element is explained in detail in the following sections, including setup examples and any current limitations.
Customily Element on Template | Customily Option on Option Set | Etsy Field | Comments |
All Text Elements: Text Box / Curved Text / Warp Text | Text Input | Text Box | |
Text Color Options | Swatch / Dropdown | List of Options |
|
Text Font Options | Swatch / Dropdown | List of Options |
|
Image Placeholder | Image Upload | Upload Files |
|
Dynamic Images | Swatch / Dropdown | List of Options |
|
Setting Up Text Elements
Text Elements are configured using an Etsy Text Box field connected to a Text Input option in your Customily Option Set.
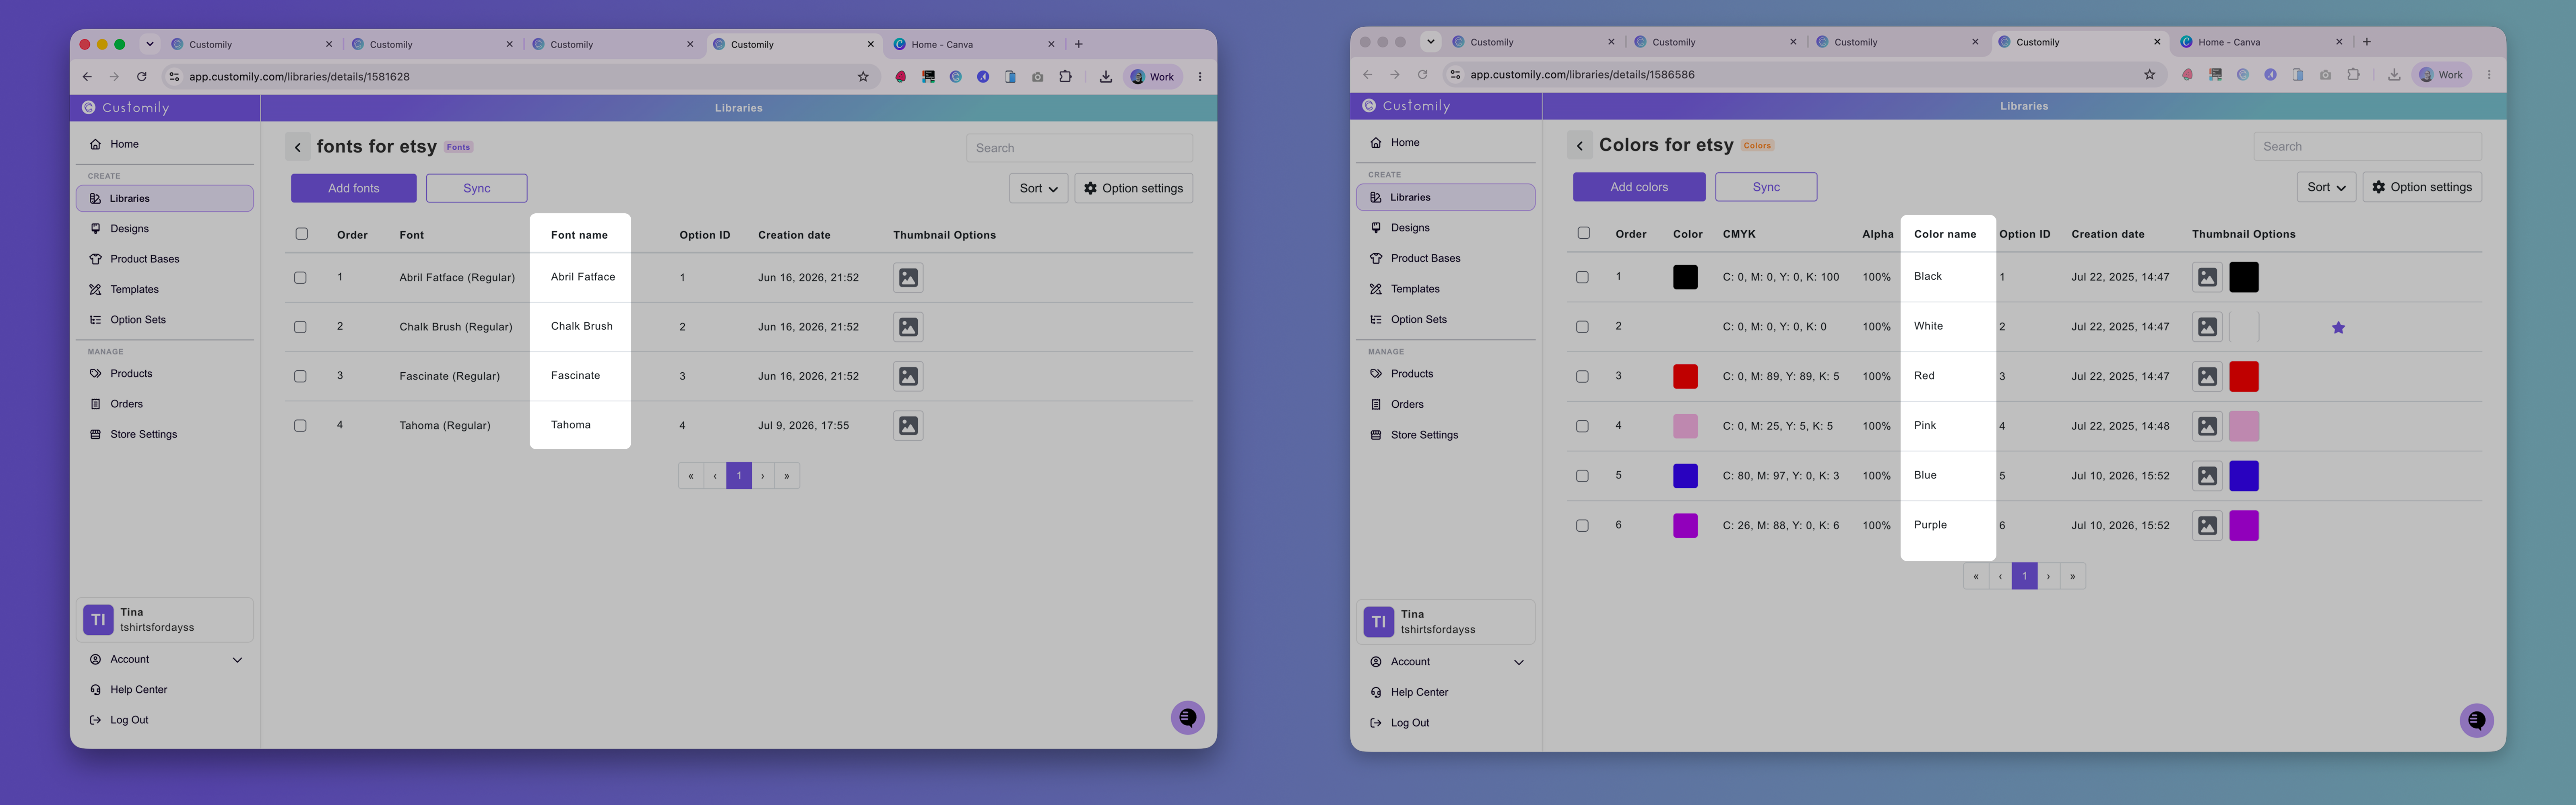
If you'd like to provide font or color options for your texts, set up a font or color library with the options that'll be available. The names for each option are the ones you'll have to use on your List of Options on Etsy, so make sure these are legible for your shoppers to choose easily between them.
Create your template or design using a text element. Set the options for color or font that you'd like to include, using libraries. If not, you could leave the font and color fixed with only one option on the template.
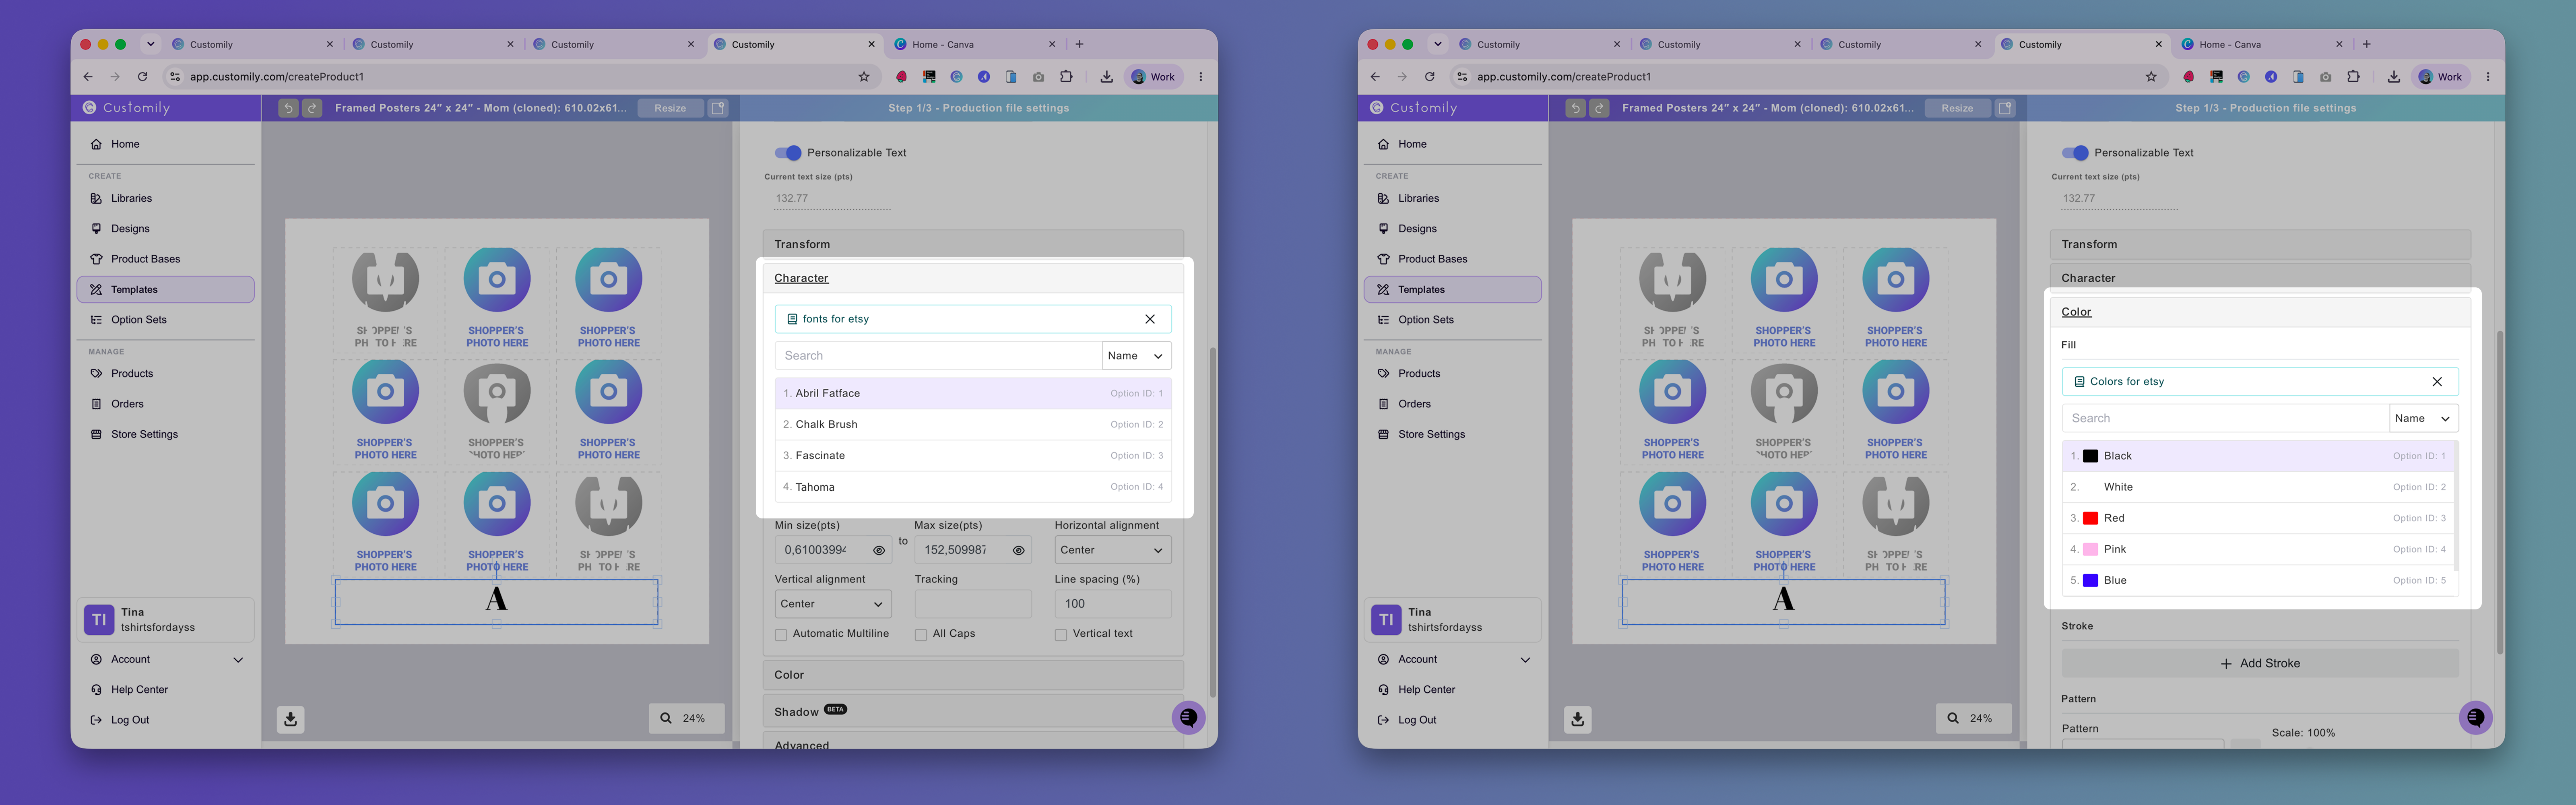
Once your template's ready, you can create your option set on Customily.
After creating your Option Set, you can create the List of Options as a Custom Field on your Etsy listing.
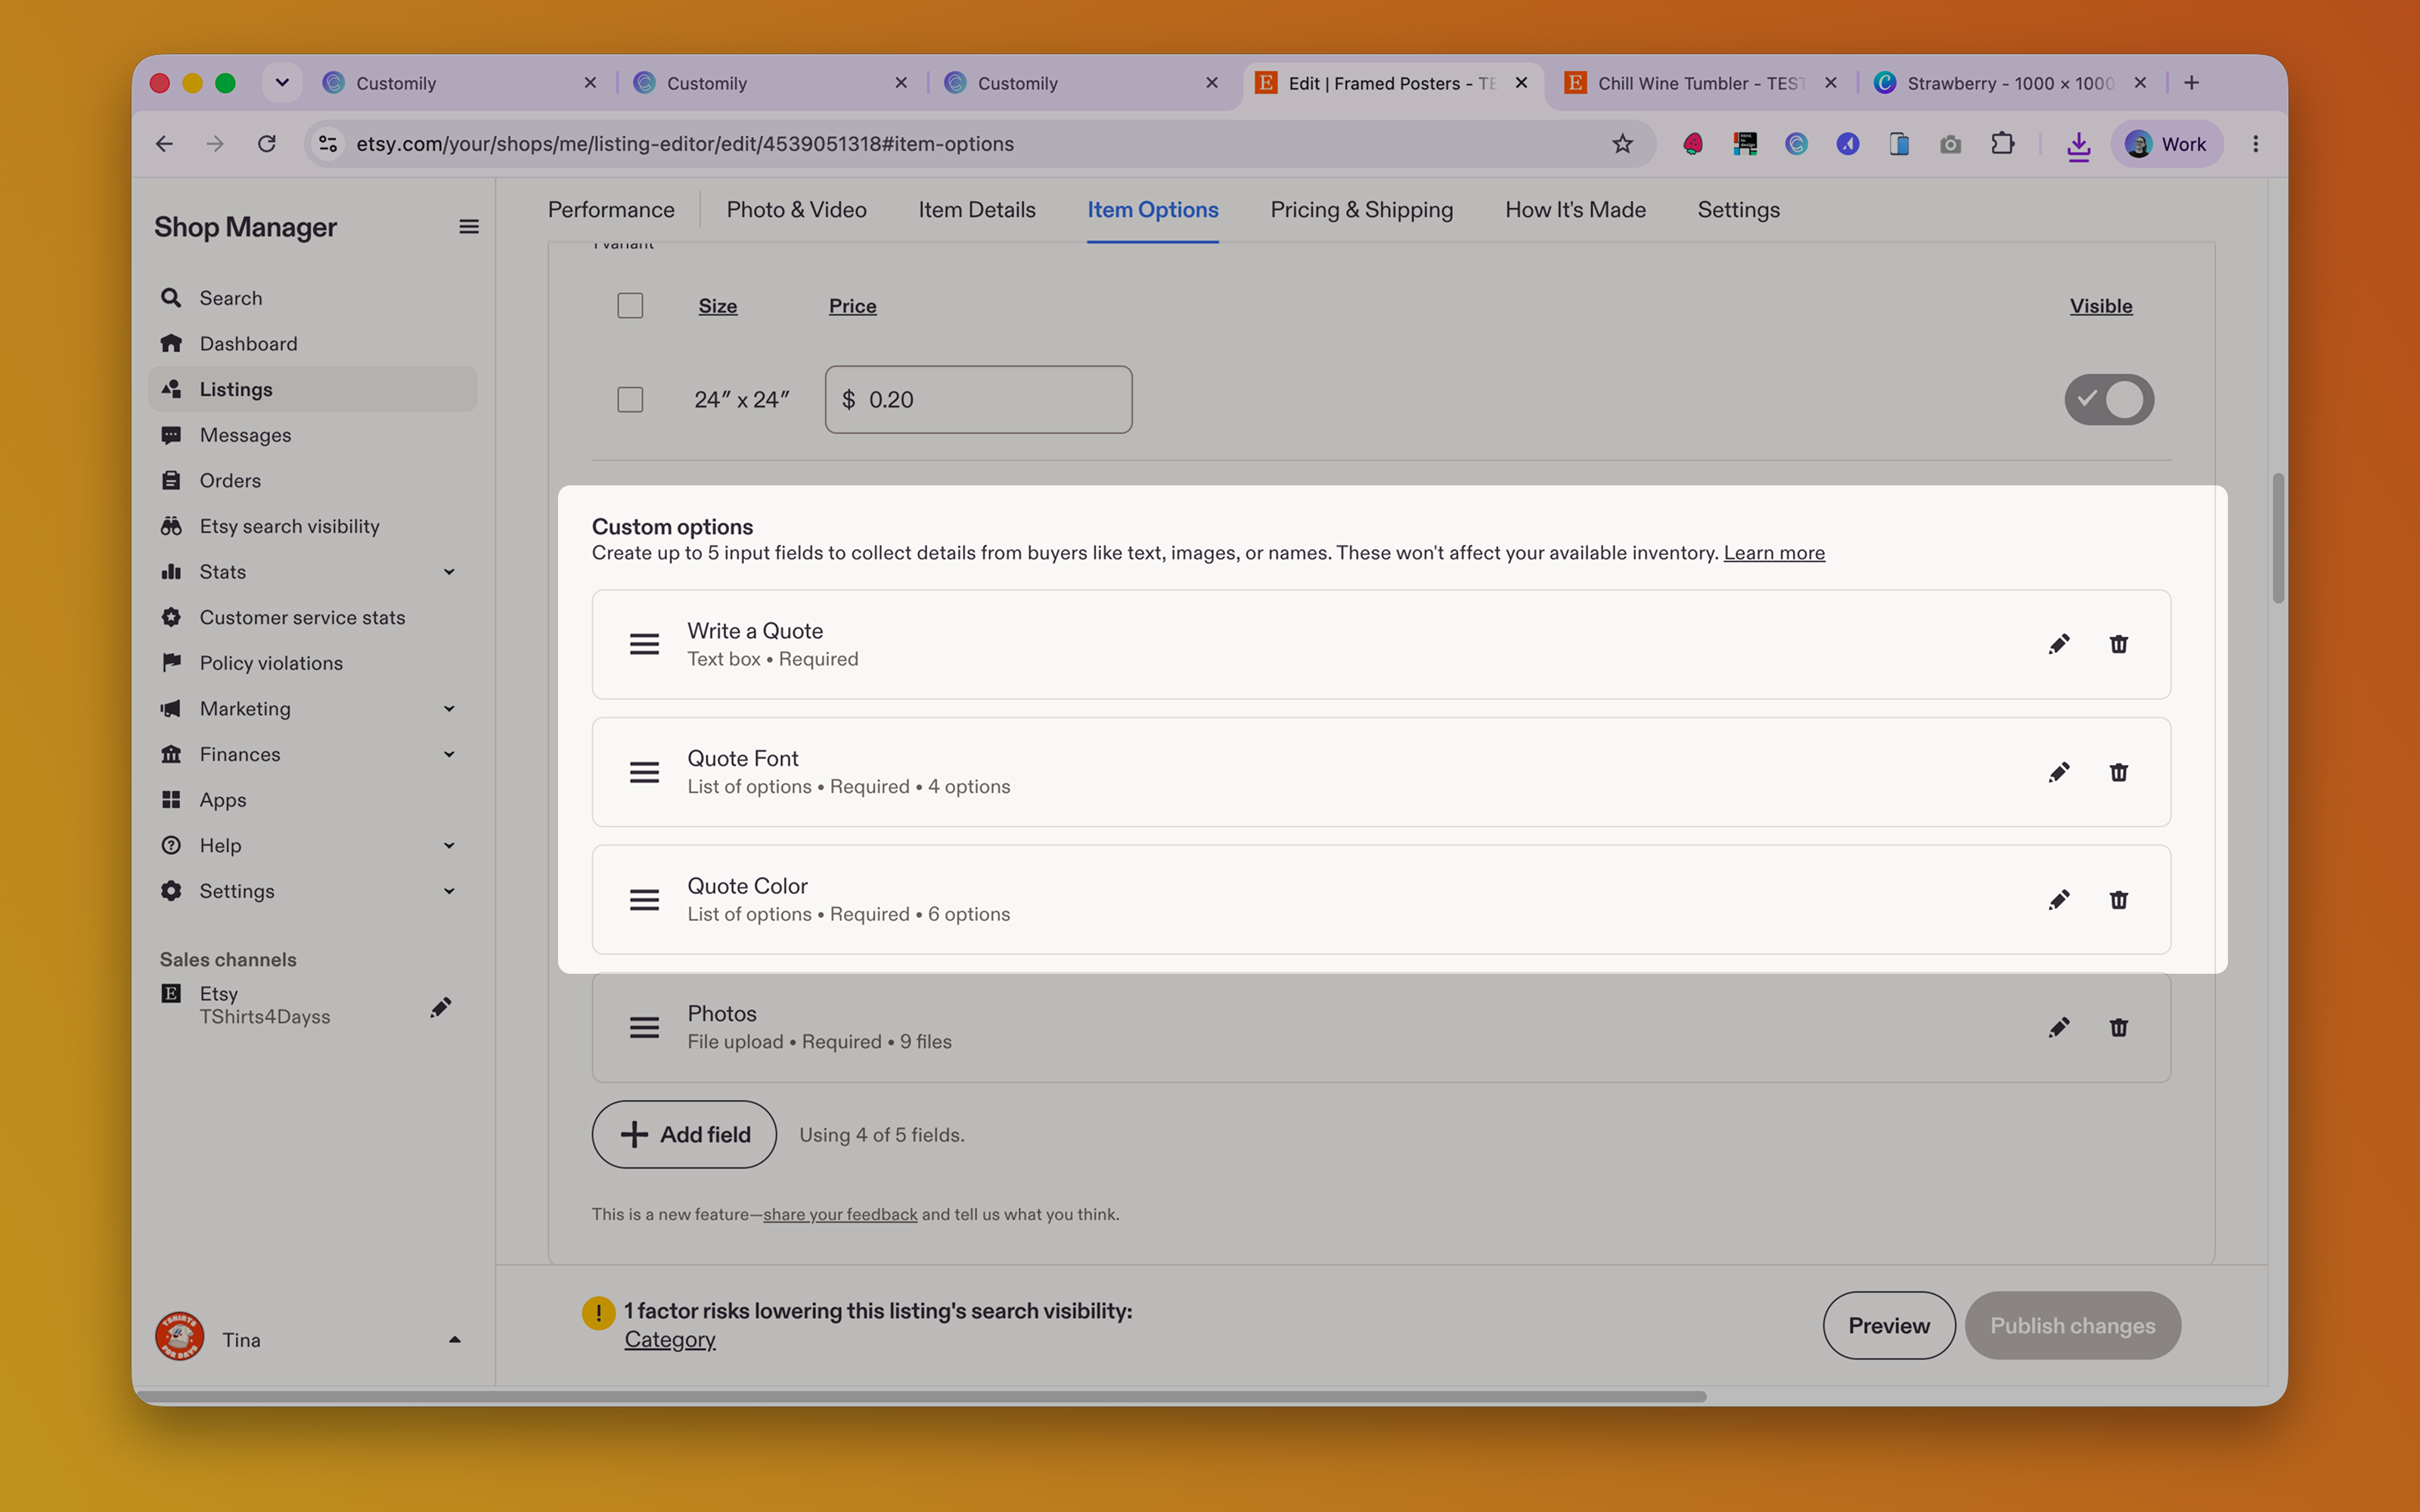
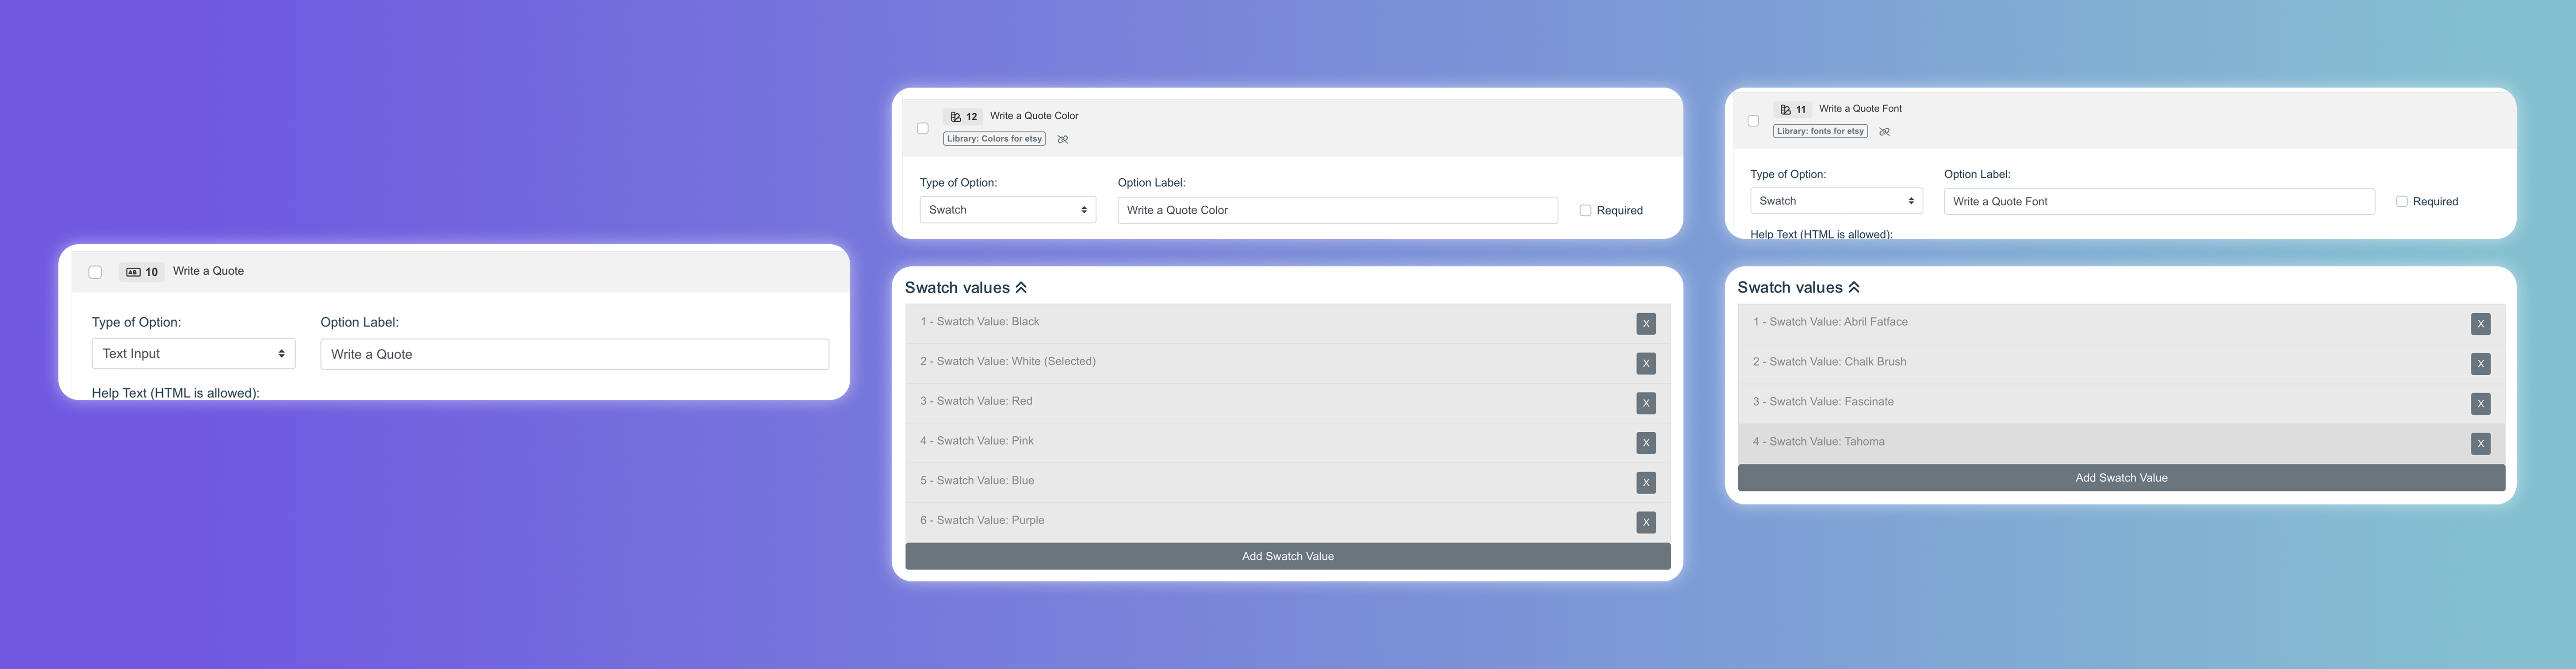
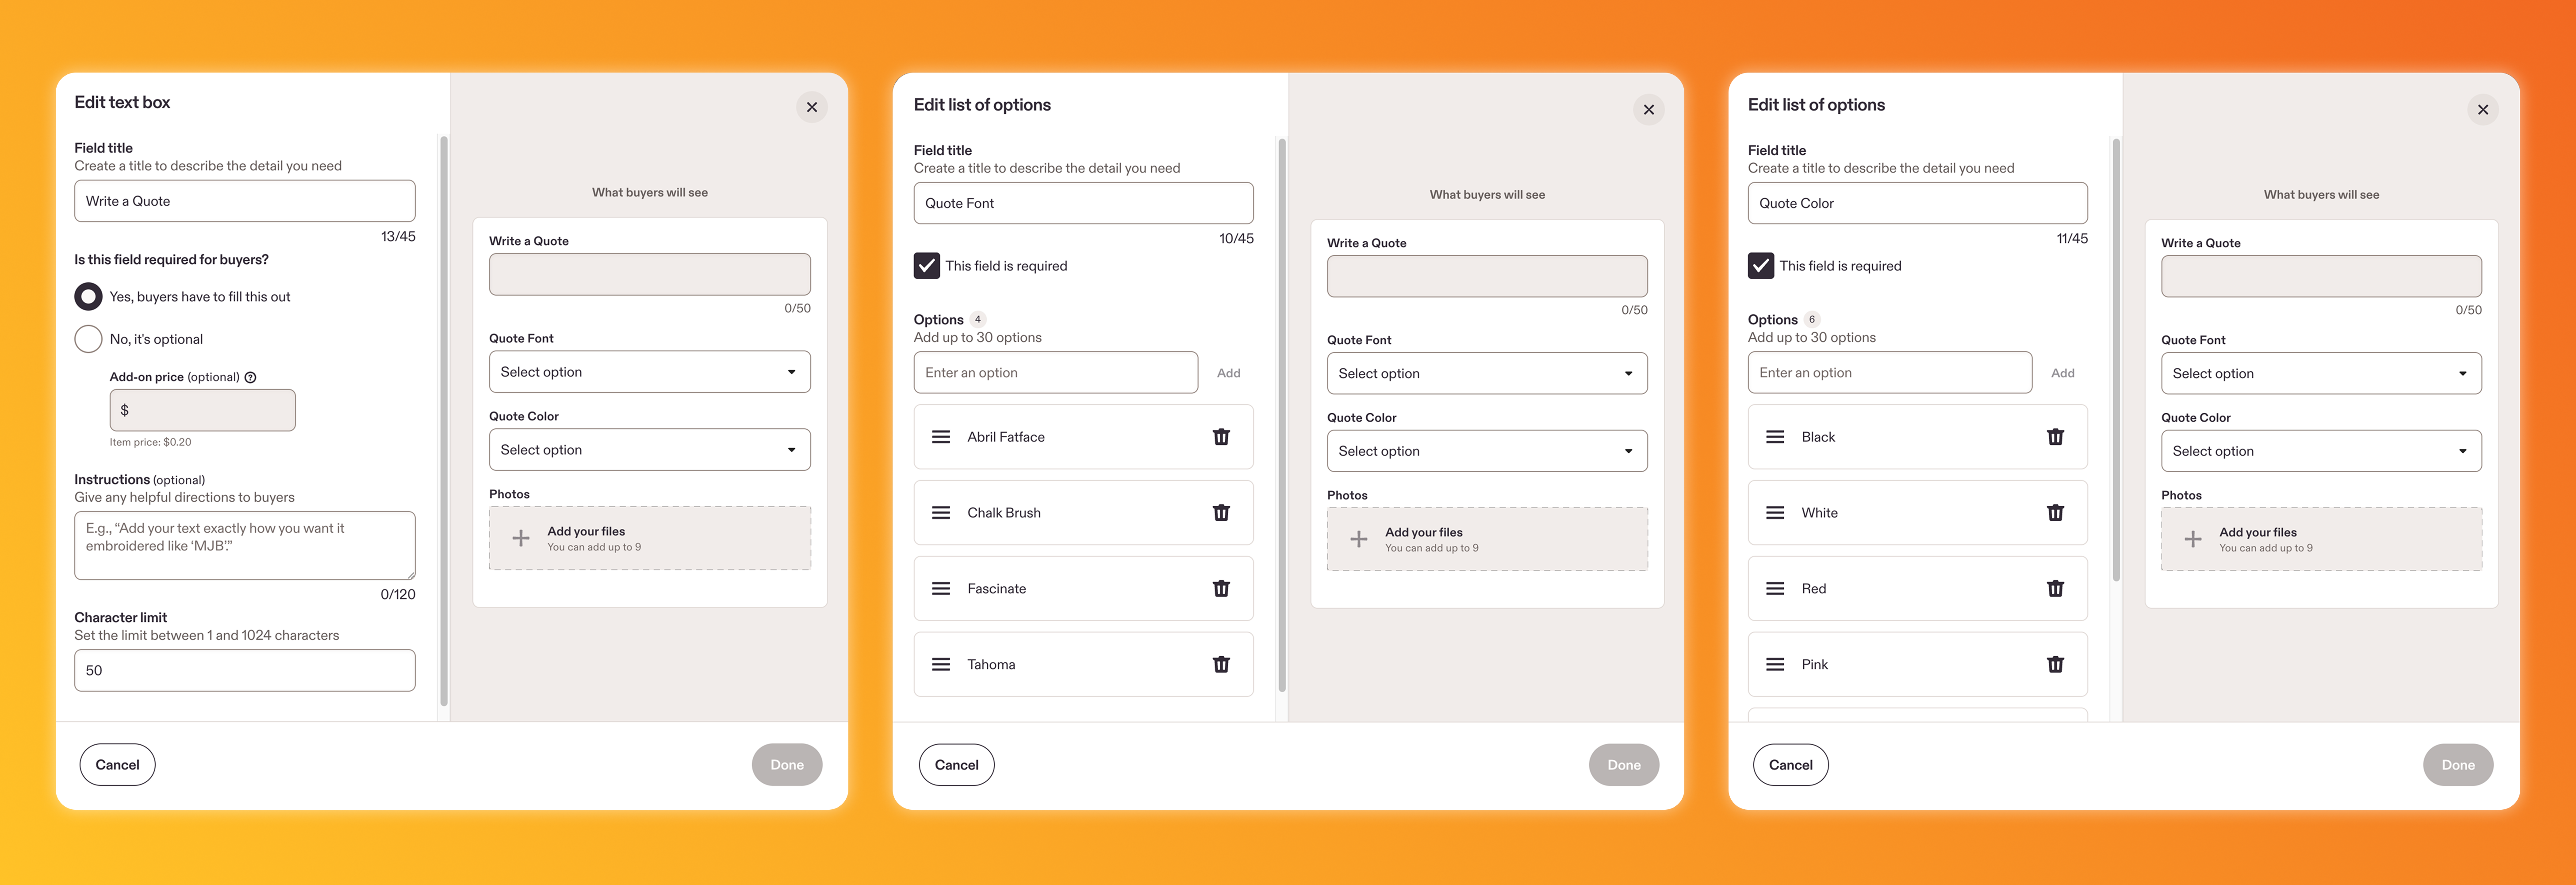
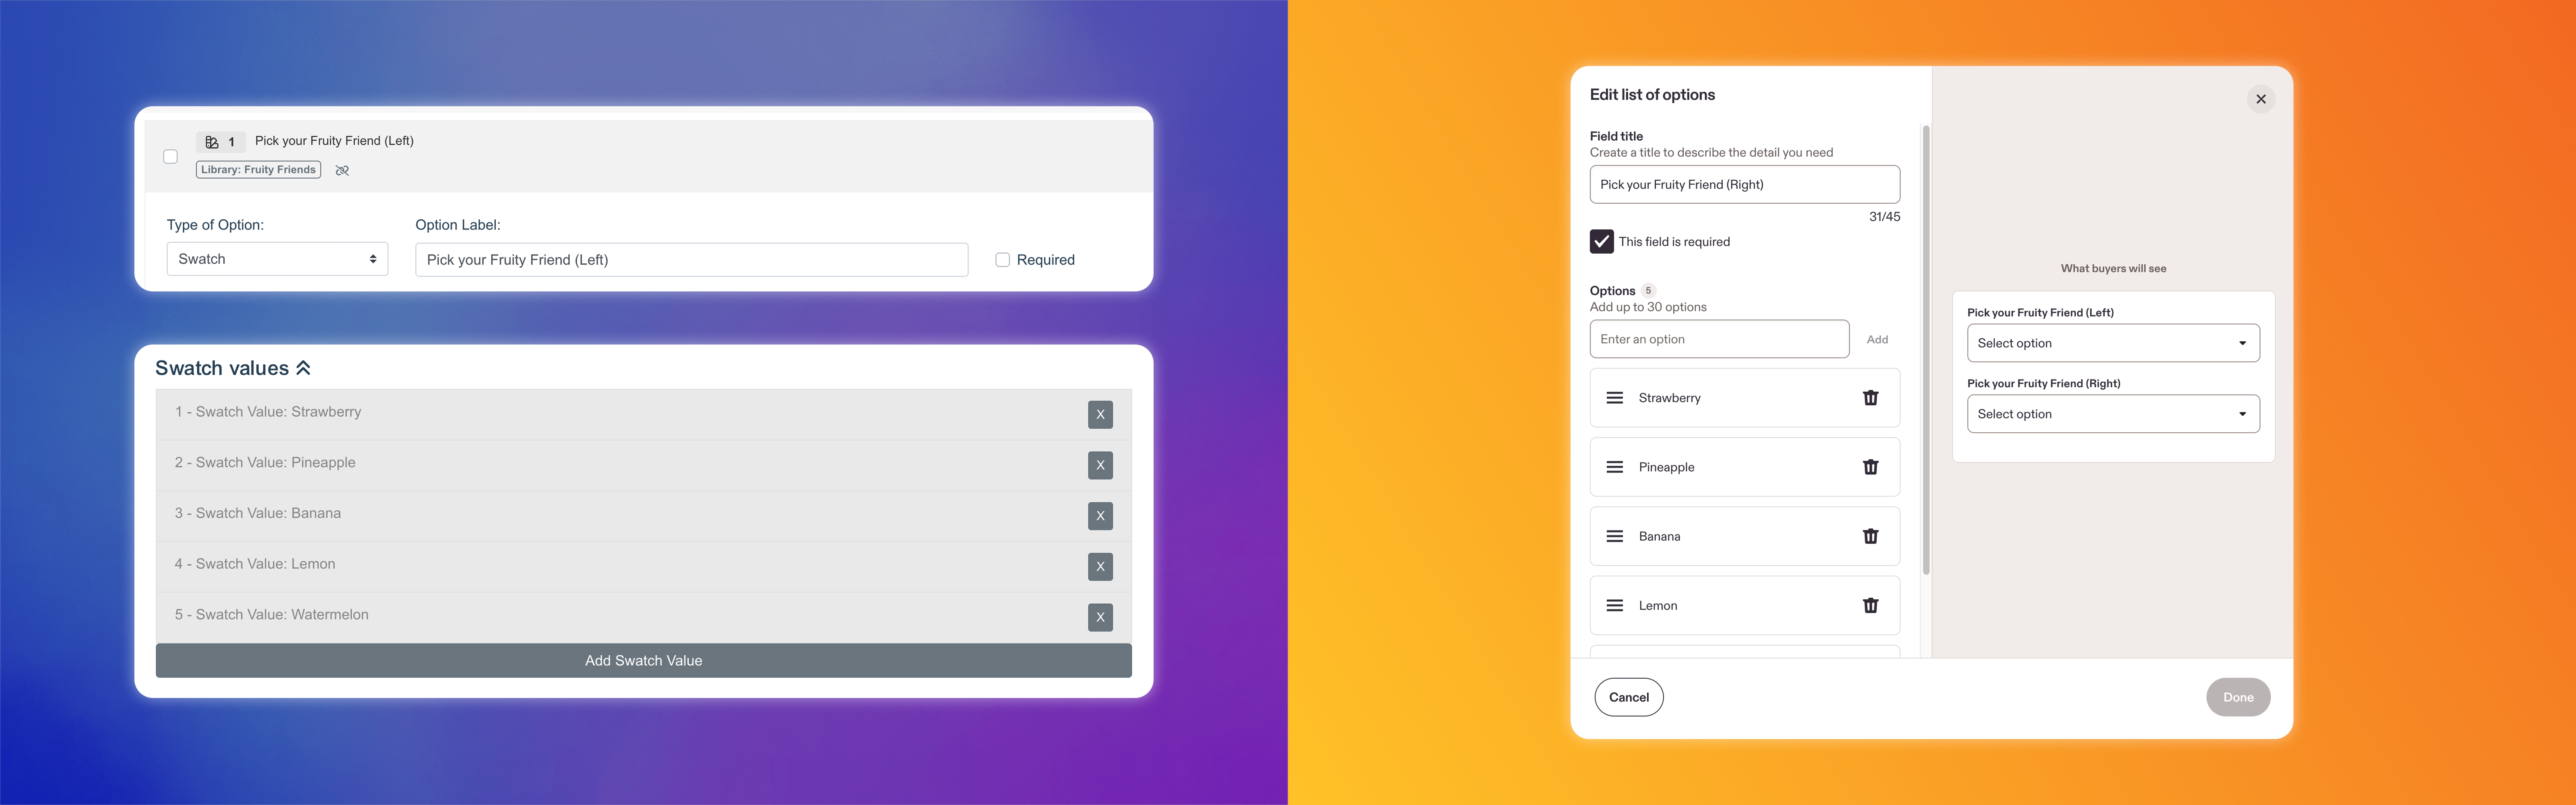
The options created on your Option Set will need to match exactly what will appear on your Etsy custom fields including:
Option Label -> Field Title on Etsy
Swatch Values (Name on Library) -> Options on Etsy
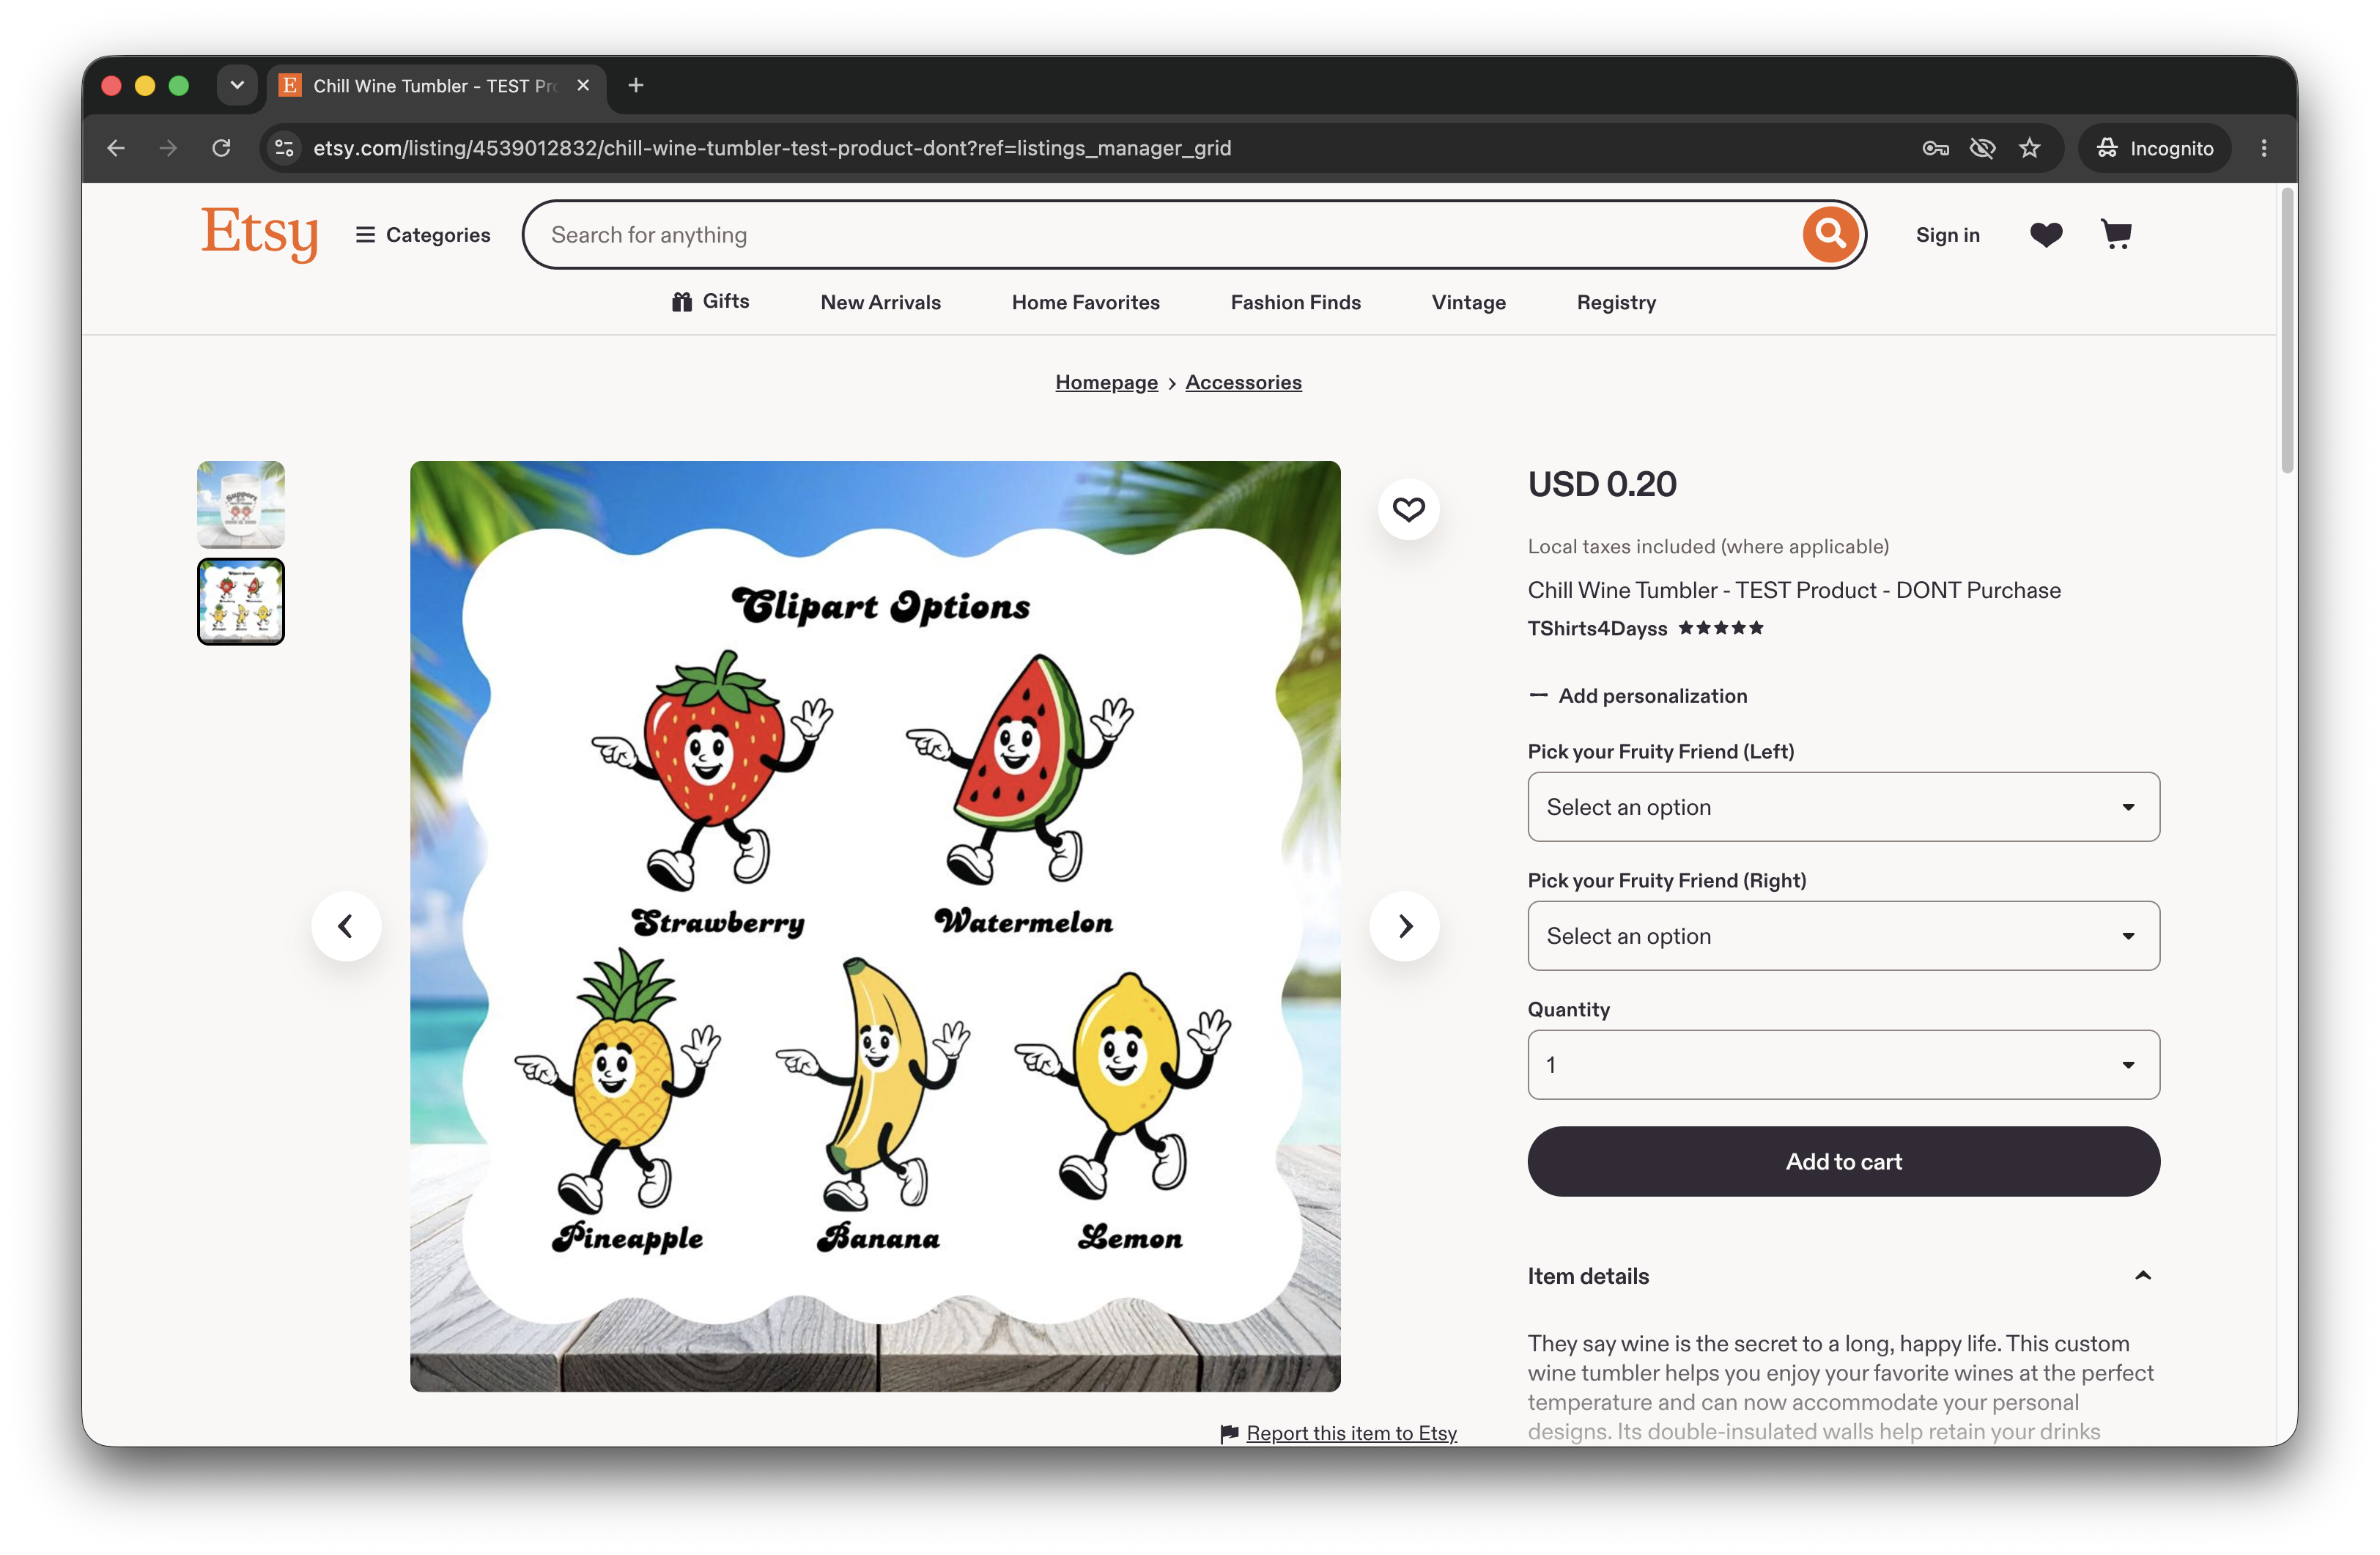
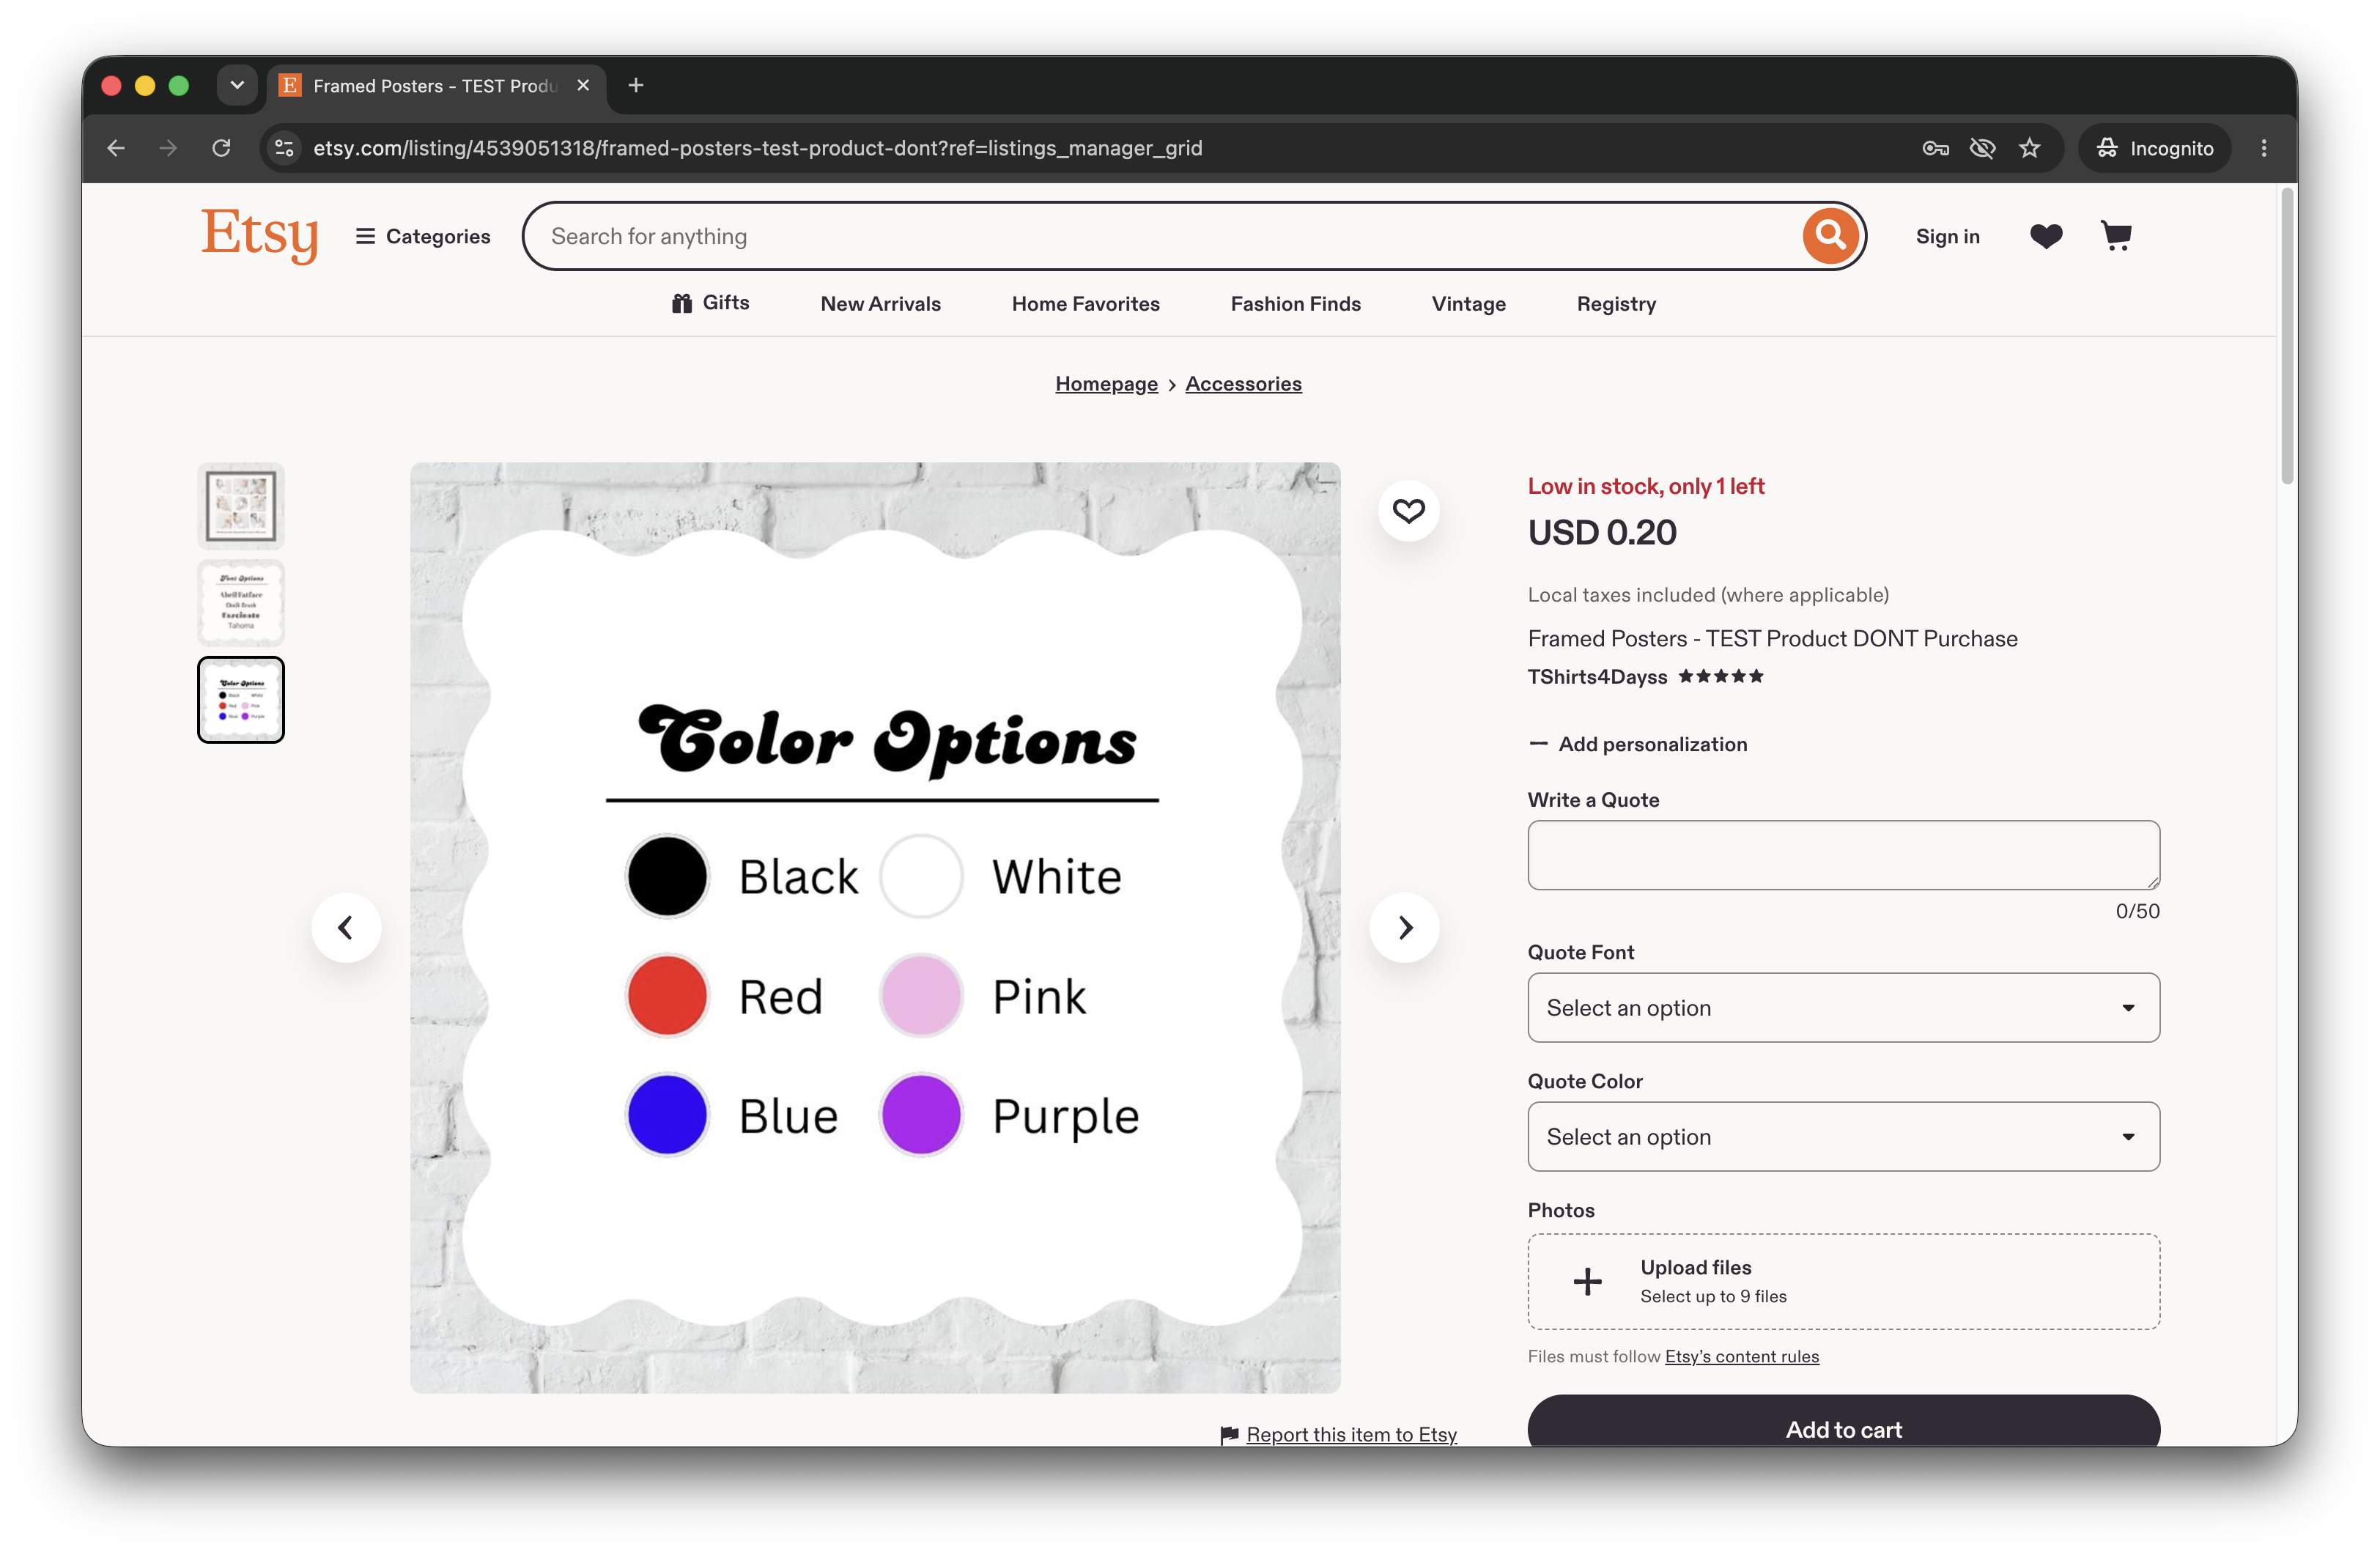
To provide clarity for your shoppers, we highly recommend including an image with all clipart options on your Etsy Listing. Here's an example:
Setting Up Image Placeholders
Image Placeholders are configured using Etsy's Upload Files field connected to an Image Upload option.
Create your template or design using image placeholder elements.
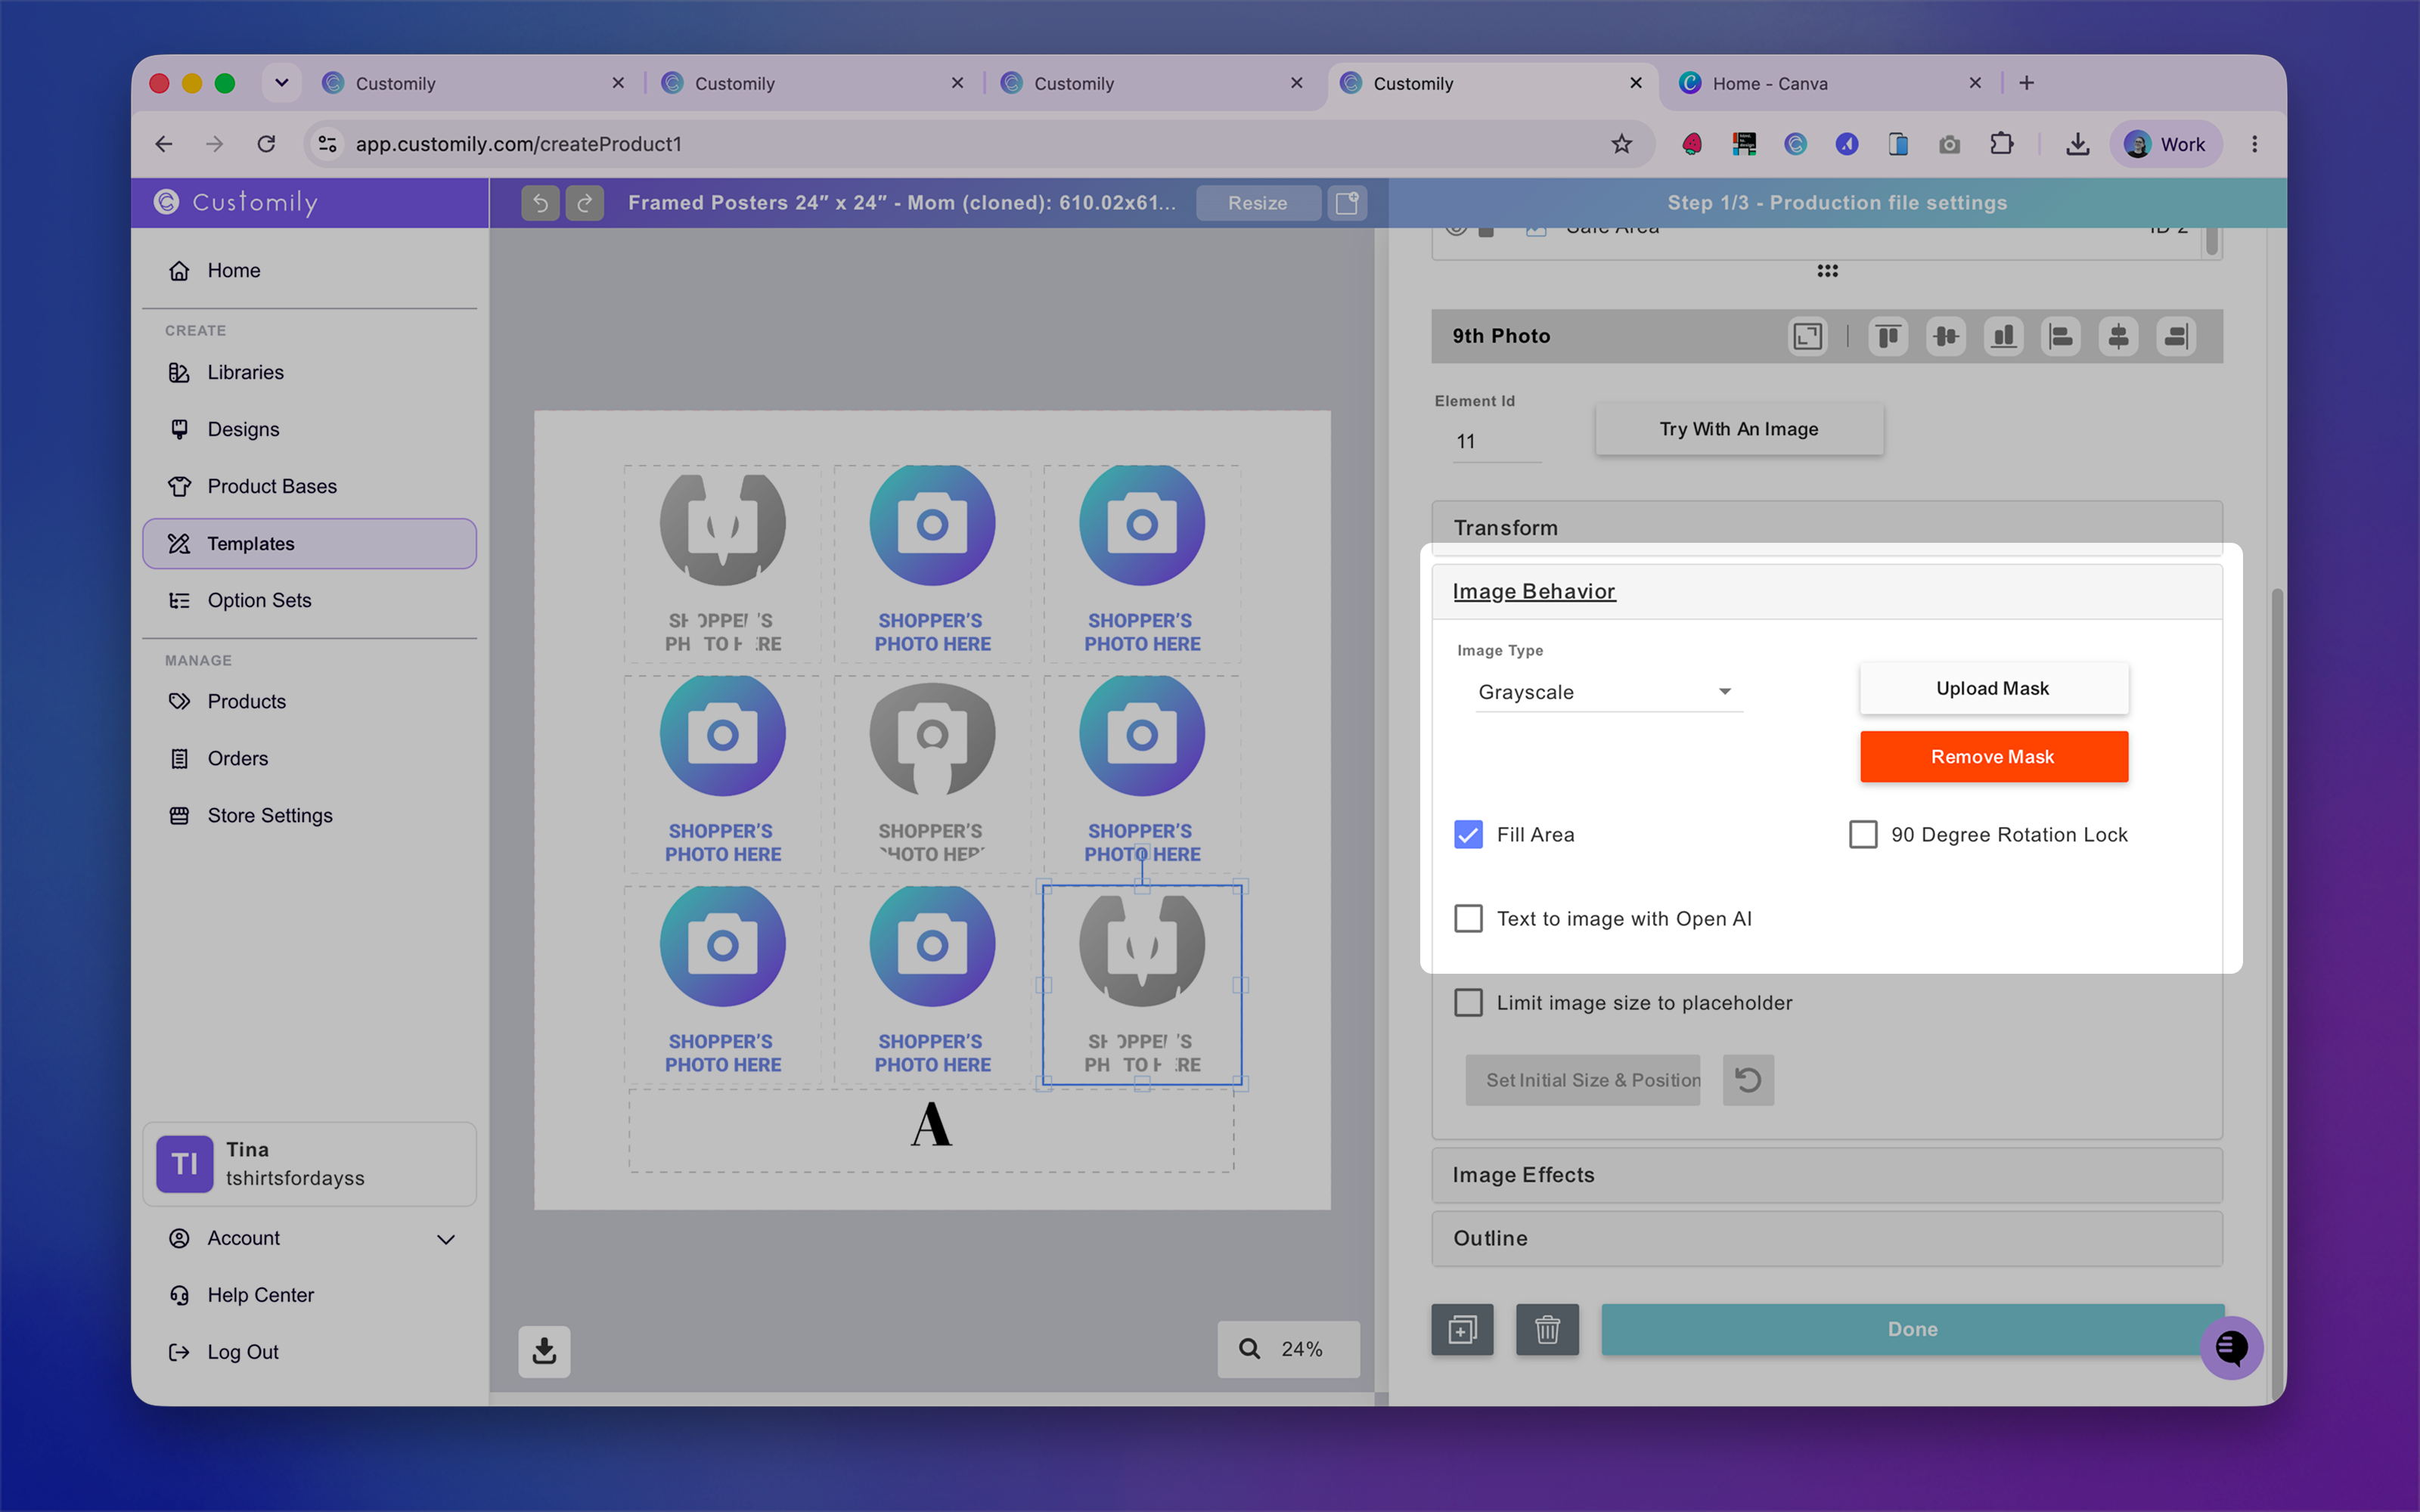
Once your template's ready, you can create your option set on Customily.
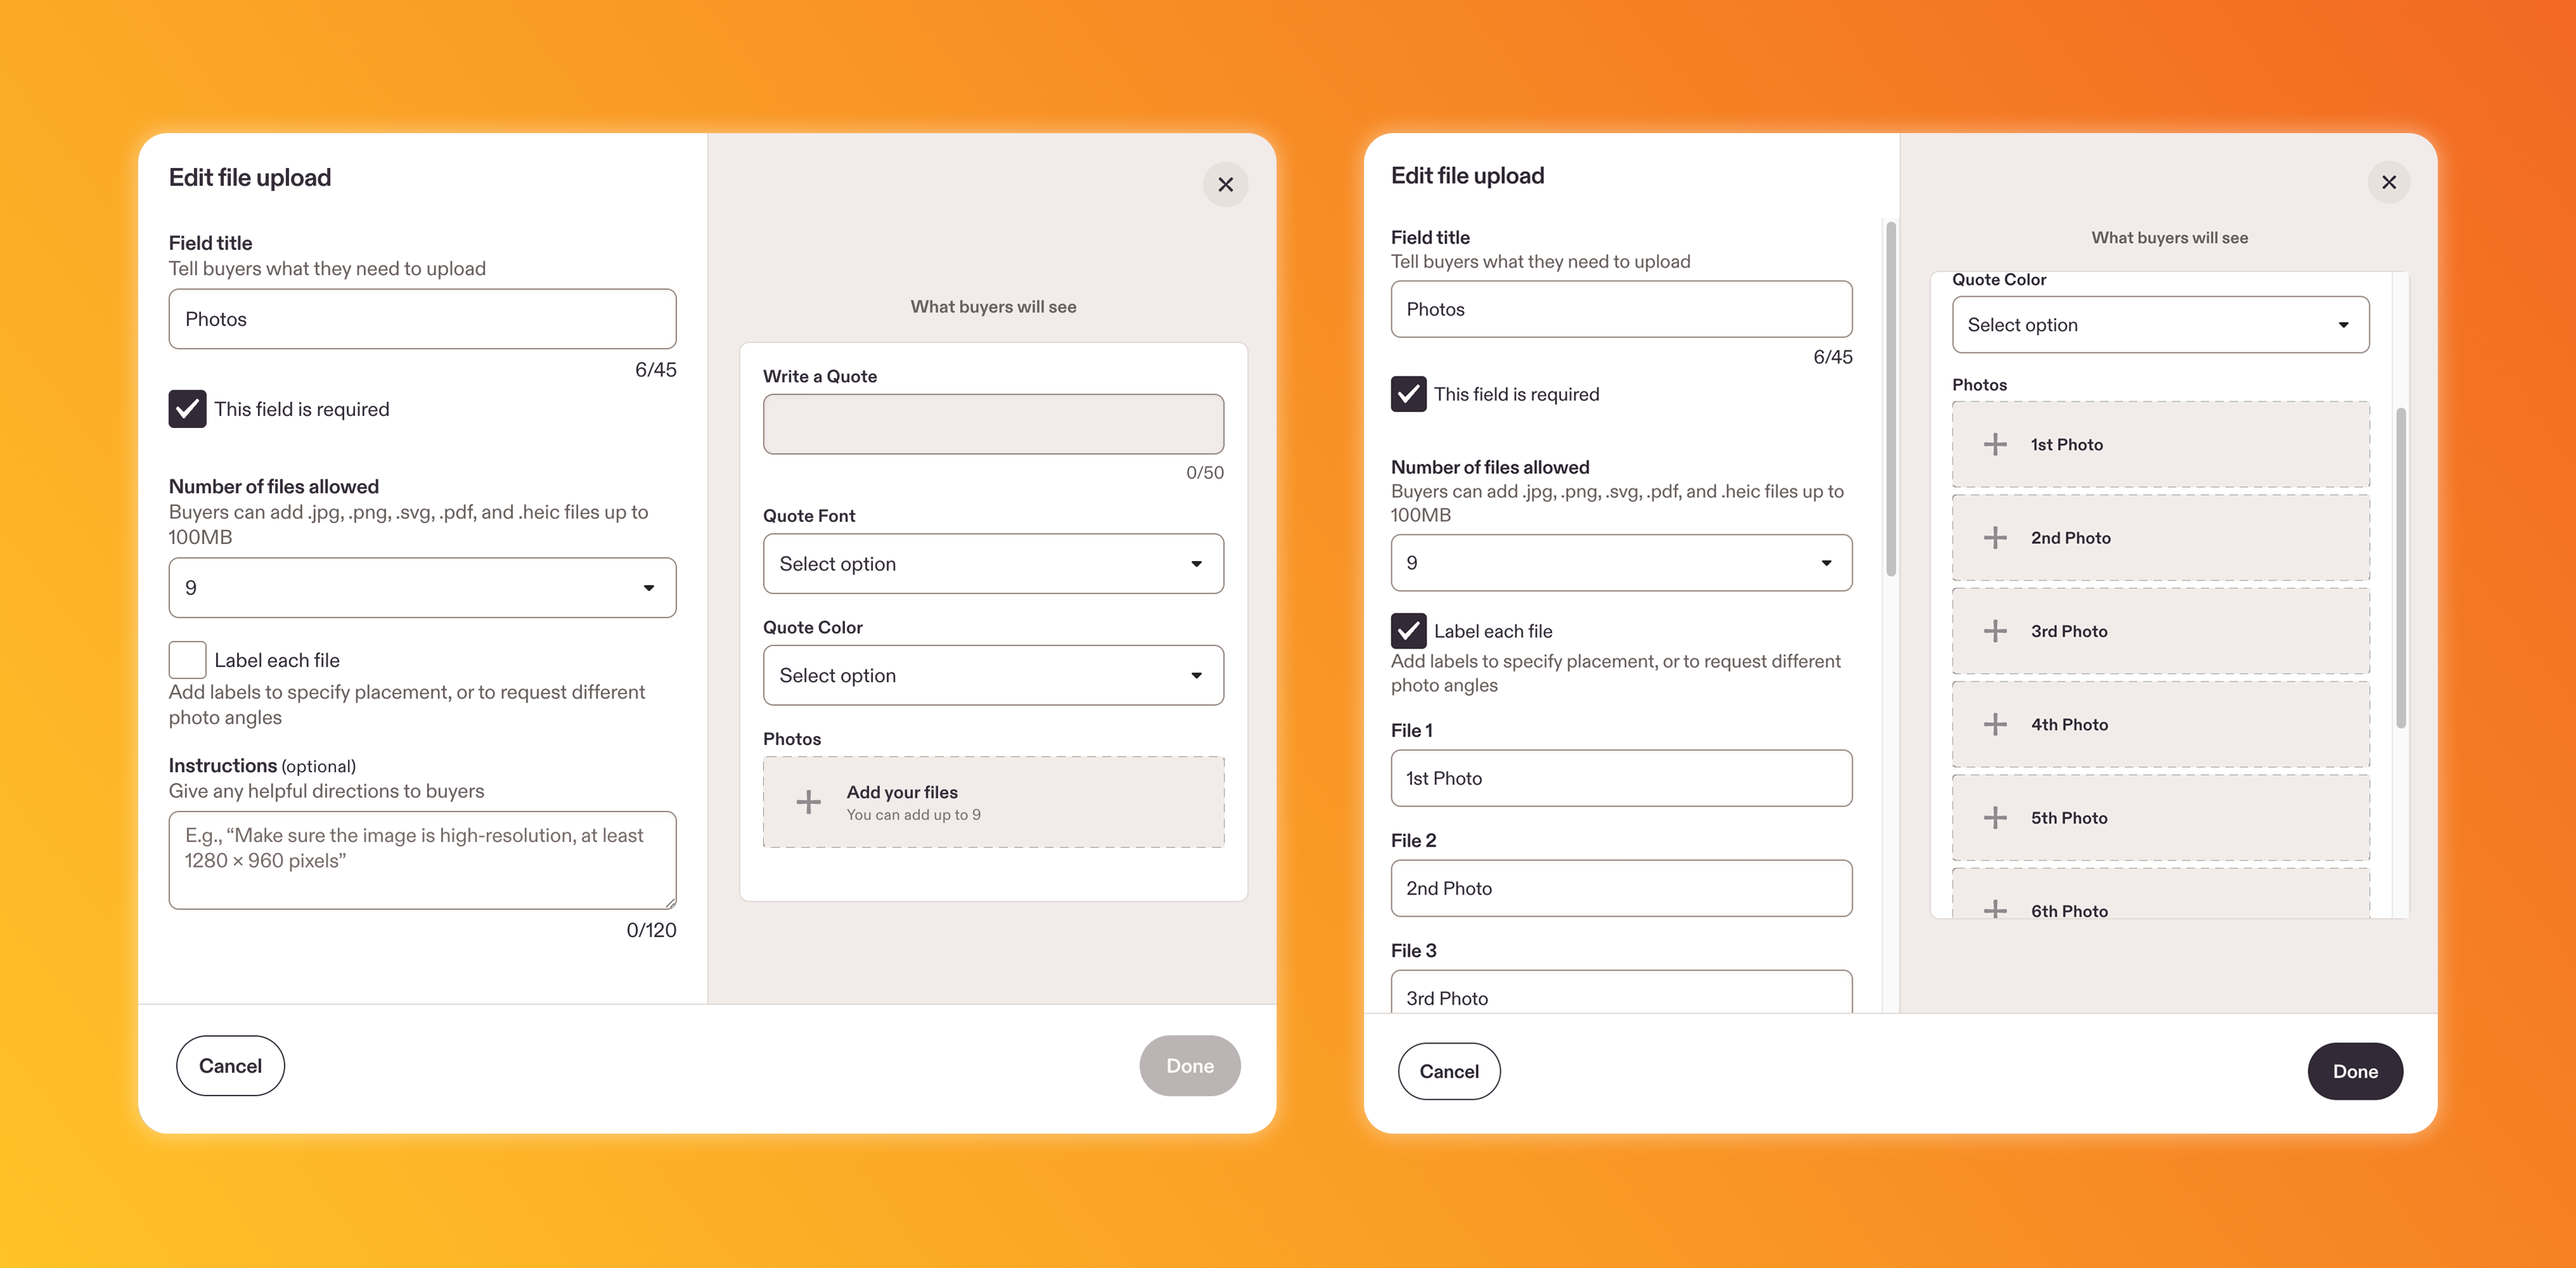
After creating your Option Set, you can create the File Upload as a Custom Field on your Etsy listing.
Here you have two options:
Label Each File: If you want customers to know exactly where their images are going to be placed, go for this option. Here, you'll need to match the File Name on Etsy to each Option Label on the Customily Option Set. This is how we'll match file name to image element.
No Labels: If you go for this option, the images will be uploaded in the order in which they are sent. Use this for collages where it doesn't really matter where each image is placed.
Setting Up Dynamic Images
Dynamic Images are configured using an Etsy List of Options field connected to a Swatch or Dropdown option. Each option should correspond to one image in your Image Library.
Set up an image library with the clipart options that'll be available. The names for each option are the ones you'll have to use on your List of Options on Etsy, so make sure these are legible for your shoppers to choose easily between them.
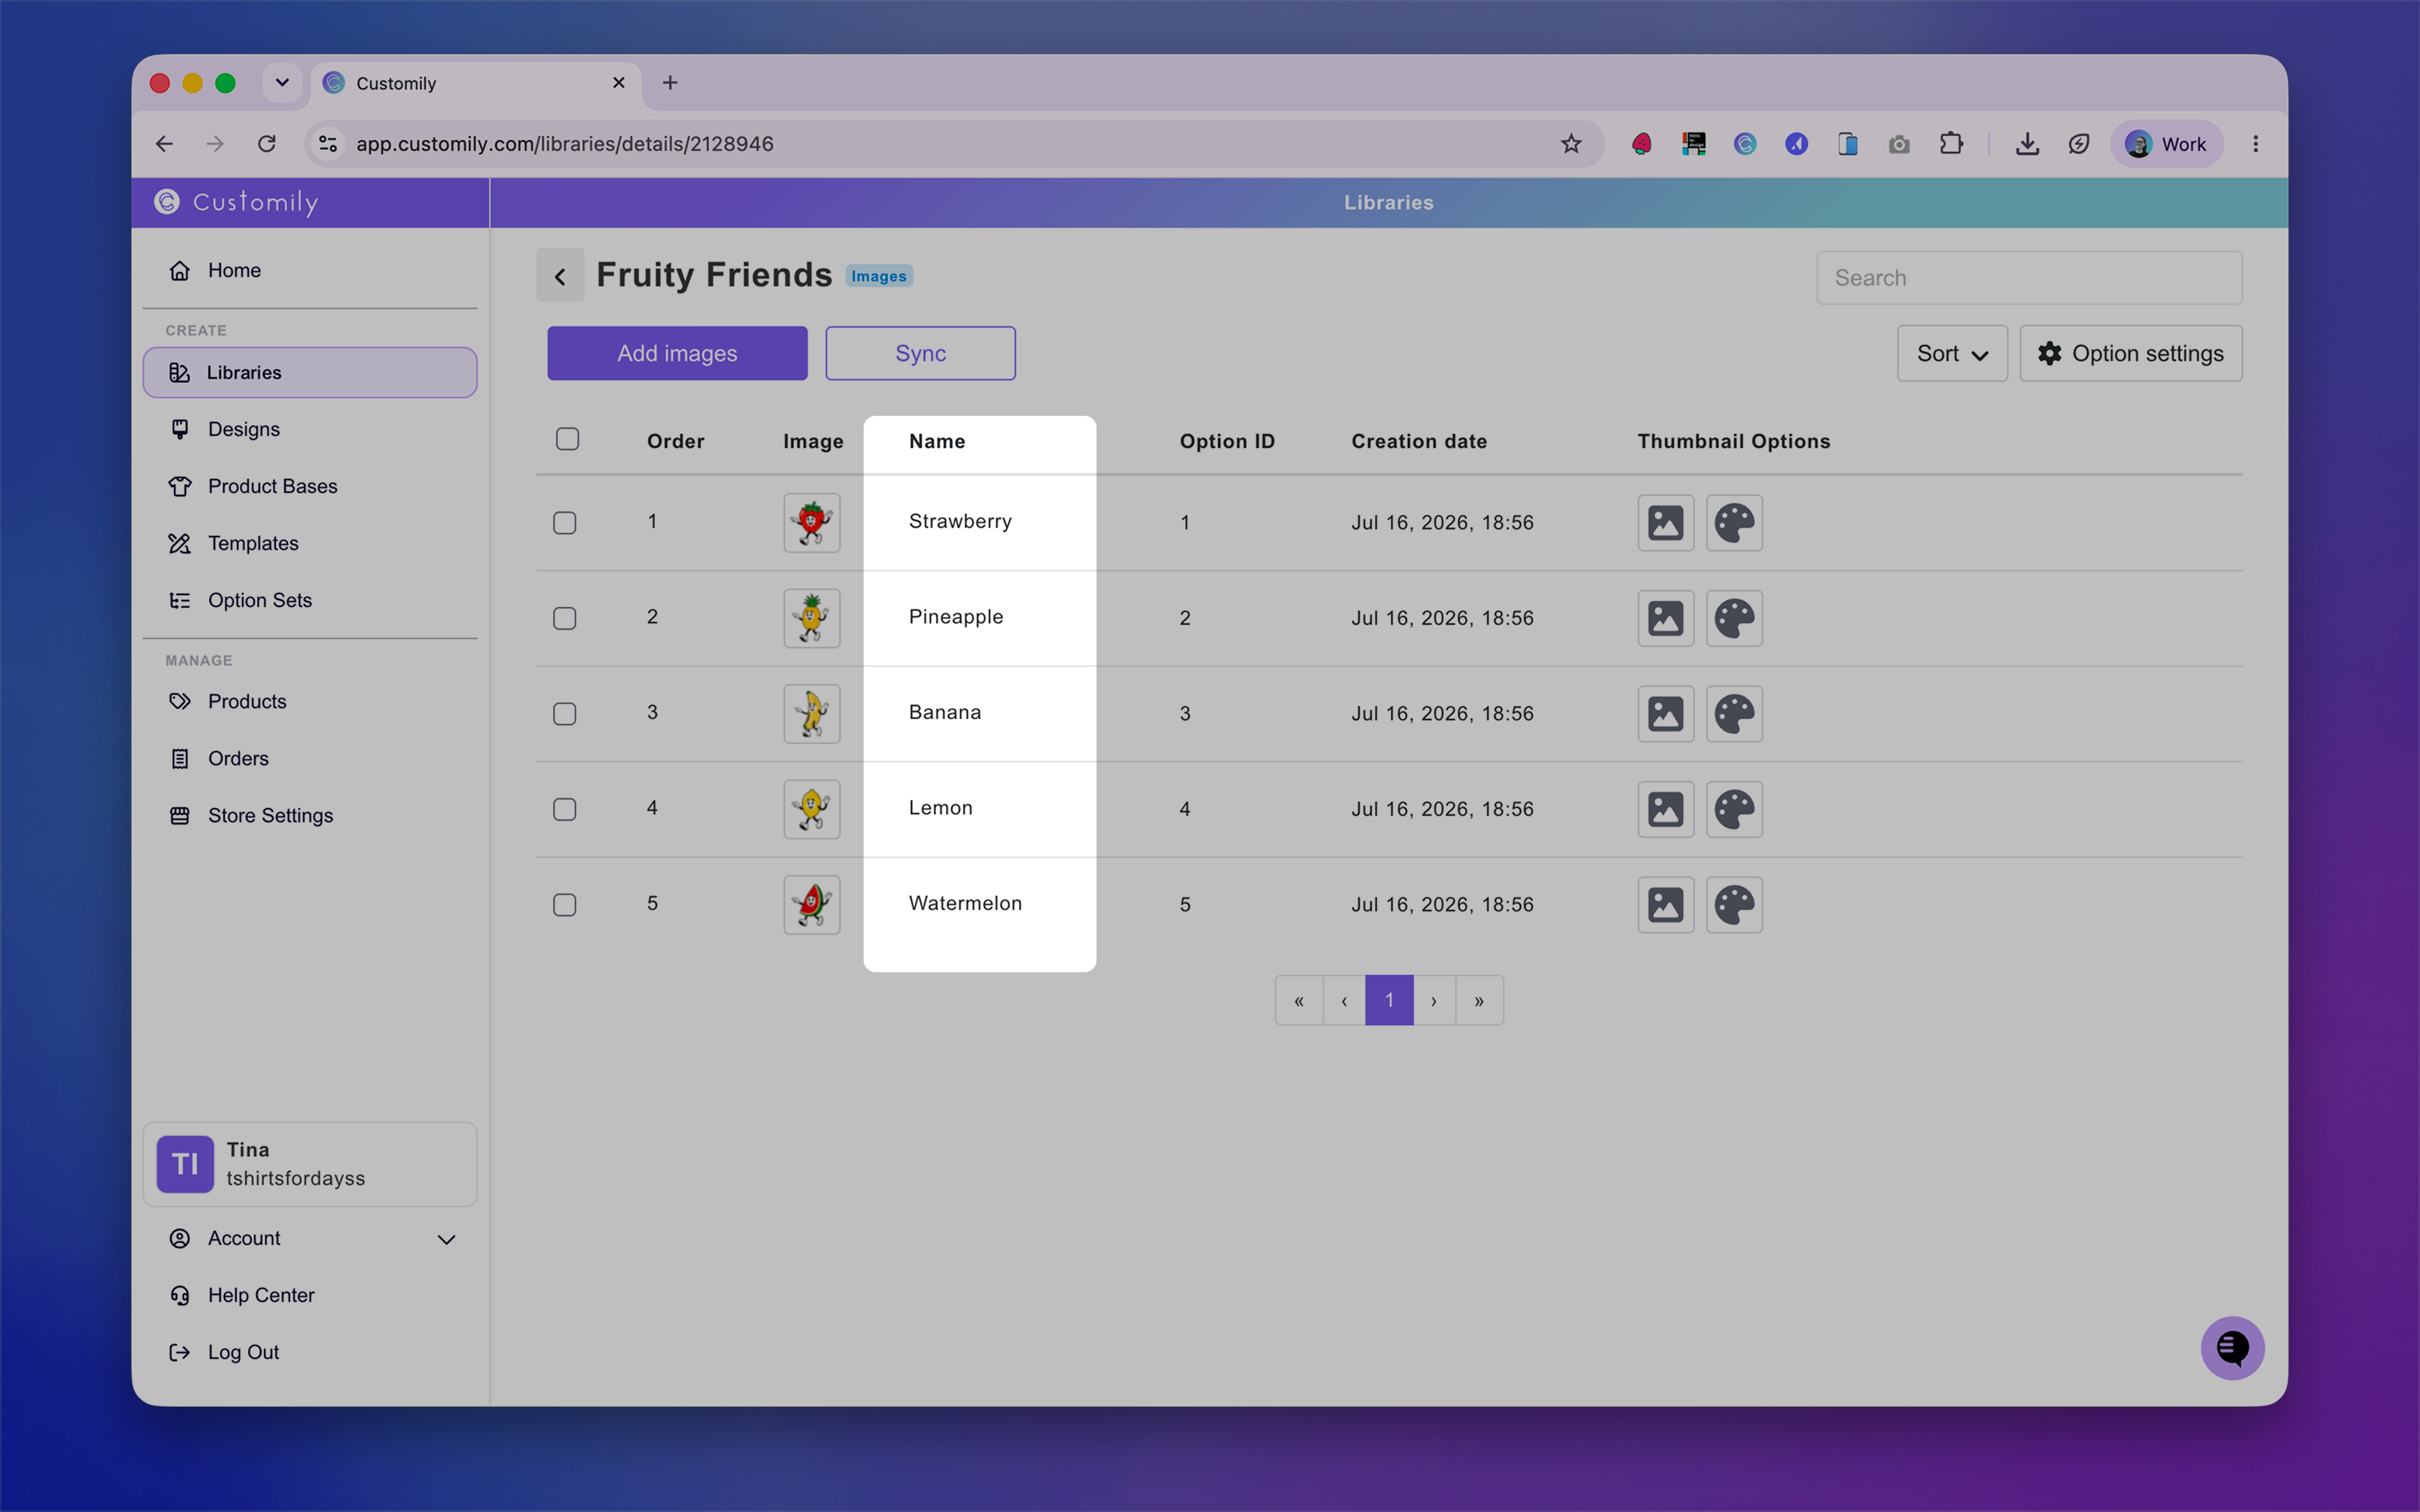
Create your template or design using a dynamic image with the new library linked.
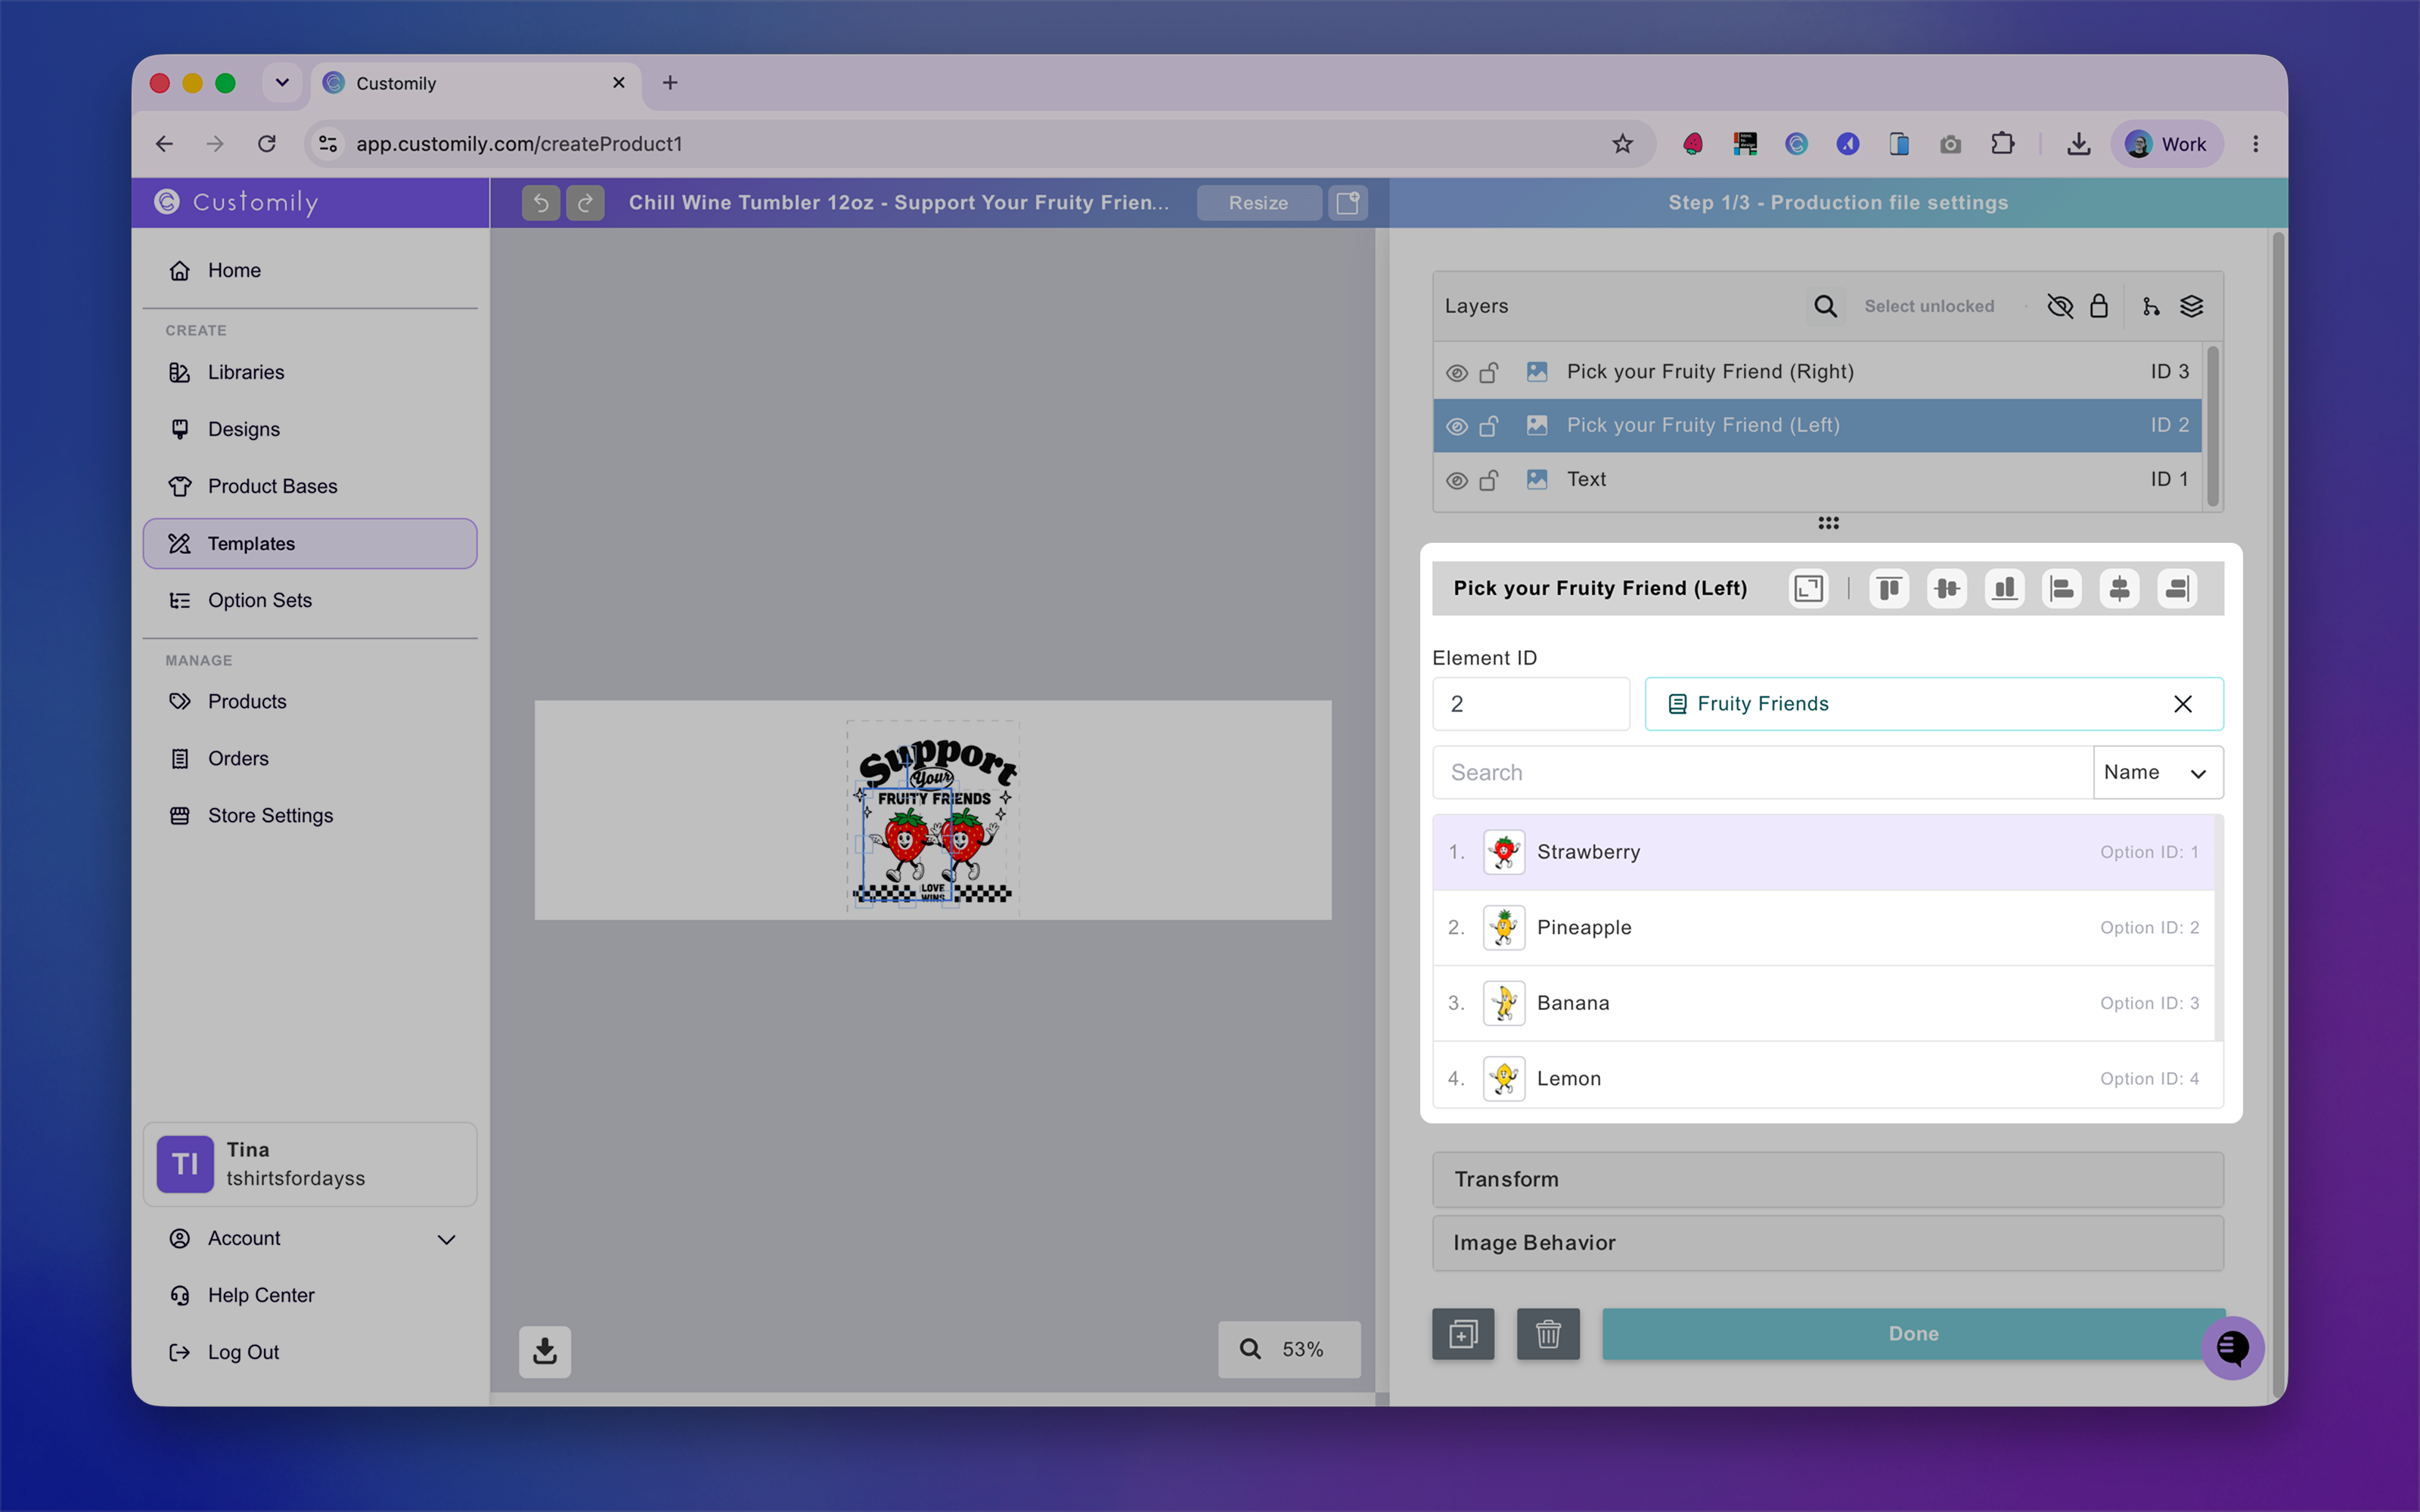
Once your template's ready, you can create your option set on Customily.
After creating your Option Set, you can create the List of Options as a Custom Field on your Etsy listing.
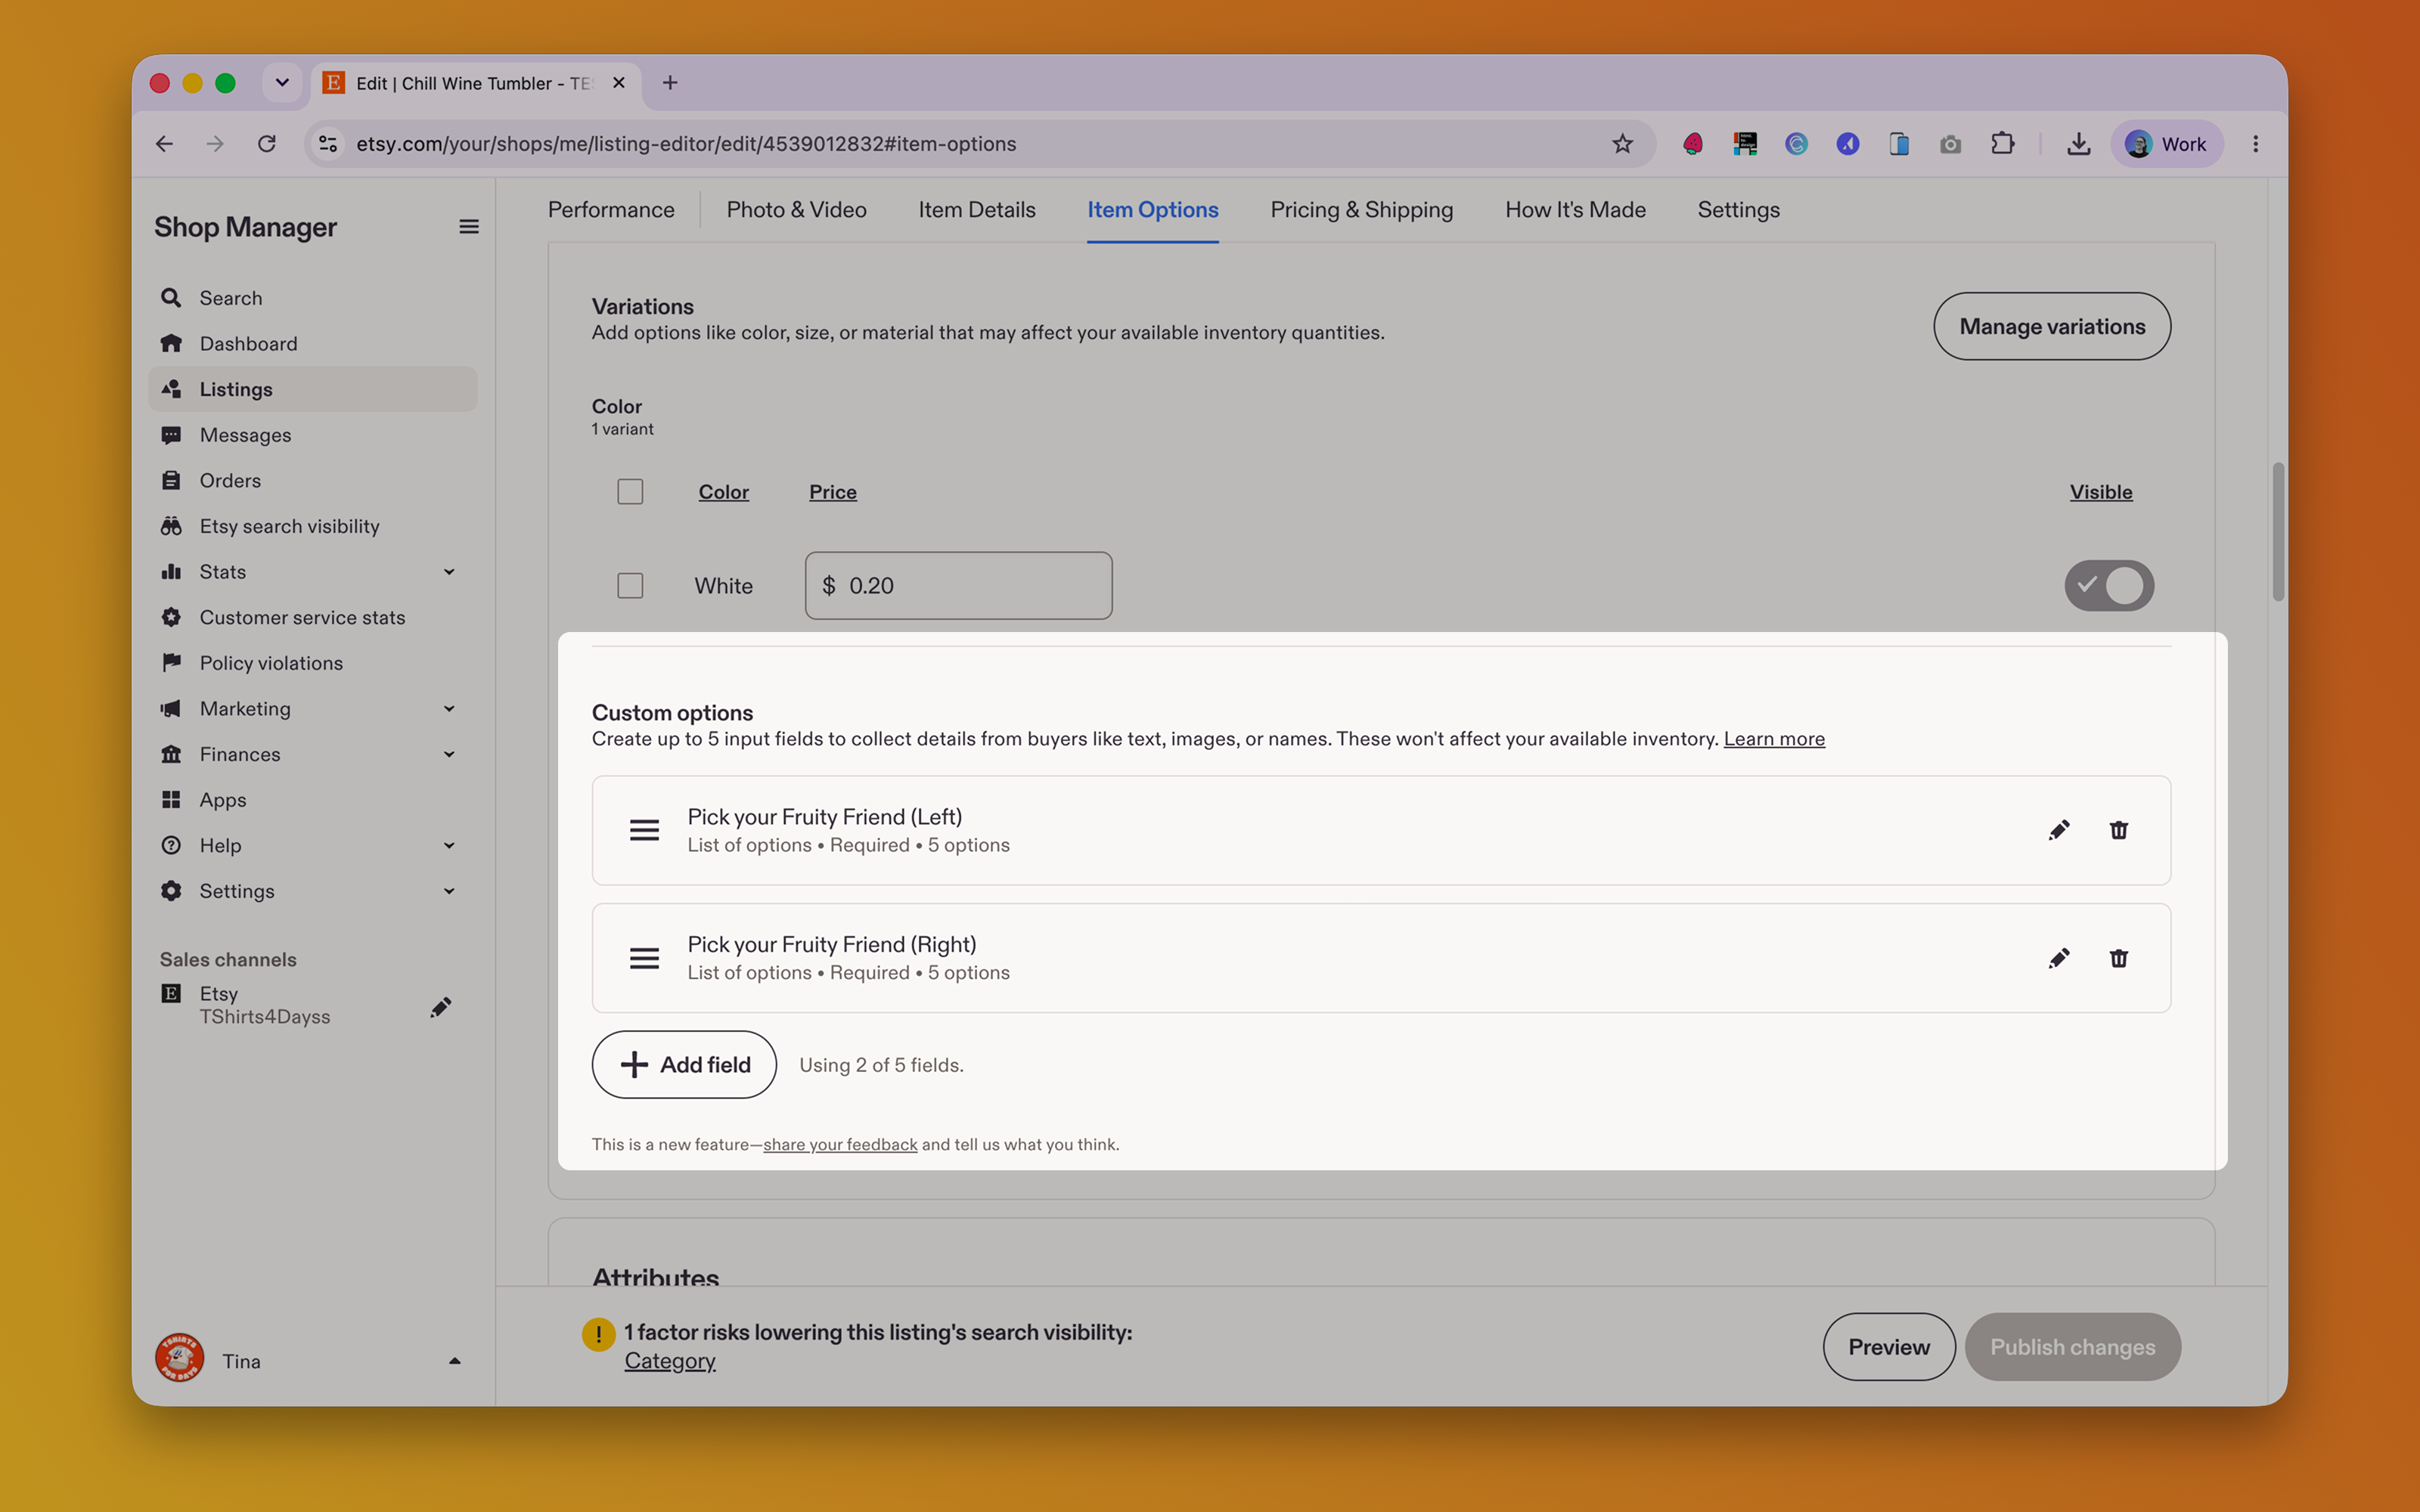
The options created on your Option Set will need to match exactly what will appear on your Etsy custom fields including:
Option Label -> Field Title on Etsy
Swatch Values (Name on Library) -> Options on Etsy
To provide clarity for your shoppers, we highly recommend including an image with all clipart options on your Etsy Listing. Here's an example: