Add a text input option to your option sets so customers can type their own text on your products.
To add a text input option
Create a new option set or edit an existing one
Click Add option
Expand the newly added Option by clicking on it
Select Text Input as option type
Configure the options parameters
Option Label
The title of the option that will appear on your product page. Something like "Type your text", "Name", or "Add your personalization" are the most used labels.
Help Text
A secondary text to give customers some extra information, tips or help. It's a good place to guide customers on what they can type with an example, or to let them know the maximum amount of characters they can type.
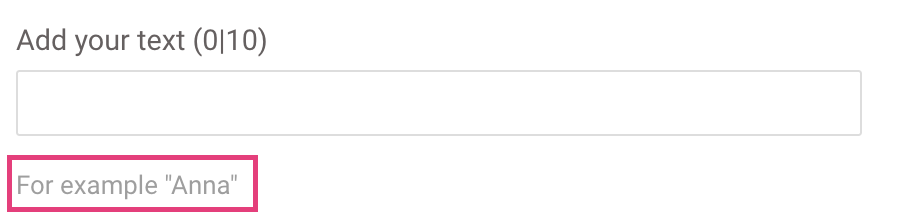
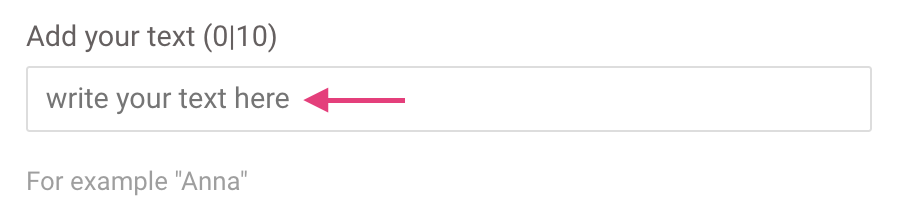
Placeholder
Example text that will appear on the text input as a reference. It will not be written on the preview. Whenever a customer starts typing, the placeholder will be deleted.
Max. Legth
The maximum amount of characters allowed in the text input. It will be displayed as a counter next to the option's title.
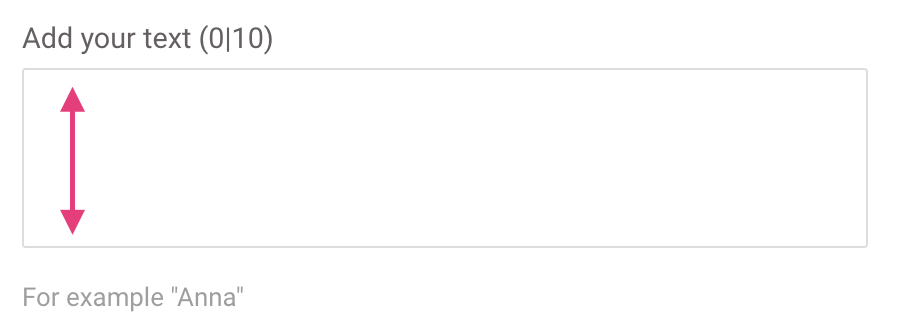
Make it Textarea
Check this box if you want the input to have multiple lines. It will transform a simple text input into a text area. The default number of lines for a text area is 2, however, you can determine if it will have more on the parameter below.
Textarea Max. number of lines
Maximum number of lines allowed on the text area. If empty, the default maximum number of lines will be 2.
Required
The text input will be required to add the product to cart. This means the customer will have to type something in it to be able to make a purchase. If the customer leaves the text input empty, it will let them know so they can fill it and add to cart properly. An asterisk (*) next to the option's title indicates that the field is required.
Hide visually
Check it if you want to hide the option from the product page. It is useful if you want to have some predefined text on the preview you don't want customers to change. However, it is hardly used.
To assign a Customily Function to a text input option
Once you have defined your option, you need to add a Customily Function to it.
Customily Functions are the way we assign actions to the options. It tells the option how to affect the preview. For example, in the case of text options, it tells it what text will change on the preview when we type.
To assign a Customily Function:
Expand the Customily Functions section by clicking on it.
Click Add a Customily Function
Select the Customily Function you want to use
Functions available for the text options are:
Text
This is the most commonly used function for text options. It tells the text option that it should type something on a text element from the preview.
Dynamic Image
This is used when you want the typed text to change some pre-set pictures on the preview. It tells the text option that it should change positions on one or more dynamic images from the preview.
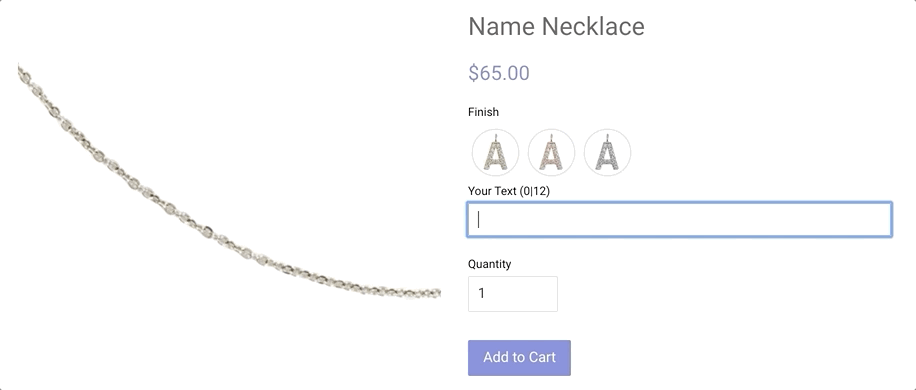
A great example of the use of this function is when the text on the product needs to displayed as pictures, as opposed to a regular text element with font, color, etc. For example, if you are creating a charm necklace.
Conditions create rules that will show or hide an option based on the customer's previous selections. With conditions you can, for example, show an option only if another specific option is selected.
To assign Conditions:
Expand the Conditions section by clicking it
Click Add Condition
Complete the condition's rules
Select action Show / Hide
When select option (the option that will generate the condition)
is -> select a value from that option
Once you have finished configuring your text input, you can move on to adding more options to the option set. If you are done with all the options just hit save and go back to the main menu.