Star Map
Last updated: April 28, 2026
With custom star maps, you can let customers immortalize a special place and moment in time. By choosing a location and a date, the star map will show how the sky looked on that exact occasion. You can format star maps in different ways to offer customers further personalization options.
How It Works
When you add a Star Map element to your design:
Shoppers select a date and location, and the sky map updates automatically.
The map shows the position of stars and constellations from that moment.
You customize the style, size labels and layout of the map.
If multiple style options are added, shoppers will see options to pick from them.
In this article:
To add a star map
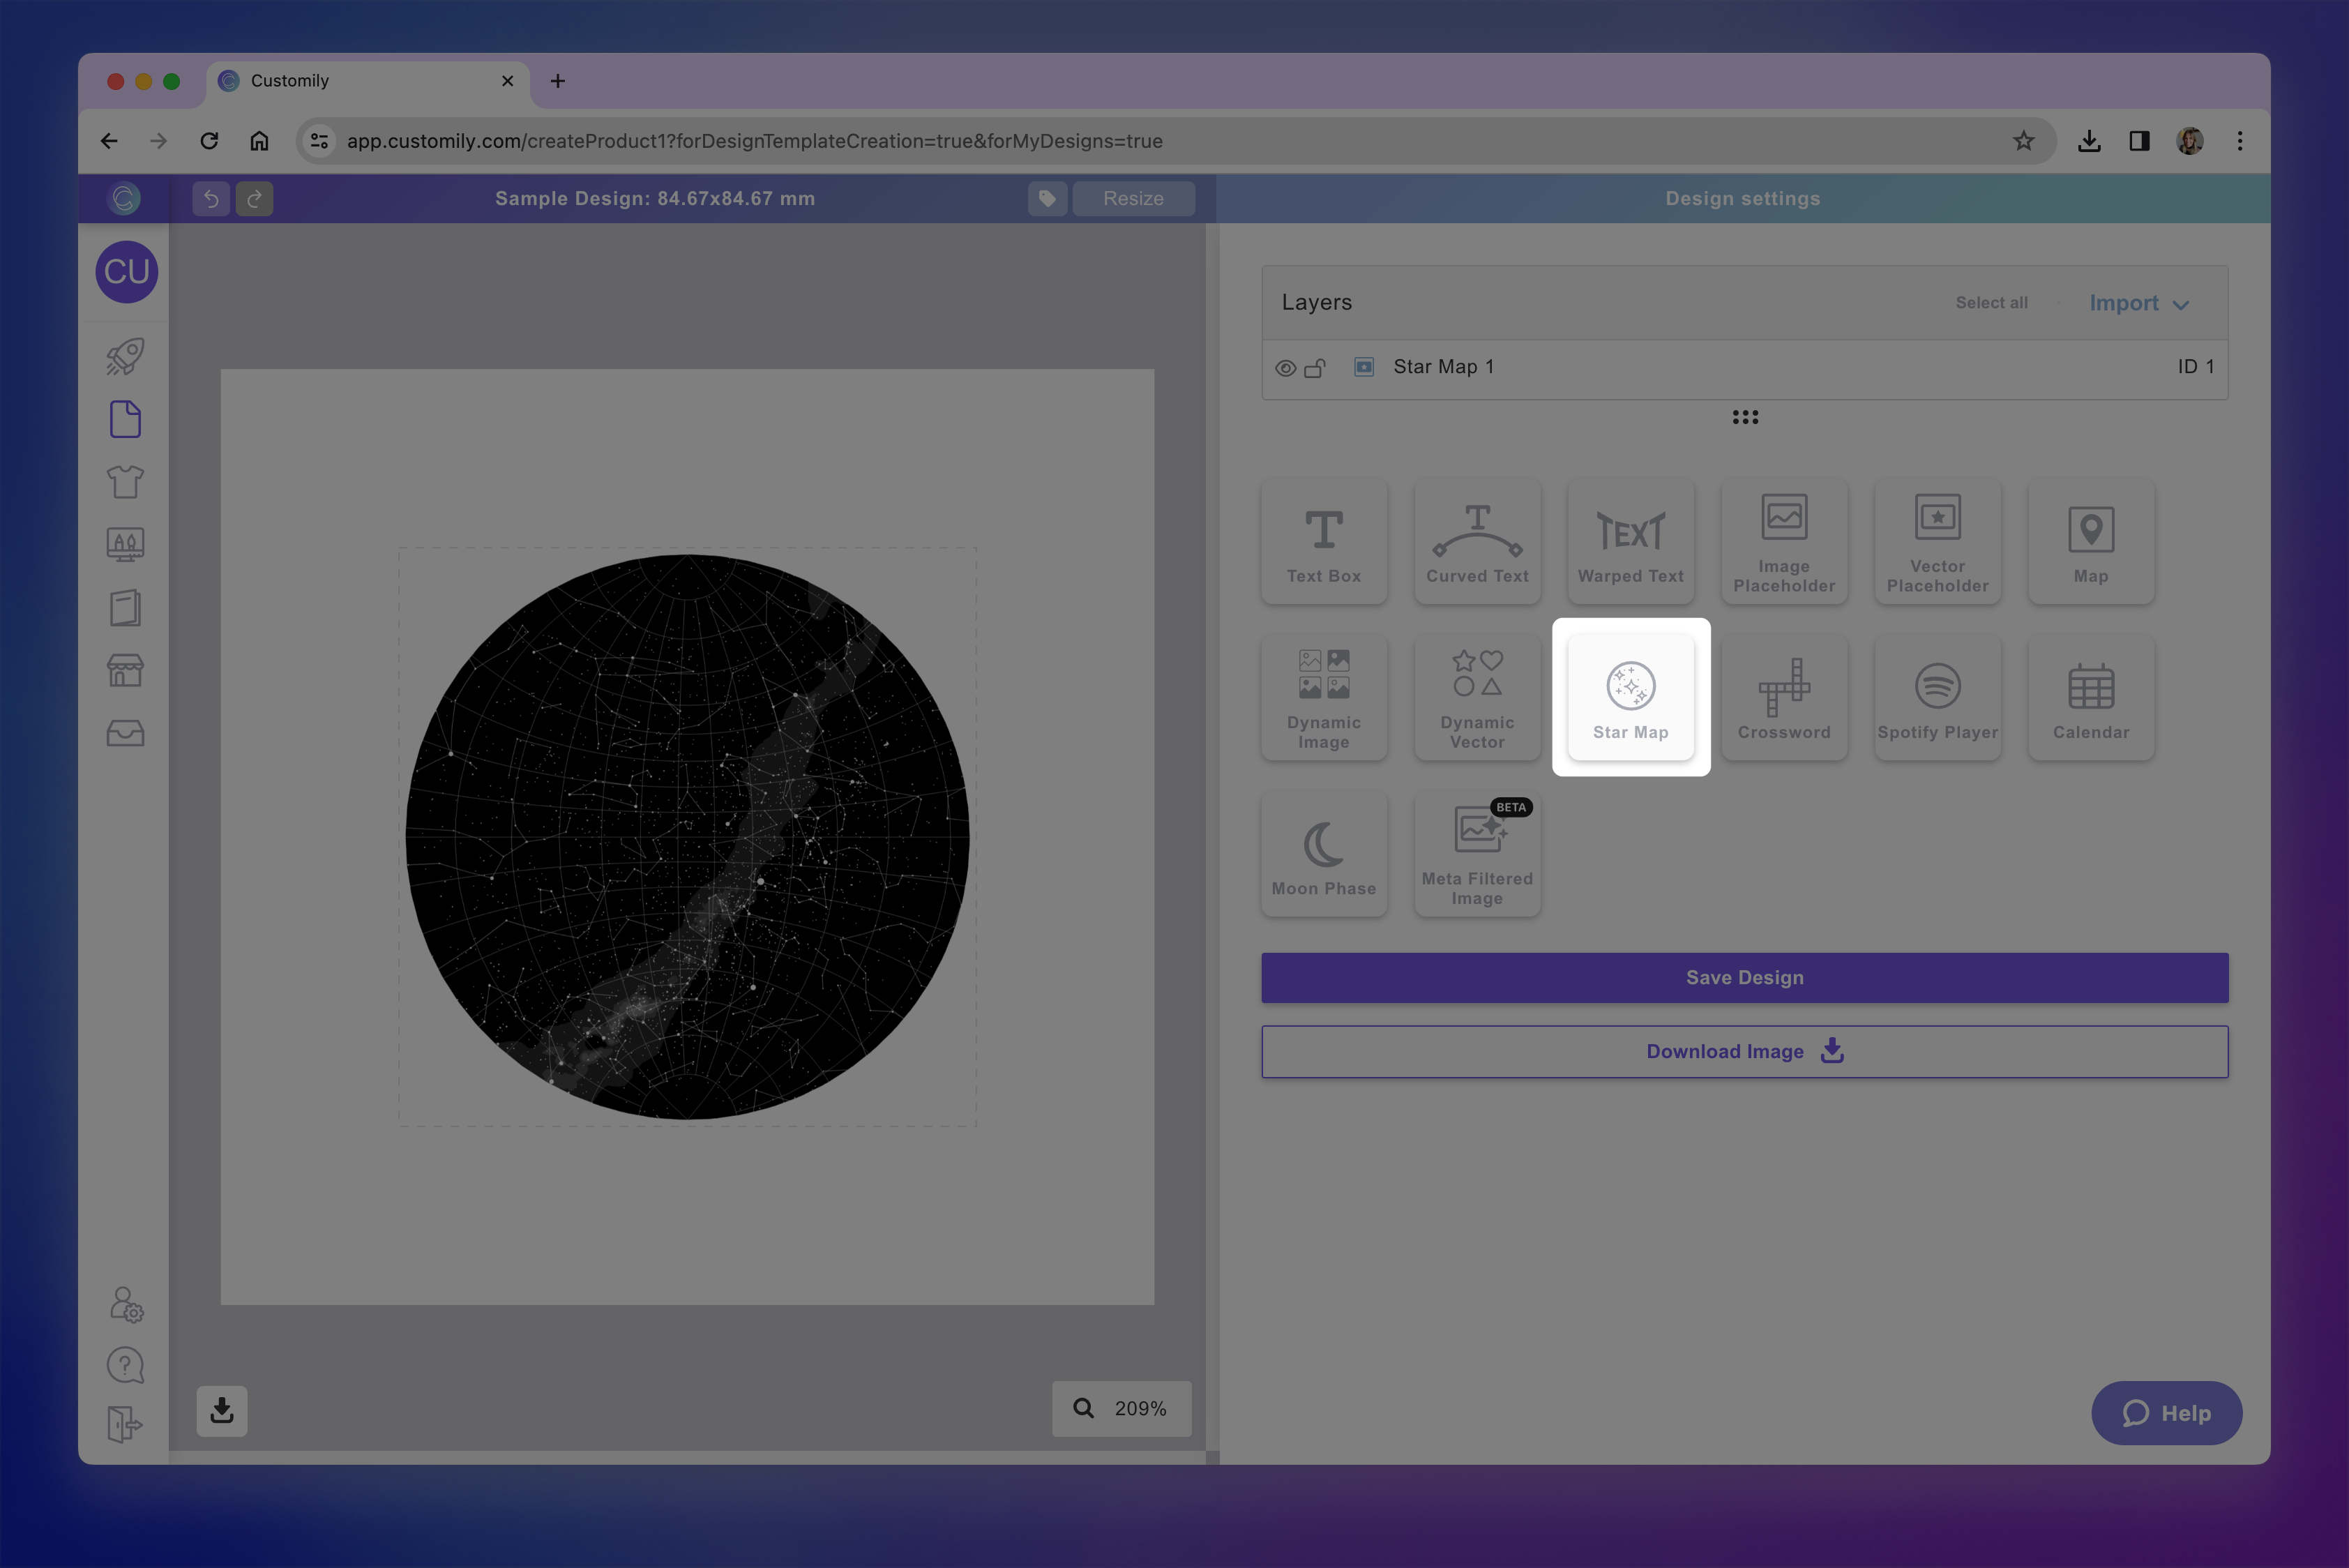
You can add star maps on Designs and on Templates, by clicking the Star map button.
Each star map you add will have a Name that you can edit, and a Unique Id for you to easily identify it.
Transform the star map
Directly on the canvas or by expanding the Transform toolbox, you can transform the star map:

Change the star map behavior and style
Changing the behavior of the star map will affect what options are available for customers to further personalize it. You can configure different behaviors:
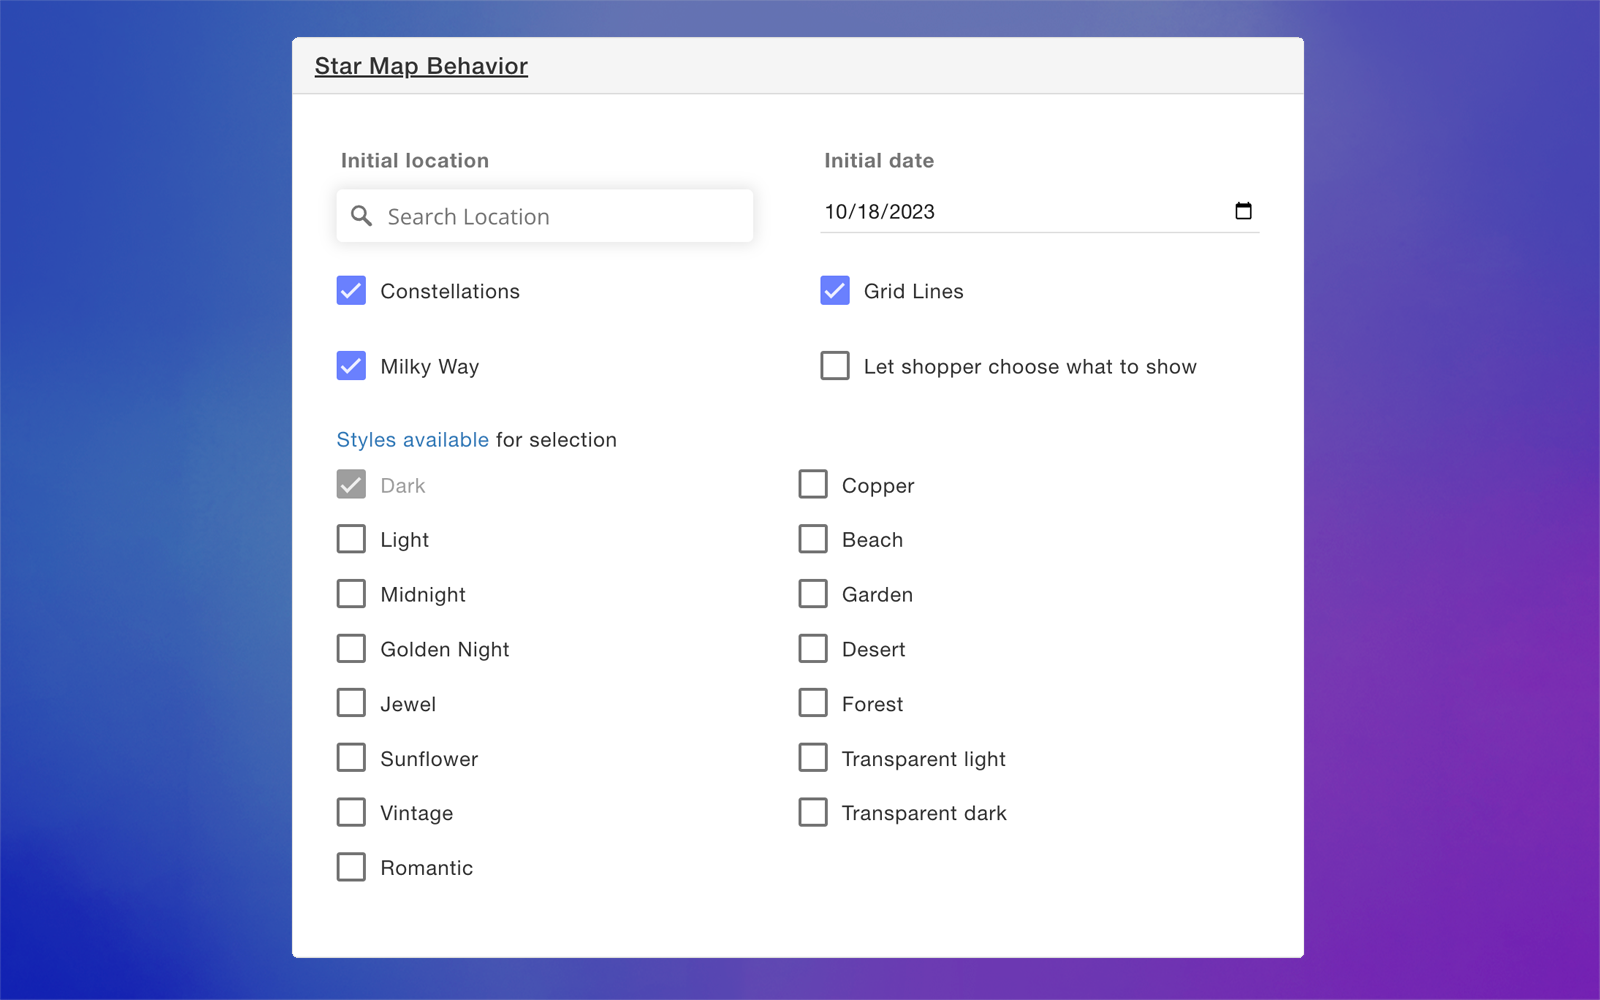
Initial location and initial date
Changing the initial location and initial date will affect what the map displays when loading. Location and dates are options that customers always need to fill in, so whatever you choose here will only apply to the initial loading of the map.
Select the star map
Expand the Star Map Behavior toolbox
Type a desired location. You can type a specific address, a city, or a country.
Pick the initial date

Add constellations, grid lines, and the Milky Way
You can choose what elements to show on your star map, or give customers the ability to choose what they want by activating the different checkboxes:
Constellations: Will show the lines forming the constellations
Grid lines: will show the latitude and longitude lines on the map
Milky Way: will show the hazy band of light that represents the Milky Way
Let shoppers choose: this will create an option where customers can choose whether they want to see these elements or not.
Select the star map
Expand the Star Map Behavior toolbox
Check/uncheck Constellation, Grid Lines, Milky Way, and/or Let shopper choose what to show

Keep in mind
If you select the checkbox for any of these elements they will be fixed on the star map. If you'd like these elements to be optional, then you should choose "let shoppers choose" as this will add the options for customers to choose what elements they want to see when customizing the star map.
Choose Map Style
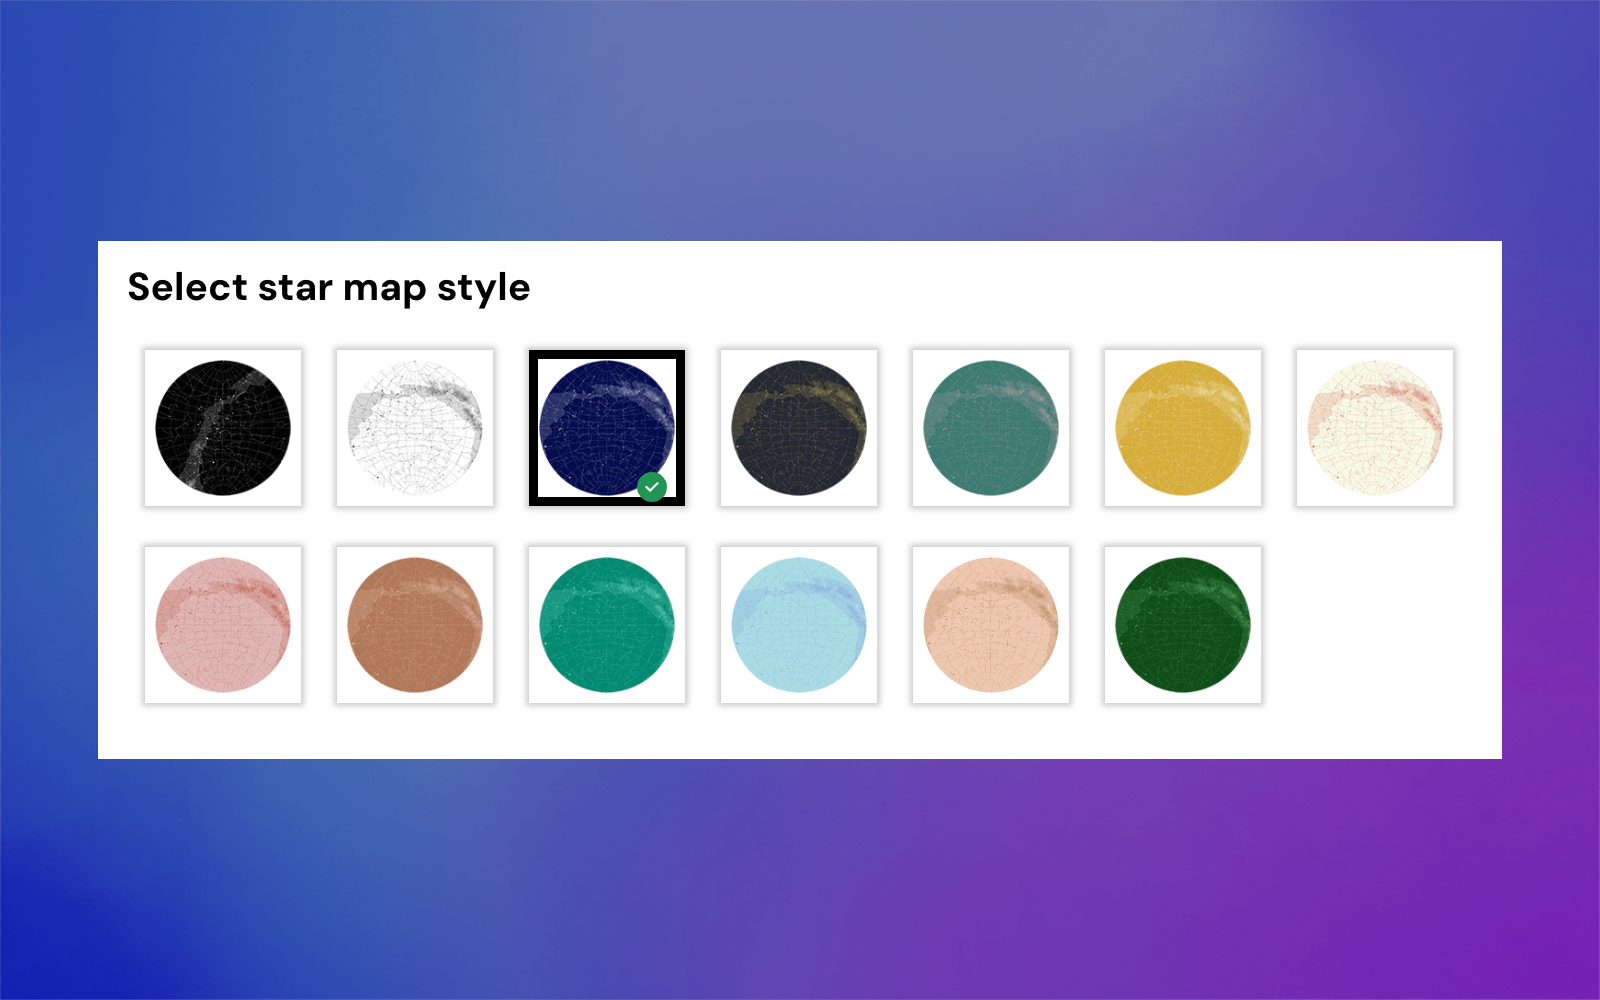
You can choose one or multiple styles for your map. By default, the dark style comes selected, but you can choose as many styles as you want. When choosing more than one style, they will be available for your customers to pick they want to use while personalizing.
Select the star map
Expand the Star Map Behavior toolbox
Check/uncheck the styles that you want to make available
Tip
The star map styles available are pre-defined by Customily, we offer a wide range of styles including some transparent ones so you can add your own images behind the stars! You can find a list of all the styles available here.
When you choose several styles, a choose map style option will be added to your product, like this: