Warped text
Last updated: April 29, 2026
The Warped text element lets you bend text into different shapes like arcs or waves. It’s a great way to add visual flair to product designs—whether you want curved names over a badge, wavy titles, or playful decorative text.
Just like the standard Text Box, this element is fully customizable in terms of content, fonts, and colors—but with added controls to shape the text path.
How It Works
When you add a Warped text to your design:
Shoppers will see a text input to type custom text along a shape you define.
As they type, their custom text appears live in the design preview adapted to the warped shape.
You control the font, size, color, and curve by dragging the nodes.
Warped text fills the entire shape; font size, alignment, and spacing are controlled by the shape, not by the shopper.
If multiple font or color options are added, shoppers will see options to pick from them.
In this article:
To add a warped text
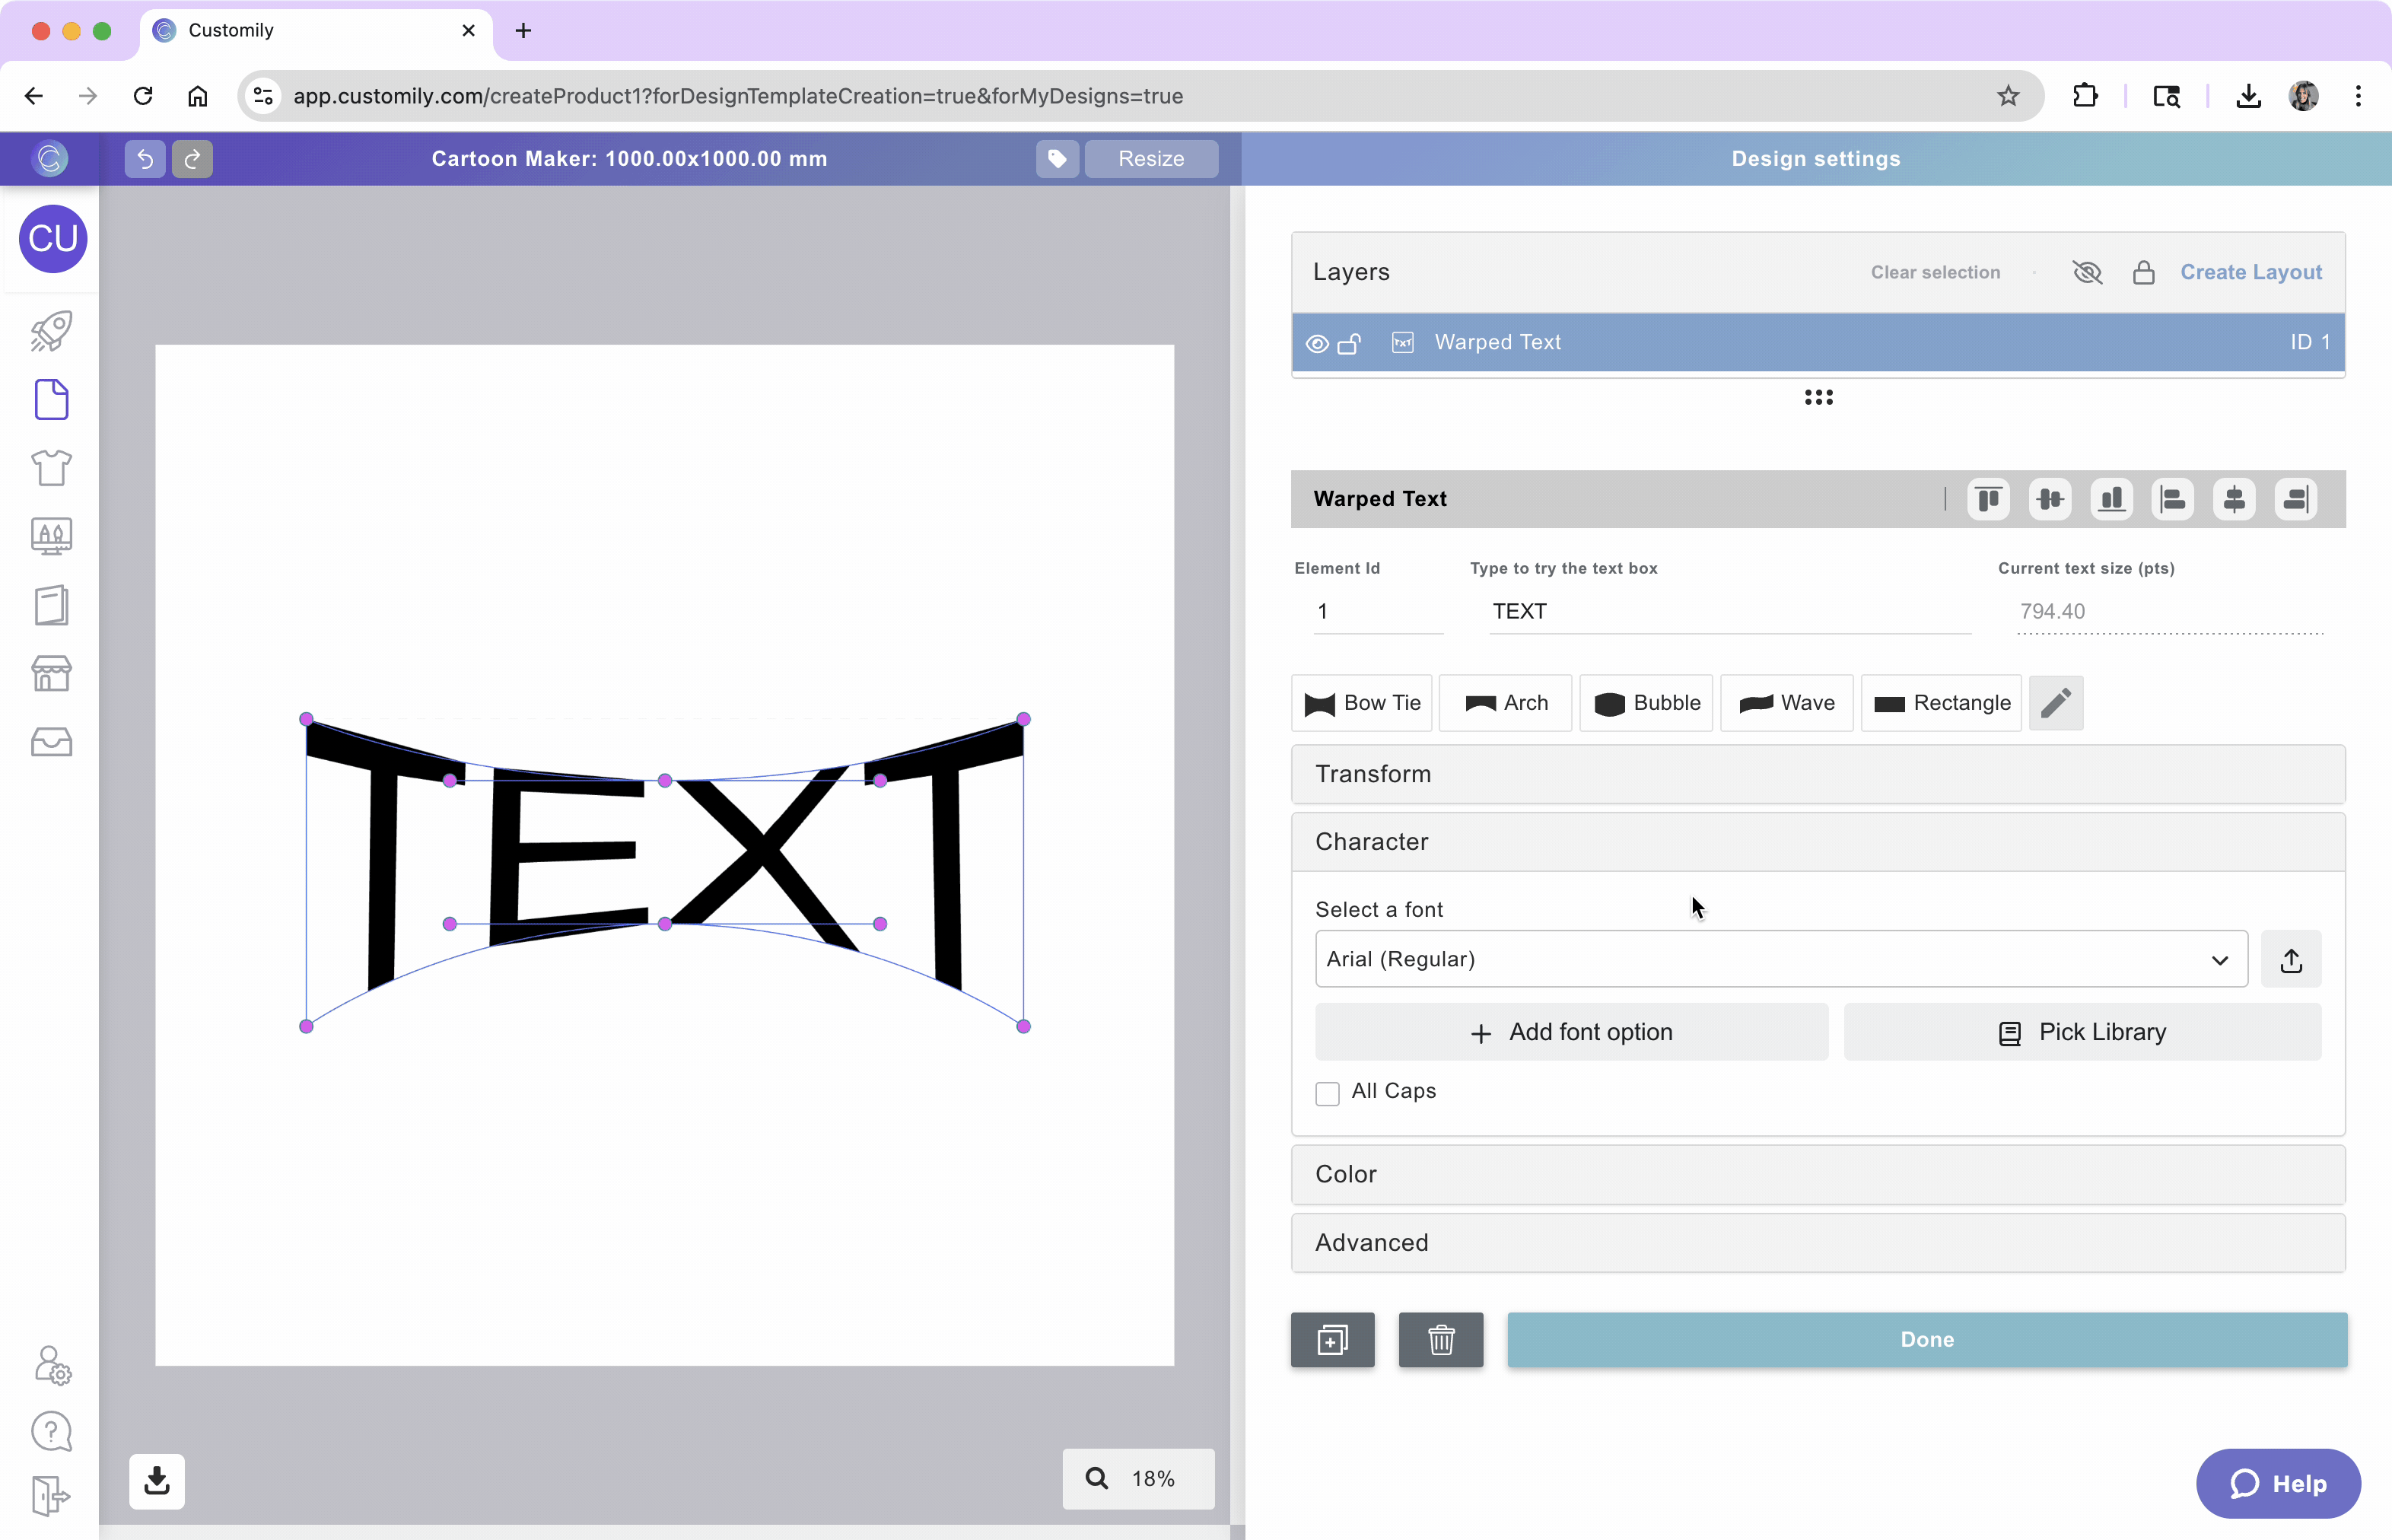
You can add a warped text element to your Designs or Templates by clicking the warped text button in the elements panel.
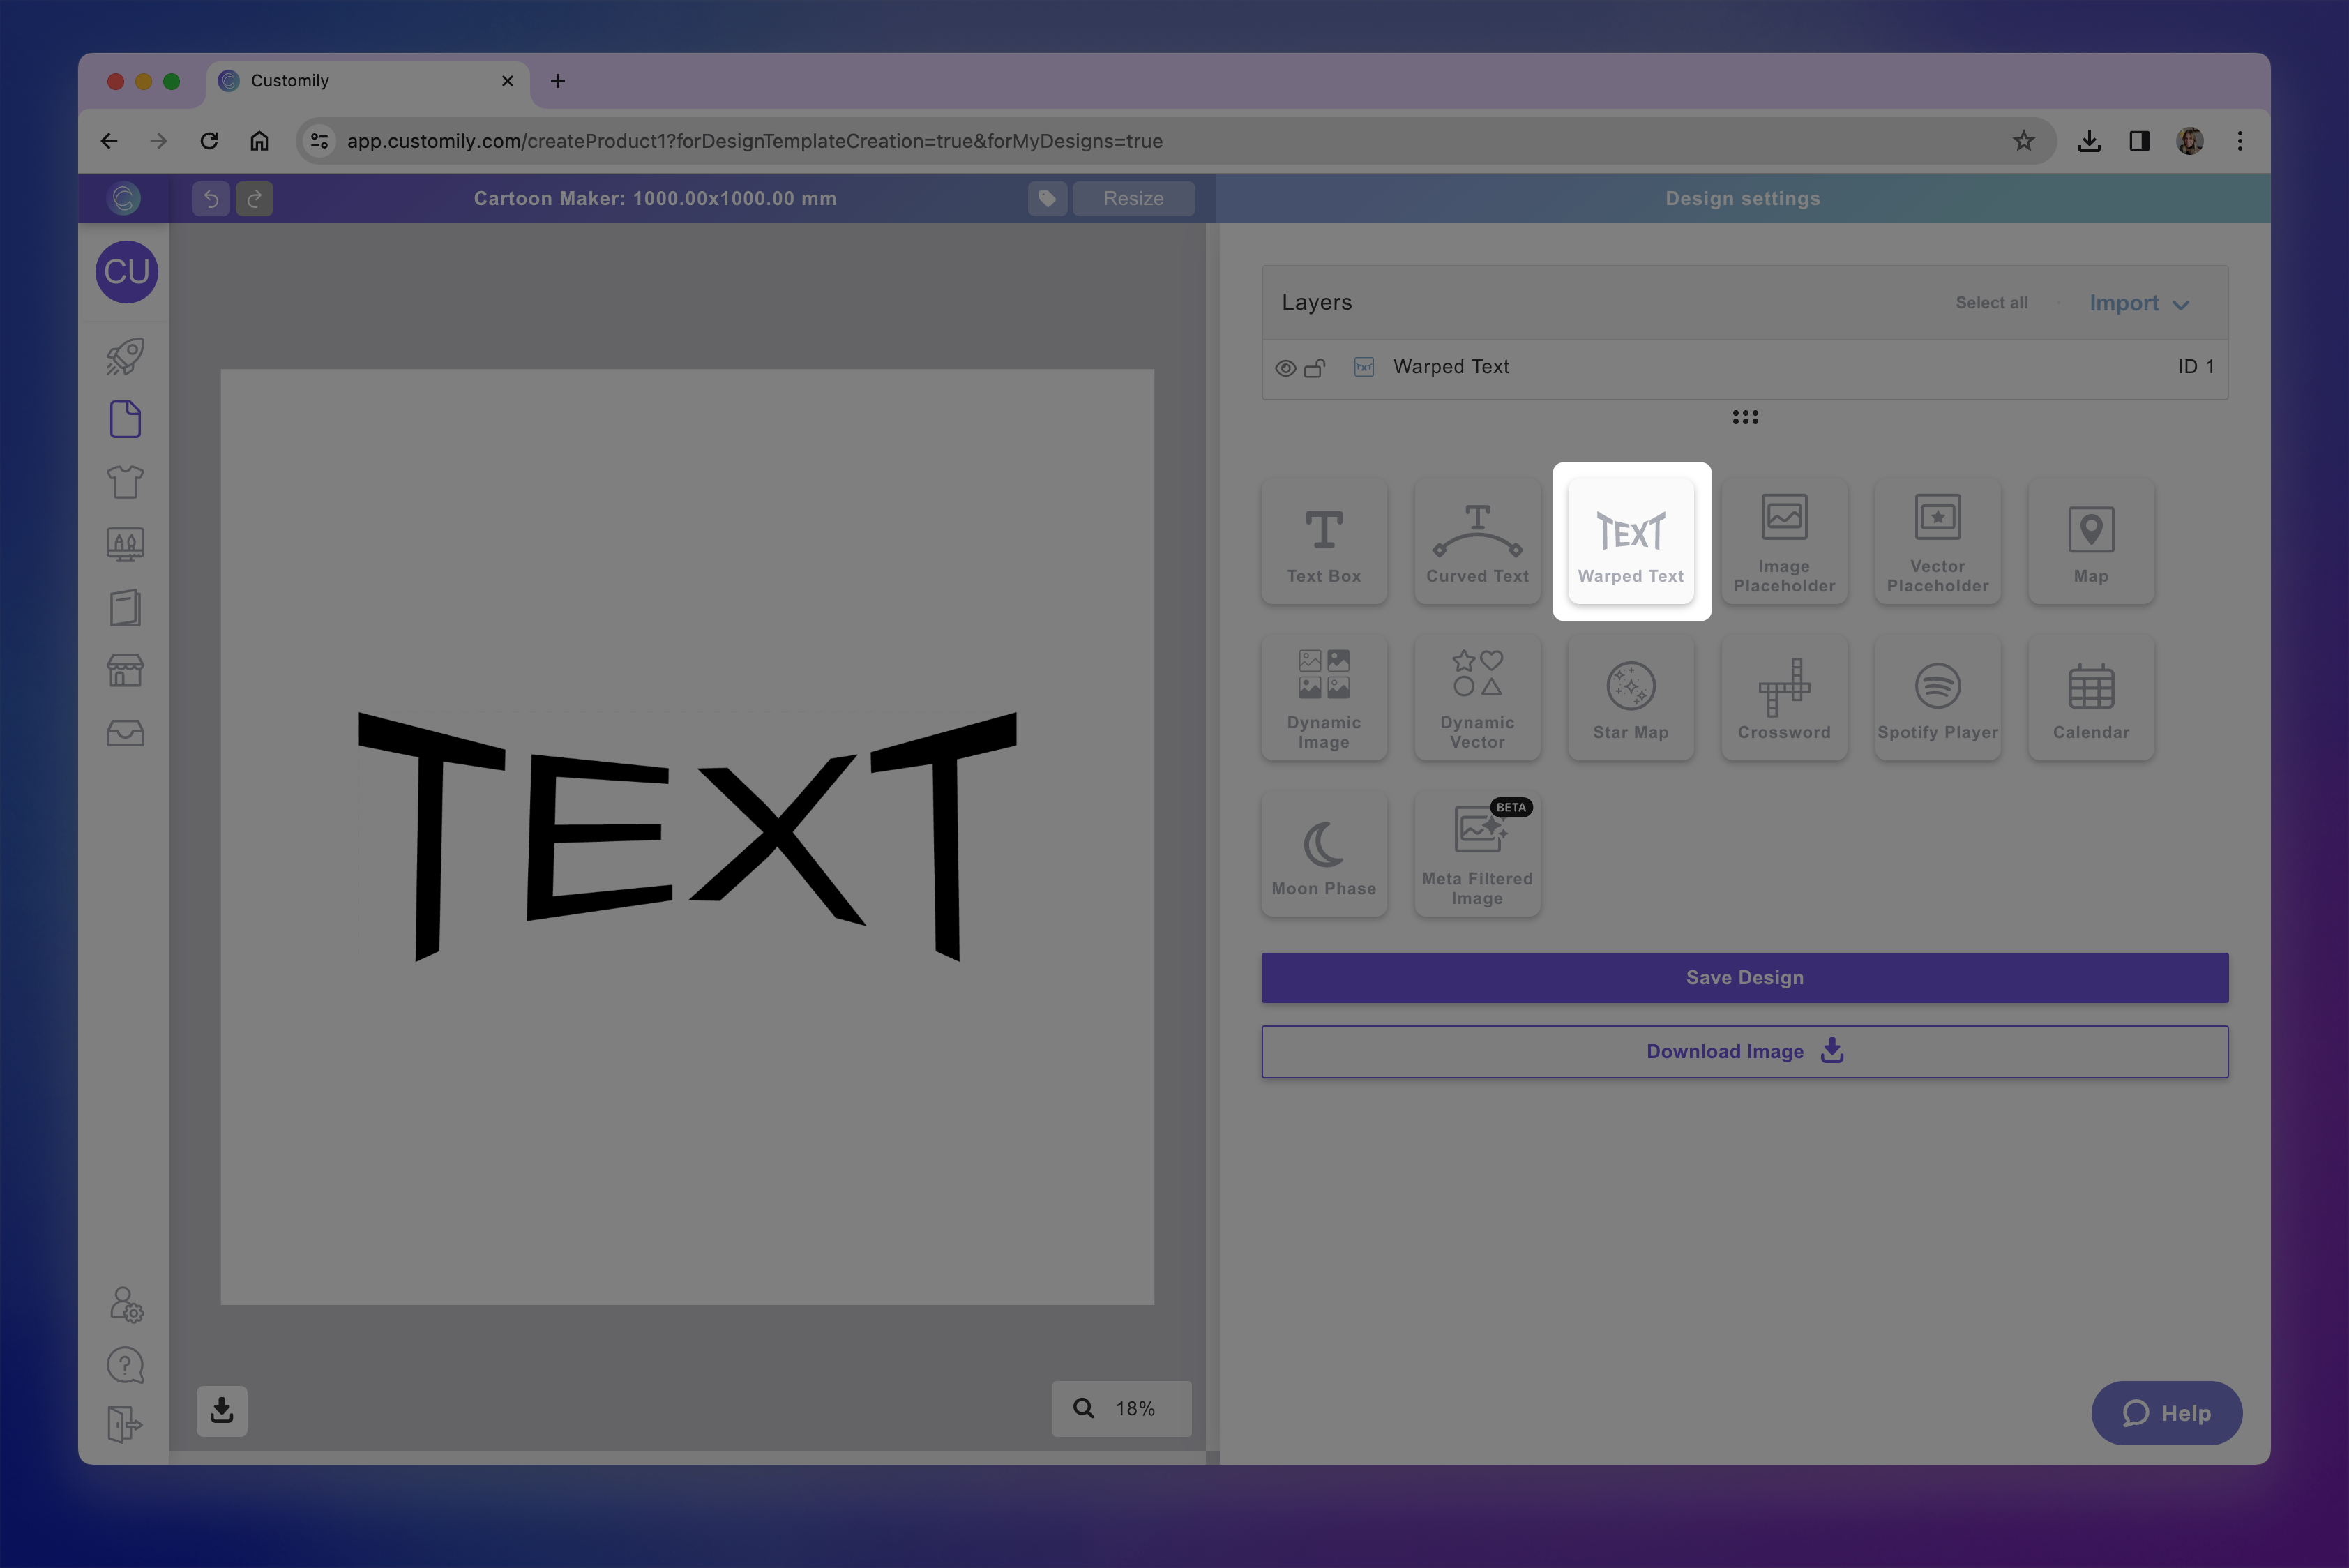
Each warped text that you add will have a Name that you can edit, and a Unique Id for you to easily identify it. Once added, it will appear on your canvas with default text and a default warp style. You can immediately edit the content and styling.
How to edit the warp shape and curve
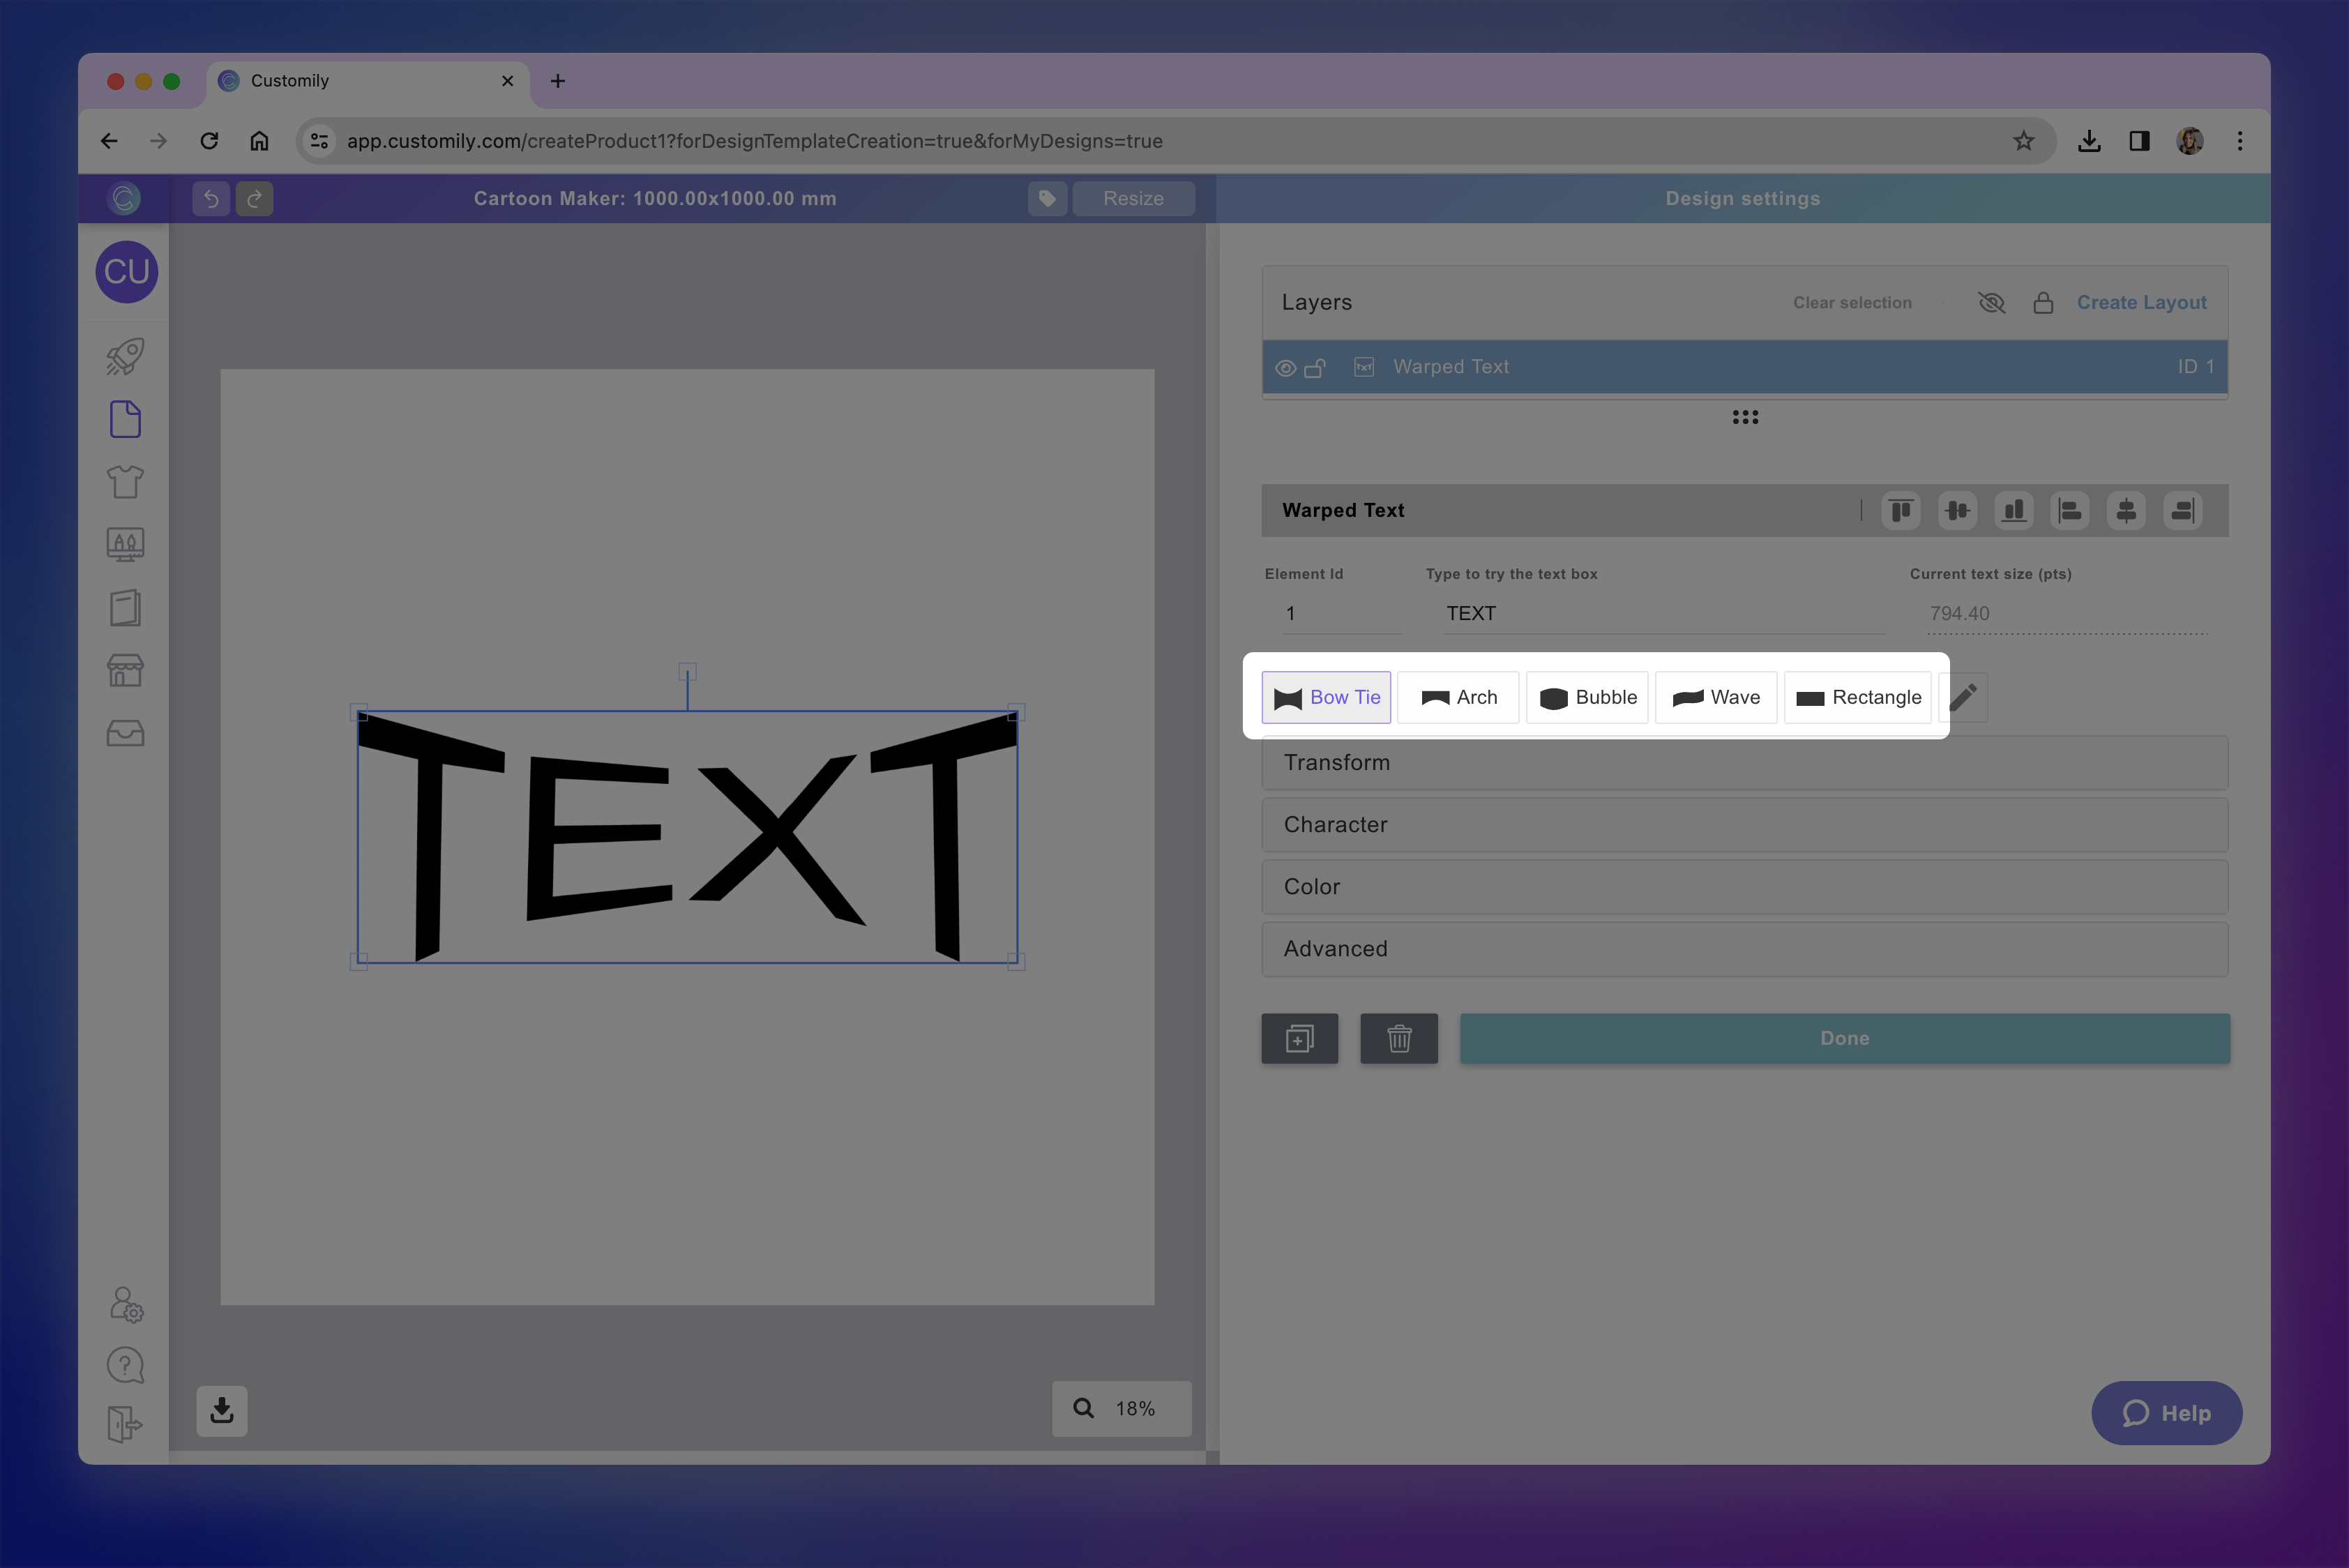
To change warp the text style:
Select the warped text element.
Click any of the pre-defined warp shapes from the side panel to apply them.
To edit and create your own custom shape, click the pencil icon
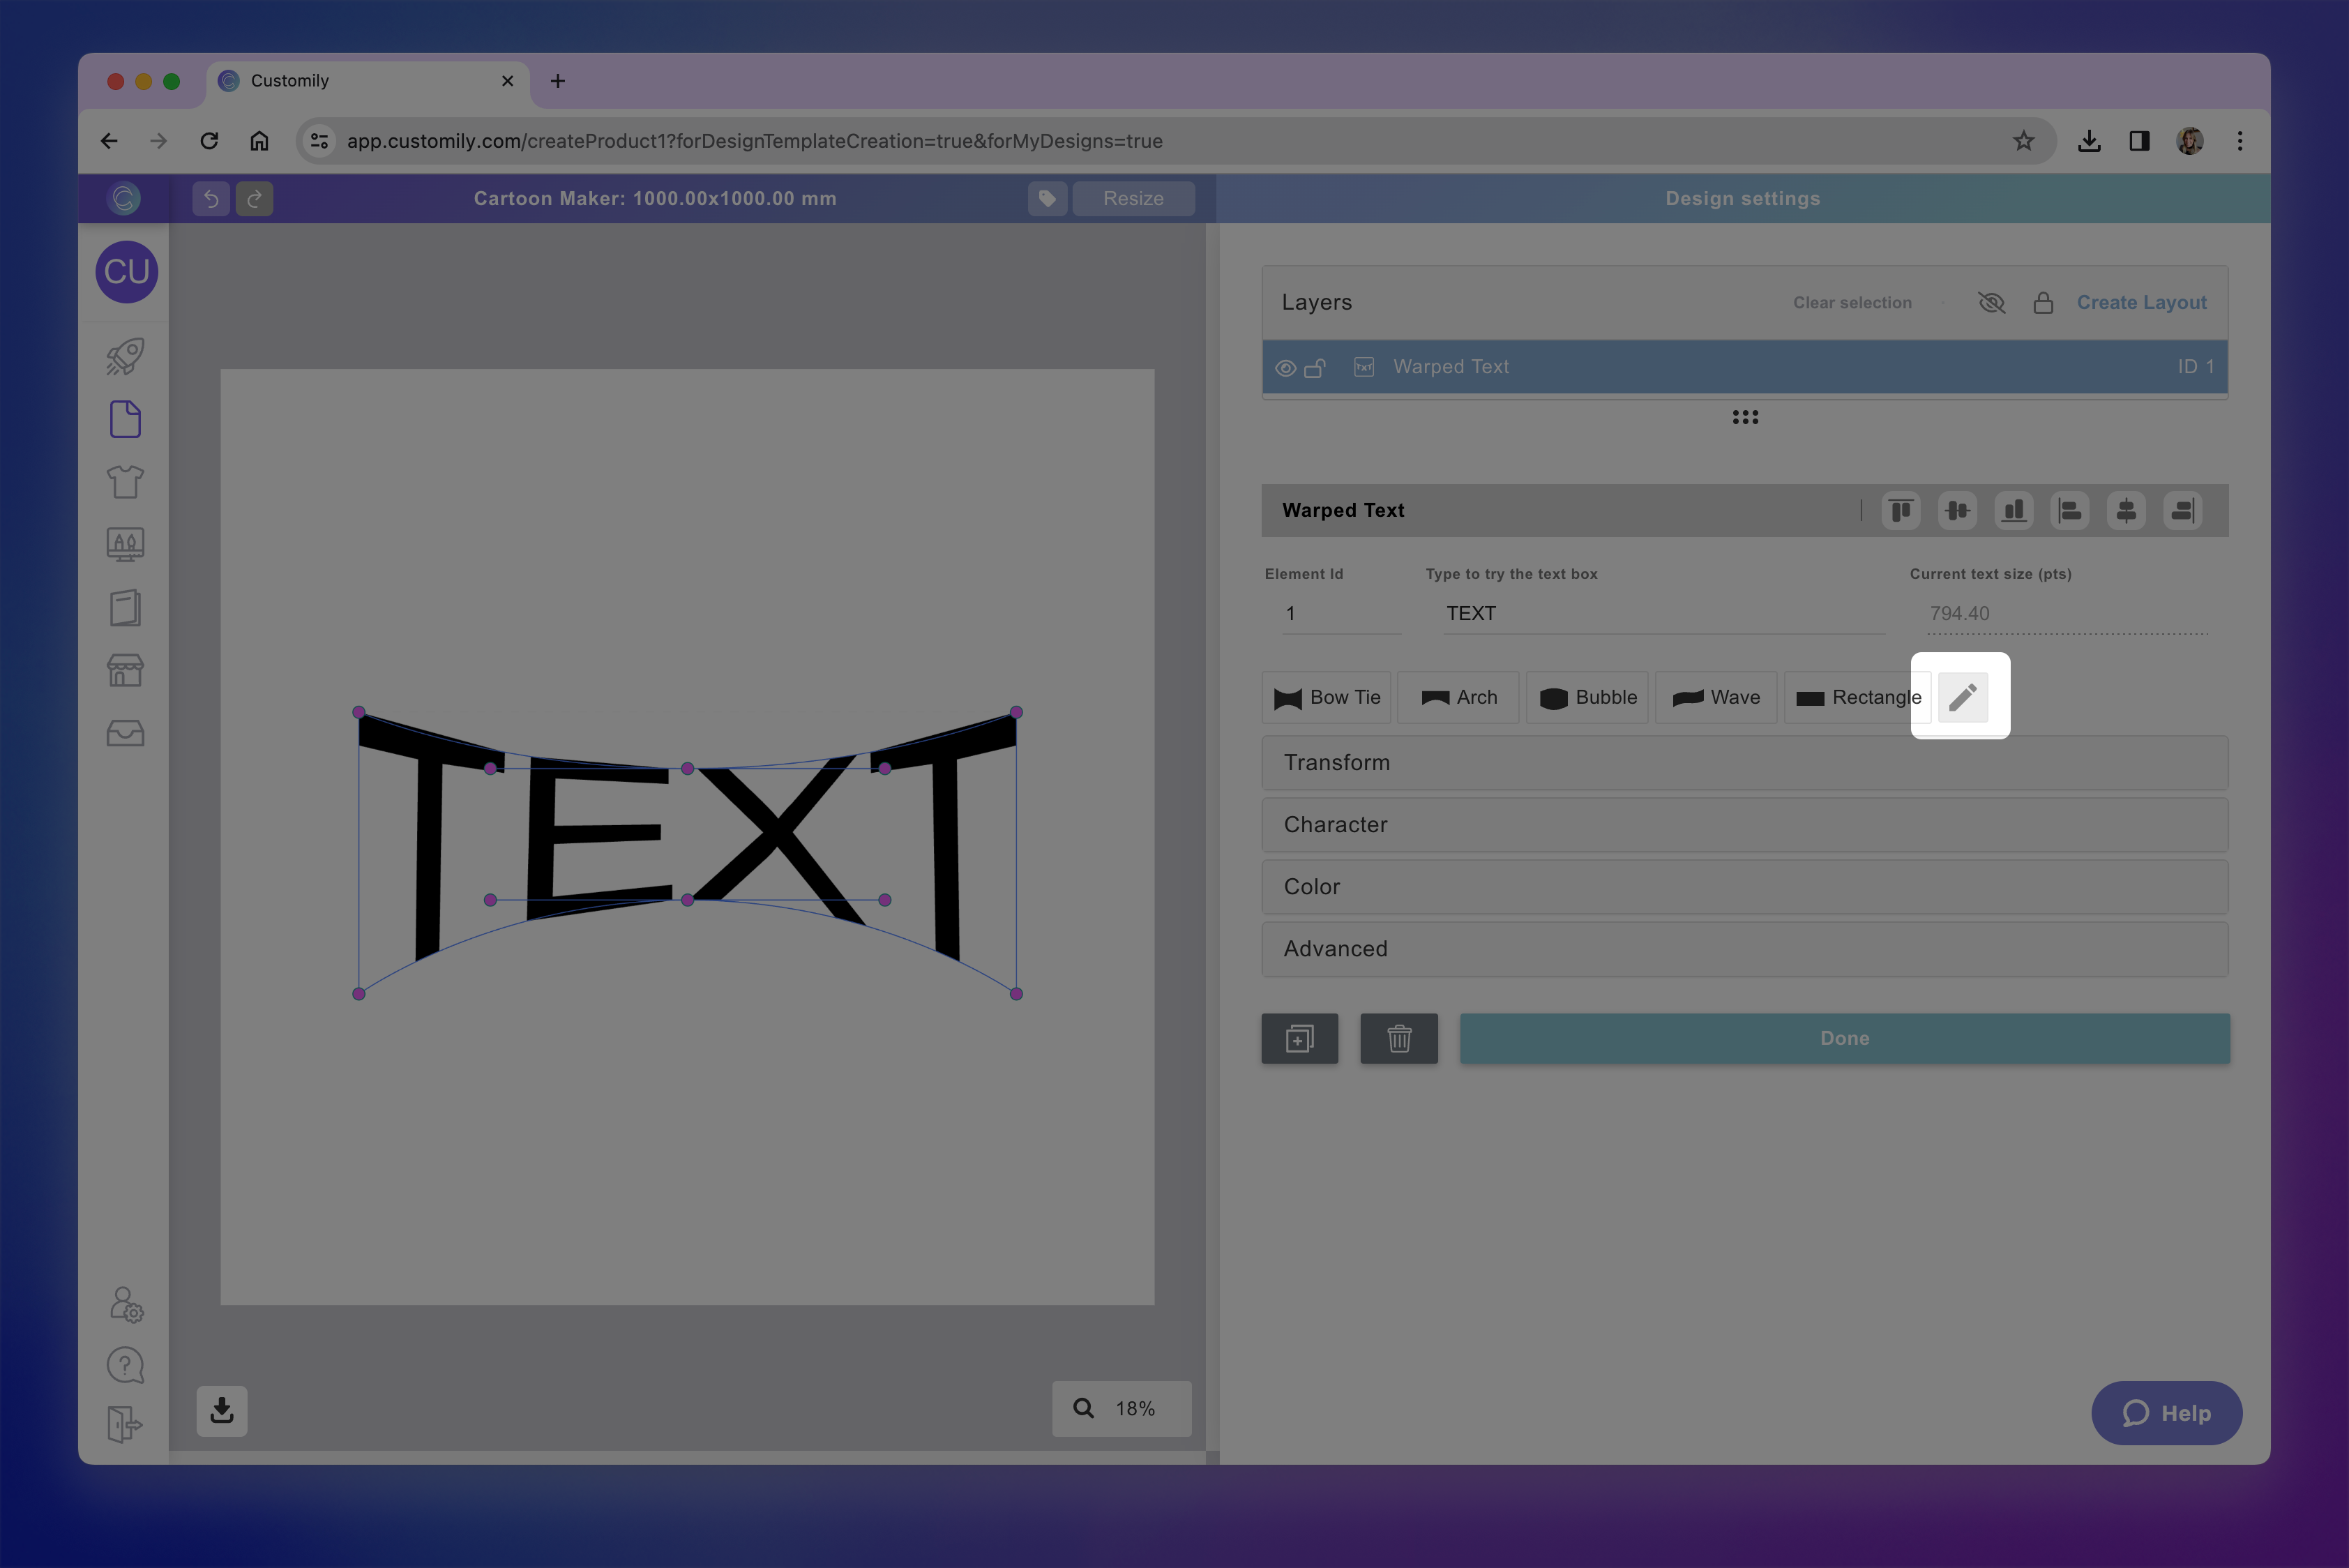
This will activate the warp editing mode, where you’ll see a curve line and draggable nodes. Here you can:
Drag the nodes to bend the text into any shape.
Adjust the tension of each point by dragging the handles.

This gives you full flexibility to create gentle curves, strong arches, waves, or any custom shape you need.
Important
Warped text behaves differently from standard text boxes. Instead of setting a font size or alignment, the text will automatically scale and flow to fill the entire warped shape you define.
You won’t be able to adjust font size, alignment, or letter spacing (kerning) manually—those are determined by the warp path and container size.
How to move, resize, and transform the text
Directly on the canvas or by expanding the Transform toolbox, you can transform the warped text:

How to style and format the text
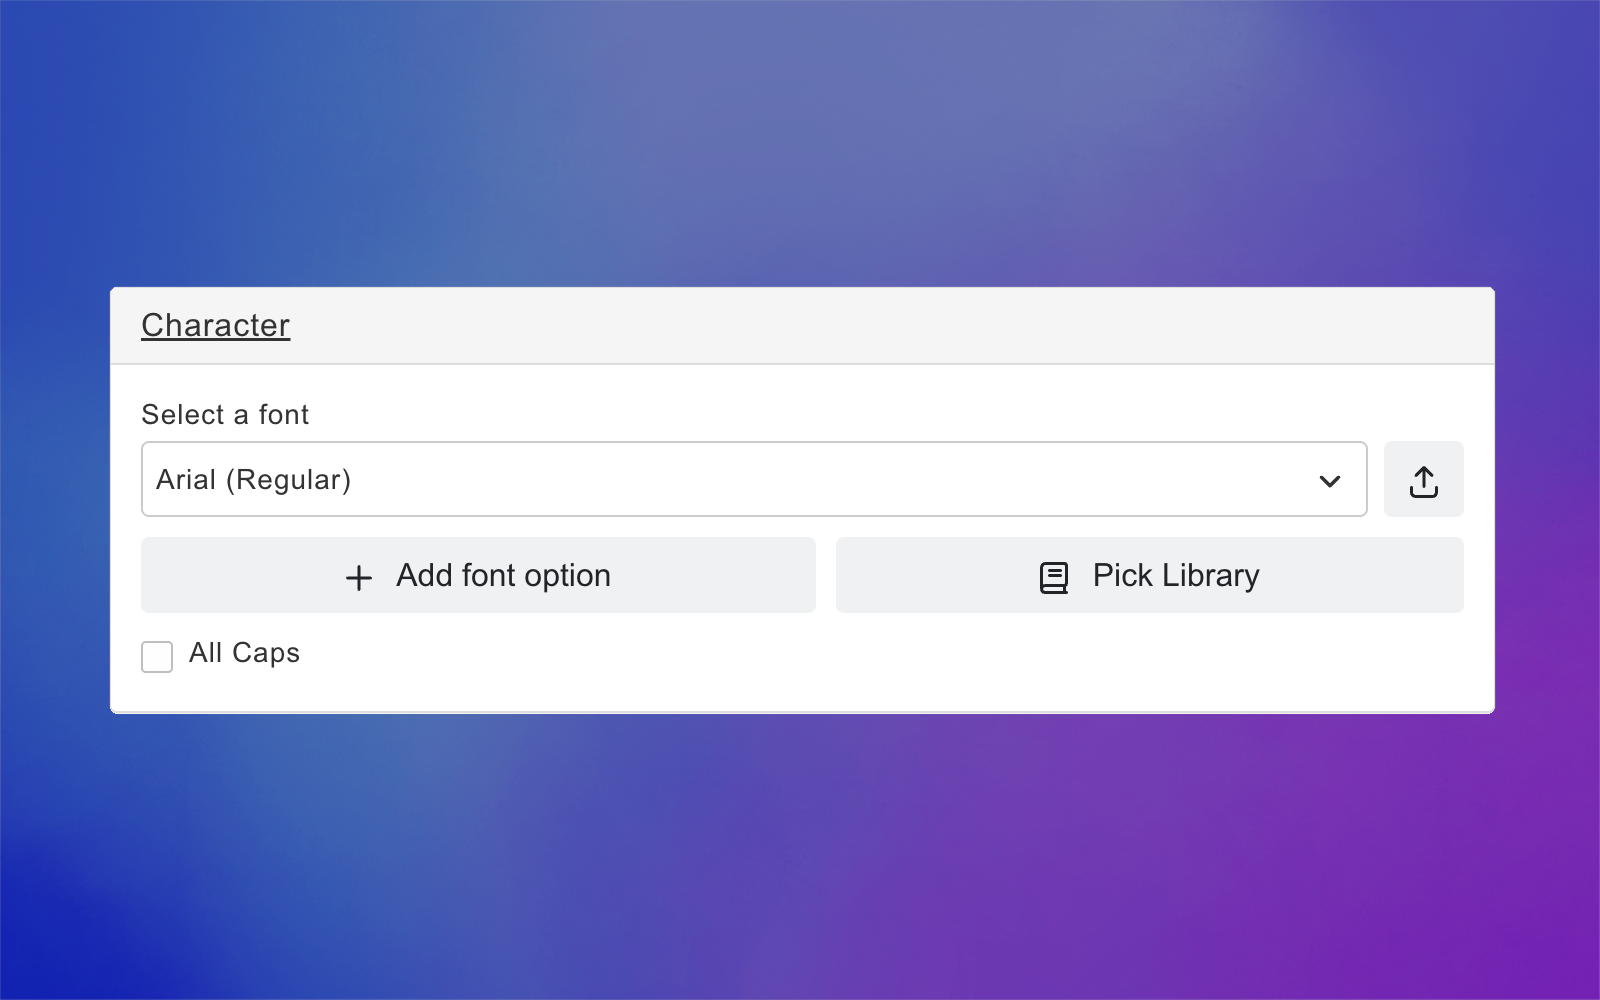
After selecting the element, expand the Character toolbox to format the warped text. Click on each item to learn more:
Note that Font size is not set directly for warped texts—the text will automatically scale to fit the size of the warp shape. If you want the text to appear larger or smaller, adjust the overall size of the element on the canvas.
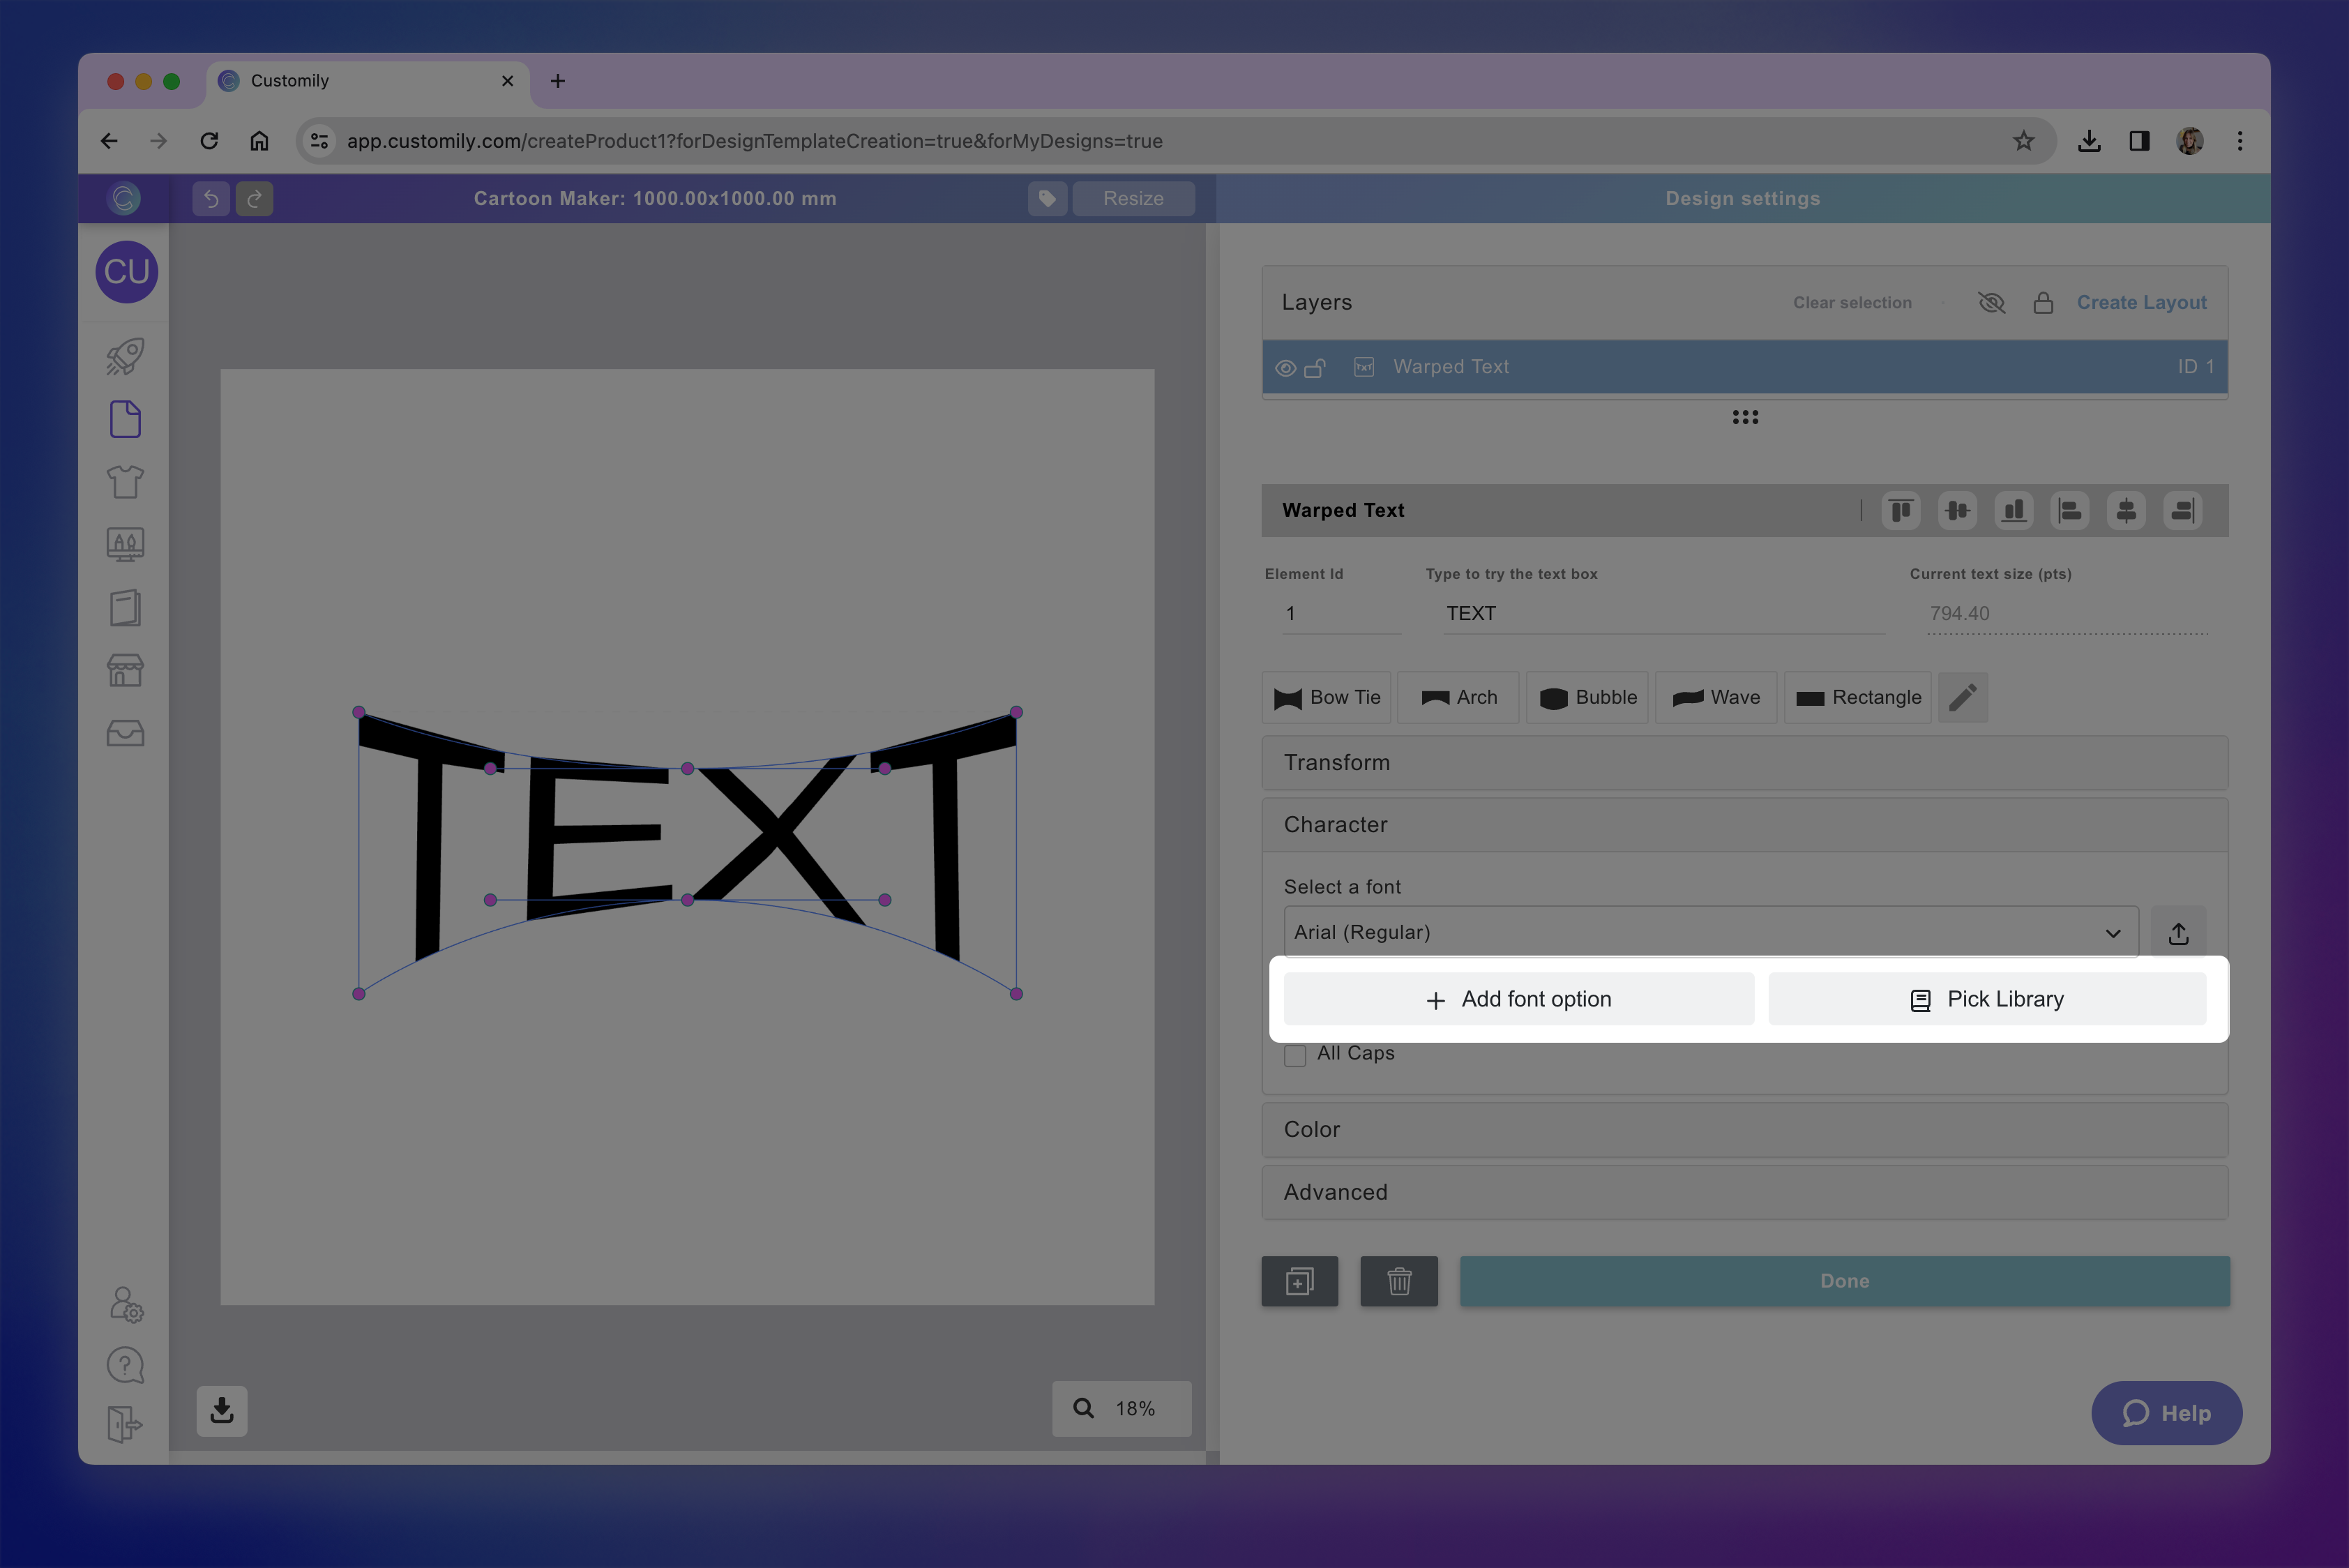
Font Option
You can apply one or multiple fonts to a warped text.
Select the text element
Expand the Character toolbox
Click to expand the Select a Font list
Pick a font from the list
New accounts will only have a set of default fonts. You can easily add as many fonts as you want to your font list.
Learn how to import fonts into Customily here.
Tip
You can add multiple font options to a text element. To add more than one font option you can either use a font library or assign multiple font options by clicking Add font option button and choosing a new font.
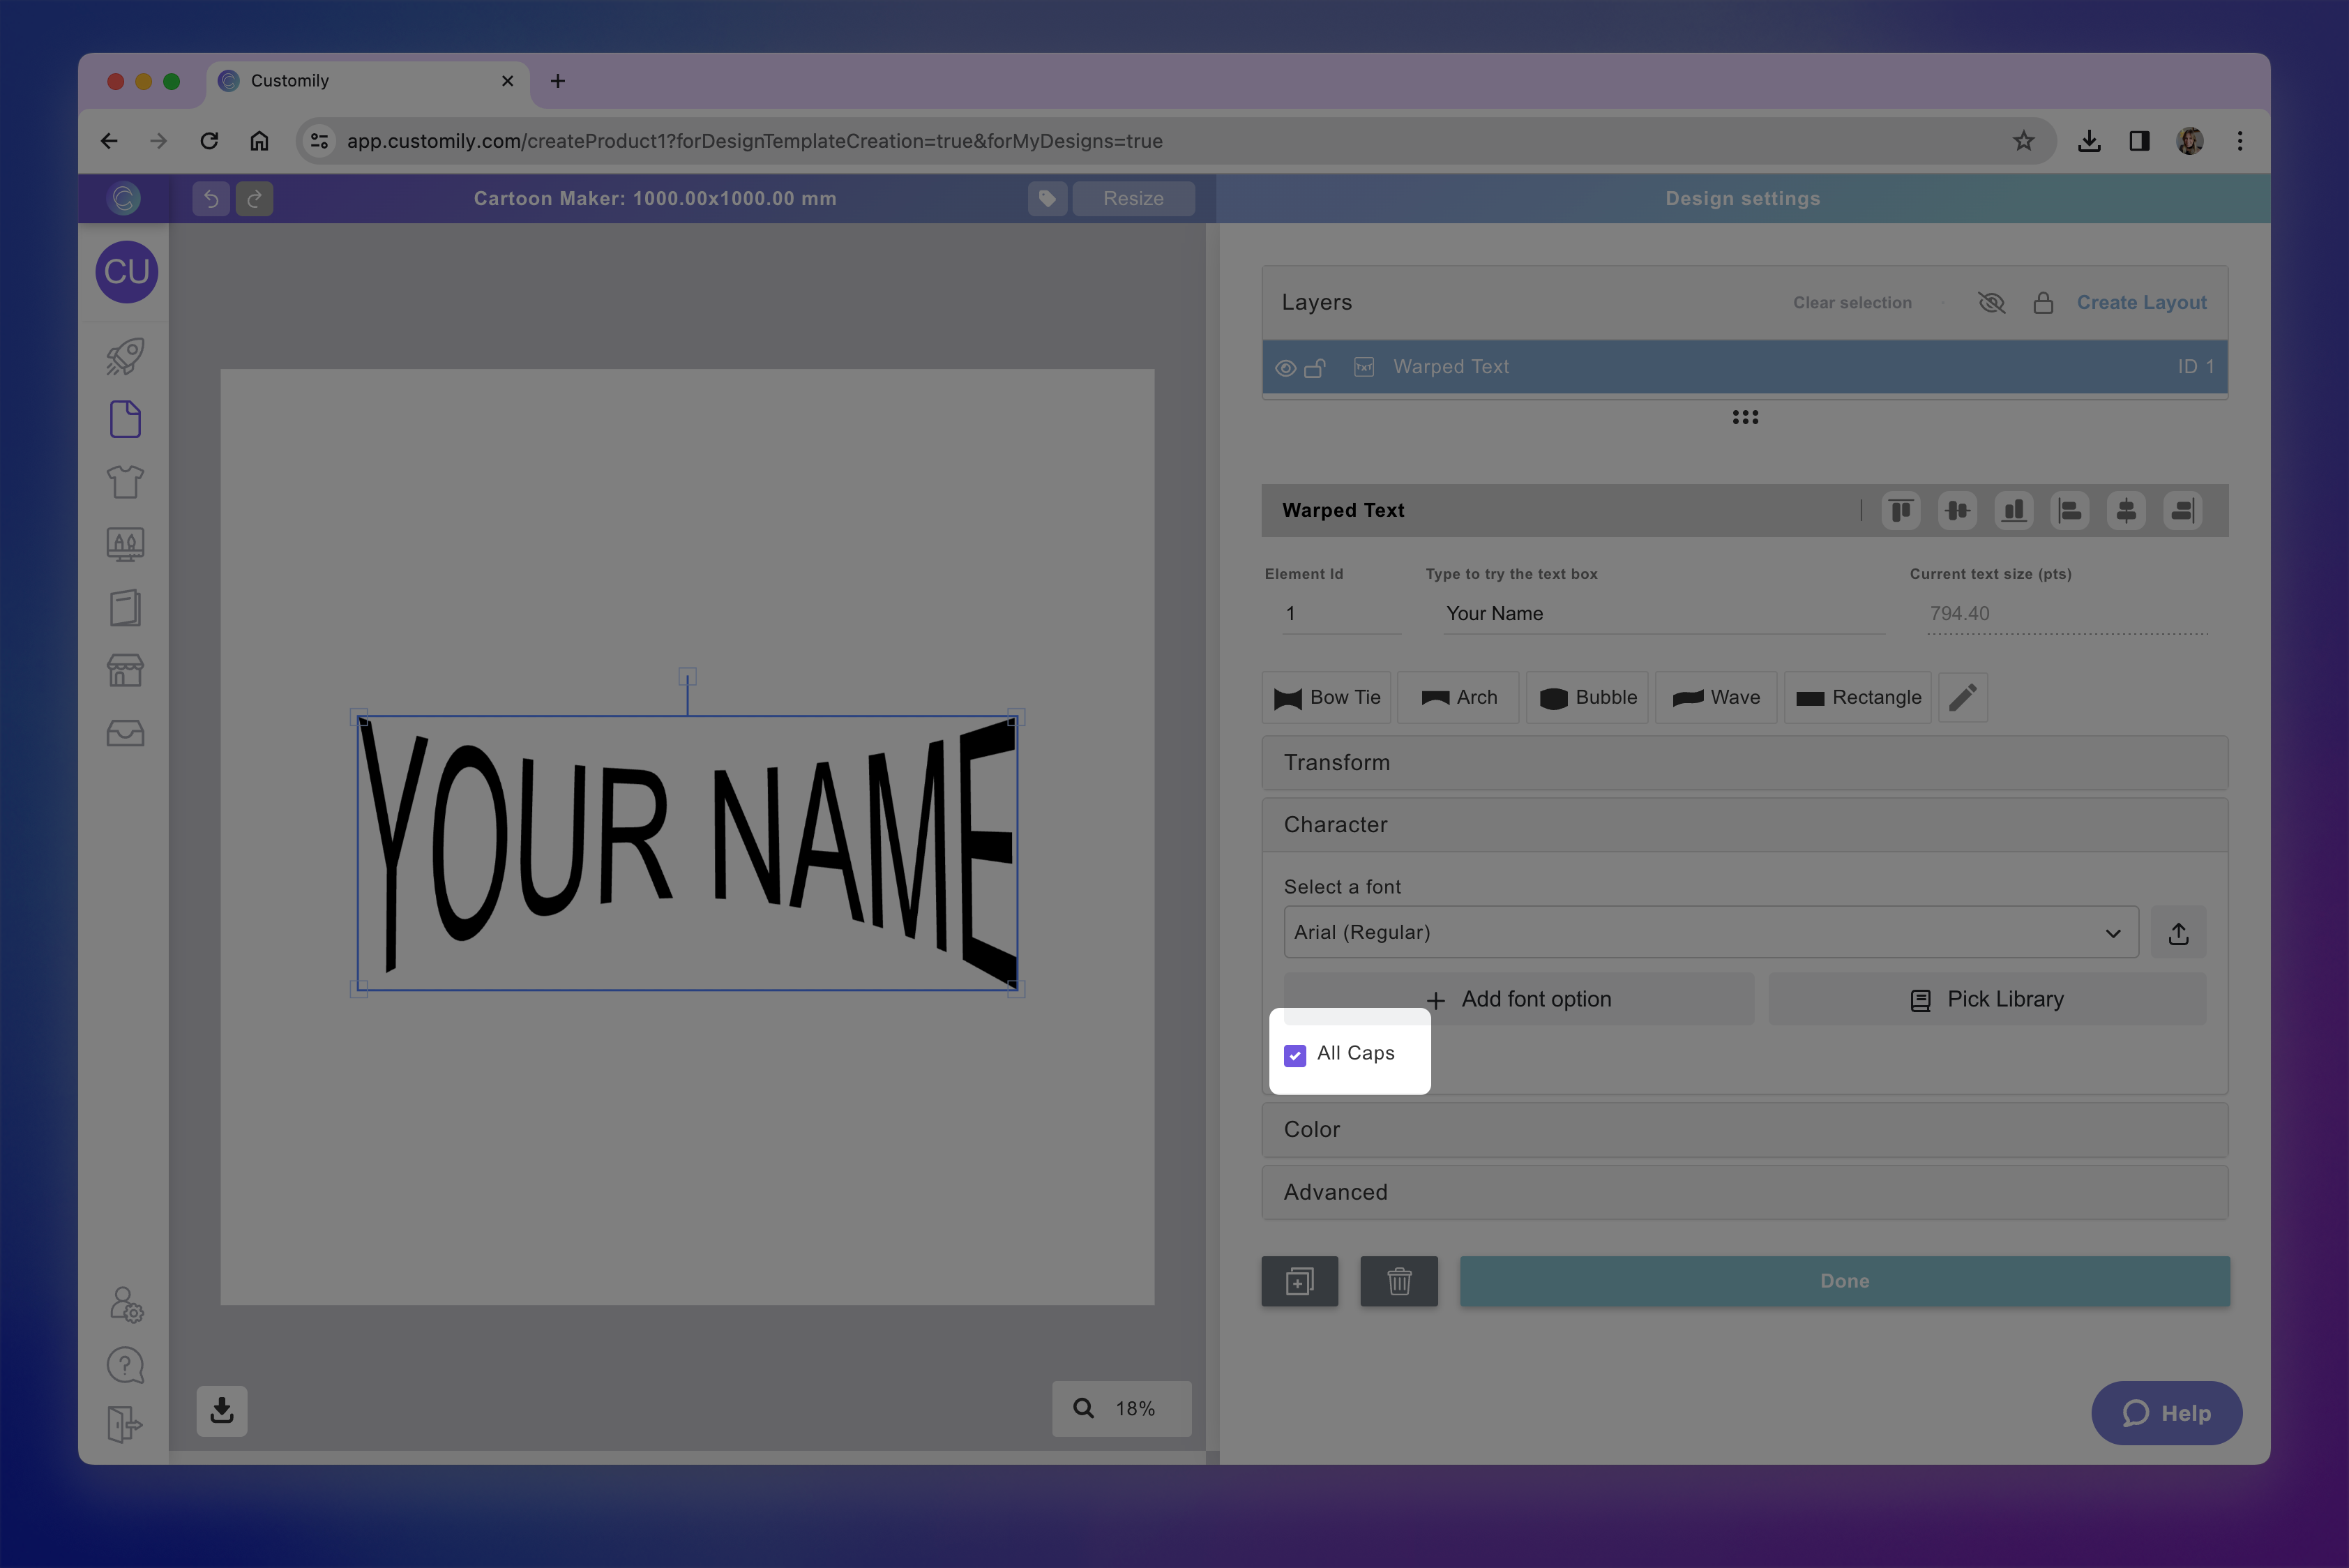
All Caps
By checking All Caps, you'll force whatever text a customer types into capital letters.
Select the text element
Expand the Character toolbox
Click the All caps checkbox
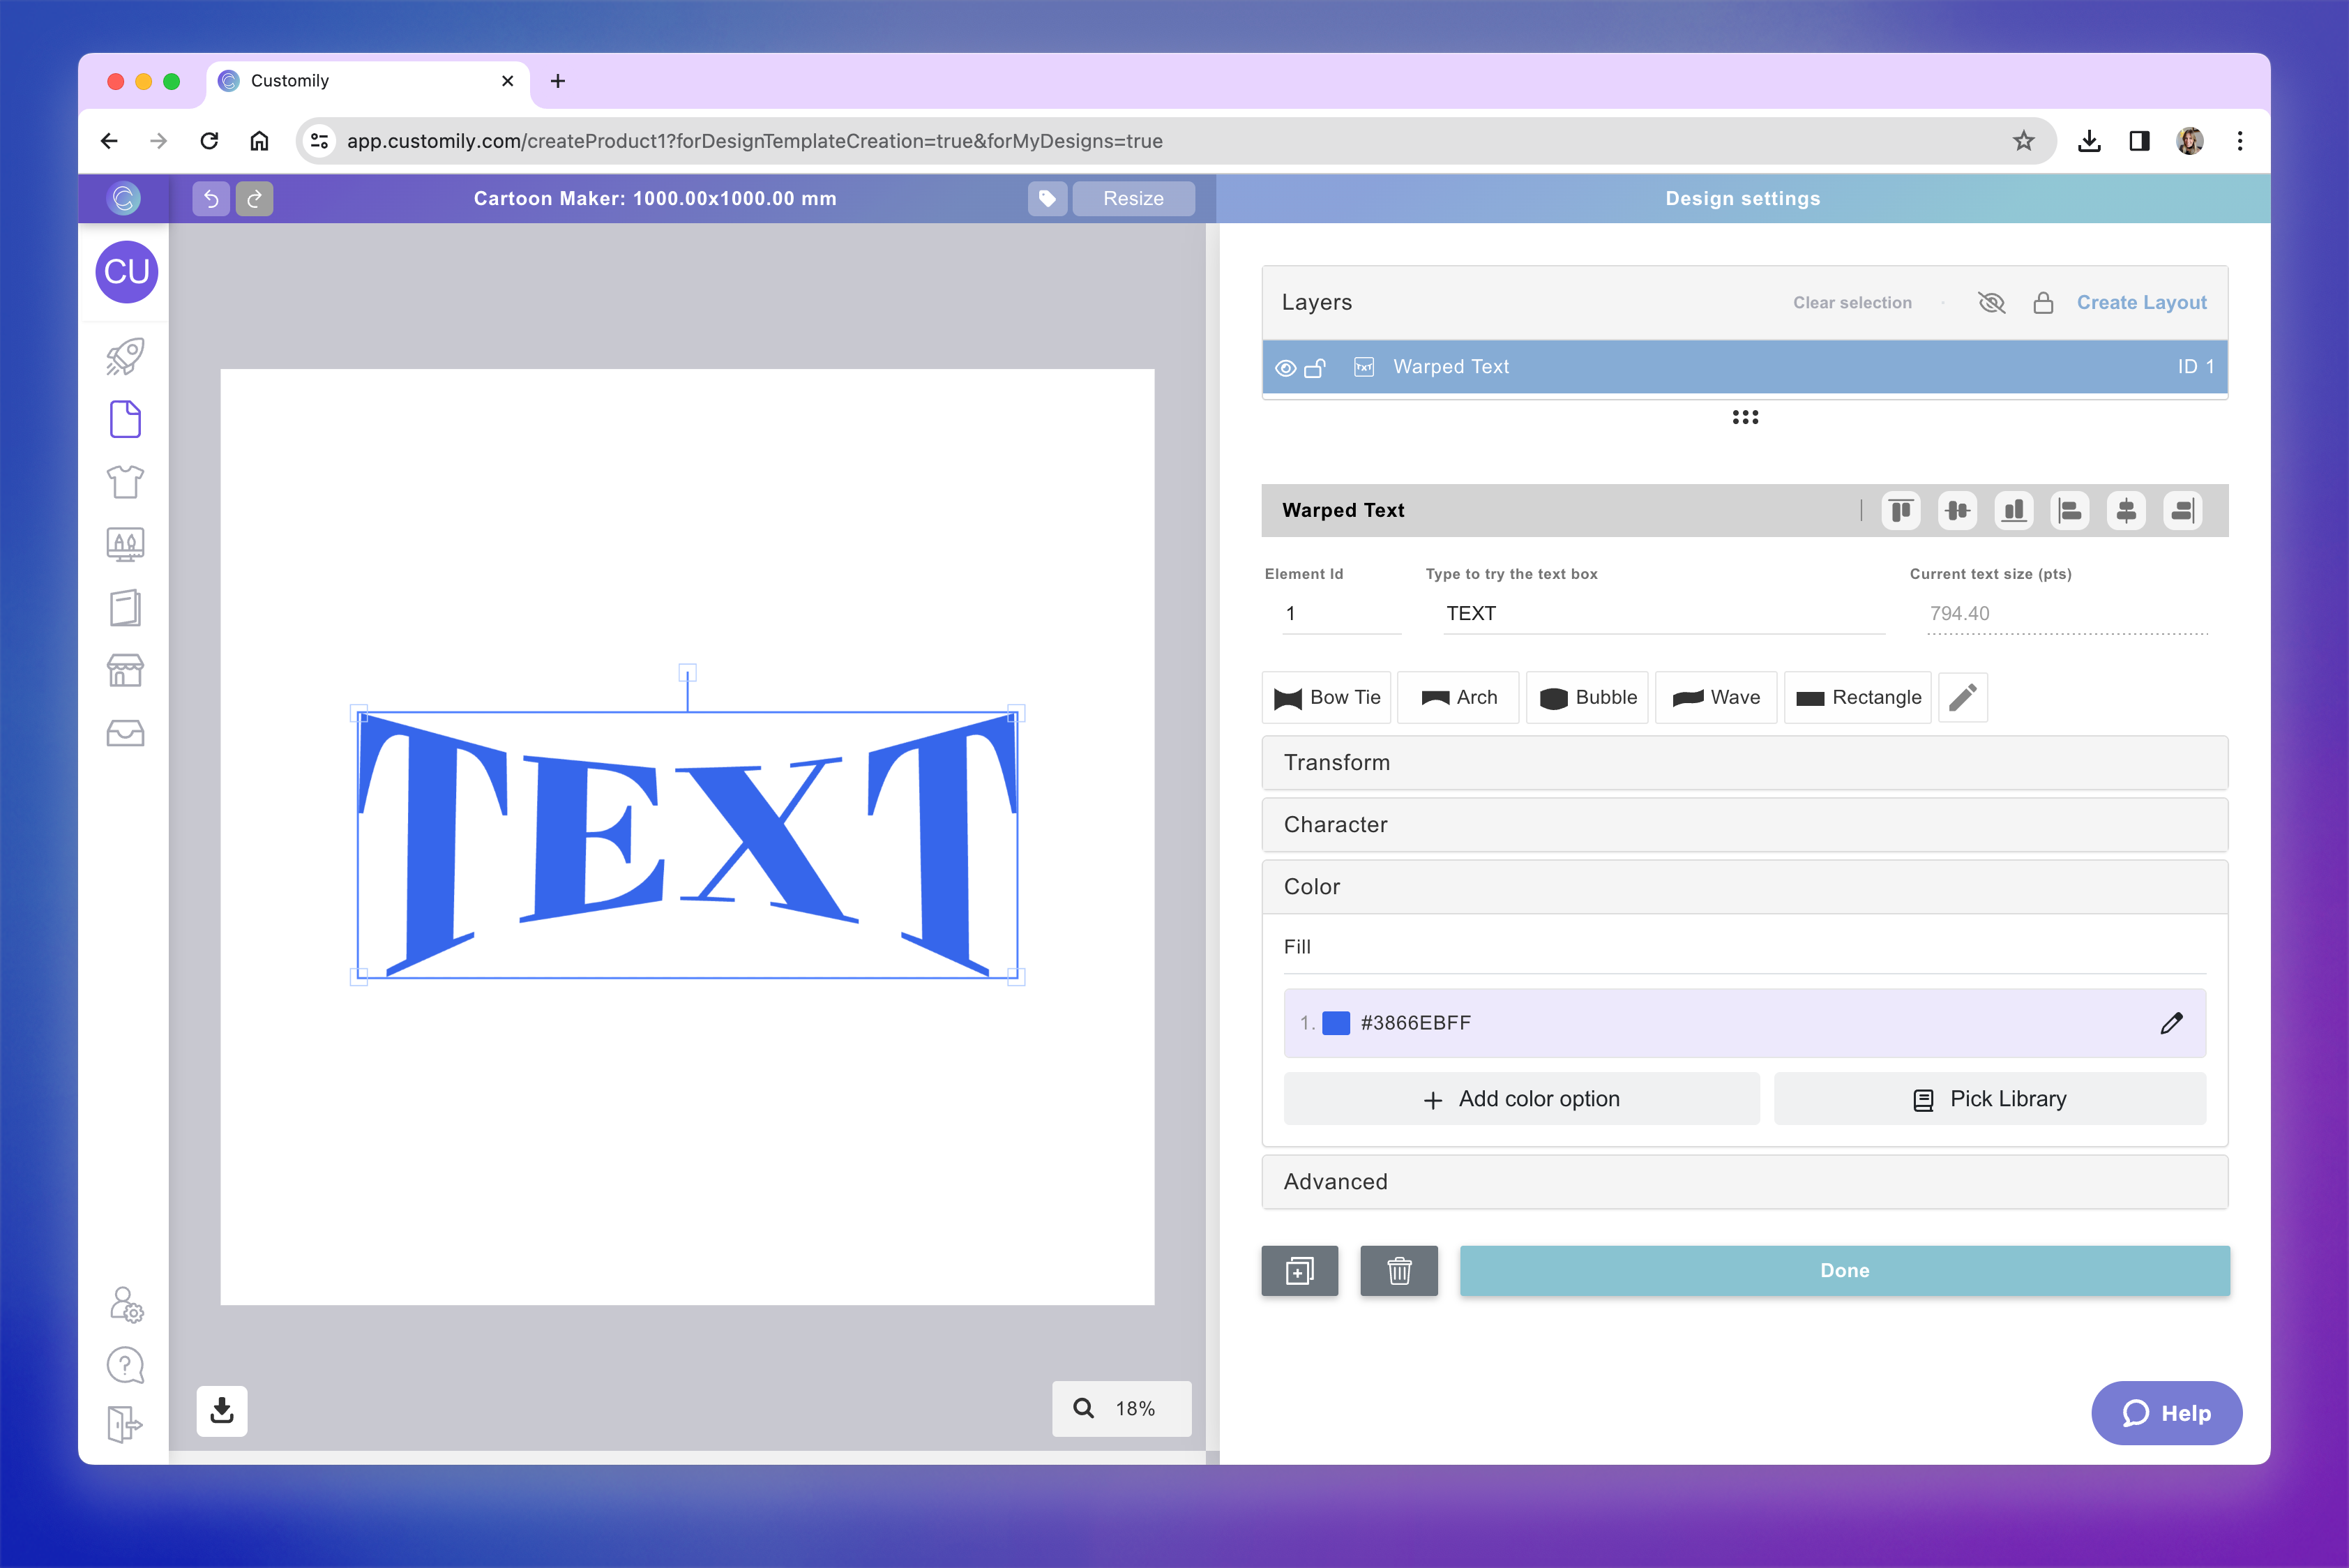
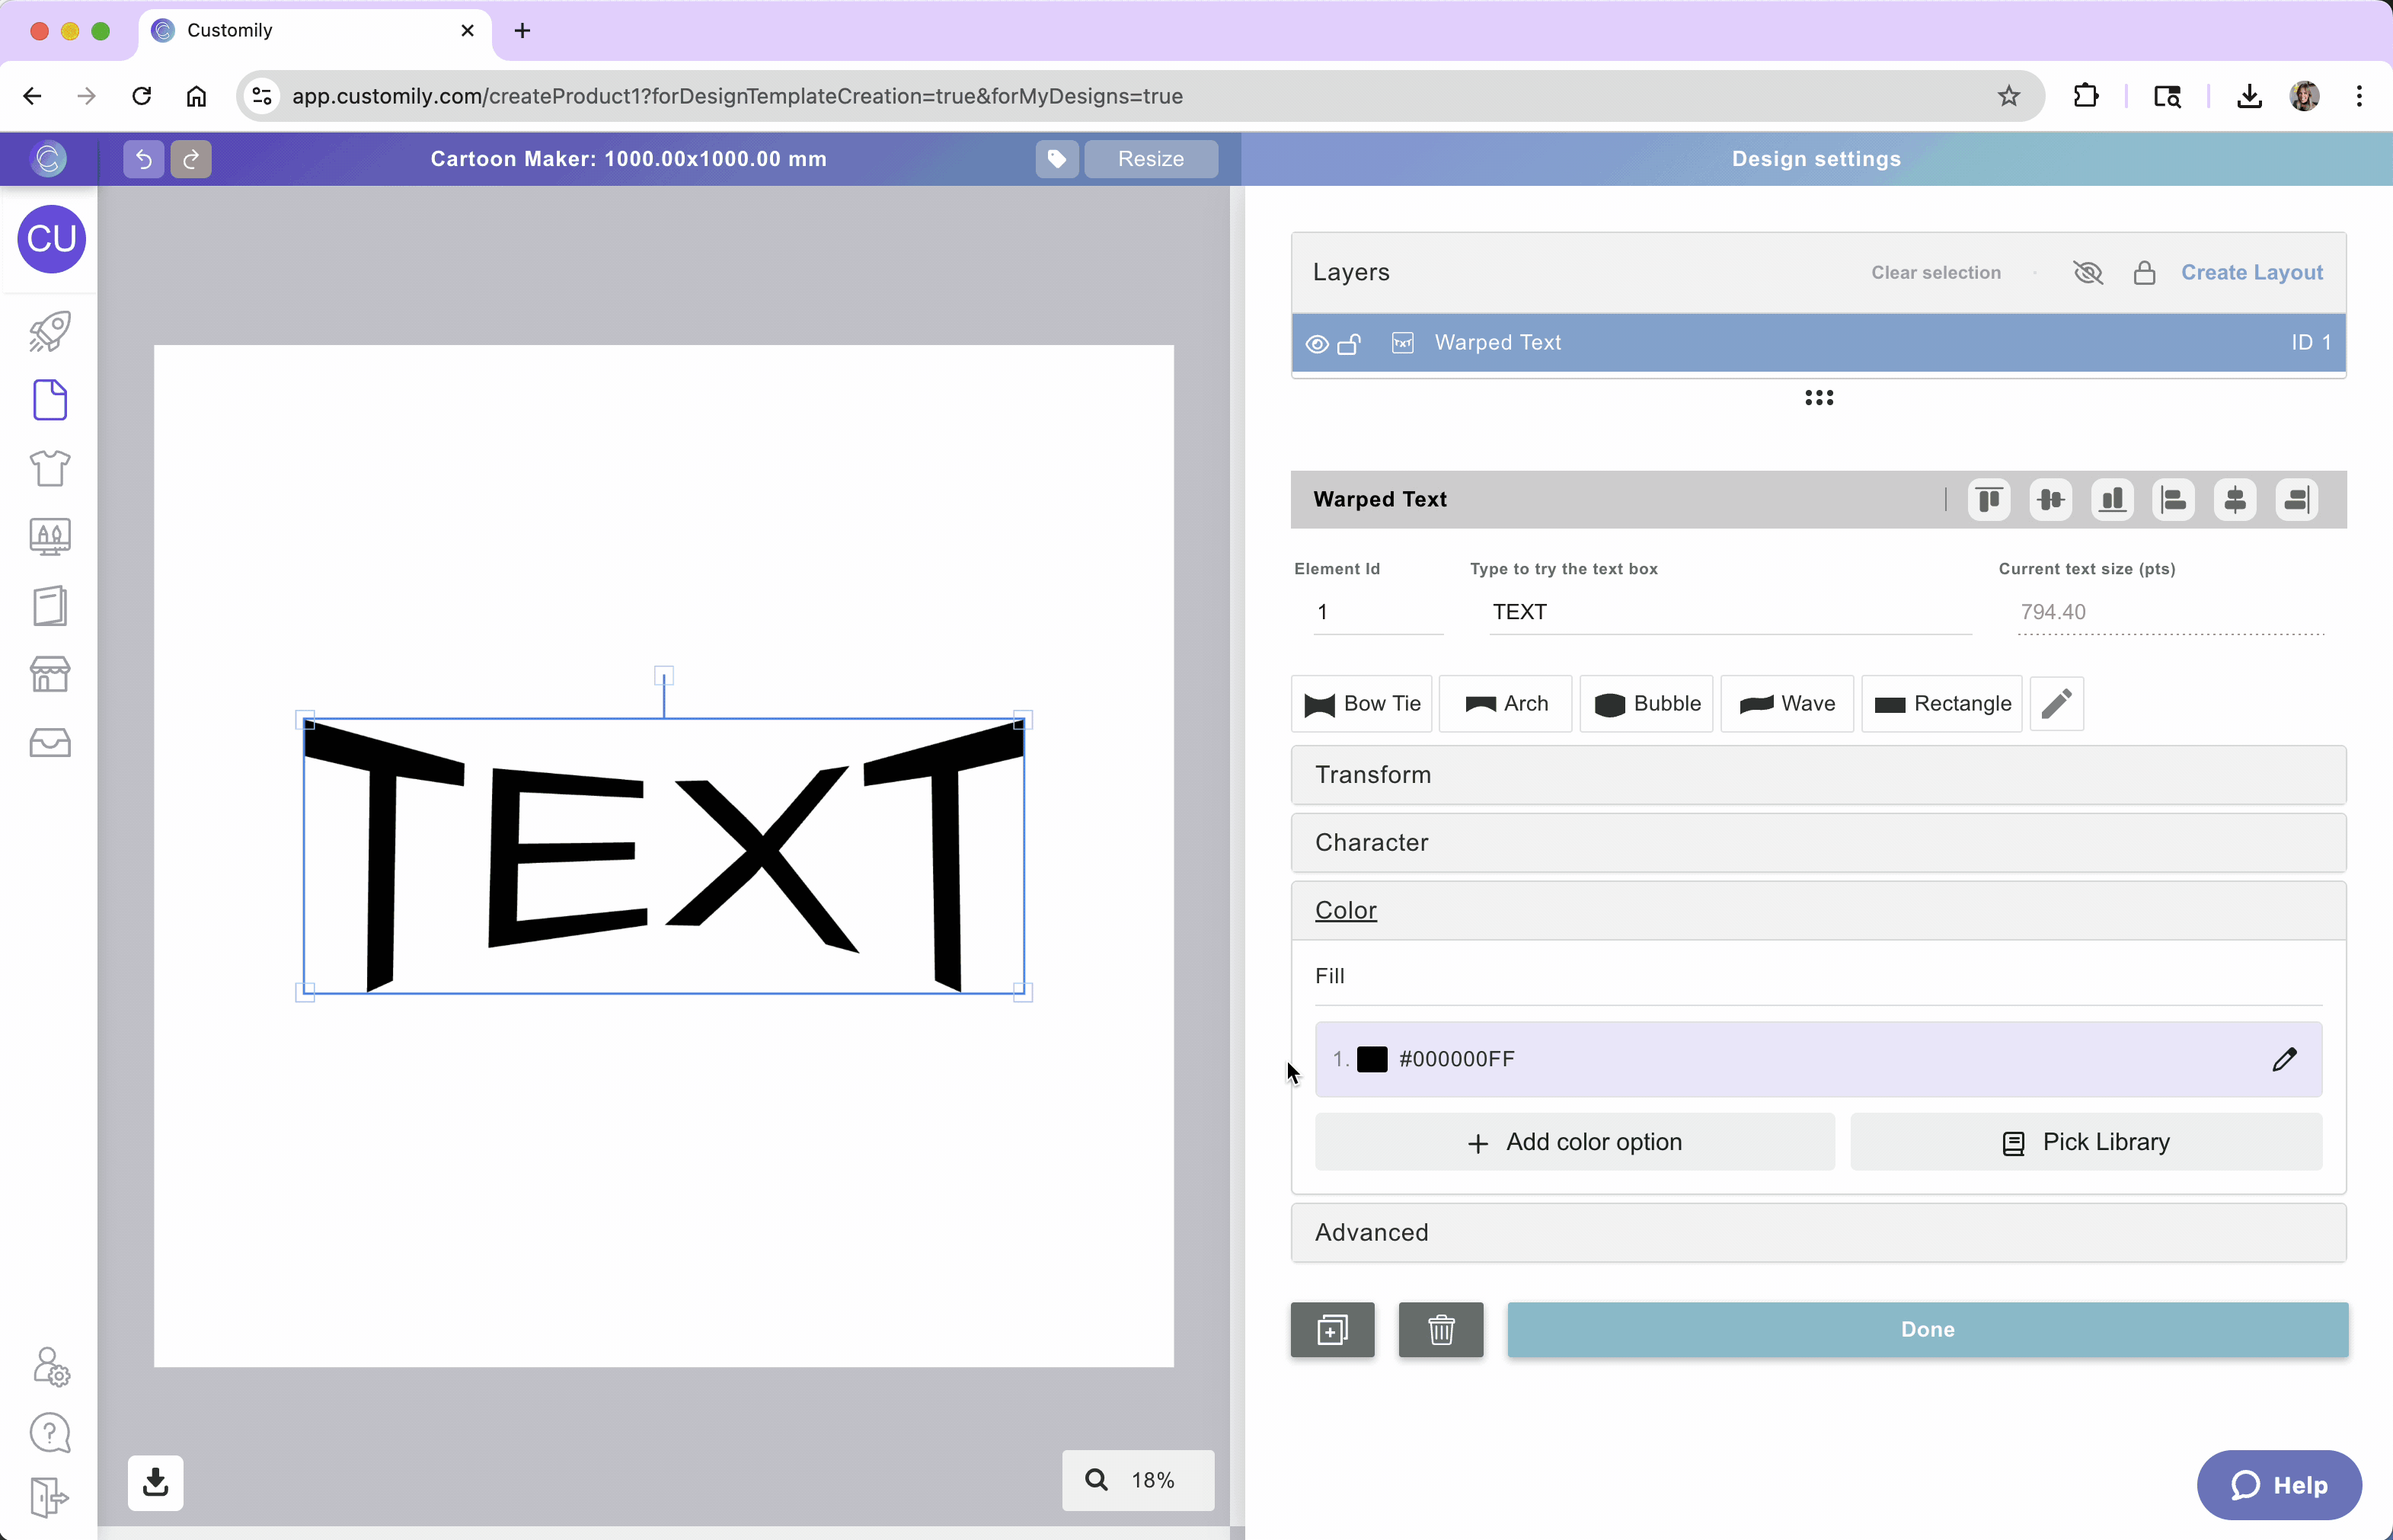
How to change the text color
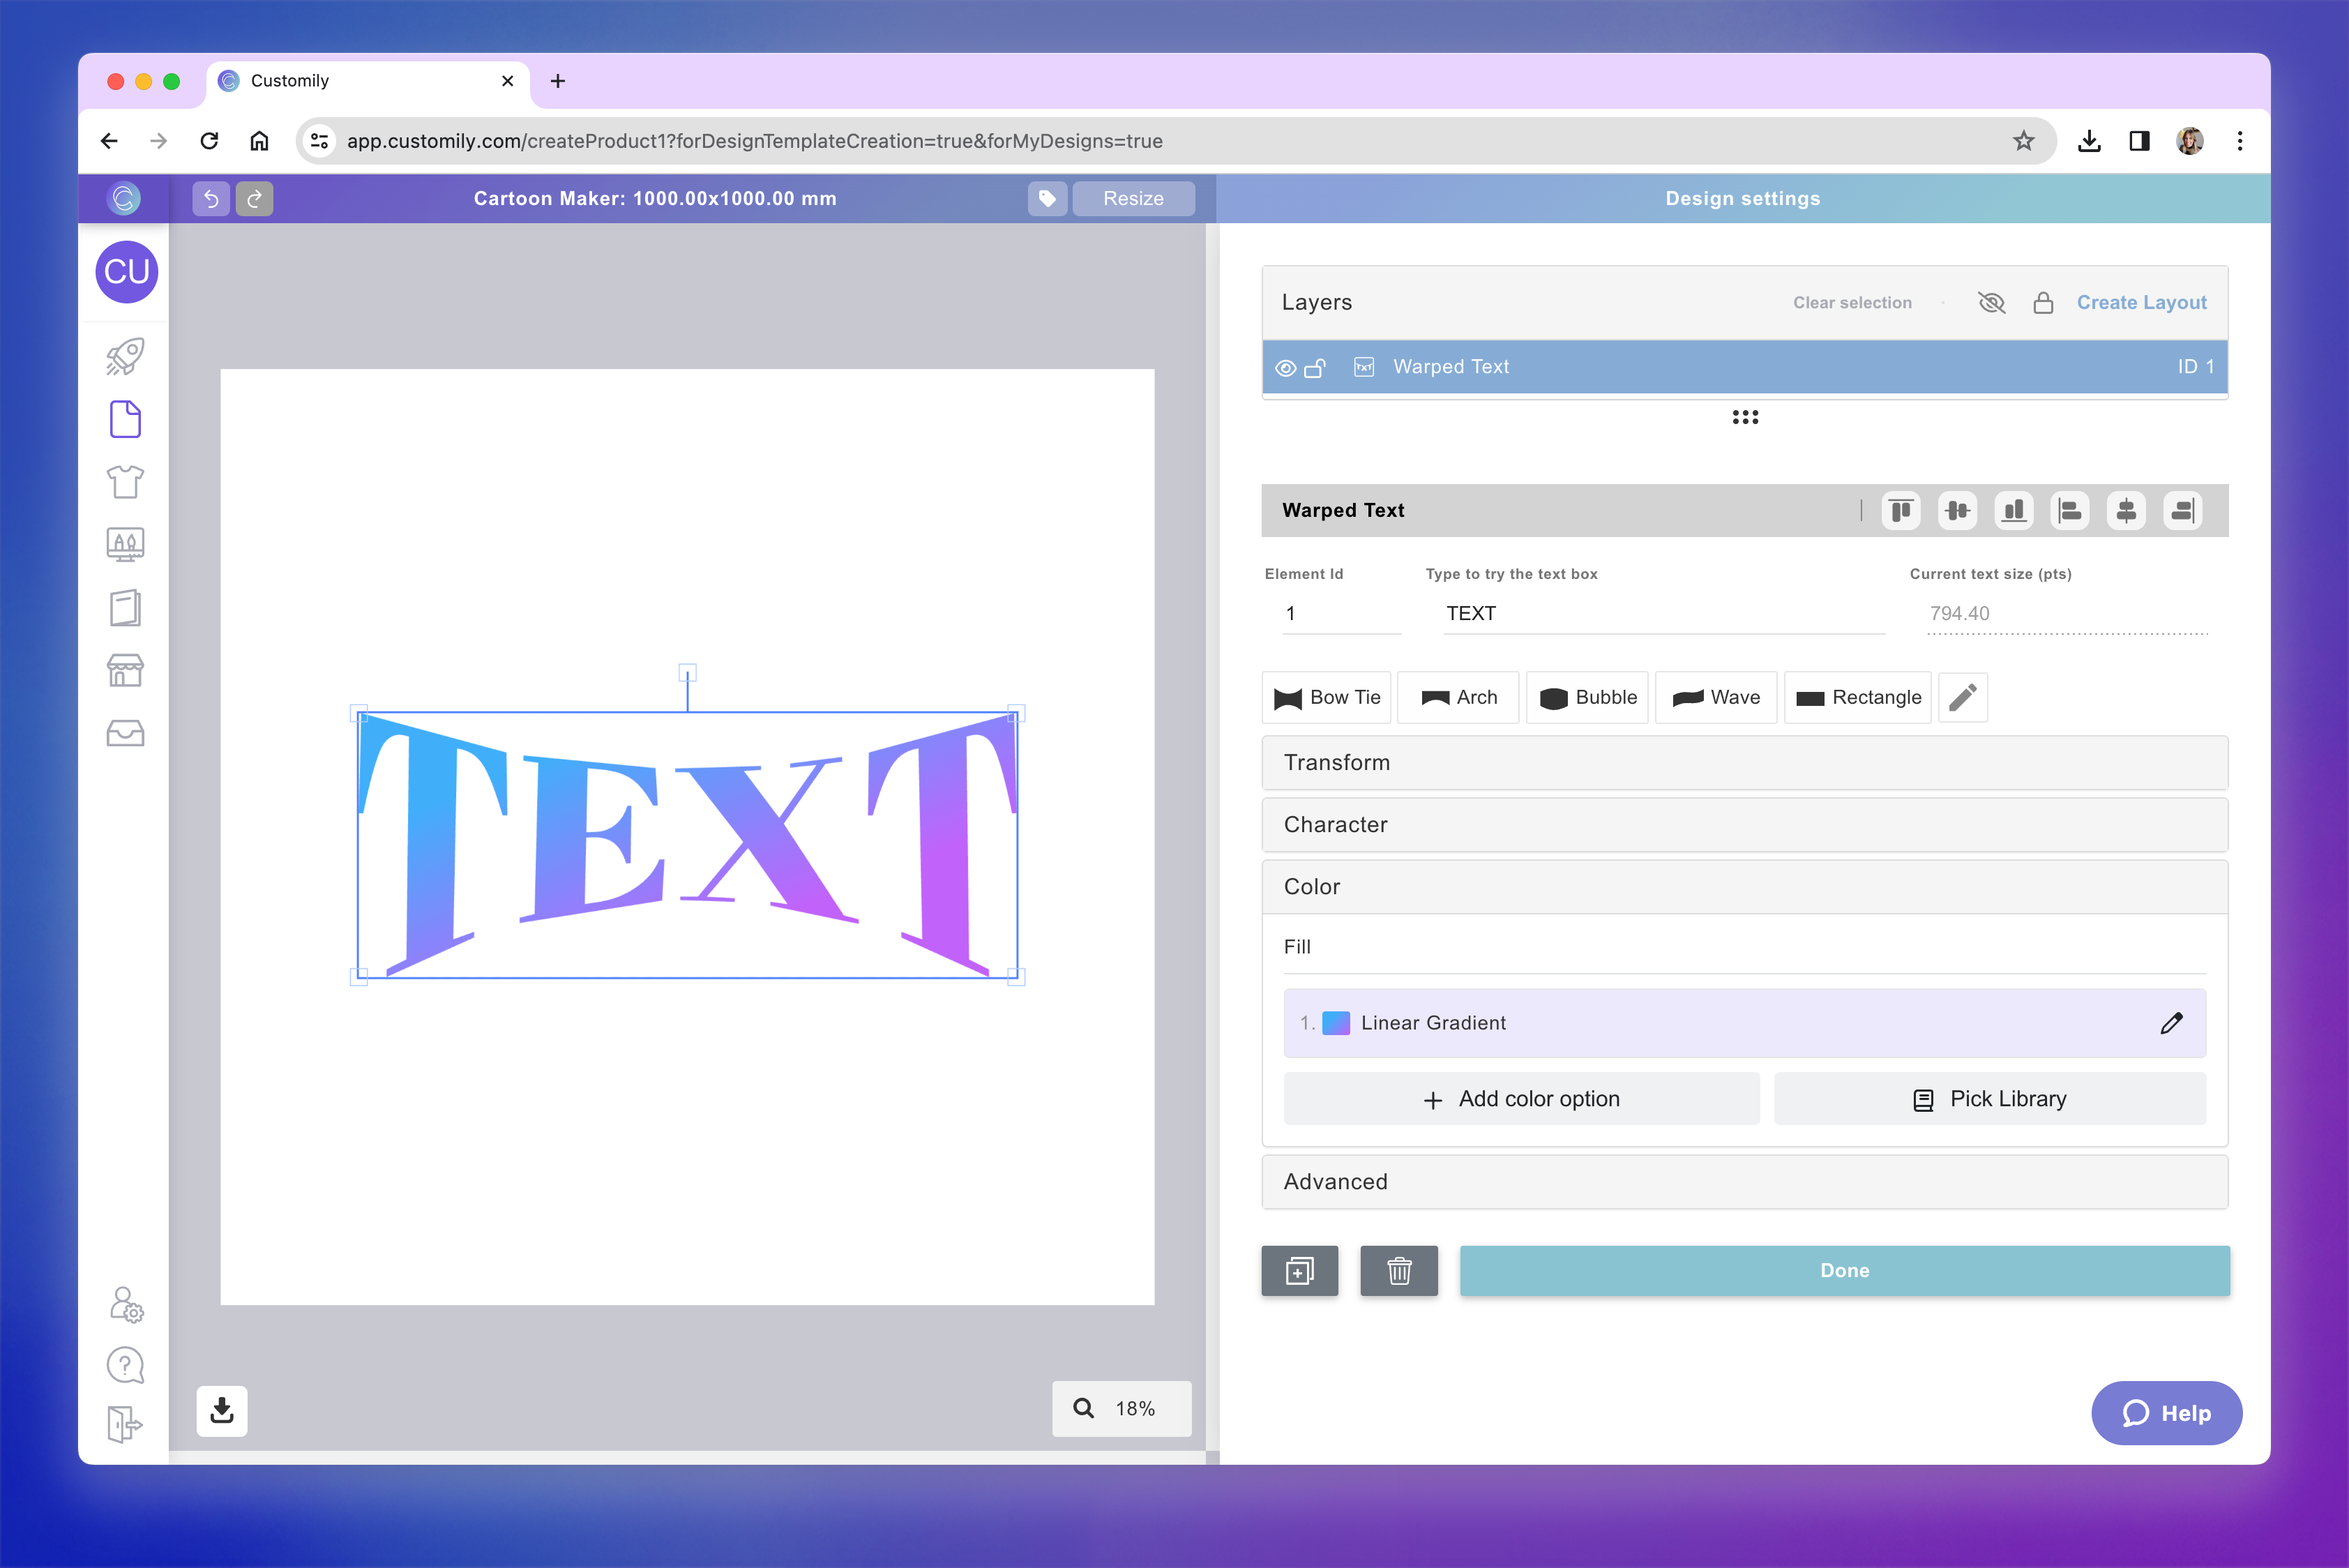
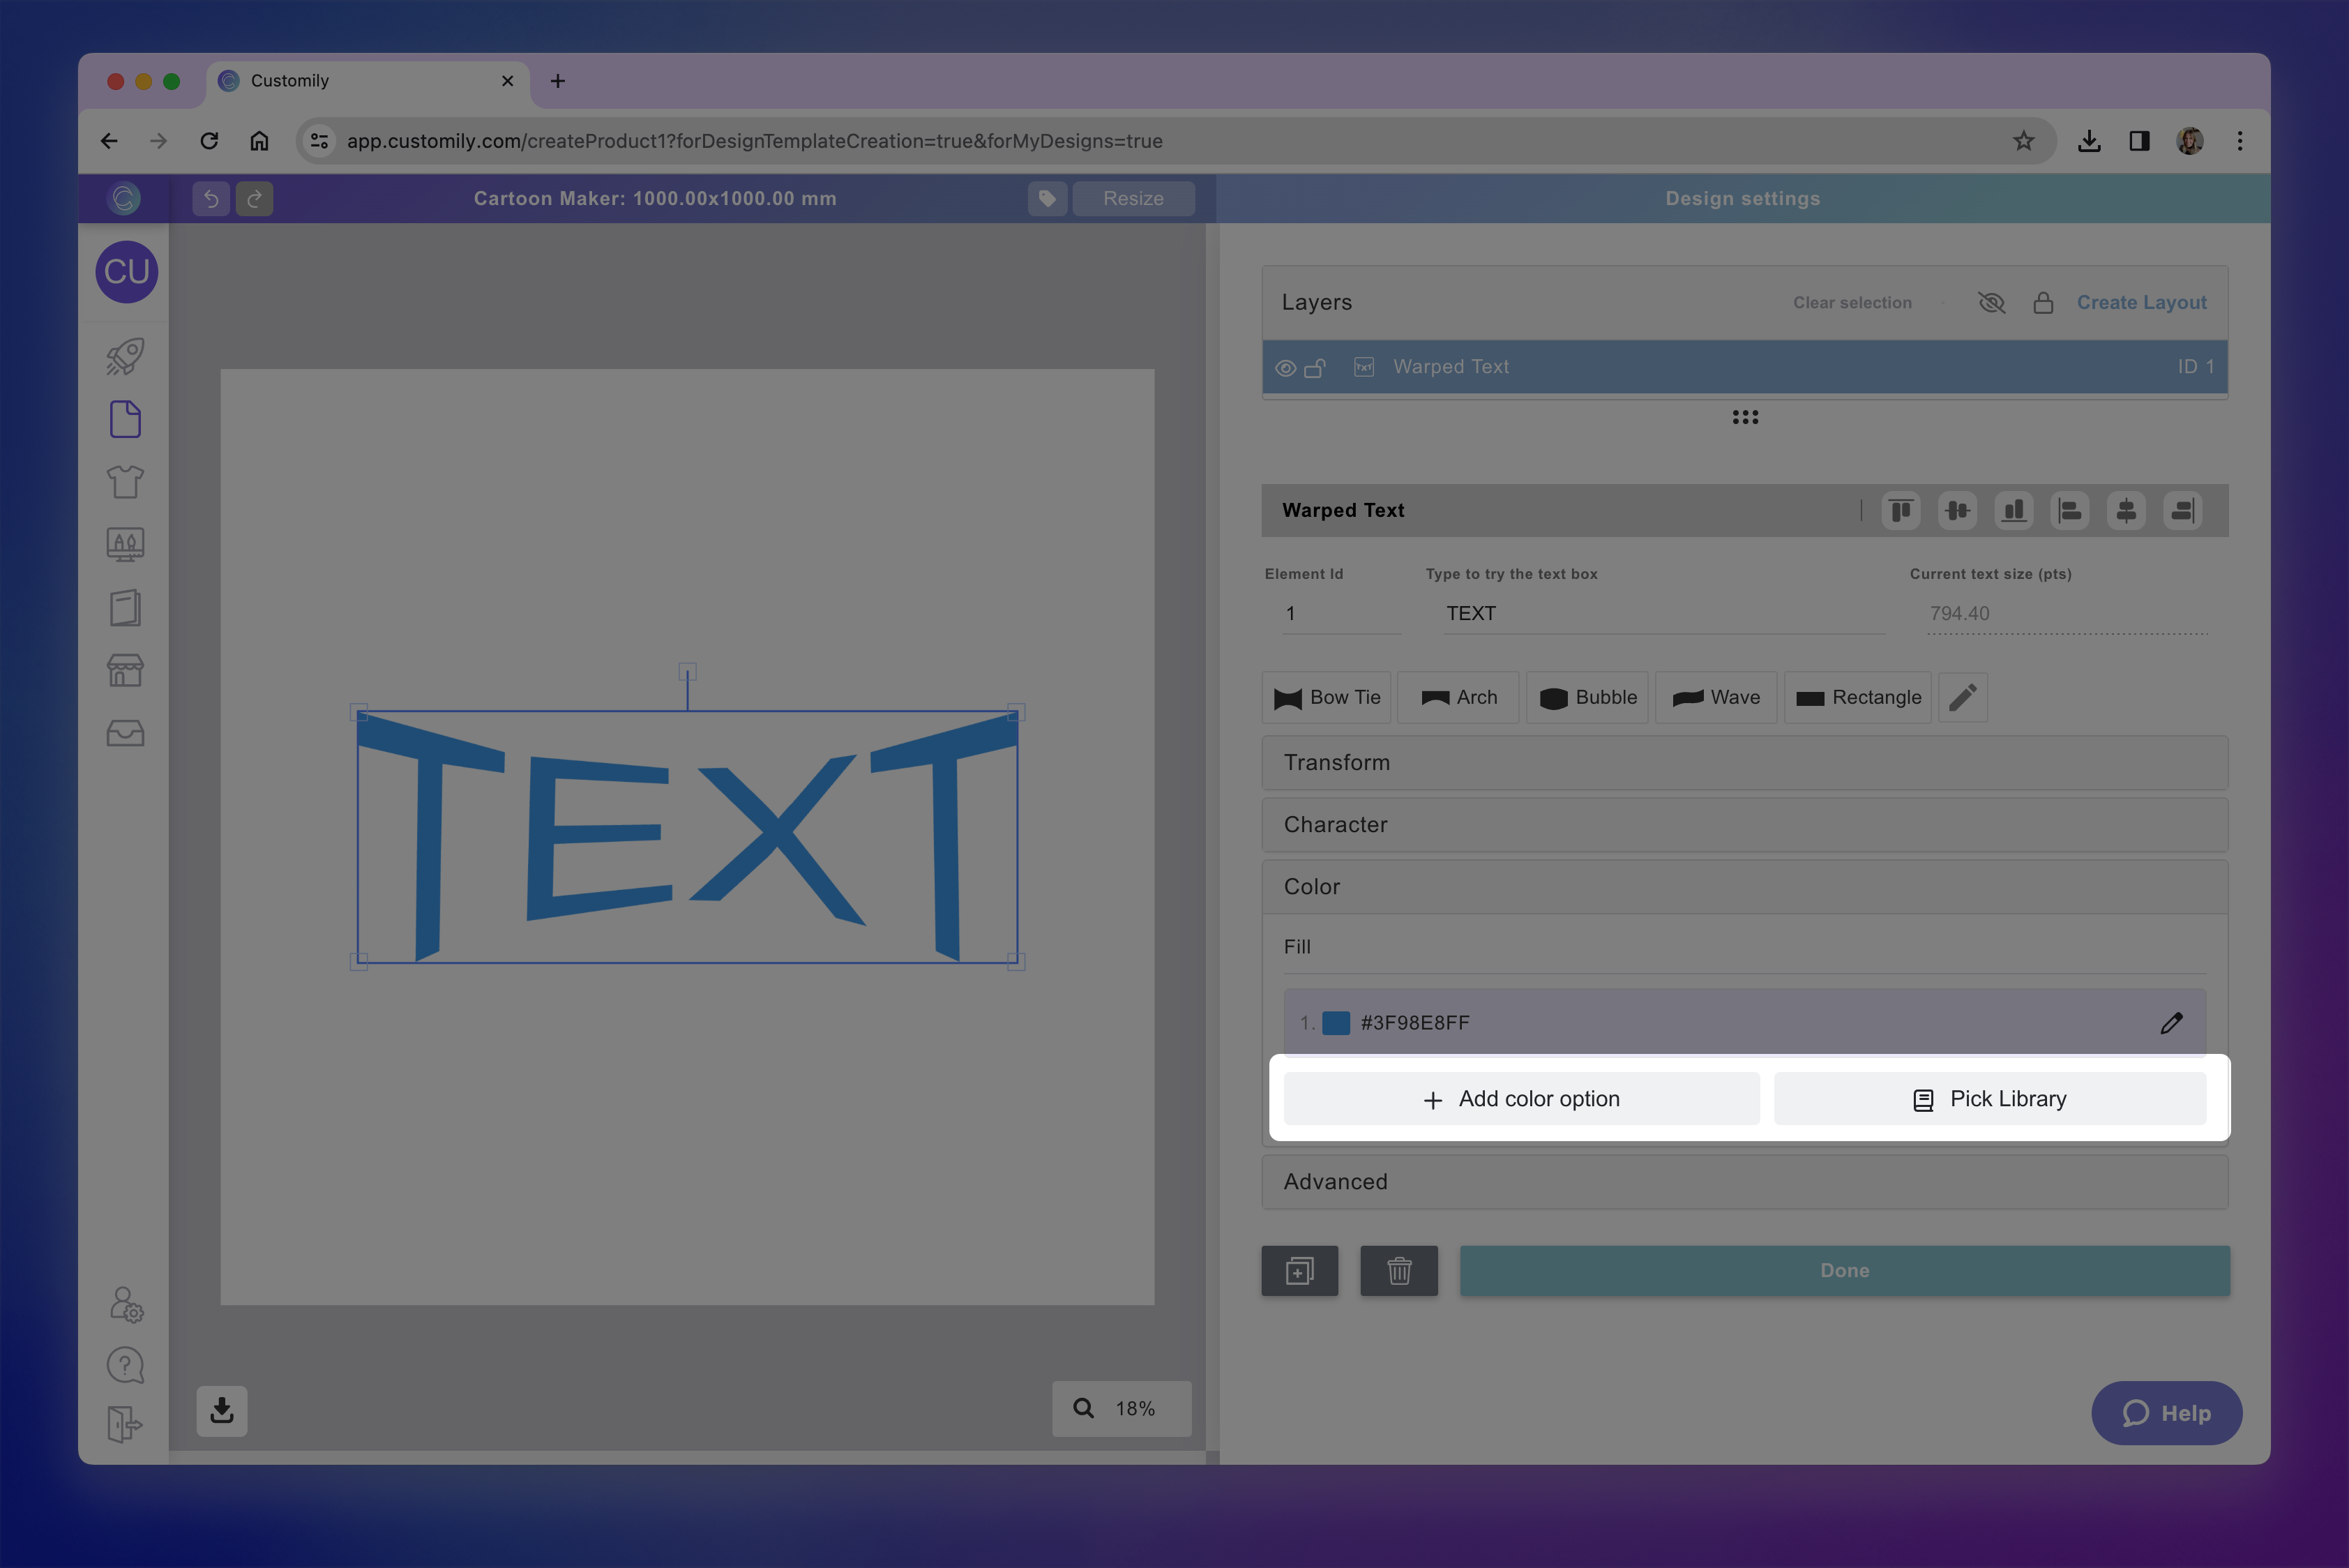
After selecting the element, expand the Color toolbox to add color options to the warped text.
You can apply one or multiple fill colors. You can assign colors by Hex value, RGB-A, CMYK-A, or by using a color picker. The color chart will change from RGB-A to CMYK-A, according to the color mode of your workspace. The A stands for Alpha, which means you can also add transparency to your text colors!
When setting the fill, you can now choose between different coloring styles:
Solid
Apply a single color to the entire text.
Gradient
Blend two or more colors smoothly across the text.
Select the text element
Expand the Color toolbox
Click the color swatch or the pencil to select a color.
Choose your coloring style: Solid or Gradient
Using the swatch you can add colors with Hex, RGB-A, or CMYK-A values (the last 2 depend on the color mode of your design). You can also use the color picker to choose a color from your screen. If you want to add transparency, just slide the Alpha control on the bottom of the chart.
Click Apply
Tip
You can add multiple color options to a text element. To add more than one color option you can either use a color library or assign multiple color options by clicking the Add Color Option button and choosing a new color.
Test how the shopper experience will look
At any moment while configuring your warped text, you can test how it will look on your design, by typing on the spot that reads Type to try the text box.
This is just for you to test, whatever you type there won't be visible to your customers ever.
