Meta Filtered Image
Last updated: April 29, 2026
Important update
Meta-Filtered Images are still available as a design element in Customily and currently work only with OpenAI. However, this functionality has now been greatly improved inside Image Placeholders using AI Filters and Effects.
We recommend using Image Placeholders with AI Filters instead of Meta-Filtered Images, as they offer:
Support for three different AI providers (Gemini - Nano Banana, OpenAI, and OpenRouter)
Better control over image generation parameters
Pre-made popular prompts, and the ability to write custom prompts
Learn more: How to Add AI Filters and Effects to User-Uploaded Images
Meta Filter Images allow your customers to upload their own photos and have an AI-generated filter automatically applied, based on a prompt you define. This lets you offer trendy, dynamic image transformations—like turning a portrait into a cartoon, a renaissance painting, or any style you imagine—without any manual editing.
Important
The prompt is not meant to generate a completely new image or design from scratch. It works by applying a style or filter to the photo uploaded by your customer. Think of it like telling the AI: “Take this uploaded image and make it look like a watercolor painting” or “Apply a Pixar-style filter.”
A good Meta Filter prompt describes how the image should look after the transformation. For example:
“Studio Ghibli style illustration”
“Vintage 80s cartoon character”
“Black and white comic book sketch”
“Pastel watercolor pet portrait”
Avoid prompts that describe full scenes or compositions unrelated to the uploaded image, like:
“A dog flying through space on a unicorn”
“A sunset landscape with mountains and a lake”
Meta Filters don’t replace the customer’s image—they enhance it using the style you describe.
On the canvas, Meta Filter Images are represented similarly to standard image placeholders, with dashed lines indicating the upload area. You can transform them, apply masks, and test them—just like image placeholders—but with an added AI twist.
How It Works
When you add a Meta Filtered Image to your design:
Shoppers will be able to upload their own image (JPG, PNG, BMP, HEIC), and an AI filter will be automatically applied based on your prompt.
The filter transforms the photo in real time—e.g., cartoon, Ghibli, sketch, etc.
You write the prompt that defines the look, and control the shape, position, and size of the placeholder.
Shoppers can't adjust the prompt, they only upload the image and are able to move it inside the placeholder.
Customers can upload one image per placeholder. The file types supported by meta images are JPG, PNG, BMP and HEIC.
Important
You can try Meta Filtered Images with 20 free credits—no OpenAI account is required at first. After using your free credits, you’ll need to connect an OpenAI account to continue generating images.
In this article:
To add a meta filtered image
You can add meta filtered image on Designs and on Templates, by clicking the Meta Filtered Image button.
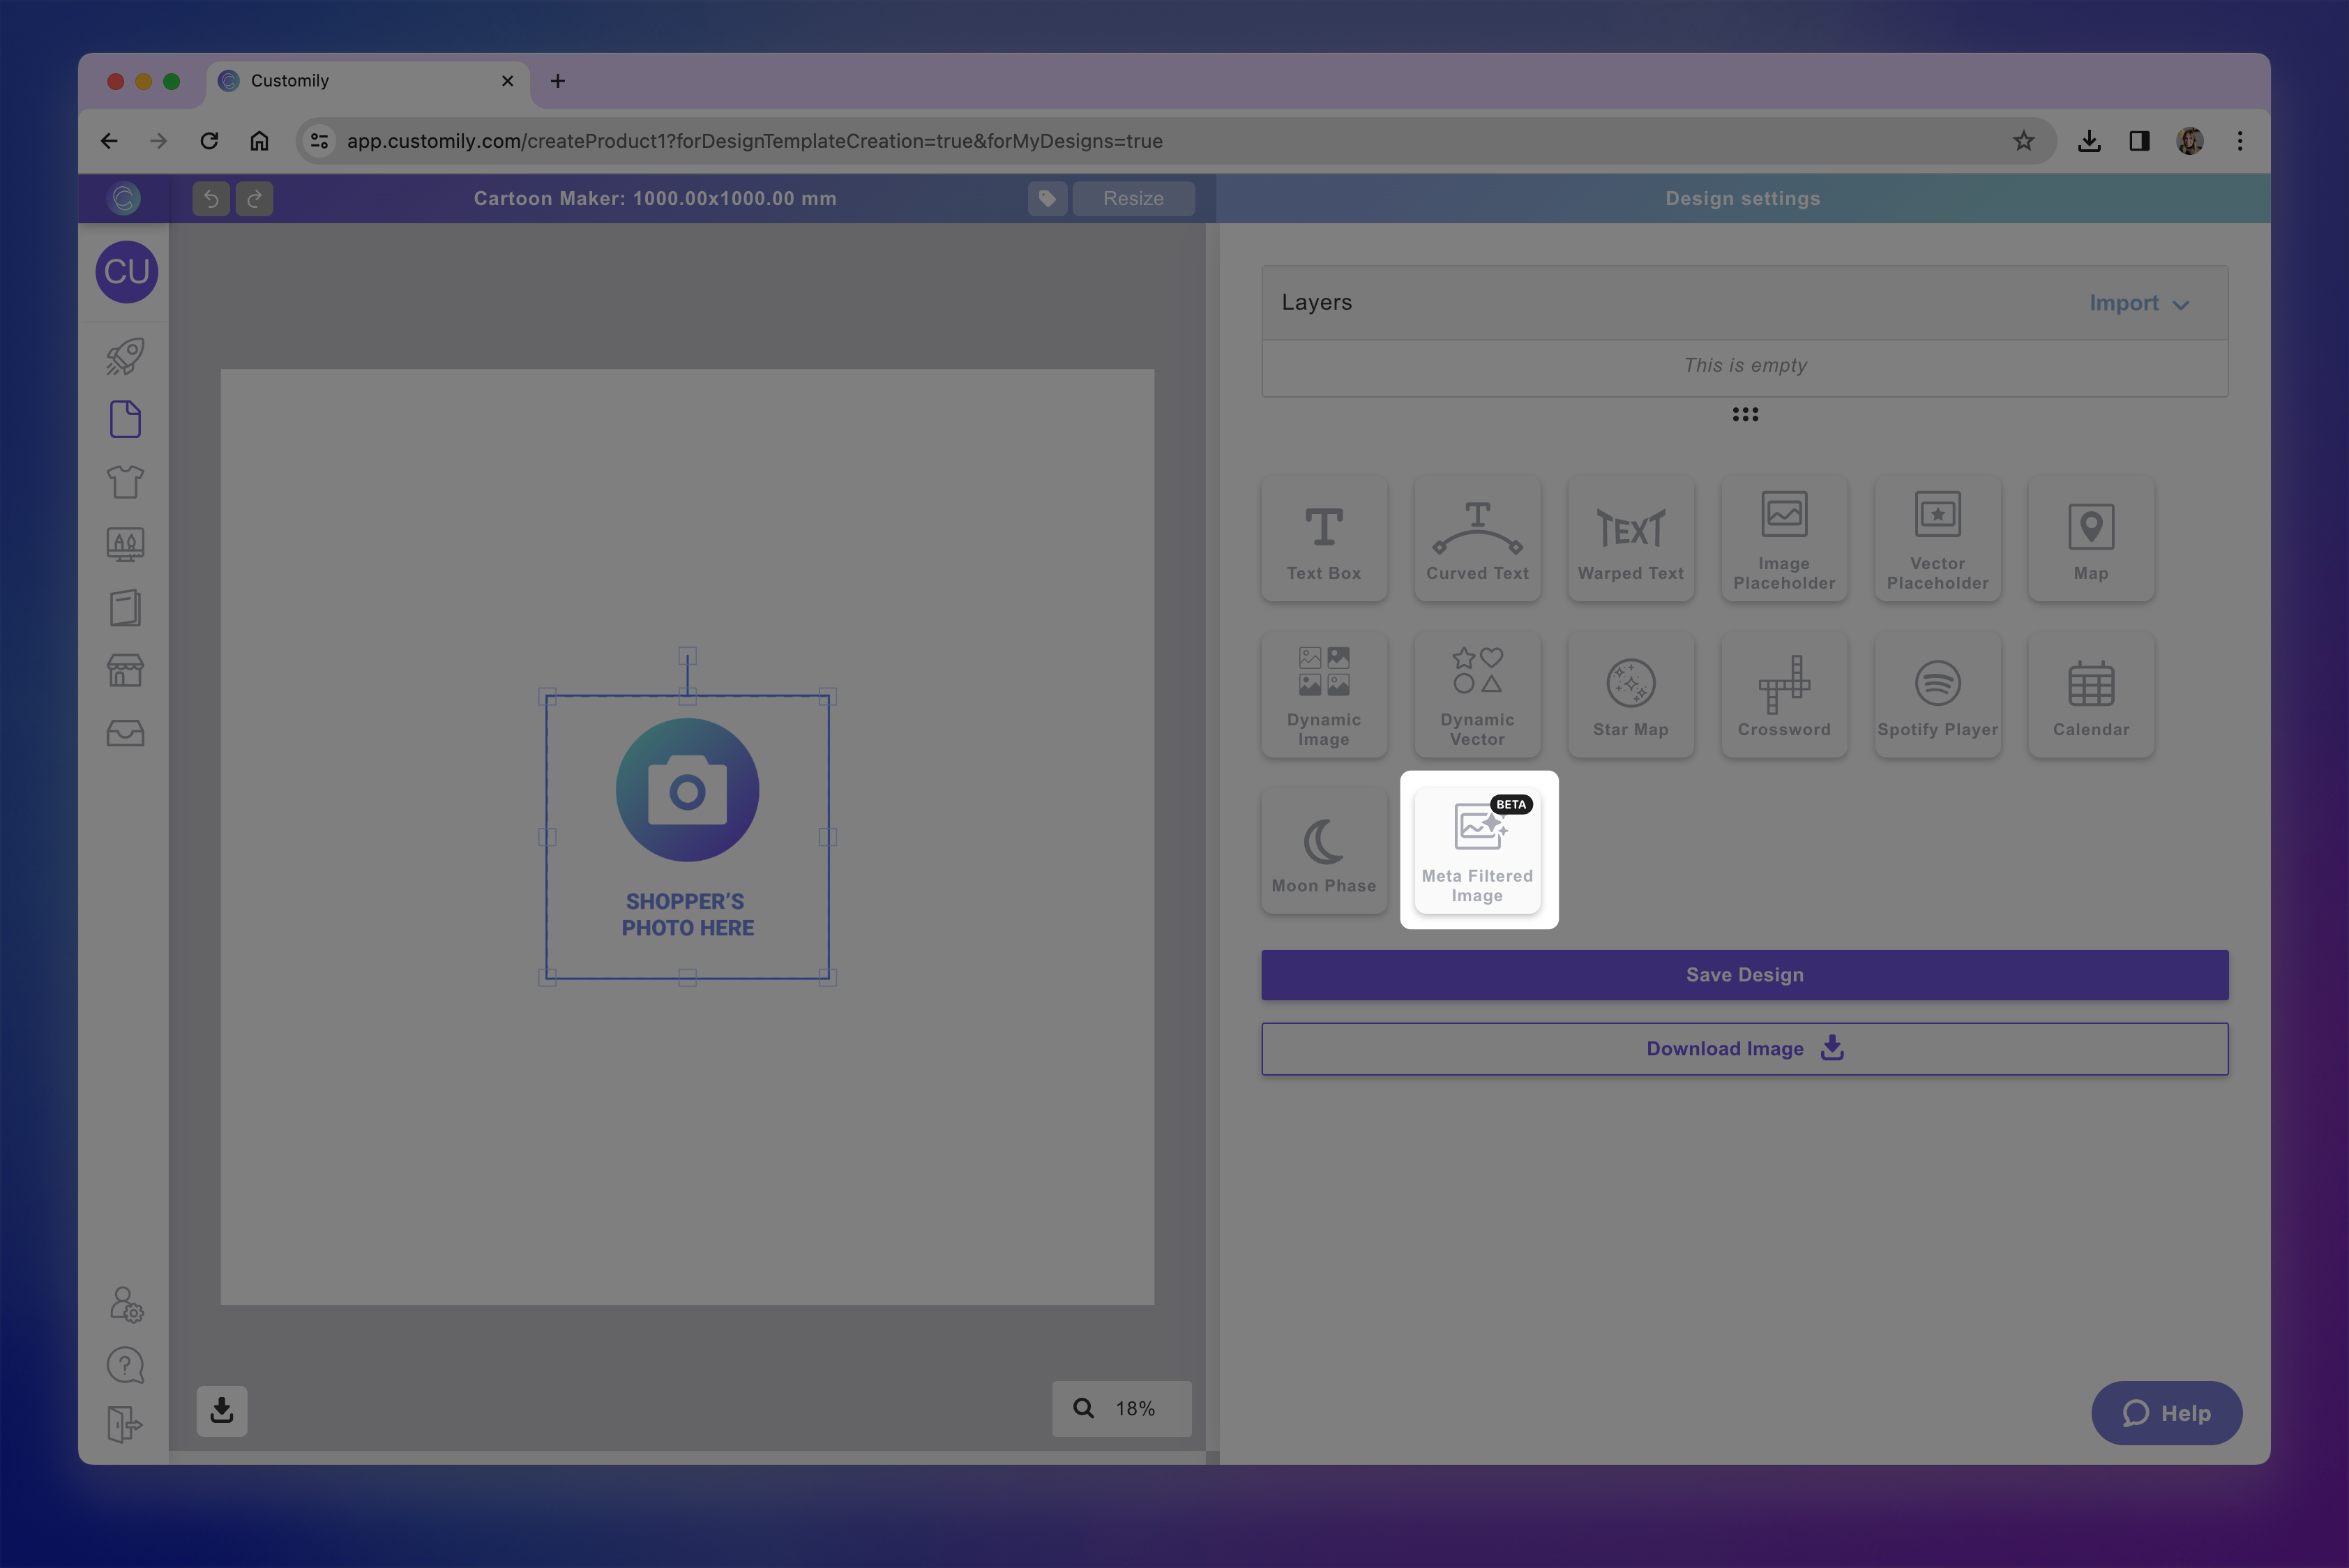
Each meta filtered image you add will have a Name that you can edit, and a Unique Id for you to easily identify it.
To configure the a meta filter to be applied
What makes Meta Filter Images unique is that they apply an AI filter to any uploaded photo using a predefined prompt. With the right prompt you can customize:
Image style (e.g., "Studio Ghibli style," "Renaissance oil painting")
Color effects
Auto background removal, Face detection or cutout (for better composition)
Compositions, like adding a specific background, light effects, and more.
This transformation is handled automatically and immediately after the image is uploaded by the customer.
To configure the AI filter:
Select the Meta Filter Image on the canvas.
Upload a test image by clicking Try with an image, this will help you visualize and test your prompt.
Enter your desired prompt in the text field that says Type a prompt for your filter

Click Apply Filter to try how the prompt works on the test image uploaded on step 2.

Transform the meta filtered image
Directly on the canvas or by expanding the Transform toolbox, you can transform the meta filtered image placeholder:

Change the uploaded image behavior
Changing the behavior of the meta filter image will affect what happens when a customer uploads an image. You can configure different behaviors to apply effects and filters to the images:
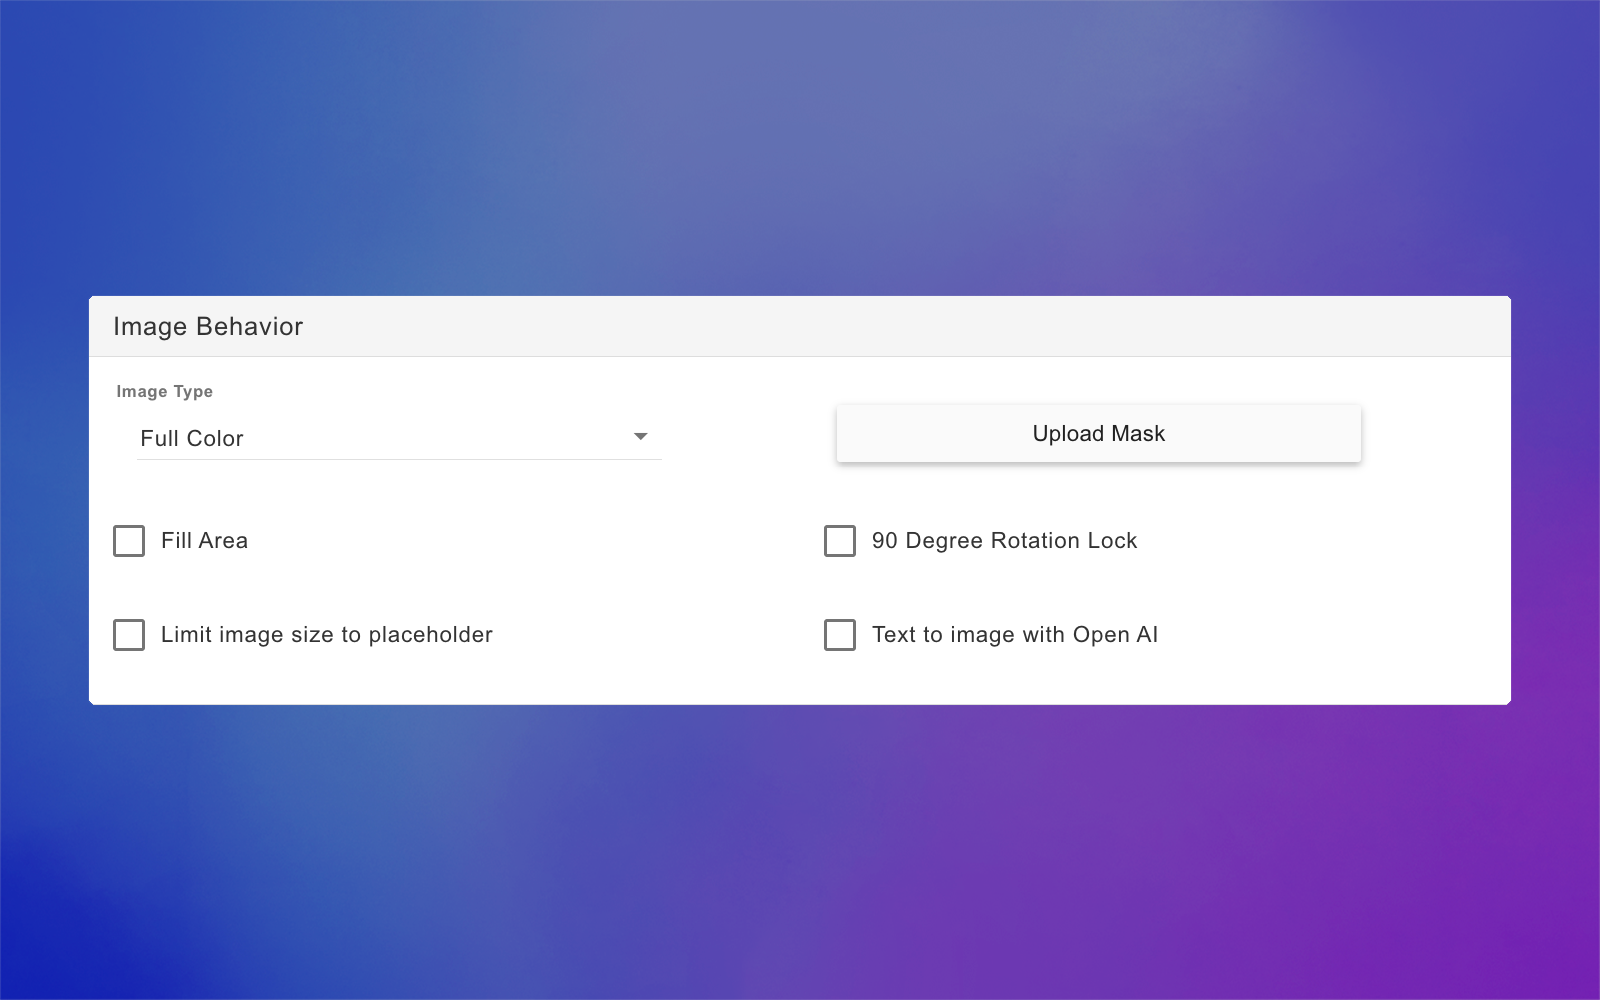
Image type
You can choose between 3 image types to change the color mode of the end result. This will be applied tot the image after the ai filter. Image types available are:
Full Color
Images in full color mode will remain exactly as they are after the ai filter is applied. This is the standard mode for images.

Grayscale
Images in grayscale mode will be converted to grayscale (black and white)

Single Color (Image Tracing)
Images in single color mode will be traced and converted to vectors with a single color. You can pick what color to use for the vector, and even give multiple color options for customers to choose from.

Select the image placeholder
Expand the Image Behavior toolbox
Select from the dropdown the Image Type
If you selected Single Color, click the color swatch or the color picker to select a color. Using the swatch you can add colors with Hex, RGB-A, or CMYK-A values (the last 2 depend on the color mode of your design). If you want to add transparency, just slide the Alpha control on the bottom of the chart.
Tip
If you select single image mode, you can add multiple color options to the user-uploaded image. To add more than one color option you can either use a color library or assign multiple color options by clicking +Add color option.

Add a mask
Masks let you give the placeholder a particular shape (other than a square or rectangle!).
Select the image placeholder
Expand the Image Behavior toolbox
Click Upload mask
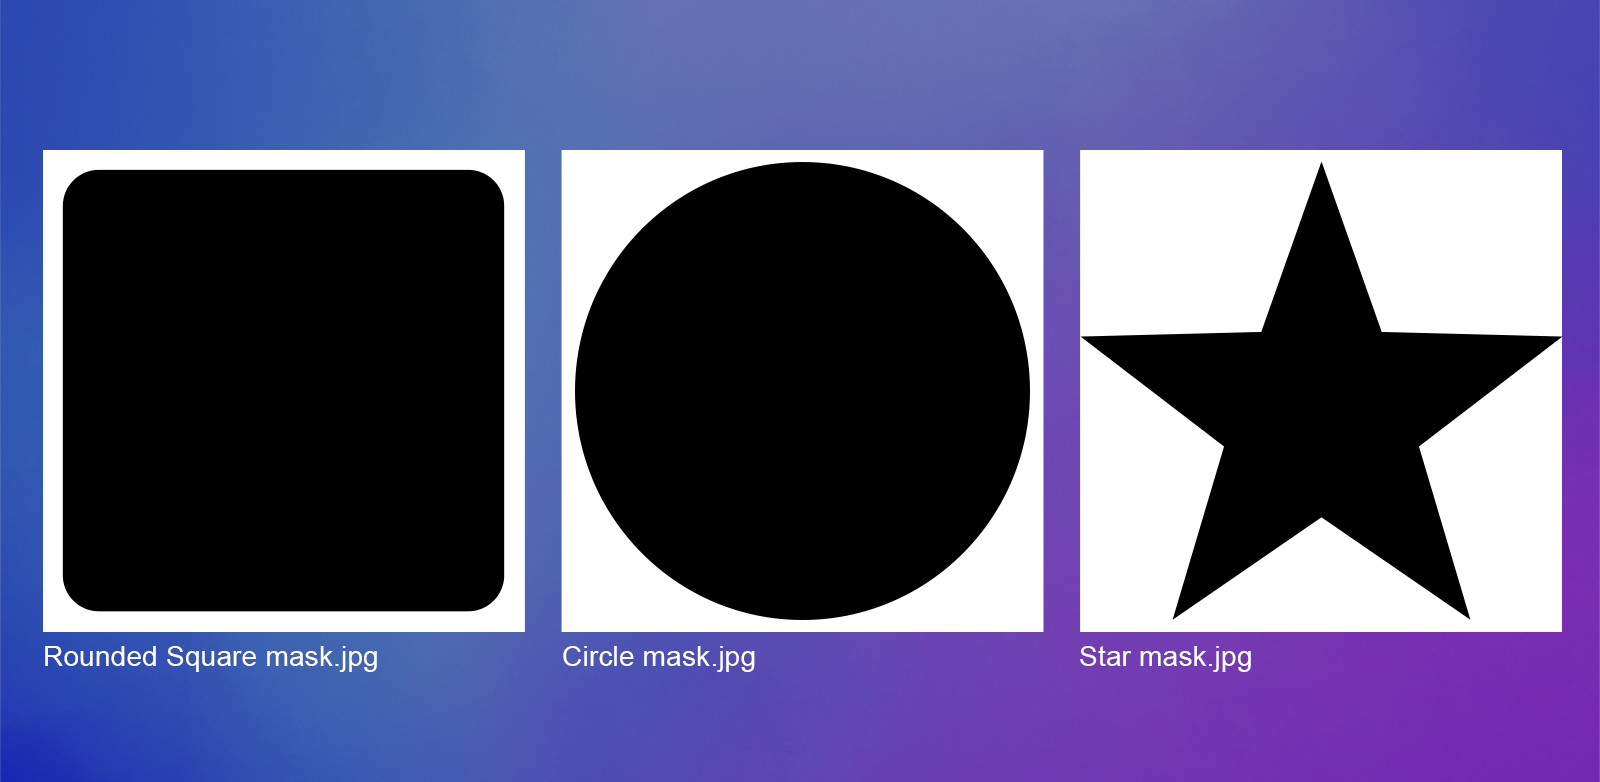
Select the JPG file you want to use as a mask.

For masks to work, the file needs to be a black-and-white image of the mask, where the shape you want the placeholder to have is black and the background of the image is white, in good quality (we recommend at least 1000x1000 px), since the better the quality the smoother the mask. Here are some examples of masks:
Tip
You can also create masks simply by layering elements on top of each other. This is especially helpful if you want to mask images with a specific design on top of them. To achieve this add a PNG on top of the user-uploaded image using a dynamic image, or a vector using a dynamic vector.
Fit / Fill
By default, customer-uploaded images are set to fit the placeholder. If you'd like the image to cover the entire placeholder, then you should enable the fill checkbox. When images fill the placeholder, after the ai filter is applied they are resized (proportionally) to occupy the entire placeholder.
Select the image placeholder
Expand the Image Behavior toolbox
Check or uncheck Fill Area option

Limit image size to placeholder area
When this is enabled together with the fill area, shoppers won't be able to leave any blank space in the placeholder. This means their image movement will be constricted, so the placeholder is filled with an image at all times.
Select the image placeholder
Expand the Image Behavior toolbox
Check Fill Area
Check Limit image size to placeholder option

Rotation Lock
By default, customer-uploaded images can be rotated freely inside the placeholder. If you want customers only to be able to rotate it in 90° increments, then you should enable the 90 Degree Rotation Lock checkbox.
Select the image placeholder
Expand the Image Behavior toolbox
Check or uncheck 90 Degree Rotation Lock option

Test how the user-uploaded image will look
At any moment while configuring your meta filtered image , you can test how it will look on your design, by clicking Try with an image button.
To see how the filter will work on that image, remember to then click Apply Filter.
This is just for you to test, whatever image you upload there won't be saved, and won't be visible to your customers ever.

Tip
Once you upload an image, you can also move it around and resize it as your customers would. To do that, double-click the image placeholder on the workspace until its boundaries turn red, and only the uploaded image is highlighted in blue. Then, you will be "acting as your customer" who will be able to move the image around inside the placeholder. To exit this mode, click anywhere outside the placeholder.