Using Masks in Your Product Base Mockups
Last updated: April 29, 2026
Masks are optional image overlays you can add to your mockup to enhance realism and depth. They sit on top of the shopper’s design, helping it blend more naturally with the product image.
What Is a Mask?
A mask is a transparent PNG image placed over the print area on your mockup. It doesn't affect the print file — it only appears in the product preview your shoppers see. It’s ideal for:
Adding shadows or folds to simulate how a design would look on real fabric

Adding texture or gloss to give the impression of specific materials (e.g. wood grain, metallic shine)
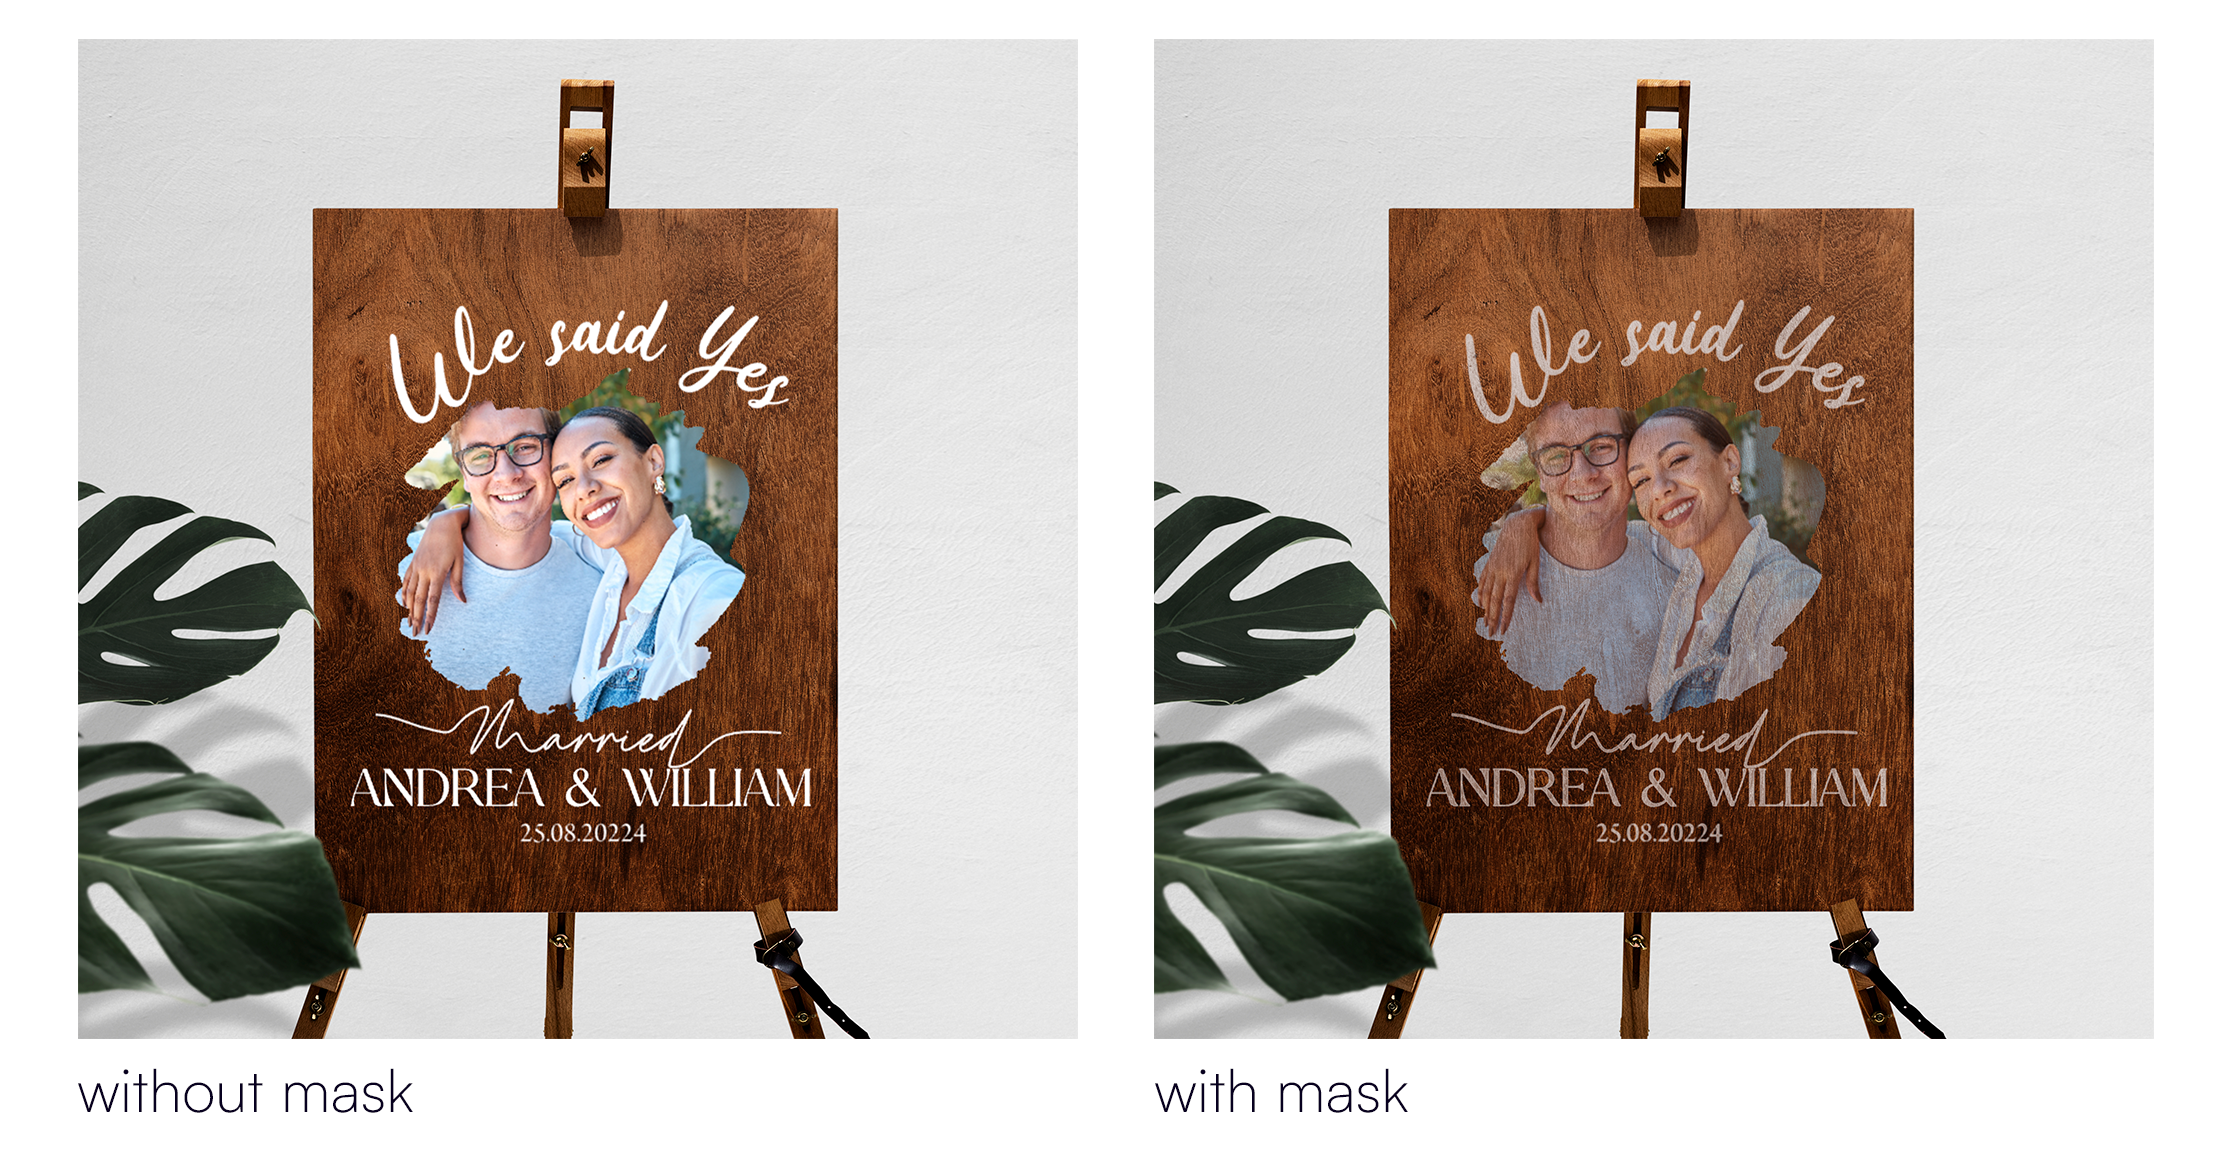
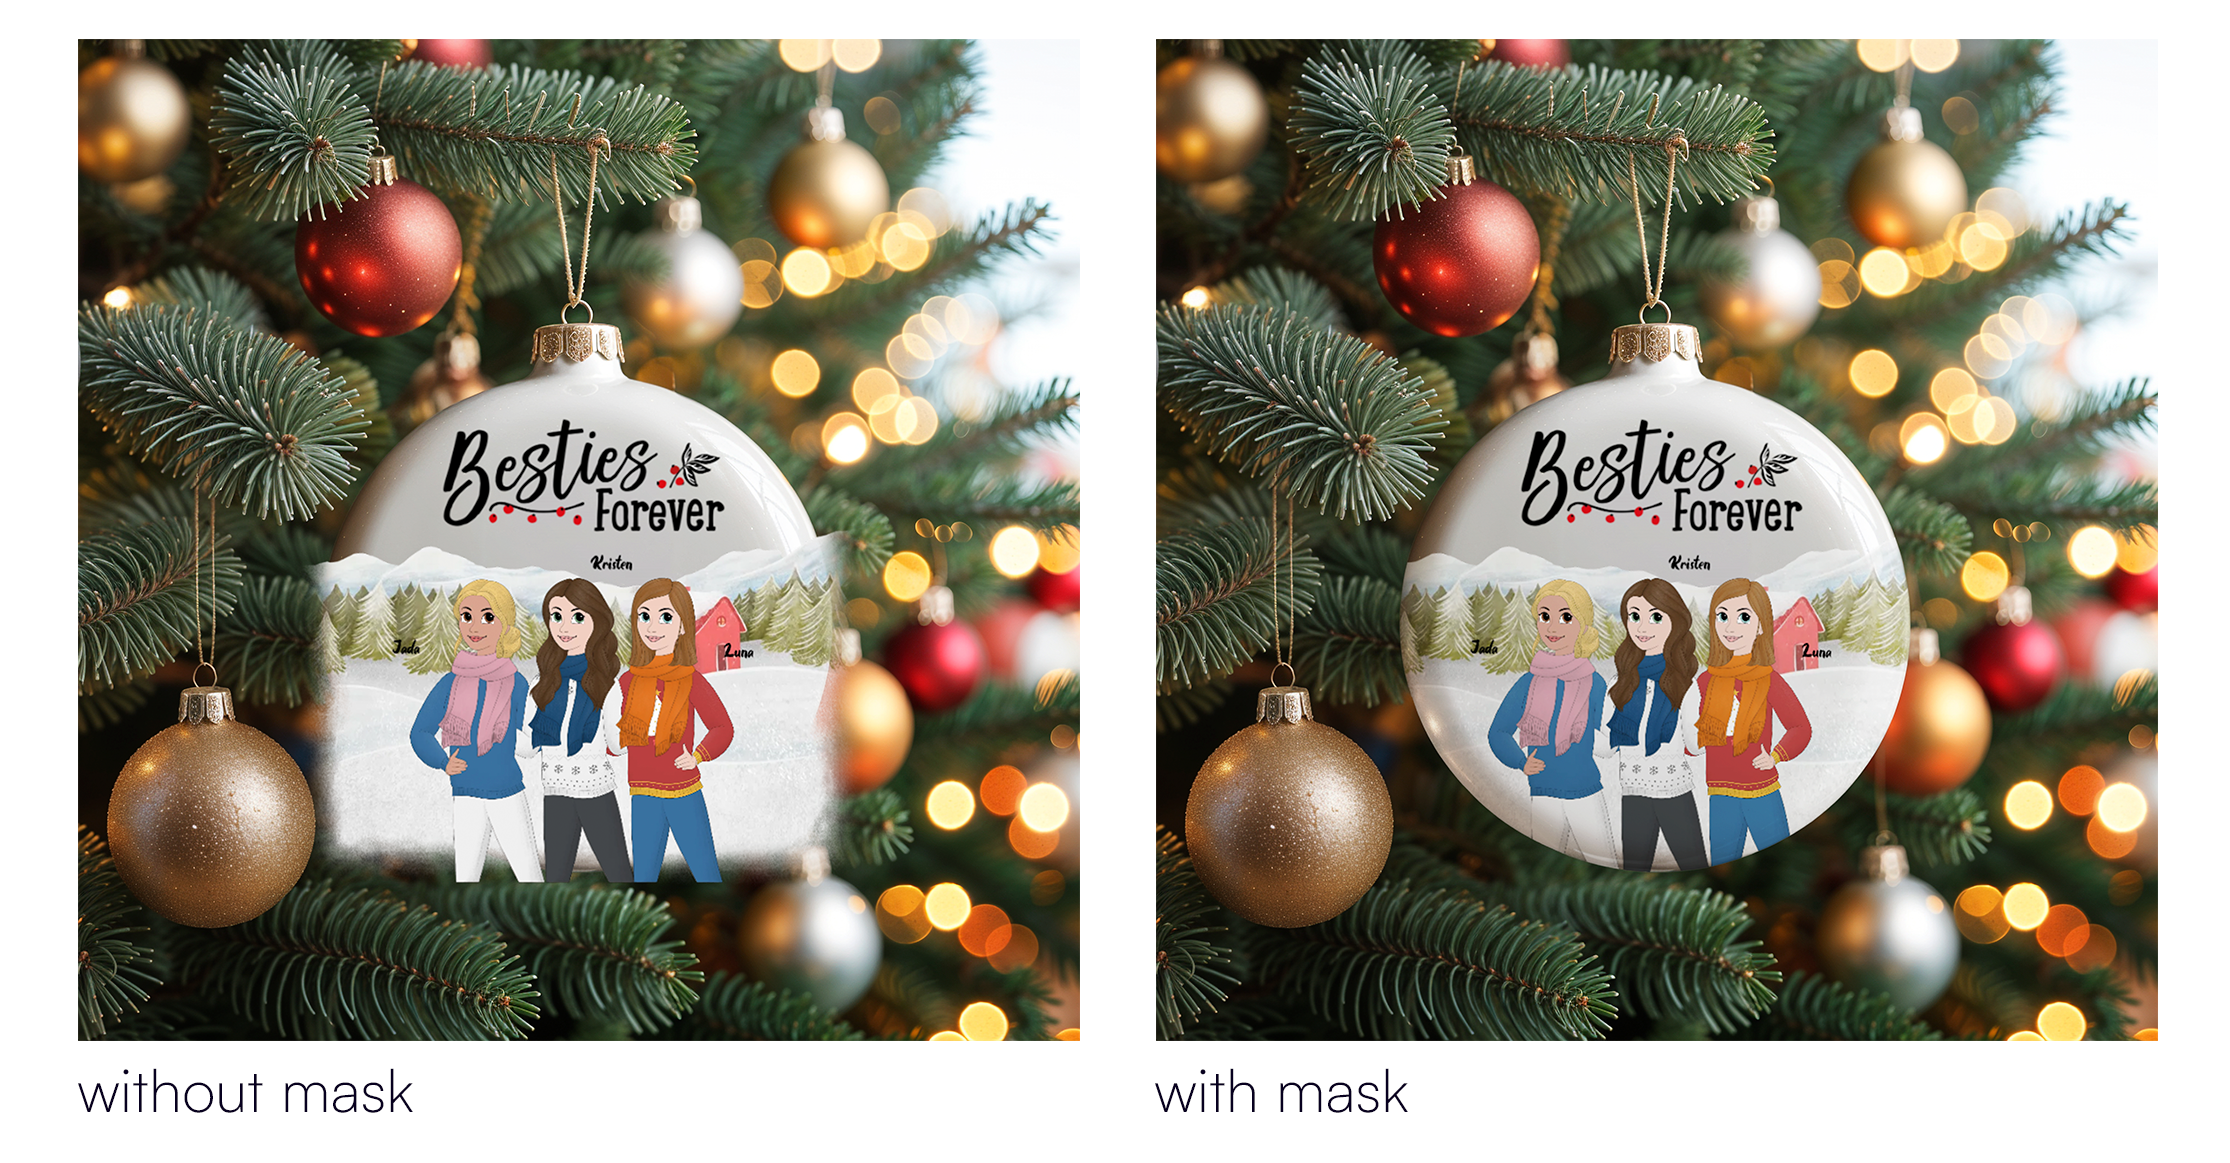
Hiding parts of the print area to match your product’s shape (like rounded edges)
When to Use a Mask
Use a mask if your product image doesn’t fully represent how the final item will look once printed. Some common examples:
Garment details that should sit above the design, like hoodie strings or jacket zippers.
Cut-out or shaped products, such as heart-shaped ornaments or circle keychains, where the print file is rectangular but the product is not.
Objects that overlap the print area, like camera cutouts on phone cases that partially cover the design.
Transparent surfaces, like glass or acrylic that require a see through or gloss effect.
Adding texture, shadows, or light effects to give your mockup a more realistic, professional look.
How to Add a Mask
Click the “Add Mask” button in the mockup step of your product base setup.
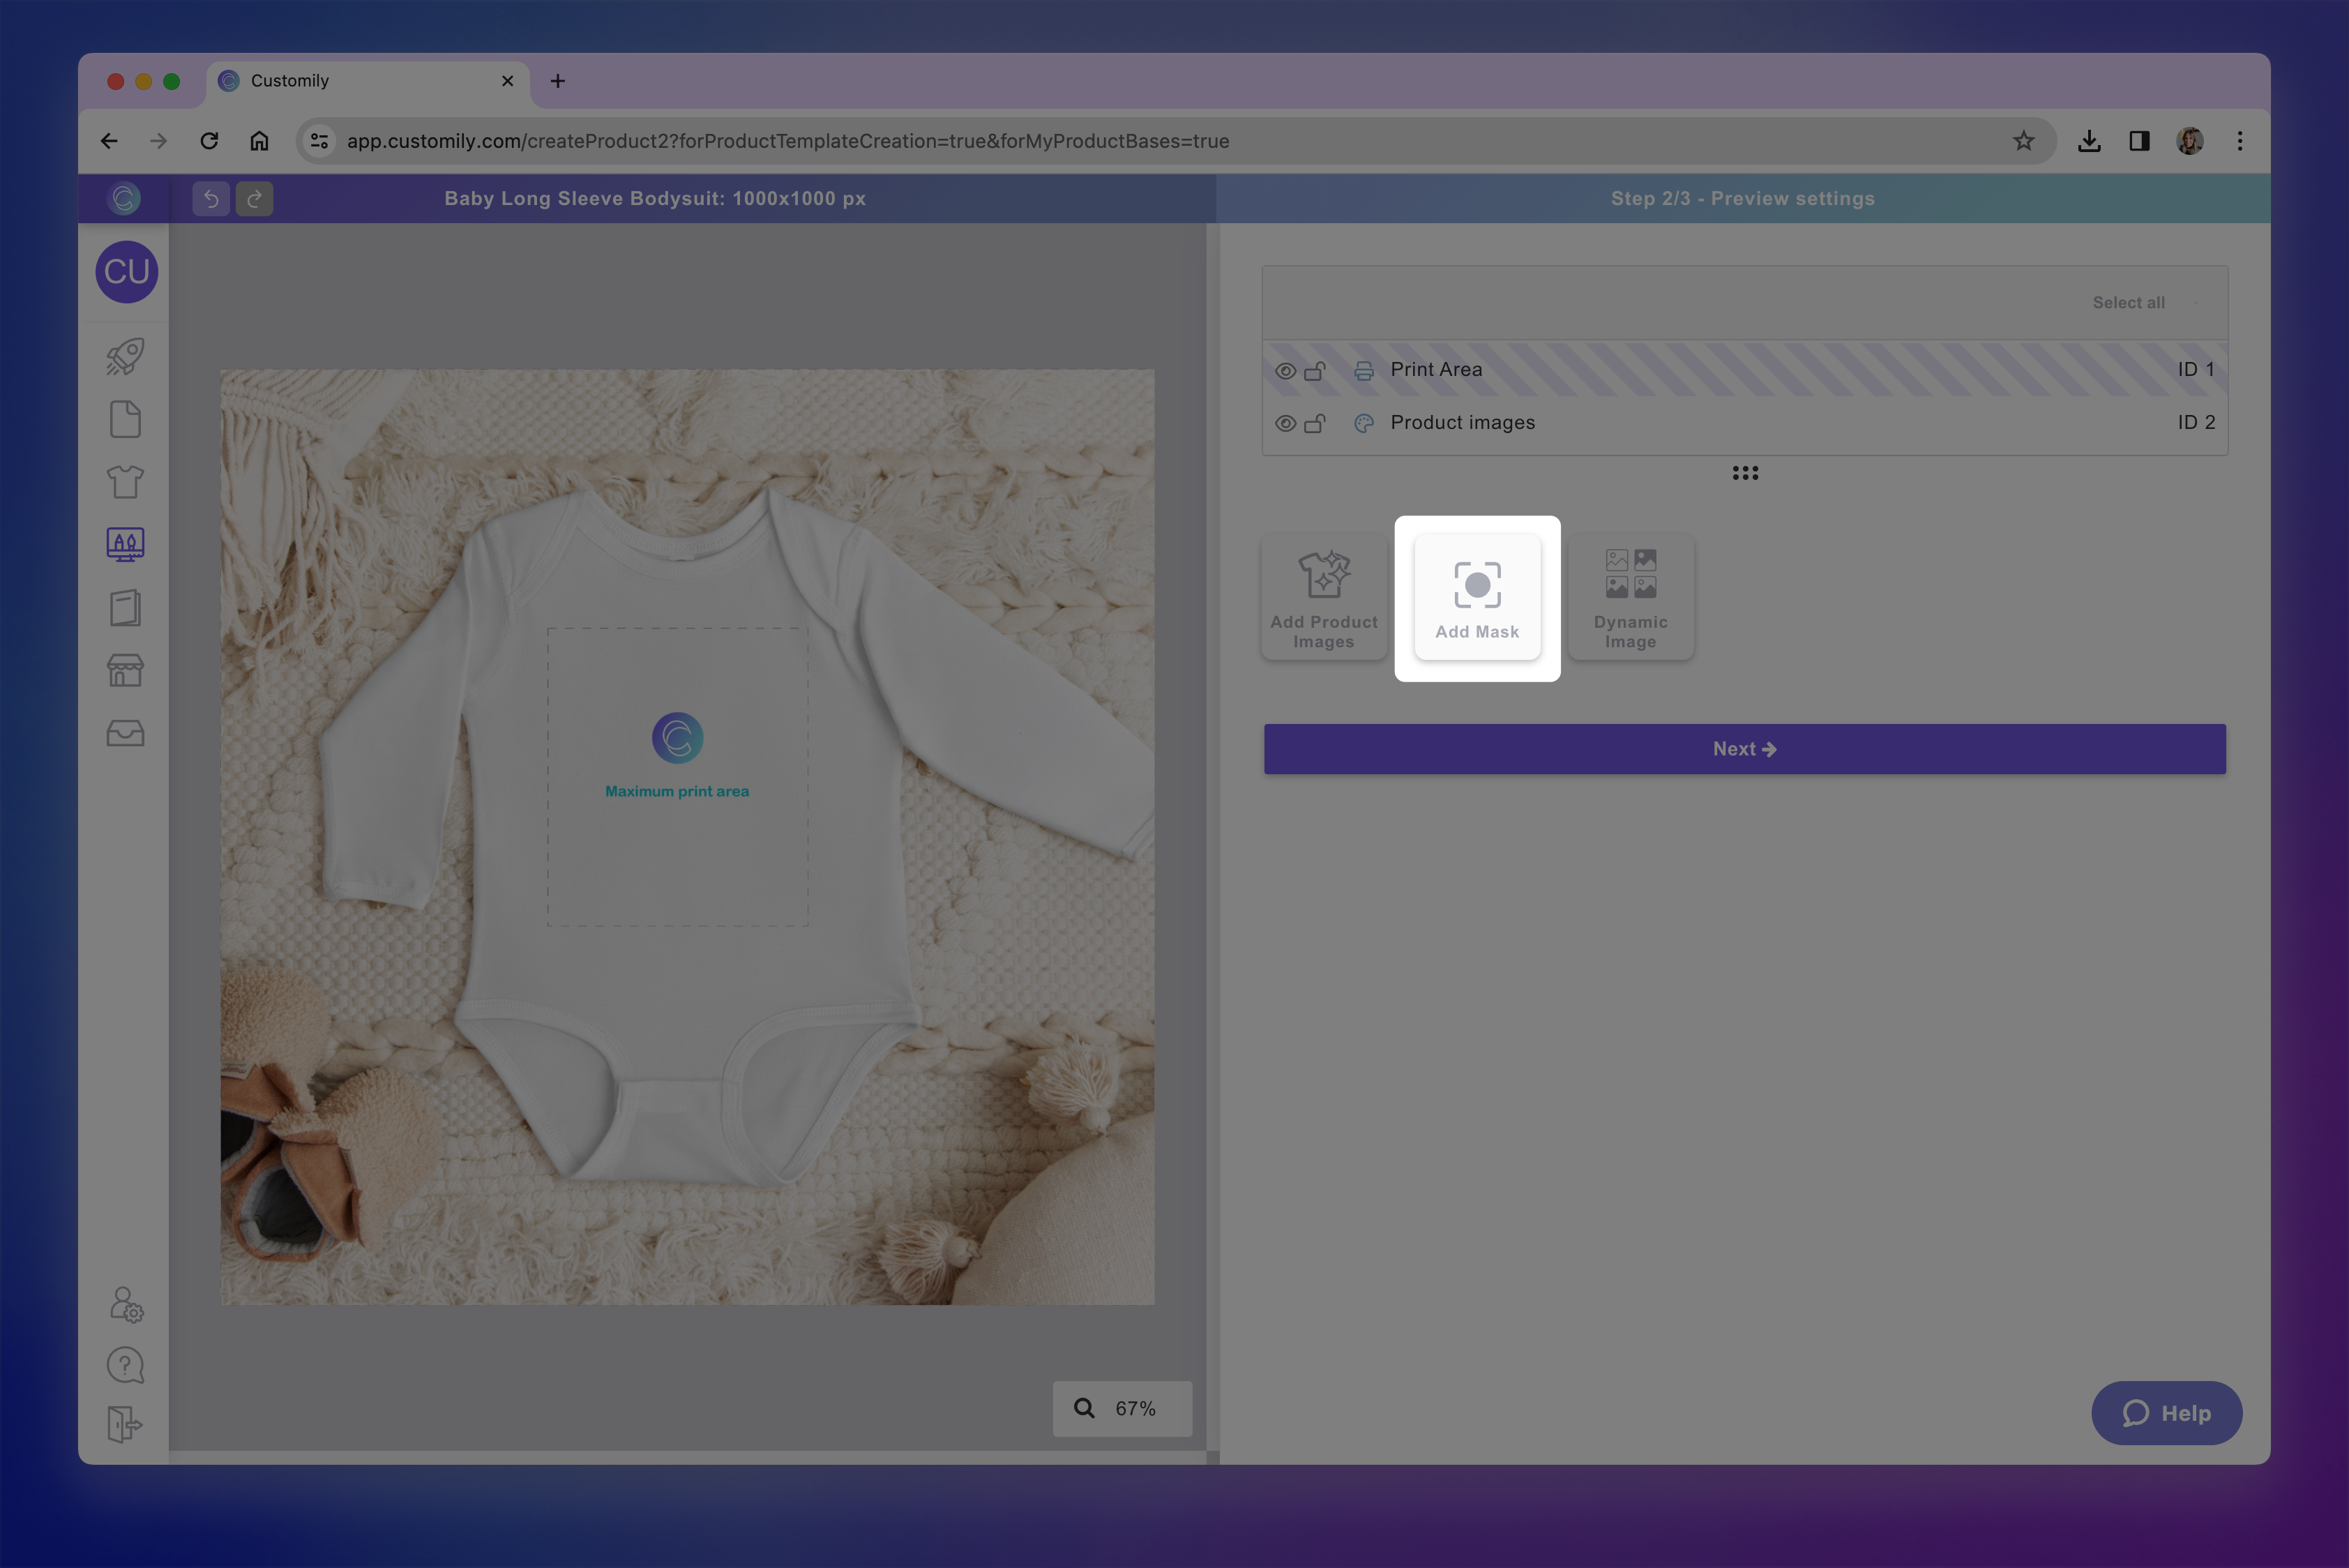
A Mask element will be created, represented with a mask icon on the layer panel.

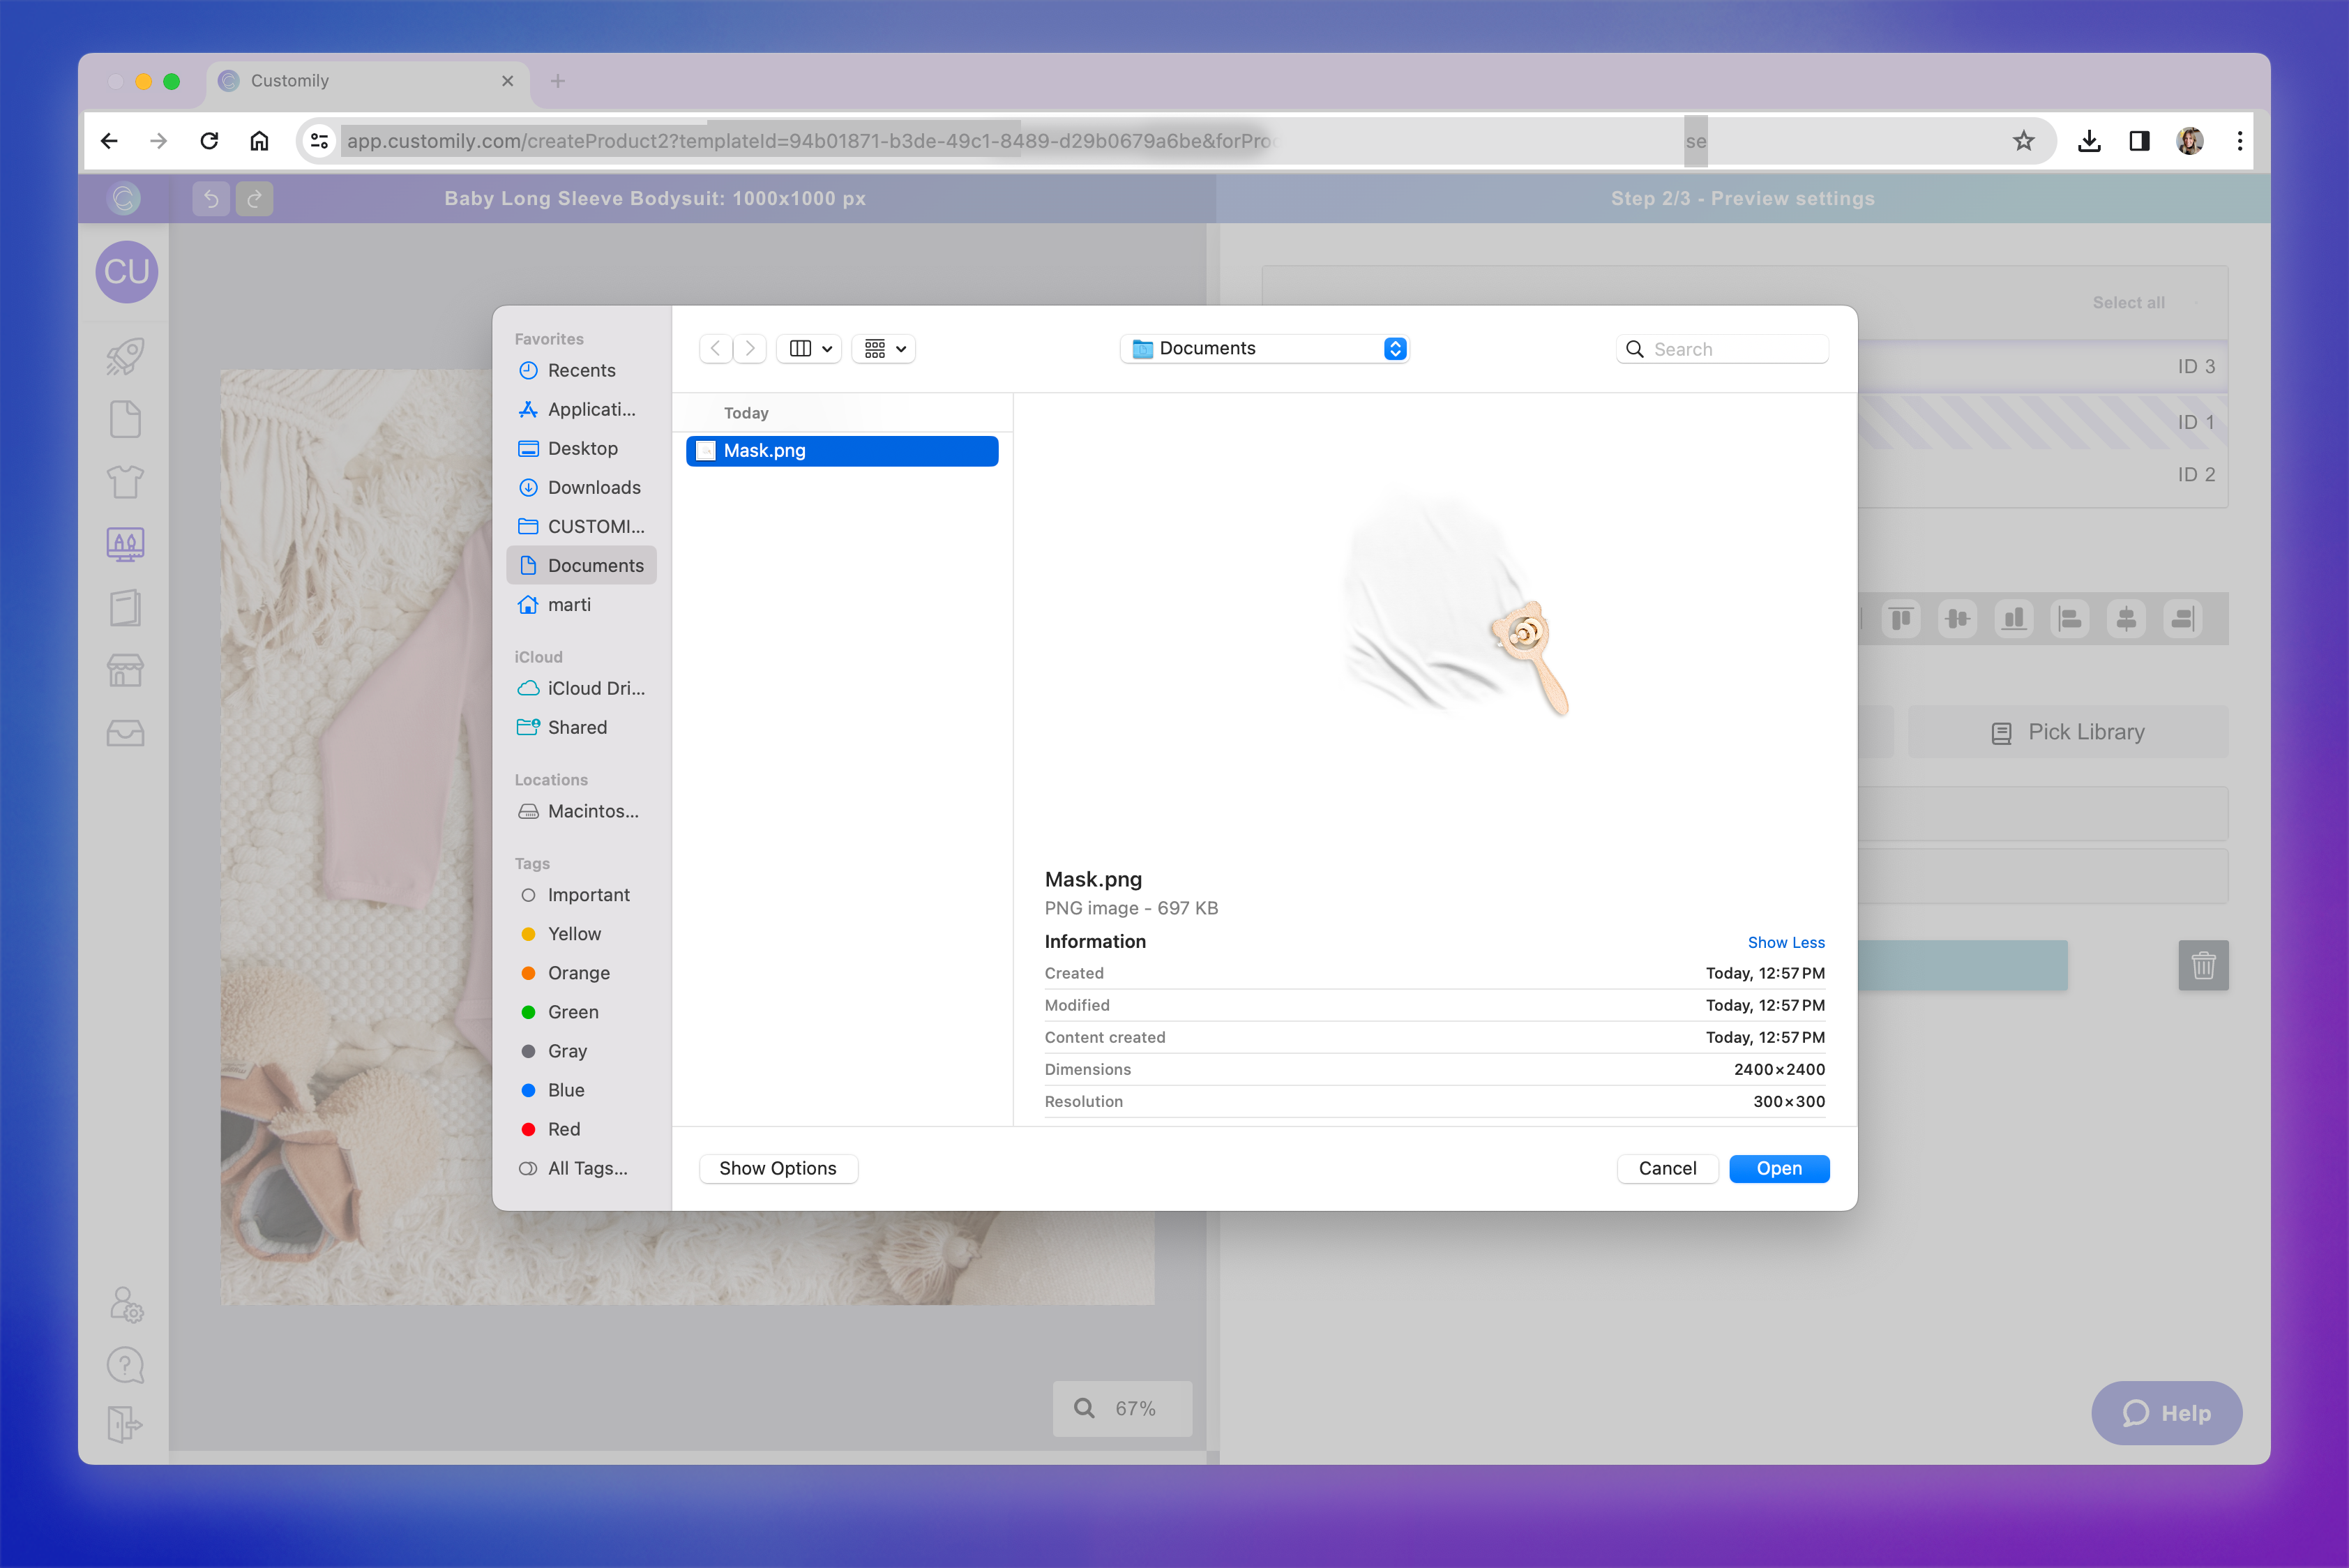
Select the element and Upload your mask image(s) as PNGs with transparency by clicking + Add Image Option.
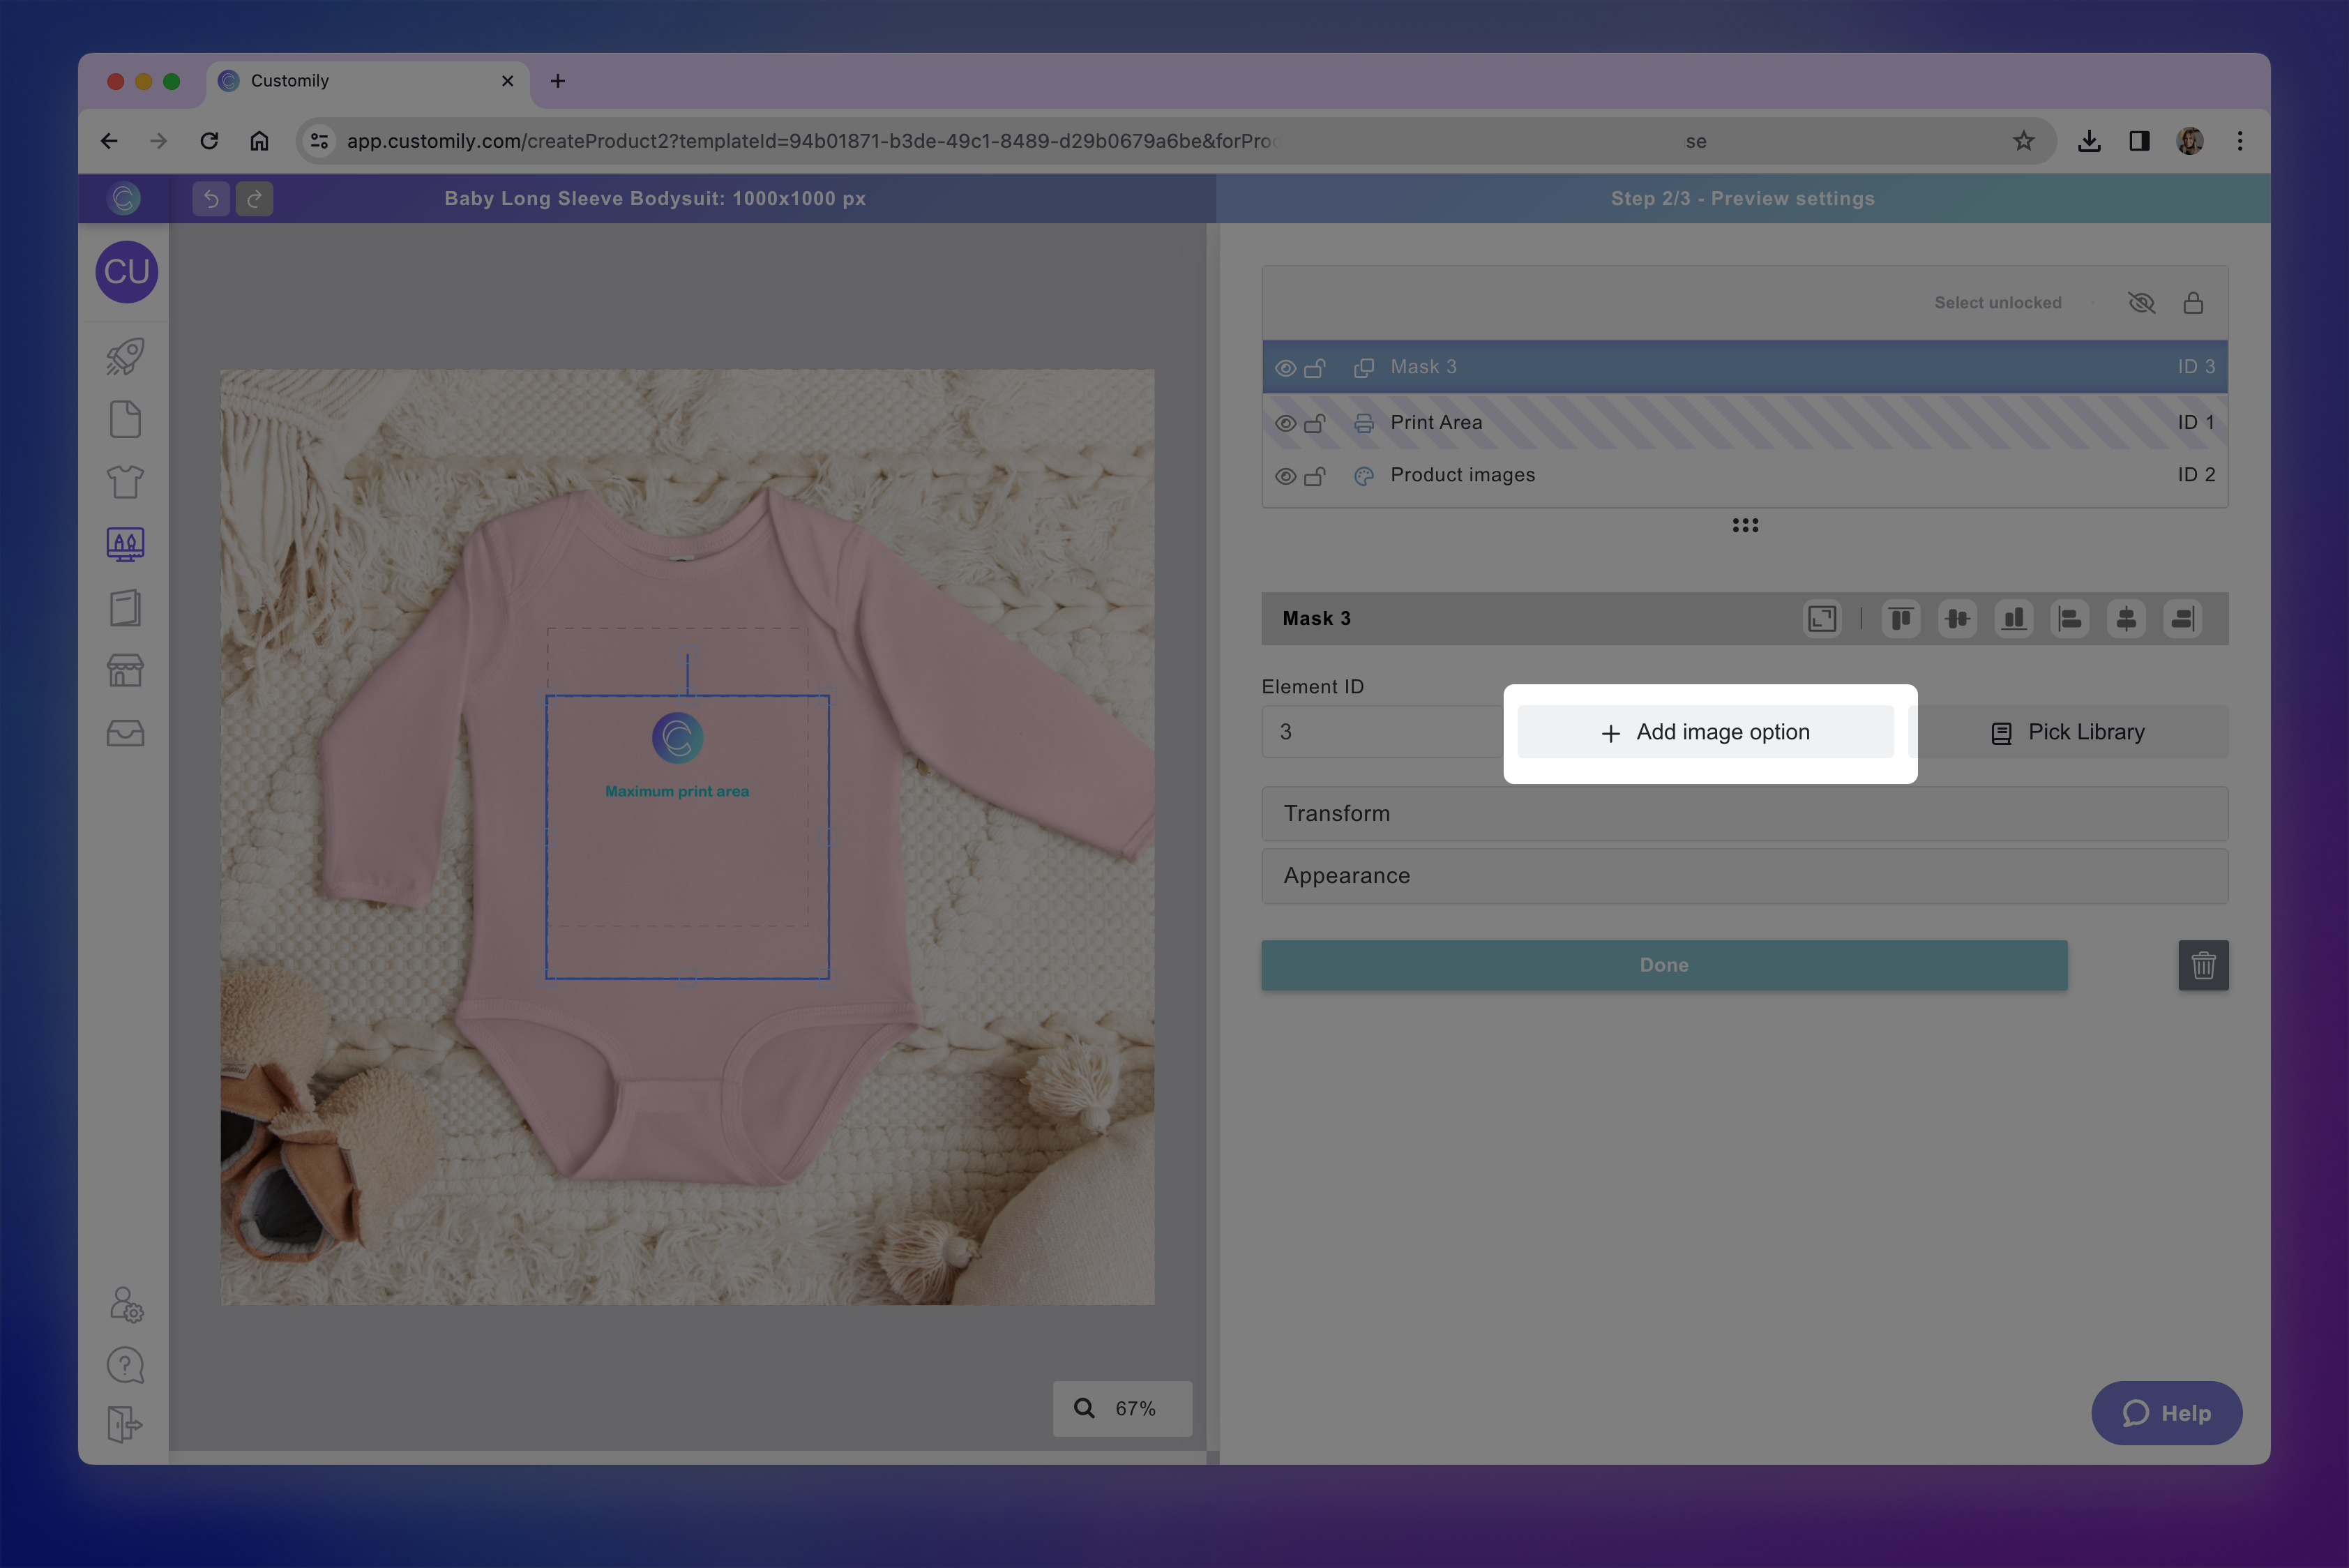
Choose the PNG you will use as a mask, these will be placed over your product images.
Important
If you have multiple product images, make sure the number of mask images matches them exactly — even if you're using the same mask image for all, simply upload copies of the image. Upload the mask images in the same order as your product images to ensure each one is correctly paired.
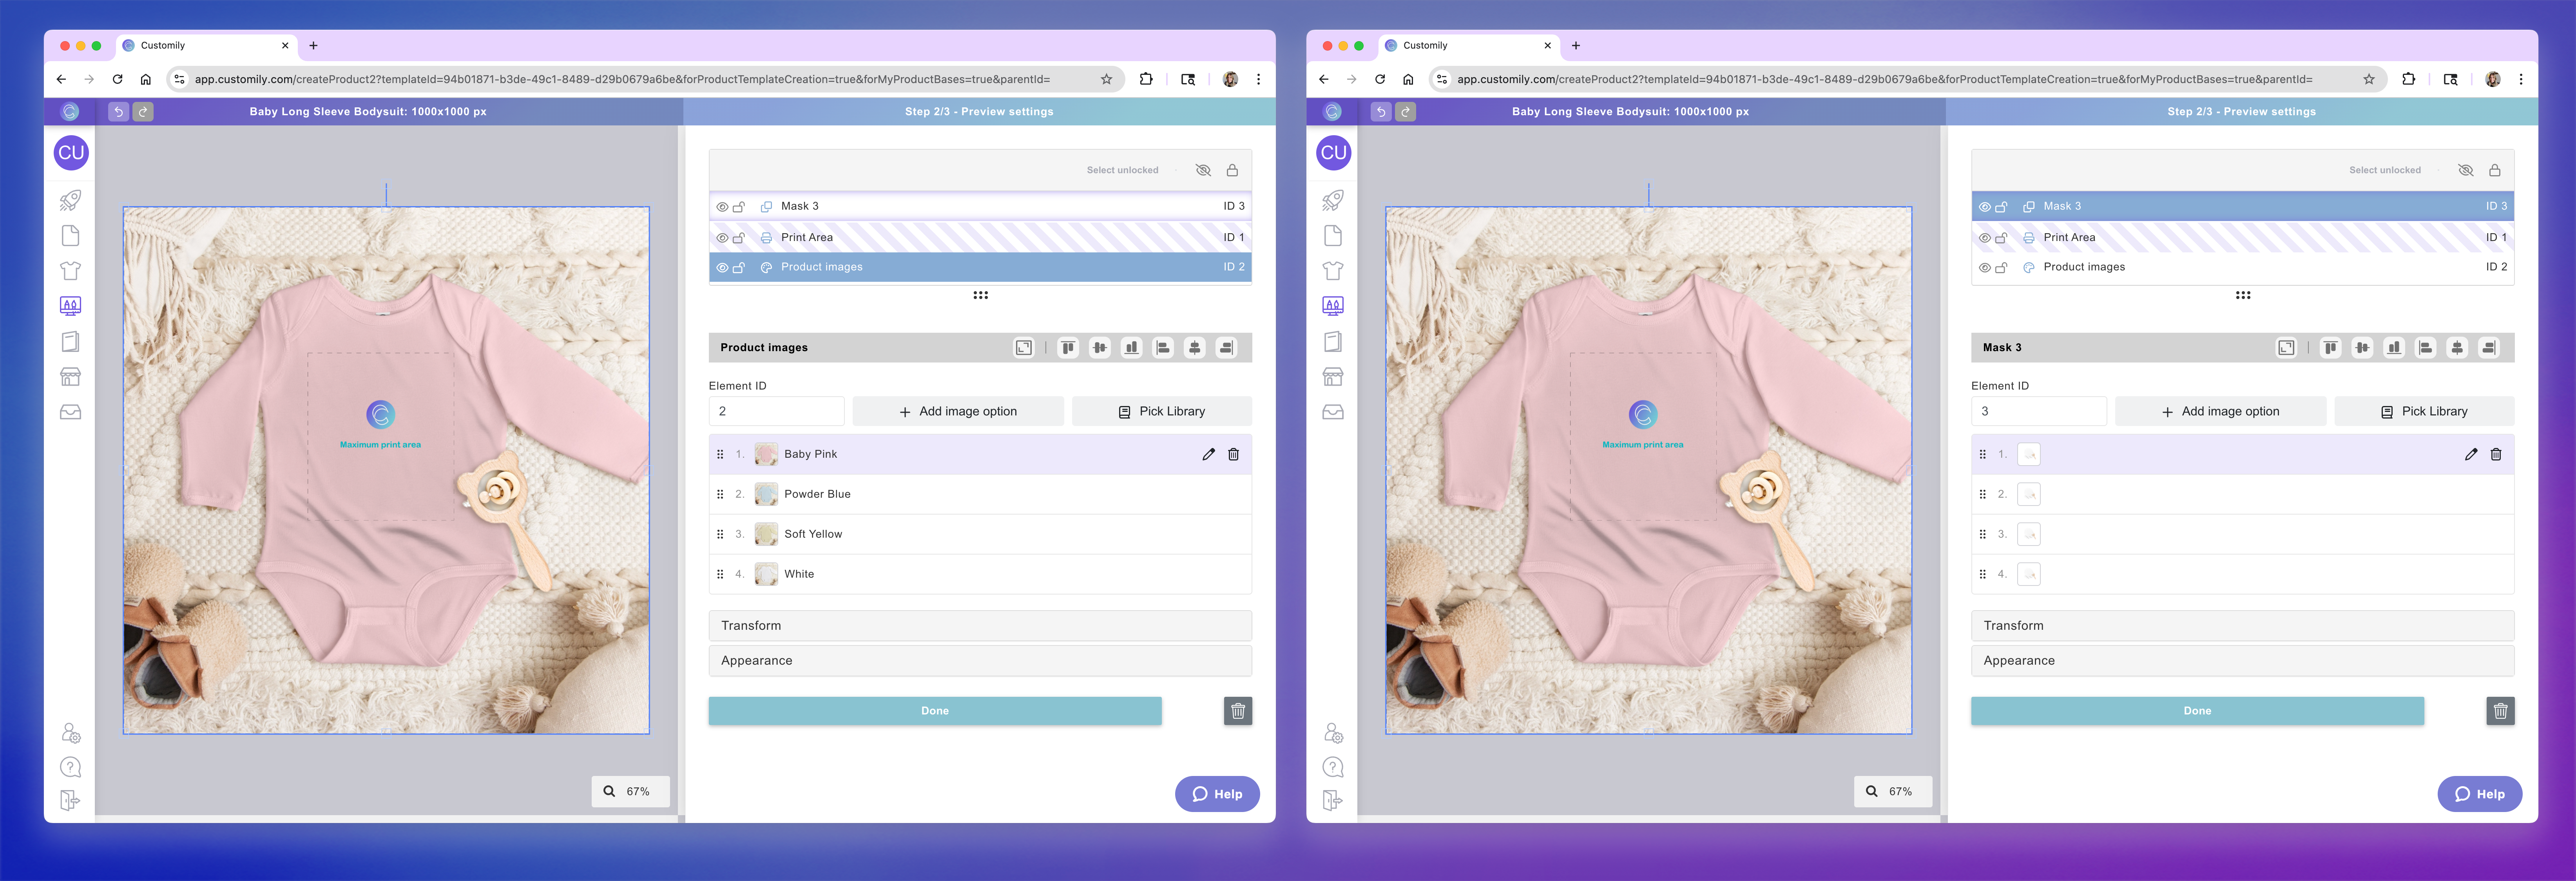
On the left we can see there are 4 product images, so we add 4 masks (shown on the right) even though in this case they are the same PNG.
Position and scale the mask to align it perfectly with your product picture. Make sure you don't alter the order of the layers. The Mask element should always remain on top of the Print Area.
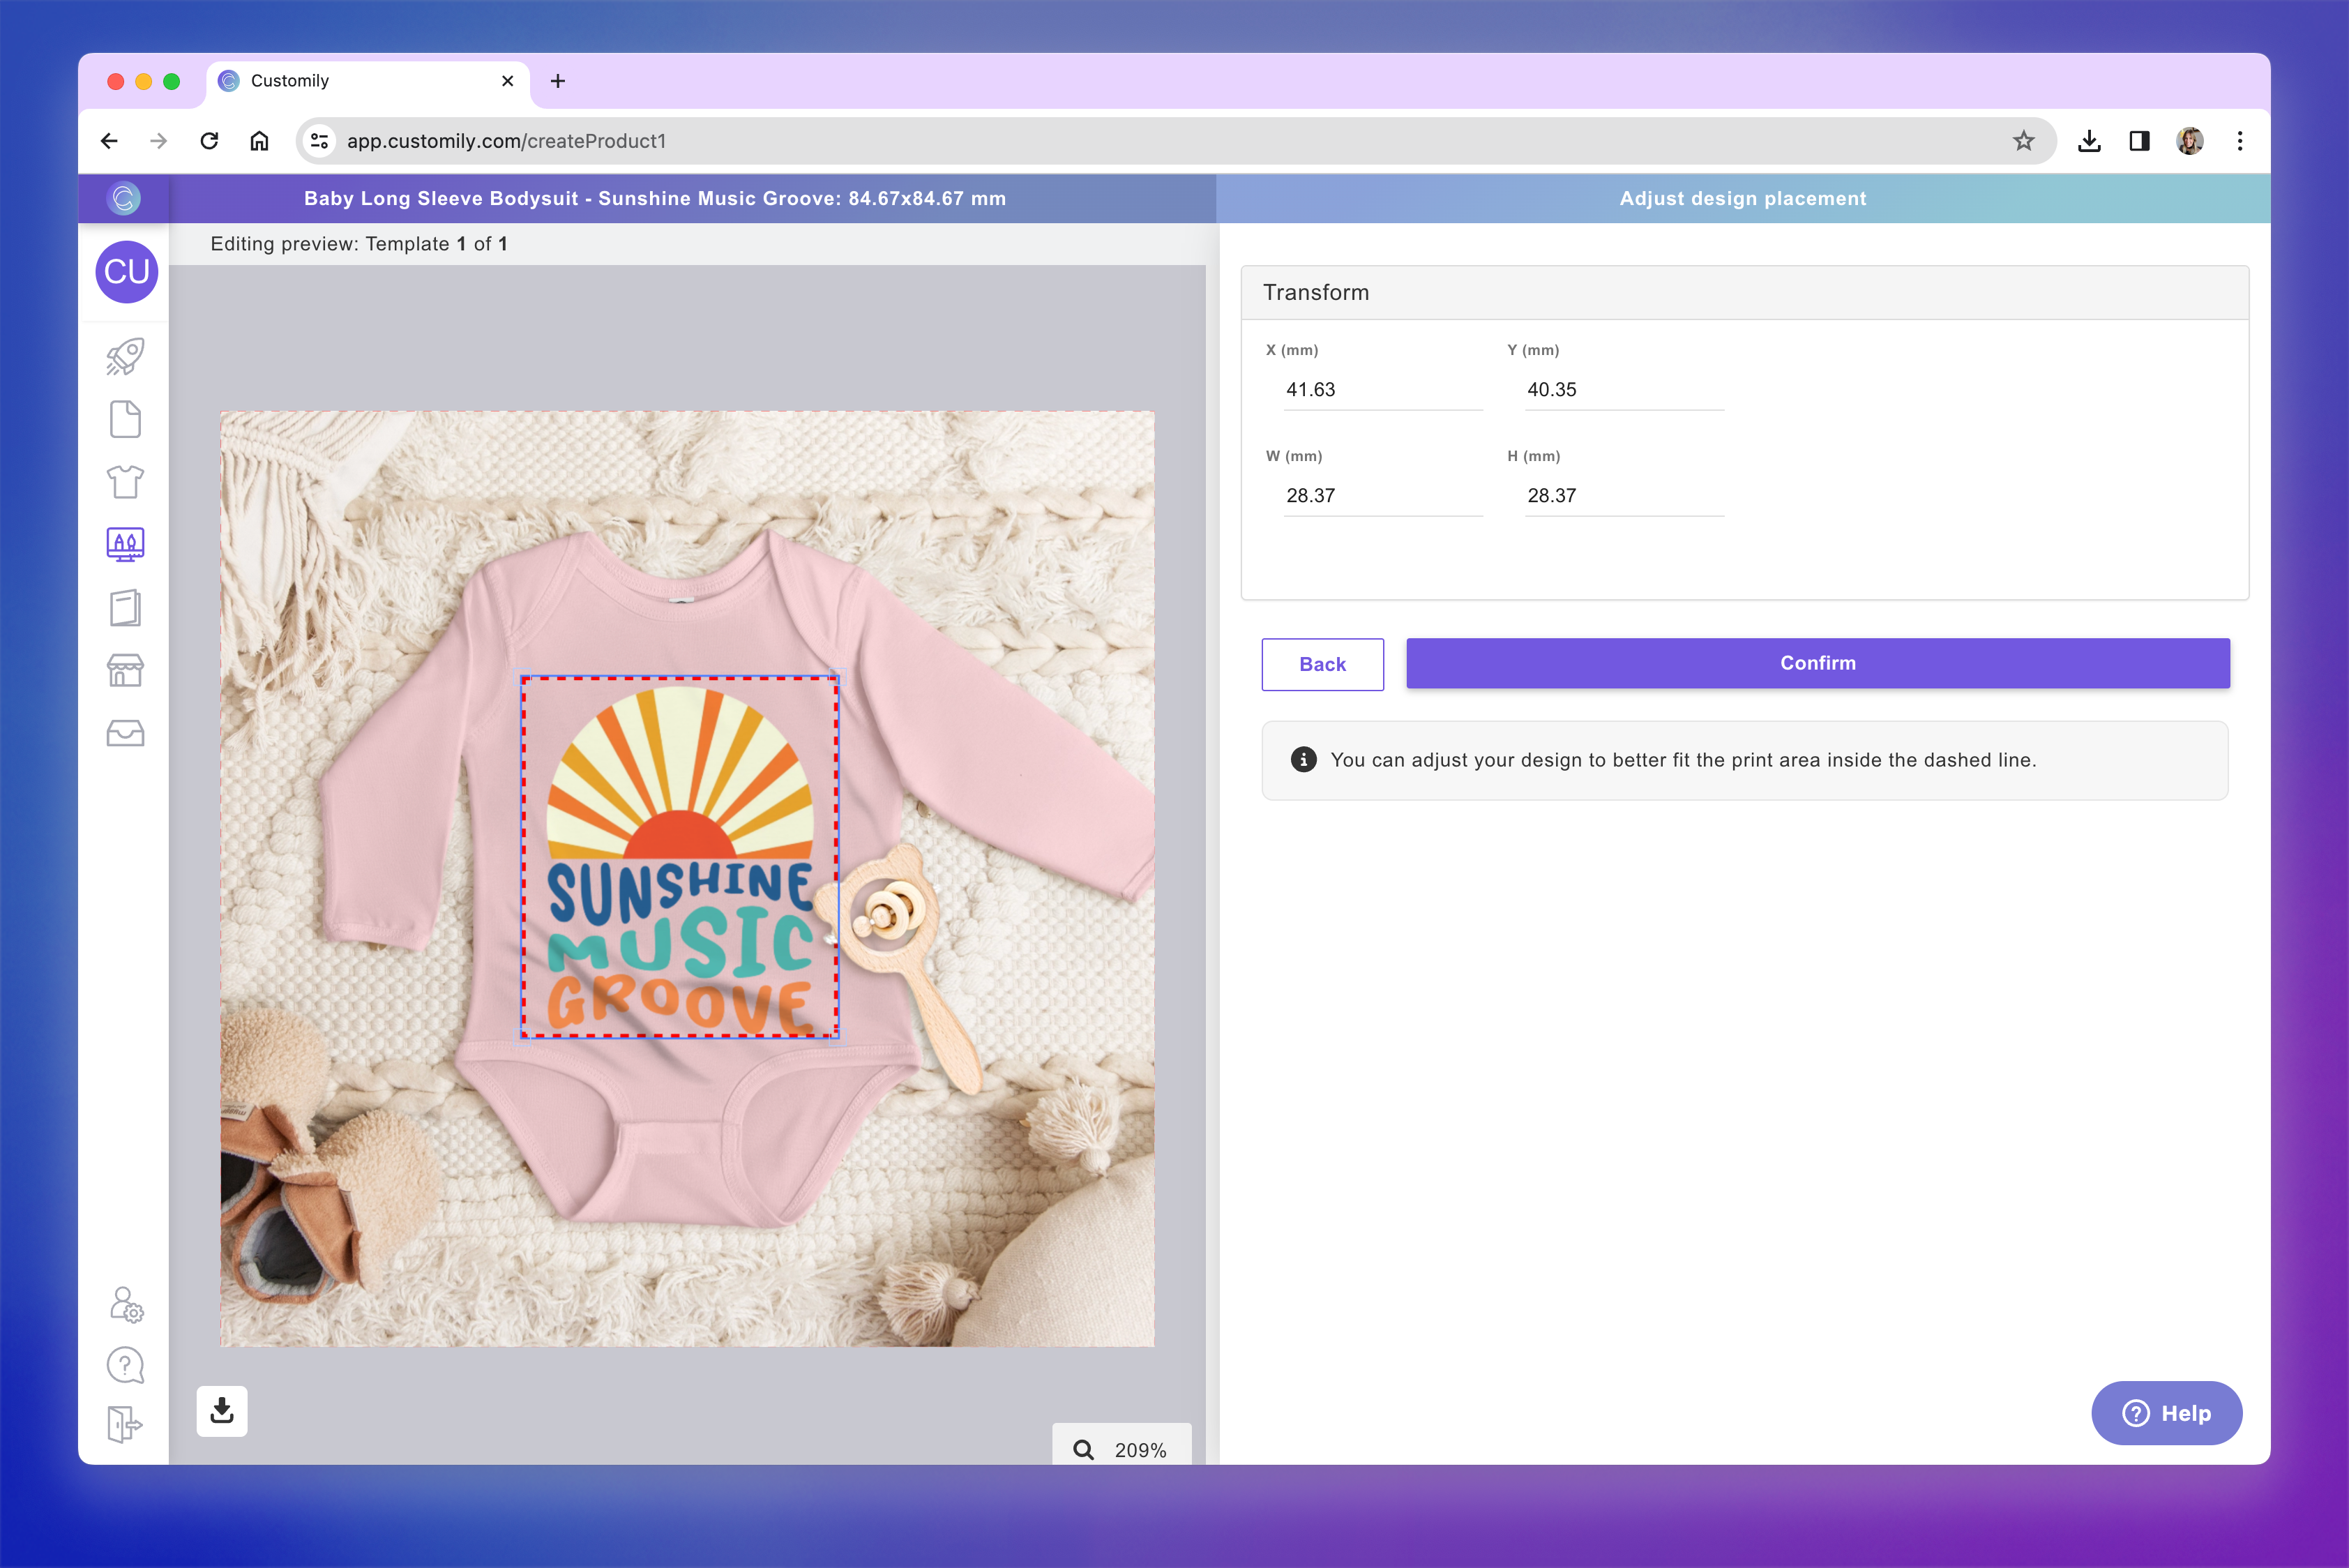
Now when you use this product and place a design on it, the mask will always sit on top of the design — adding depth, shadows, texture or shape. This helps your product preview look more realistic and closer to what the final printed item will look like.