Image placeholder
Last updated: July 15, 2026
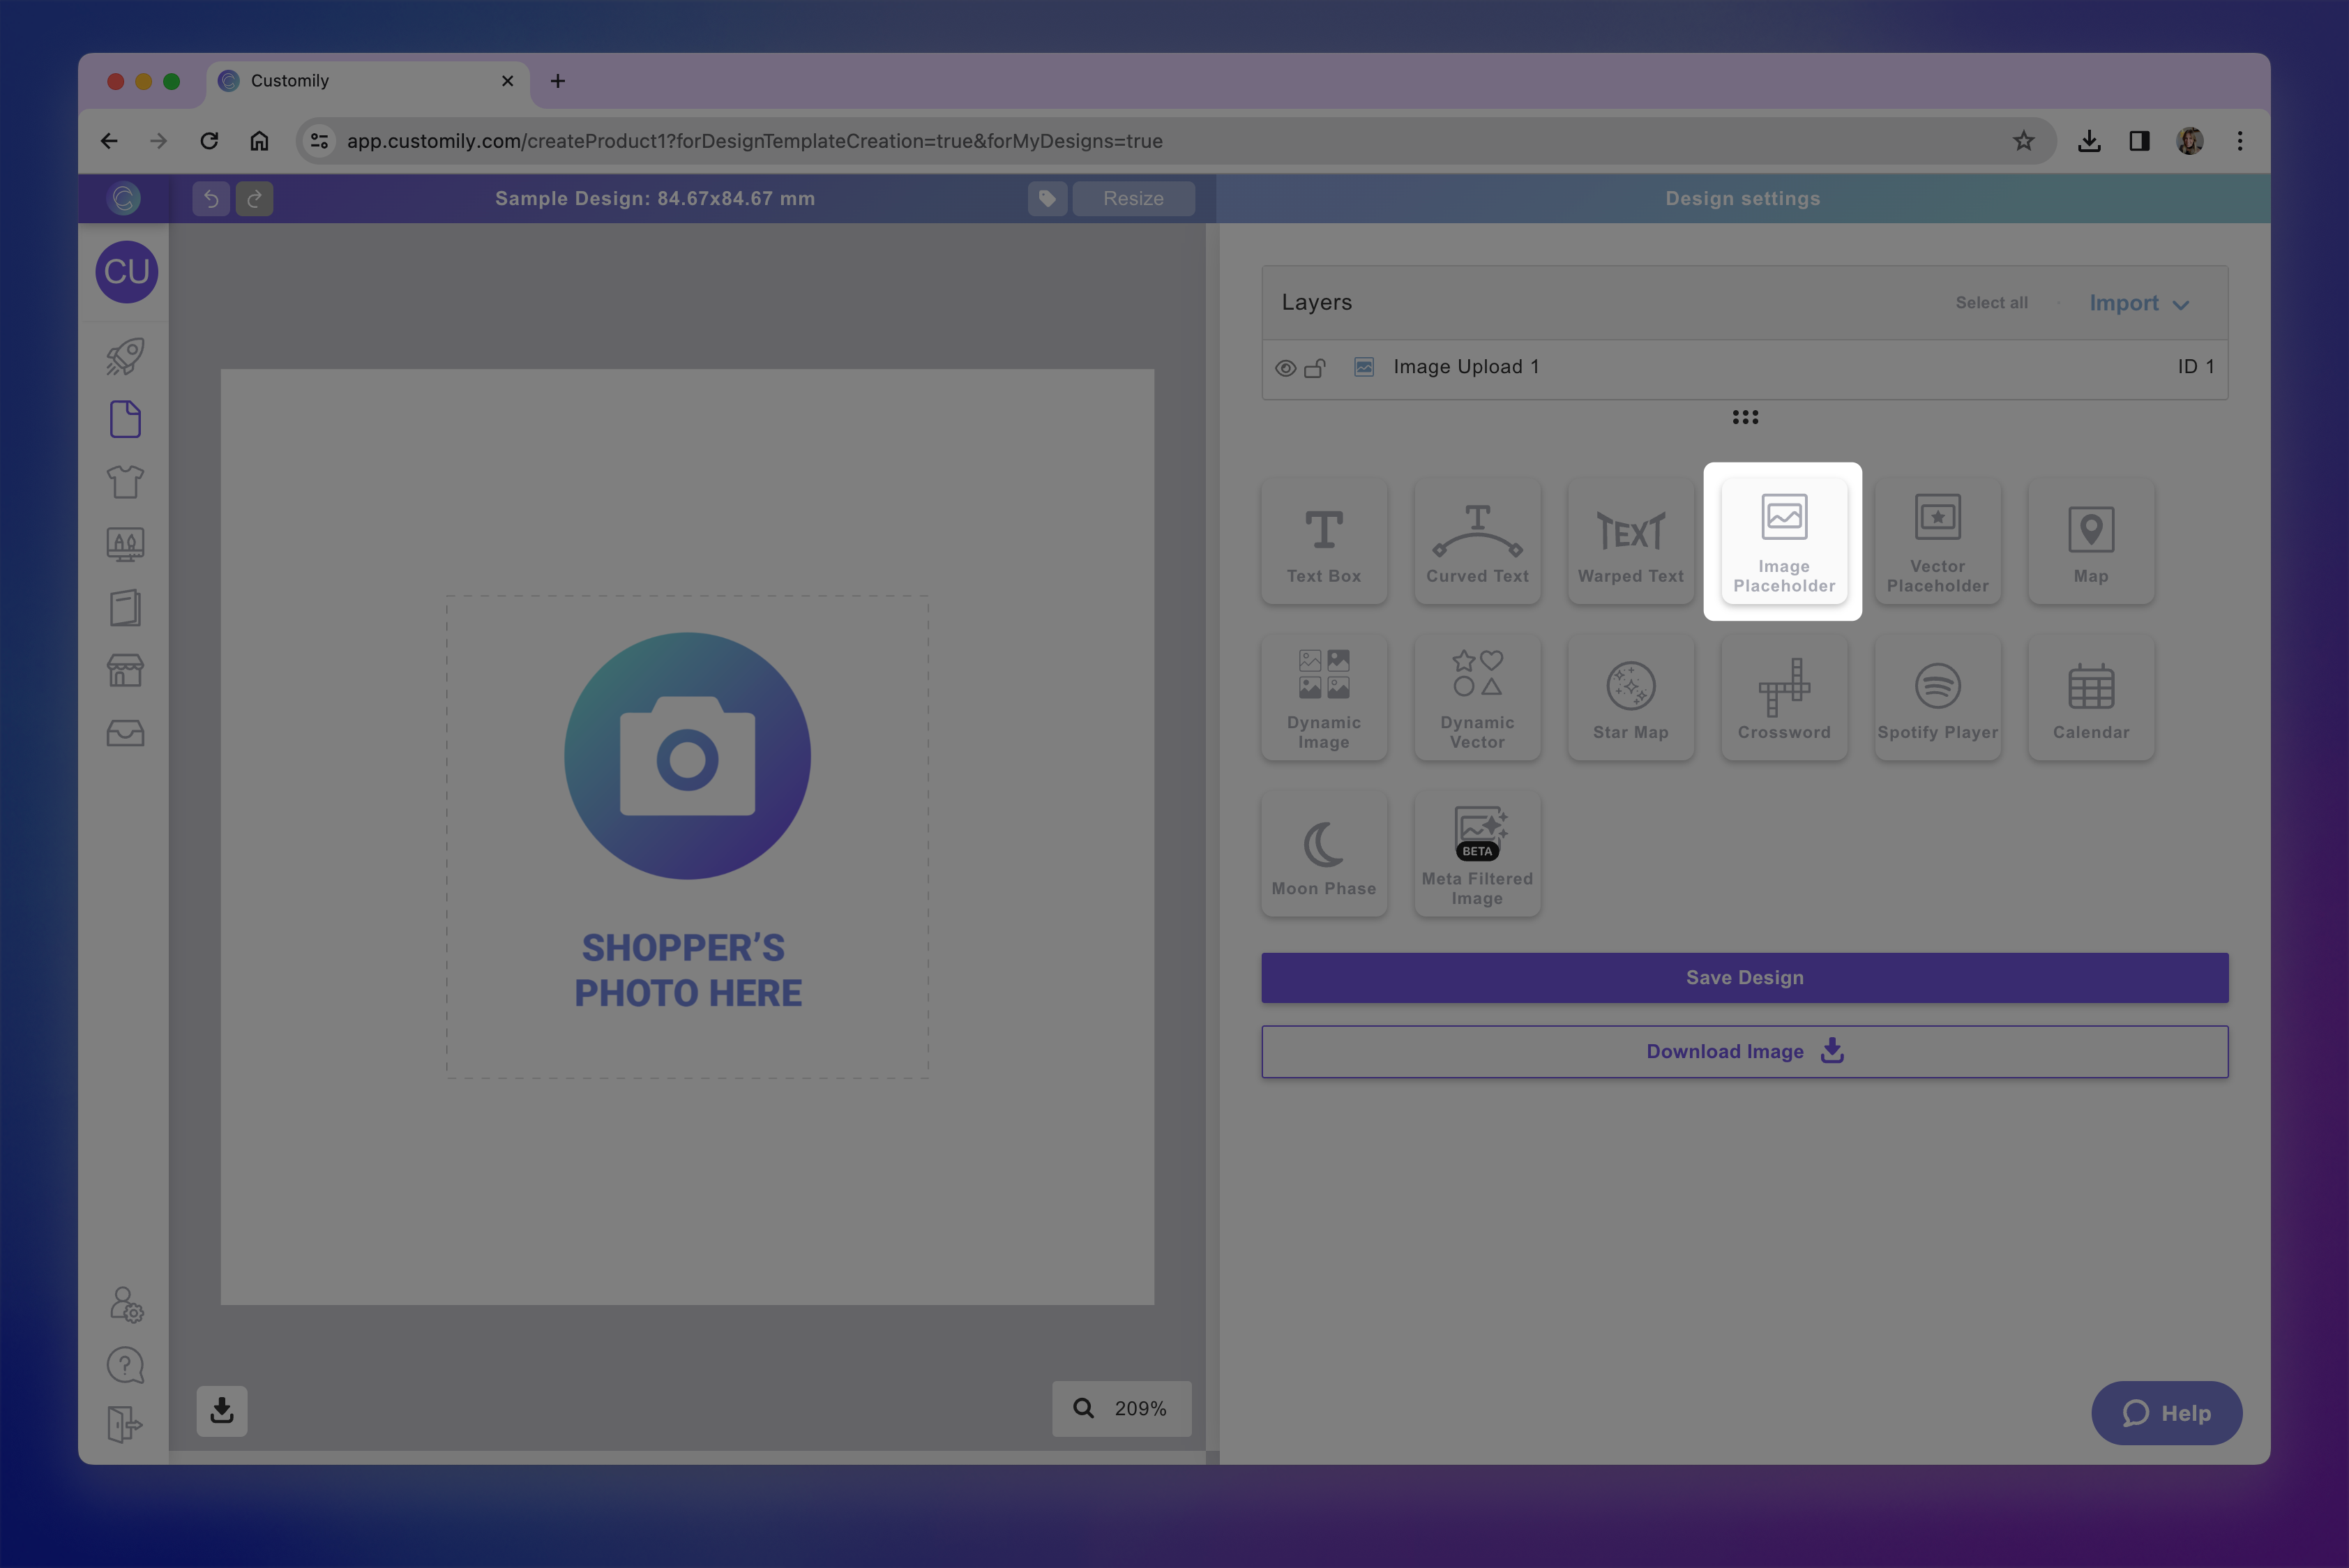
Image placeholders are places where shoppers can upload their own pictures. An image placeholder sets the boundaries where the picture will be uploaded and is represented on the canvas by a dashed line. You can format image placeholders in many ways to give customers further options.
How It Works
When you add an Image placeholder to your design:
Shoppers will be able to upload their own image (JPG, PNG, BMP, HEIC).
The image appears inside the placeholder you set on the design.
You control the shape, position, and size of the placeholder.
Shoppers are able to move the image inside the placeholder.
You can automatically apply filters, remove the background, cut out faces, to whatever image the shopper uploads.
Shoppers can upload one image per placeholder. The file types supported by image placeholders are JPG, PNG, BMP and HEIC. If you want customers to upload other formats, such as PDF or Vectors, check vector placeholders.
In this article:
To add an image placeholder
You can add image placeholders on Designs and on Templates, by clicking the Image Placeholder button.
Each image placeholder you add will have a Name that you can edit, and a Unique Id for you to easily identify it.
Transform the image placeholder
Directly on the canvas or by expanding the Transform toolbox, you can transform the image placeholder:

Change the uploaded image behavior
Changing the behavior of the placeholder will affect what happens when a customer uploads an image. You can configure different behaviors to apply effects and filters to the images:
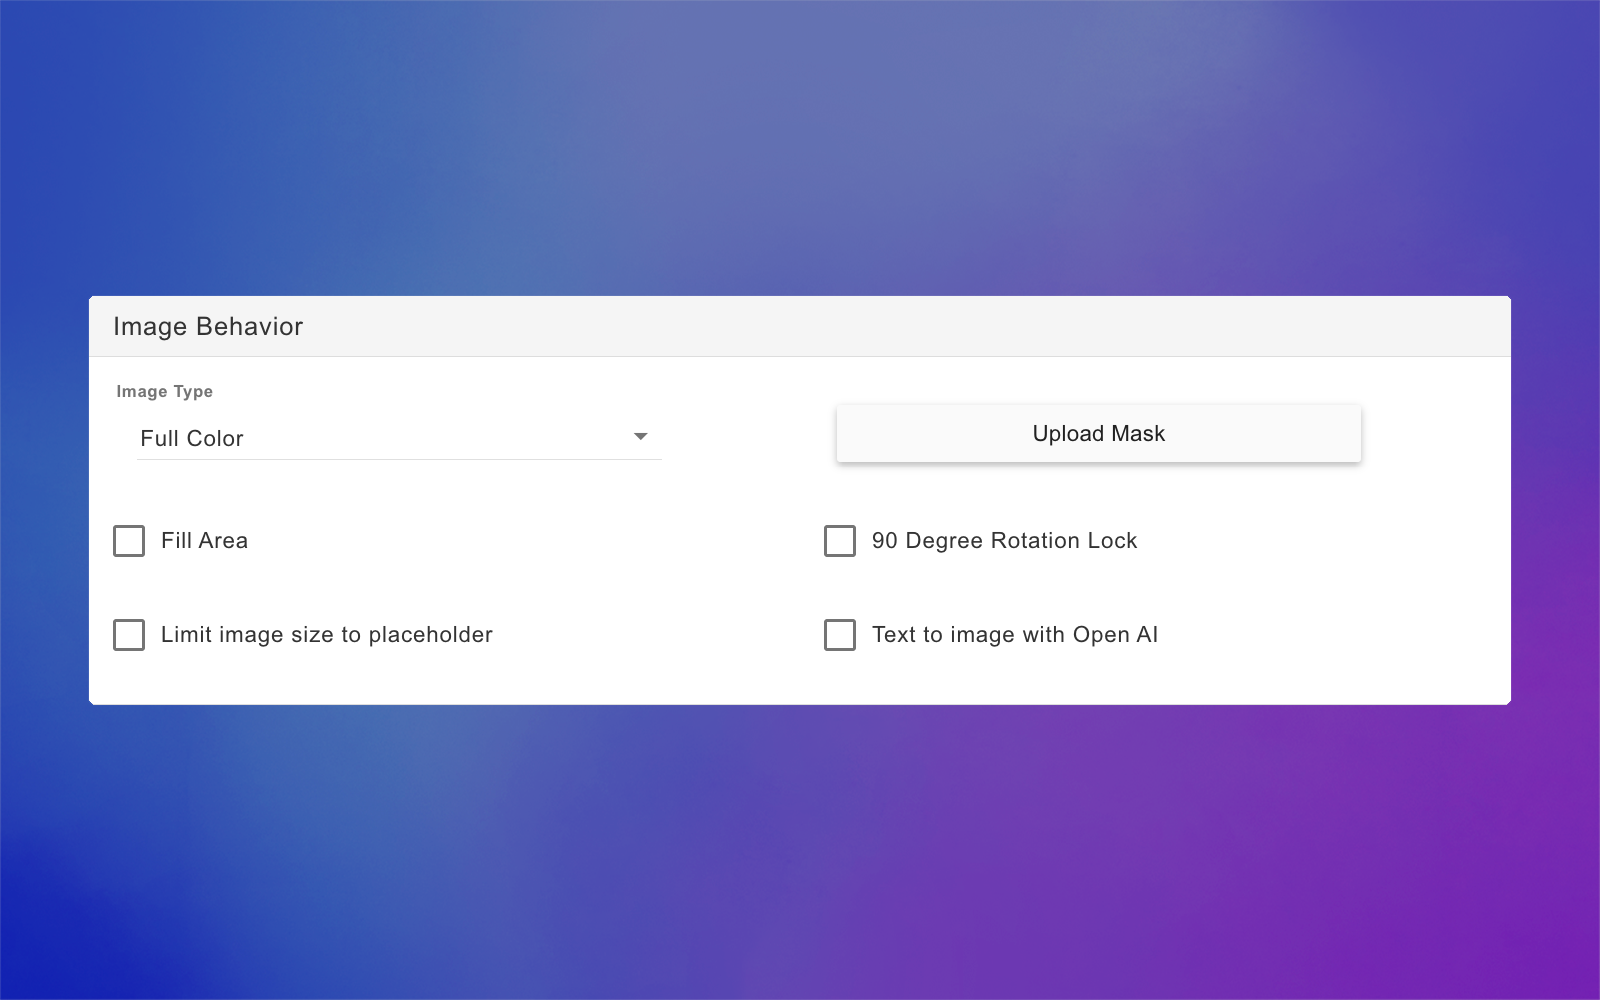
Image type
You can choose between 3 image types to change the color mode of the user-uploaded image. Image types available are:
Full Color
Images in full color mode will remain exactly as the customer uploaded them. This is the standard mode for images.

Grayscale
Images in grayscale mode will be converted to grayscale (black and white)

Single Color (Image Tracing)
Images in single color mode will be traced and converted to vectors with a single color. You can pick what color to use for the vector, and even give multiple color options for customers to choose from.

Select the image placeholder
Expand the Image Behavior toolbox
Select from the dropdown the Image Type
If you selected Single Color, click +Add color option to select a color. Using the swatch you can add colors with Hex, RGB-A, or CMYK-A values (the last 2 depend on the color mode of your design). If you want to add transparency, just slide the Alpha control on the bottom of the chart.

Tip
If you select single image mode, you can add multiple color options to the user-uploaded image. To add more than one color option you can either use a color library or assign multiple color options by clicking +Add color option.

Add a mask
Masks let you give the placeholder a particular shape (other than a square or rectangle!).
Select the image placeholder
Expand the Image Behavior toolbox
Click Upload mask
Select the JPG, PNG or SVG file you want to use as a mask.

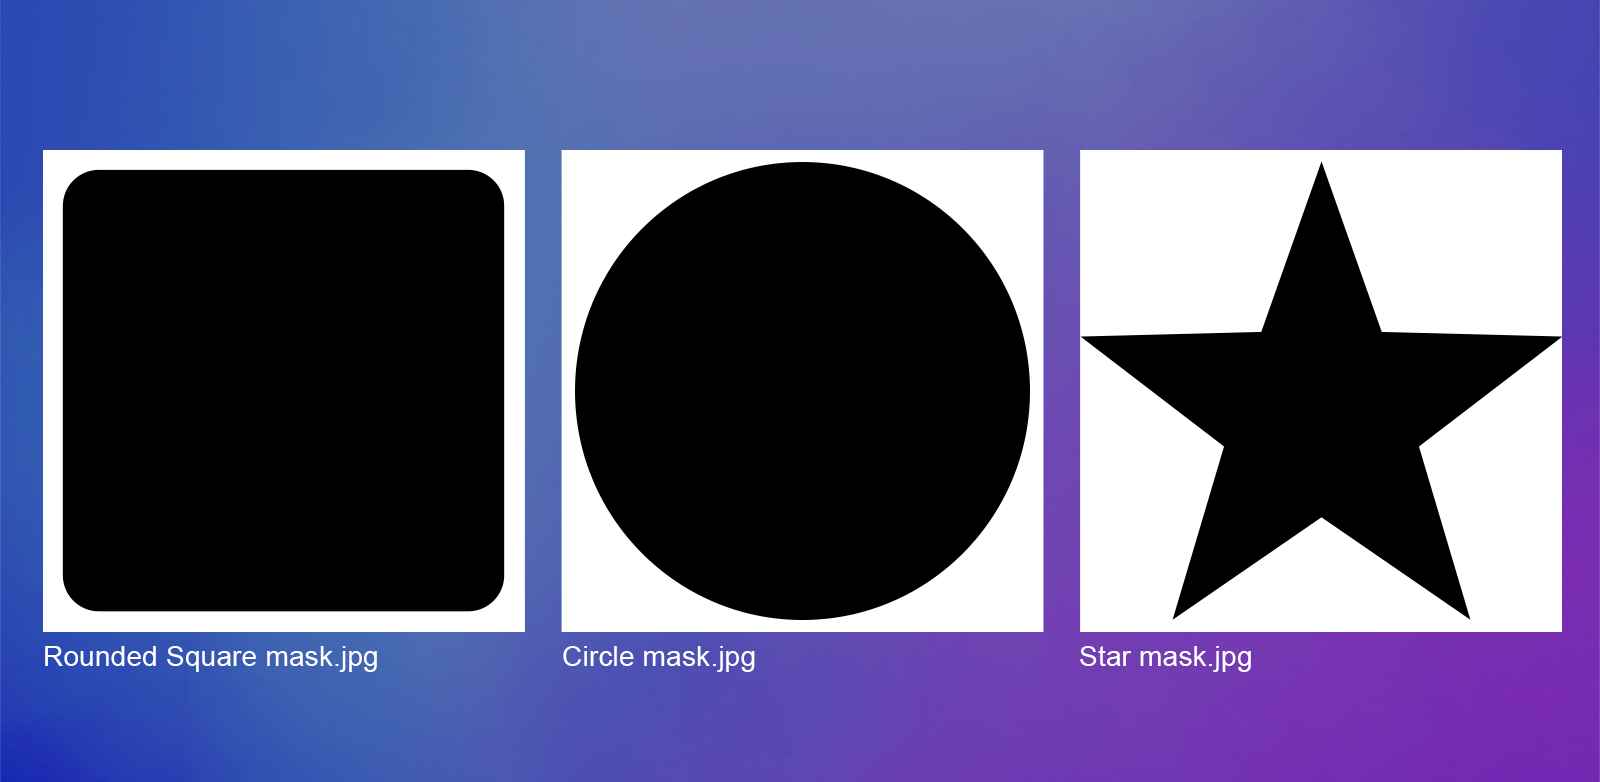
For masks to work, the file needs to be a black-and-white image of the mask, where the shape you want the placeholder to have is black and the background of the image is white, in good quality (we recommend at least 1000x1000 px), since the better the quality the smoother the mask. Here are some examples of masks:
Tip
You can also create masks simply by layering elements on top of each other. This is especially helpful if you want to mask images with a specific design on top of them. To achieve this add a PNG on top of the user-uploaded image using a dynamic image, or a vector using a dynamic vector.
Fit / Fill
By default, customer-uploaded images are set to fit the placeholder. If you'd like the image to cover the entire placeholder, then you should enable the fill checkbox. When images fill the placeholder, they are resized (proportionally) to occupy the entire placeholder.
Select the image placeholder
Expand the Image Behavior toolbox
Check Fill Area option

Limit image size to placeholder area
When this is enabled together with the fill area, shoppers won't be able to leave any blank space in the placeholder. This means their image movement will be constricted, so the placeholder is filled with an image at all times.
Select the image placeholder
Expand the Image Behavior toolbox
Check Fill Area
Check Limit image size to placeholder option

Rotation Lock
By default, customer-uploaded images can be rotated freely inside the placeholder. If you want customers only to be able to rotate it in 90° increments, then you should enable the 90 Degree Rotation Lock checkbox.
Select the image placeholder
Expand the Image Behavior toolbox
Check 90 Degree Rotation Lock option

Create Images from Text Prompts (Text to Image)
With Text to Image, shoppers can generate a brand-new image just by typing a short description. This feature uses AI to turn a prompt—like “a cat flying a rocket through space”—into a unique, automatically generated image.
Great for fun or imaginative products where the shopper doesn’t have a photo to upload, or wants something totally custom and unexpected.
Important
The Text to image with OpenAI is a 3rd party integration. You will need to have an account to be able to use it. For information on their costs visit openai.com.
Select the image placeholder
Expand the Image Behavior toolbox
Check Text to image with OpenAI
Enter the prompt you want to use as the default (shoppers will then be able to add their own prompt)

Apply AI Filters and Effects to Uploaded Images
Customily lets you enhance shopper-uploaded photos using powerful AI filters and effects.
These effects can clean up, restyle, or completely transform uploaded images with just a few clicks — from background removal and face cutouts to AI-generated artistic styles like cartoon, watercolor, 3D, or Renaissance painting.
All AI effects are applied automatically when shoppers upload an image.
Select the image placeholder
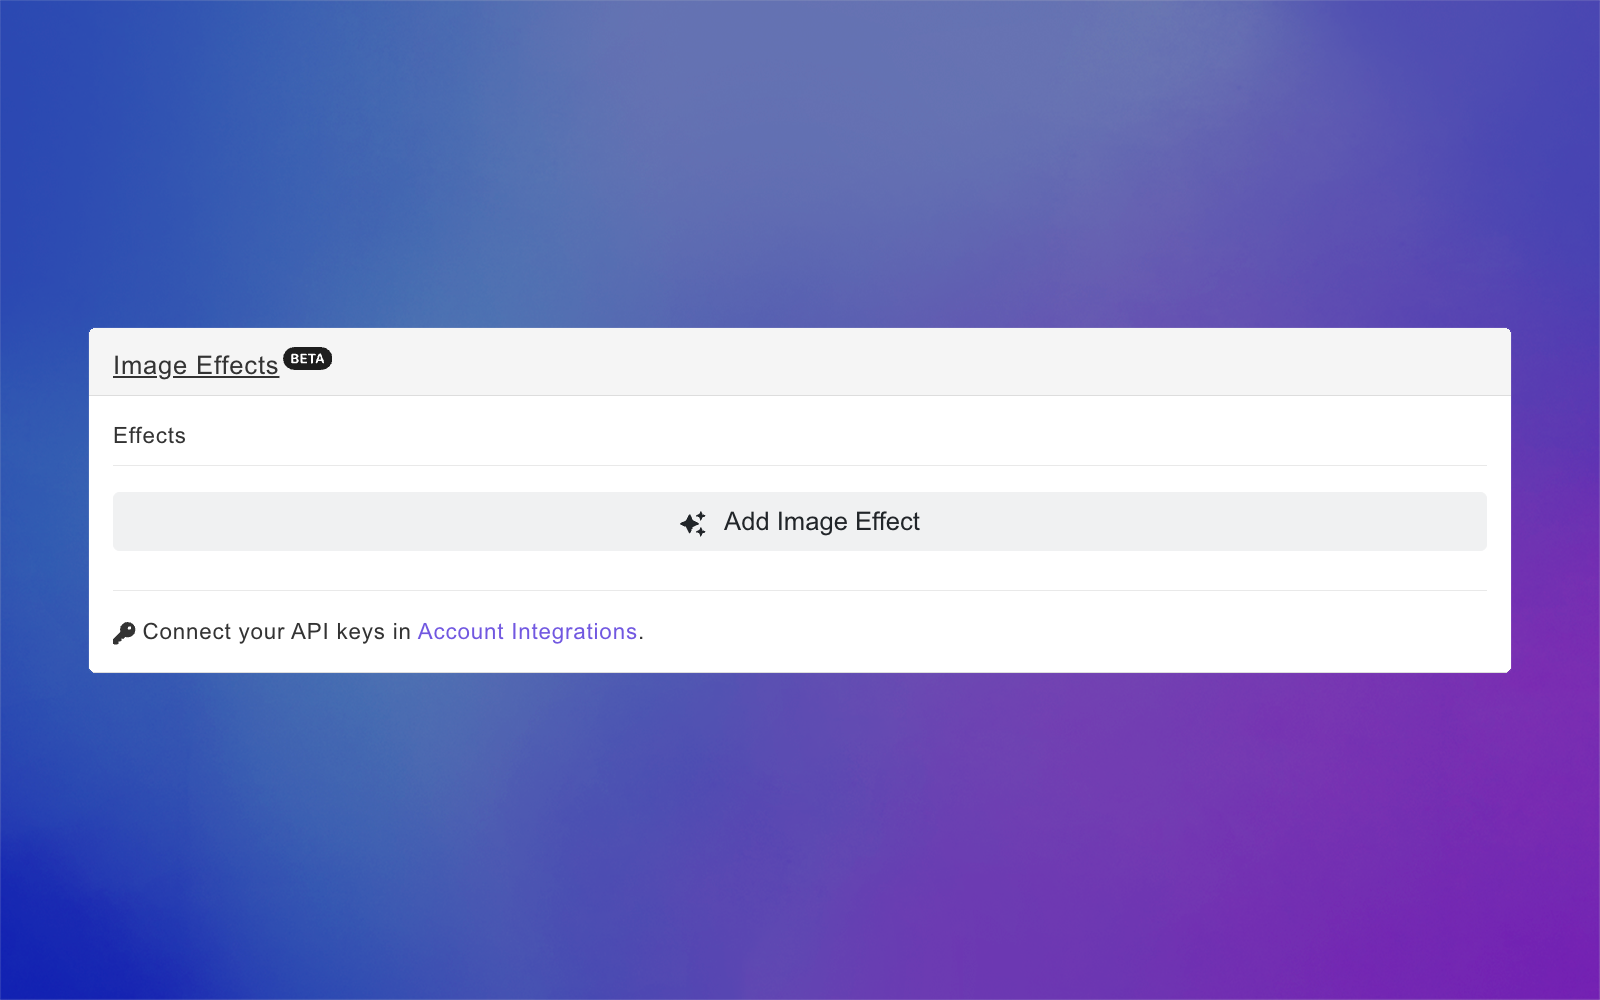
Expand the Image Effects toolbox
Click Add Image Effect
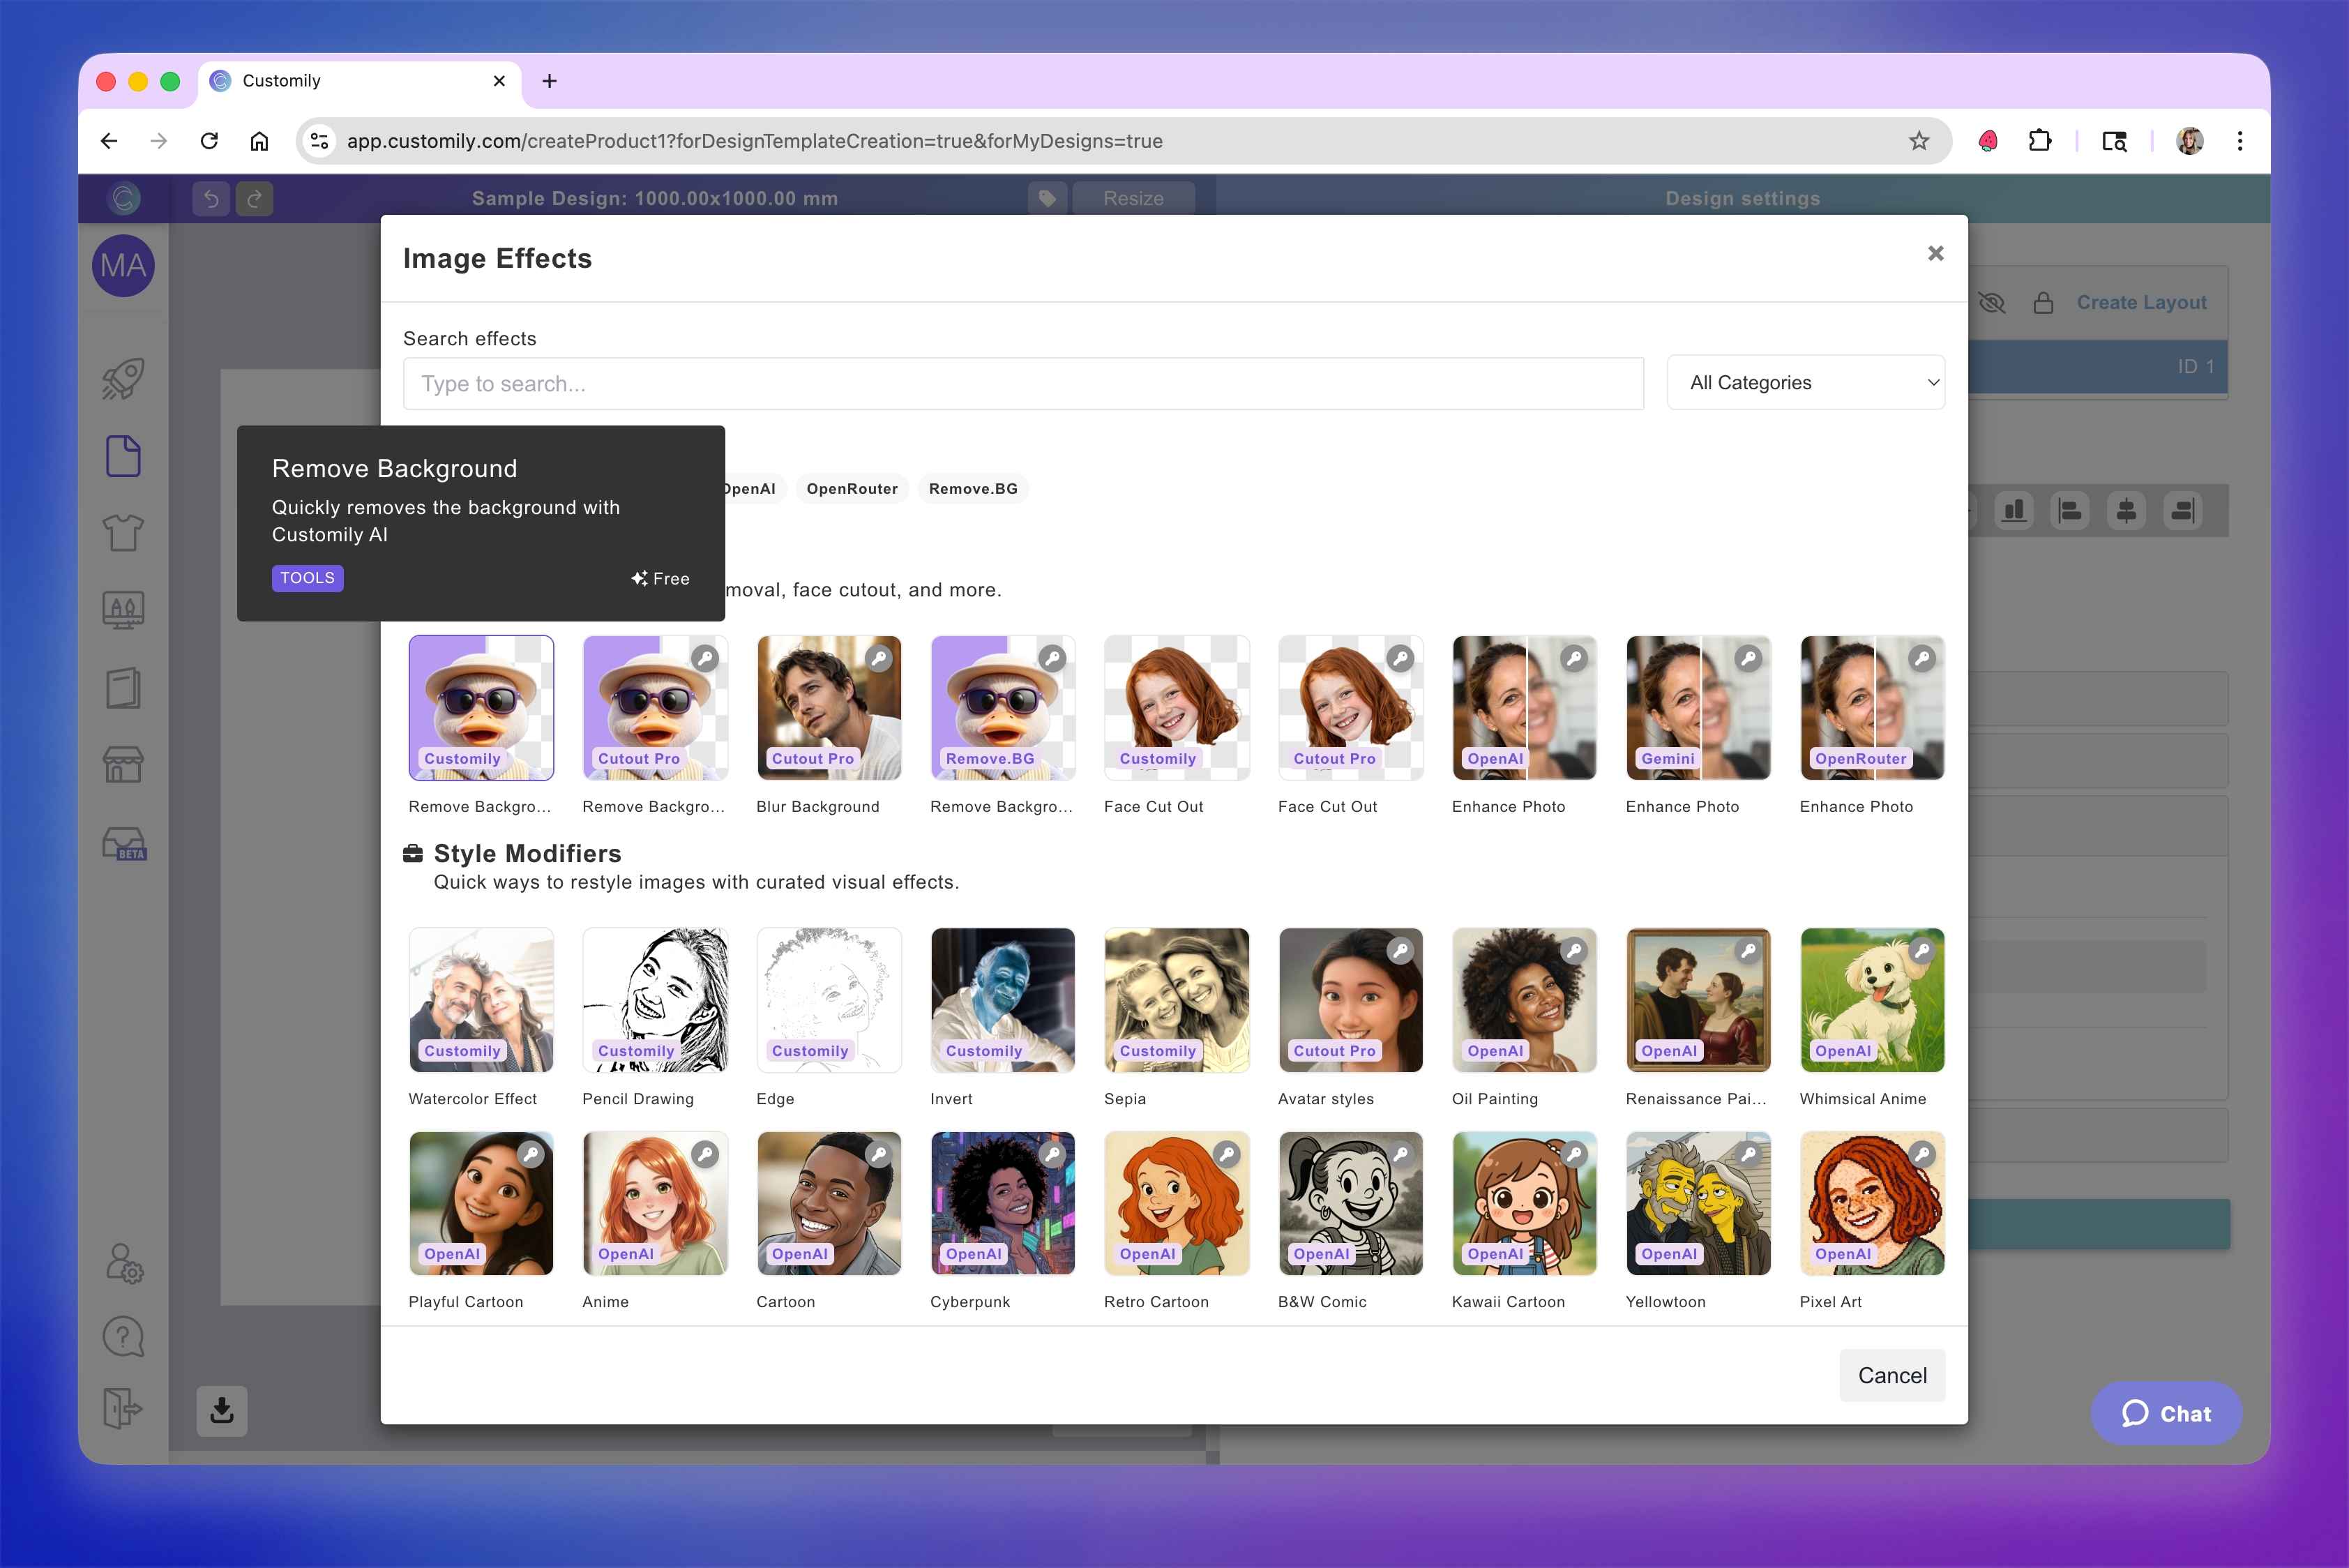
Browse or search for an effect
Click an effect to apply
The applied effect will be displayed in the effects toolbox. You can apply more than one effect, stack and reorder them for layered results.
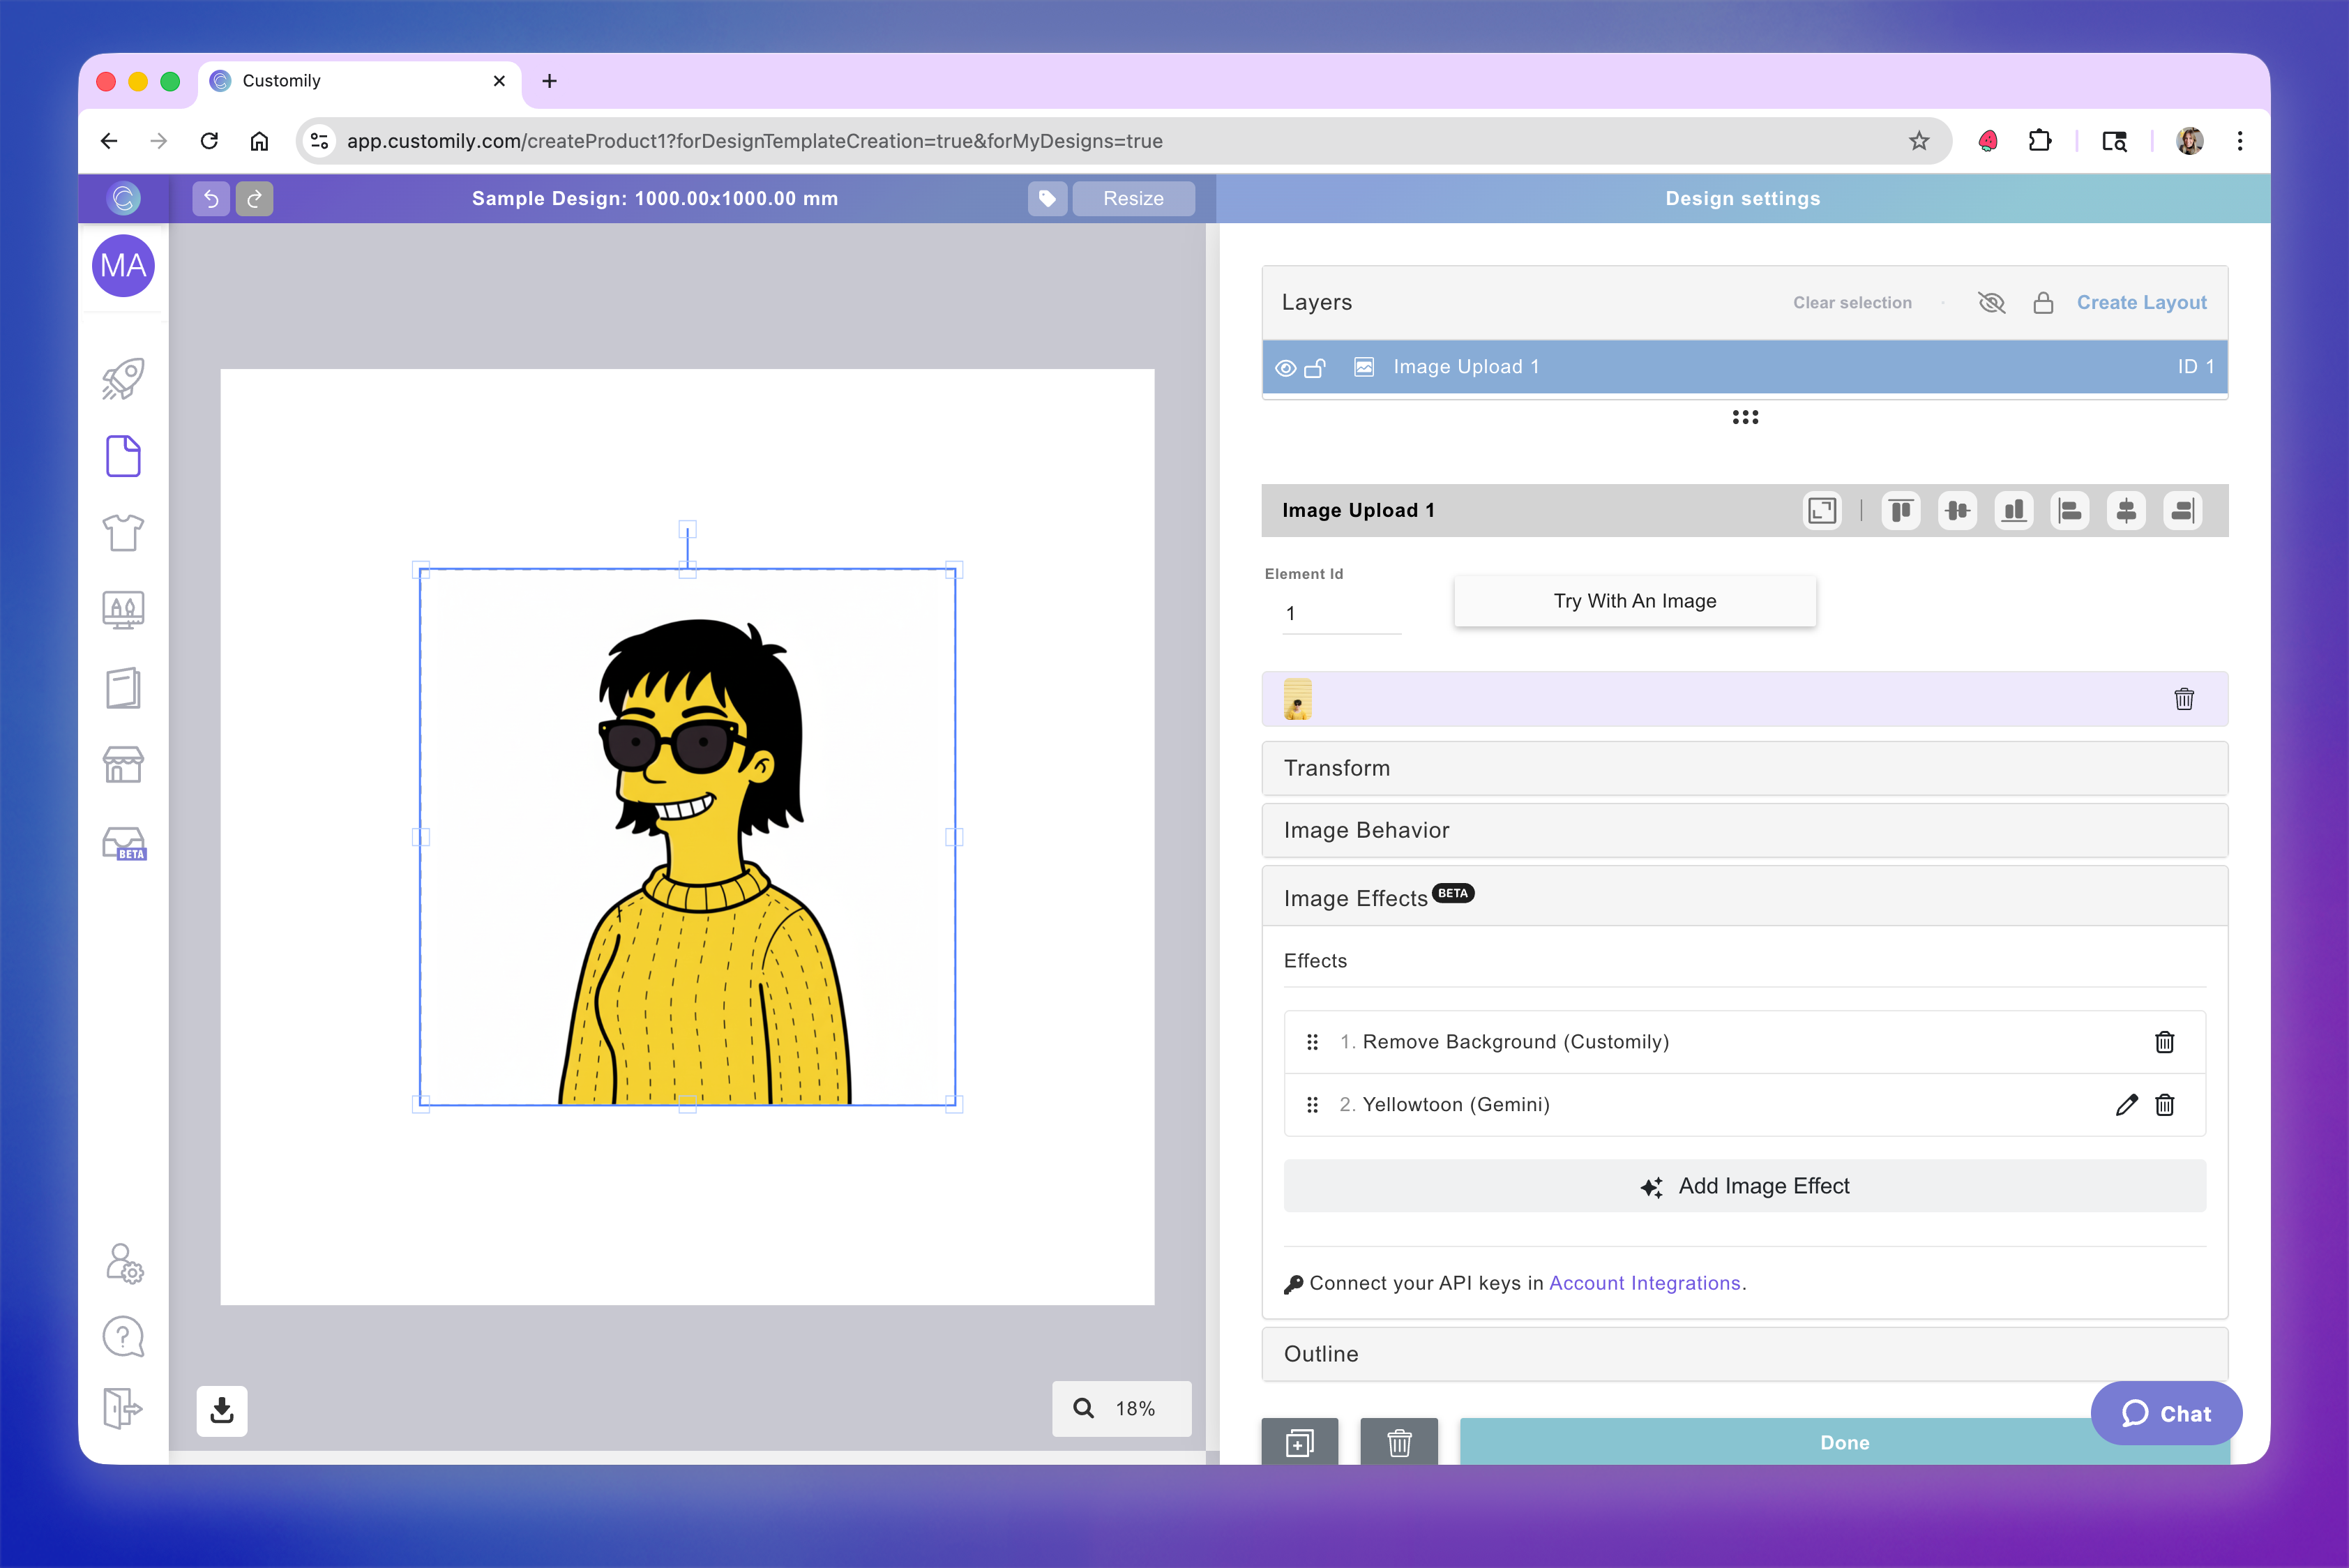
Depending on the effect you chose, there are different parameters you can configure. Click on the pencil to fine tune the effect if needed.
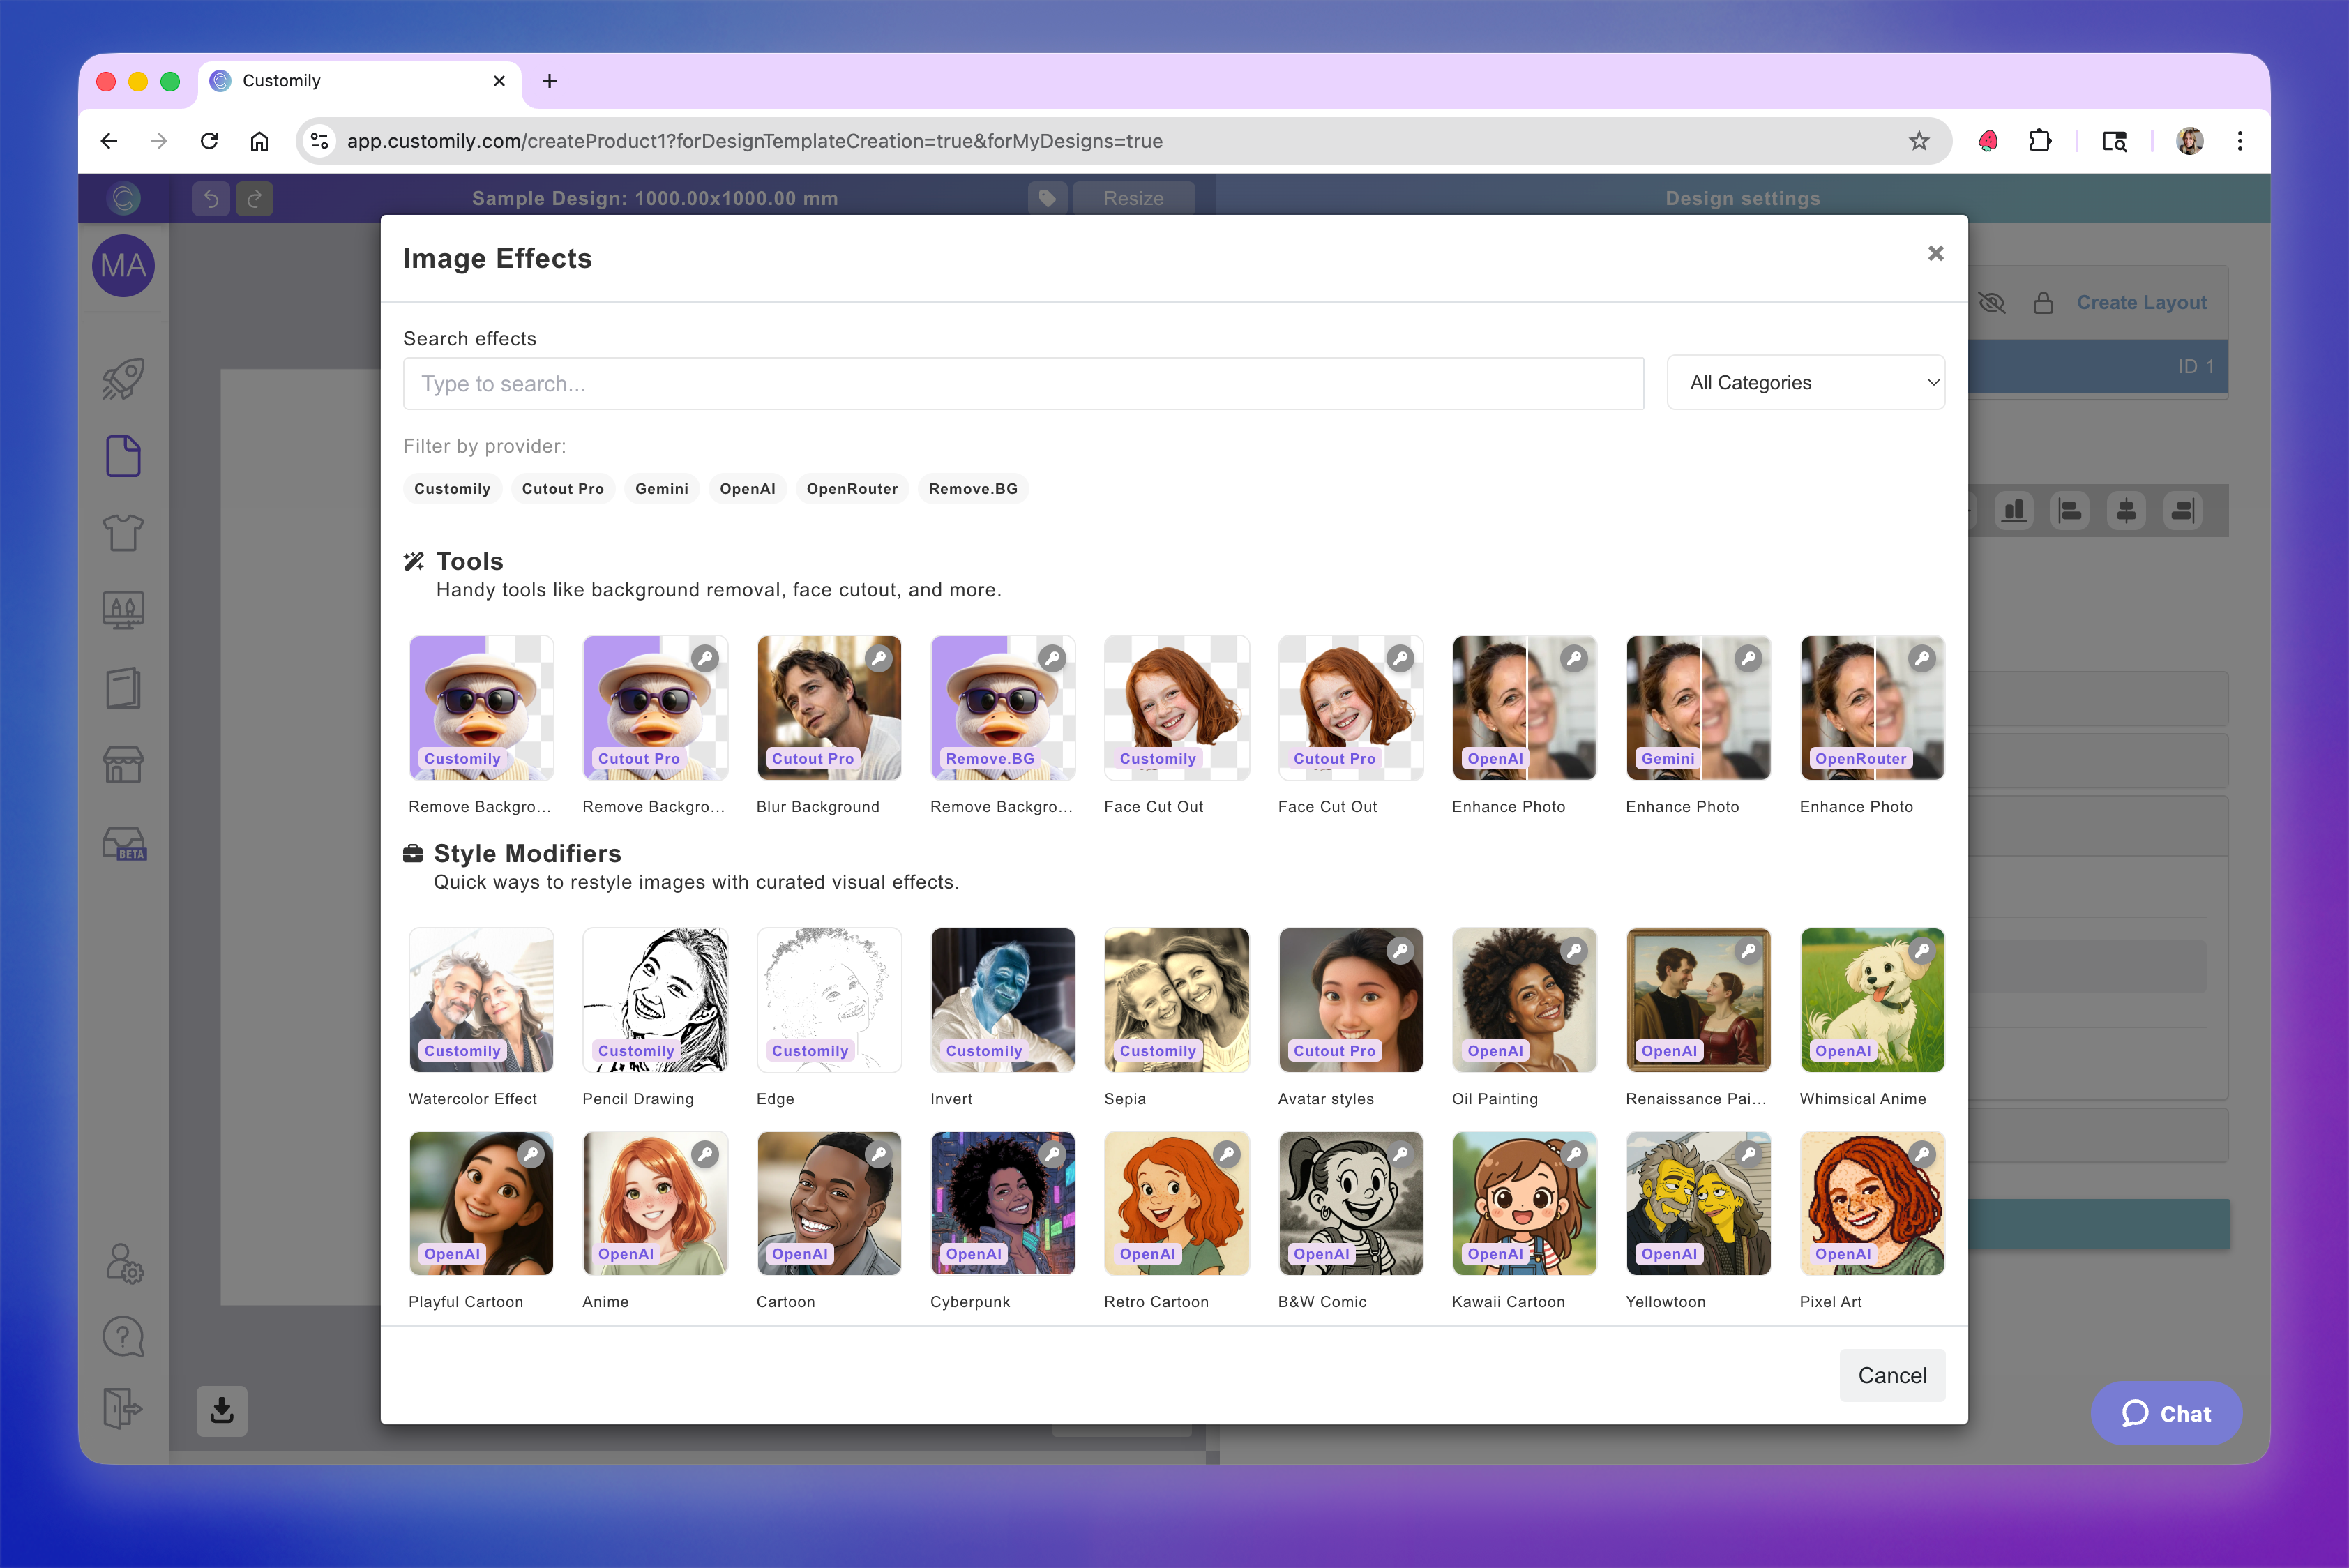
Customily offers a wide variety of image effects — from quick tools to advanced AI-powered filters. To make it easier to explore them, effects are organized into three main categories: tools, style modifiers, custom prompts. You can also search or filter them by provider (Customily, Gemini, OpenAI, OpenRouter), and see which ones are free or require a third-party API connection.
Effect Categories
🧰 Tools
Handy tools like background removal, face cutout, and more.
Remove Background
Blur Background
Face Cut Out
Enhance Photo Quality
🪄 Style Modifiers
Restyle images with visual filters such as:
Pencil Drawing
Watercolor
Sepia / Invert
Anime, Cartoon, Cyberpunk, 3D Art, Retro, Whimsical, Renaissance and more
💬 Custom Prompts
For full creative control, use a custom prompt to describe the exact look you want.
Example:
“Turn the photo into a cute 3D cartoon with bright colors and soft lighting.”
Choose your AI provider (Gemini, OpenAI, or OpenRouter) for generation.
Learn more about all effects and filters available, how to enable them and how to combine them here.
Add an outline to the uploaded image
You can add an outline (stroke) around the shopper’s uploaded image for extra definition and visual impact. This is especially useful when paired with features like background removal or face cutout, since the outline will follow the shape of whatever remains—creating clean, eye-catching effects.
Select the image placeholder
Expand the Advanced toolbox
Define:
Outline Width
Outline Color
Test how the shopper-uploaded image will look
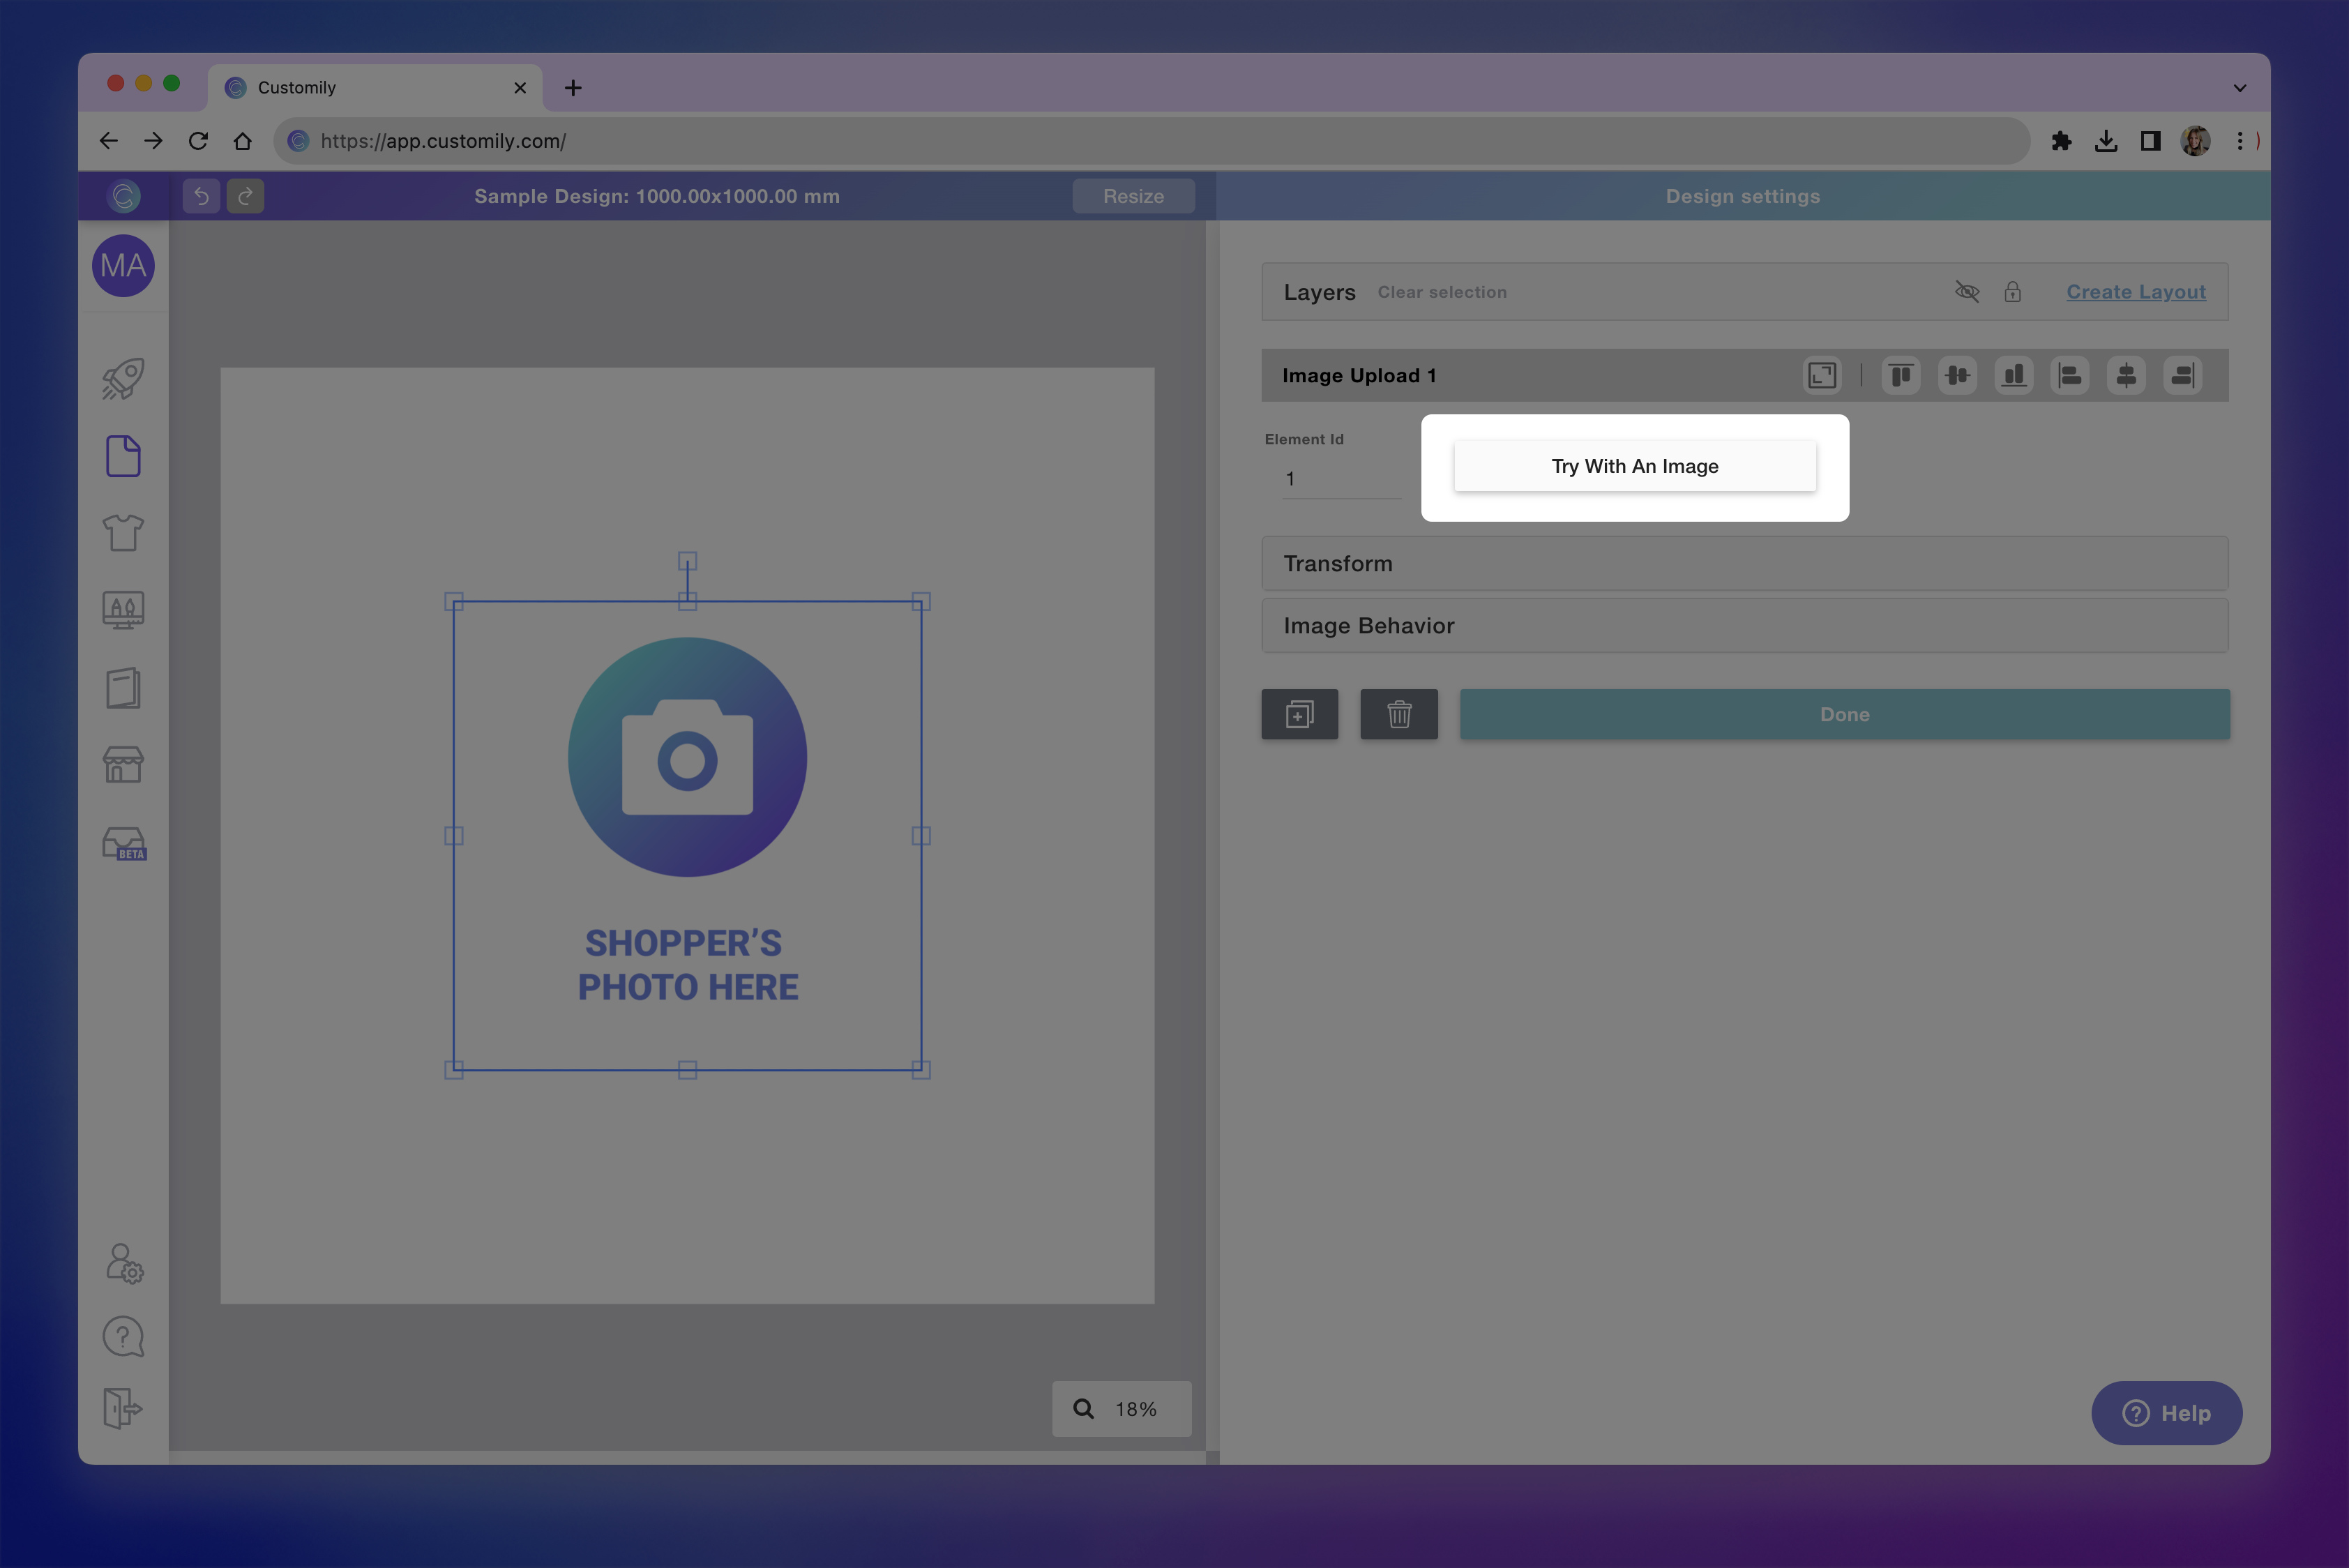
At any moment while configuring your image placeholder, you can test how it will look on your design, by clicking Try with an image button.
This is just for you to test, whatever image you upload there won't be saved, and won't be visible to your customers ever.
Tip
Once you upload an image, you can also move it around and resize it as your customers would. To do that, double-click the image placeholder on the workspace until its boundaries turn red, and only the uploaded image is highlighted in blue. Then, you will be "acting as the shopper" who will be able to move the image around inside the placeholder. To exit this mode, click anywhere outside the placeholder.
