Add personalization to an existing product using your own product
Last updated: October 8, 2026
If you’ve already created a product listing in Shopify—with its image gallery, description, and variants—you can add personalization yo it without rebuilding the listing.
This guide shows you how to use a Product Base and a Design to add personalization to your own products—products that don’t use a Print on Demand (POD) provider. Customily automatically creates the Template and Option Set needed to power the personalization.
Note
Using your own Product Base doesn’t connect the product to automatic POD fulfillment. Customily generates the personalized print files, and you or your production partner handle production and shipping.
Before you start
Have your product listing already created in Shopify.
You’ll need a Product Base to define your product’s print areas, printing requirements, variants, and preview images. You can use one you’ve already created or make one during setup using AI and your Shopify listing. See 📄 How to create a Product Baseto prepare one beforehand, or Create a Product Base from an existing product using AI to create one during setup.
If you want to use your own Design, create it before starting this flow. See 📄 How to create a new Designfor instructions. You can also choose a ready-made Design from Customily’s Design Library.
1. Choose the product from your store
Open the flow to add personalization to an existing product, then select the Shopify listing you want to use.
Go to Home and click Set Up Personalization for Existing Product.
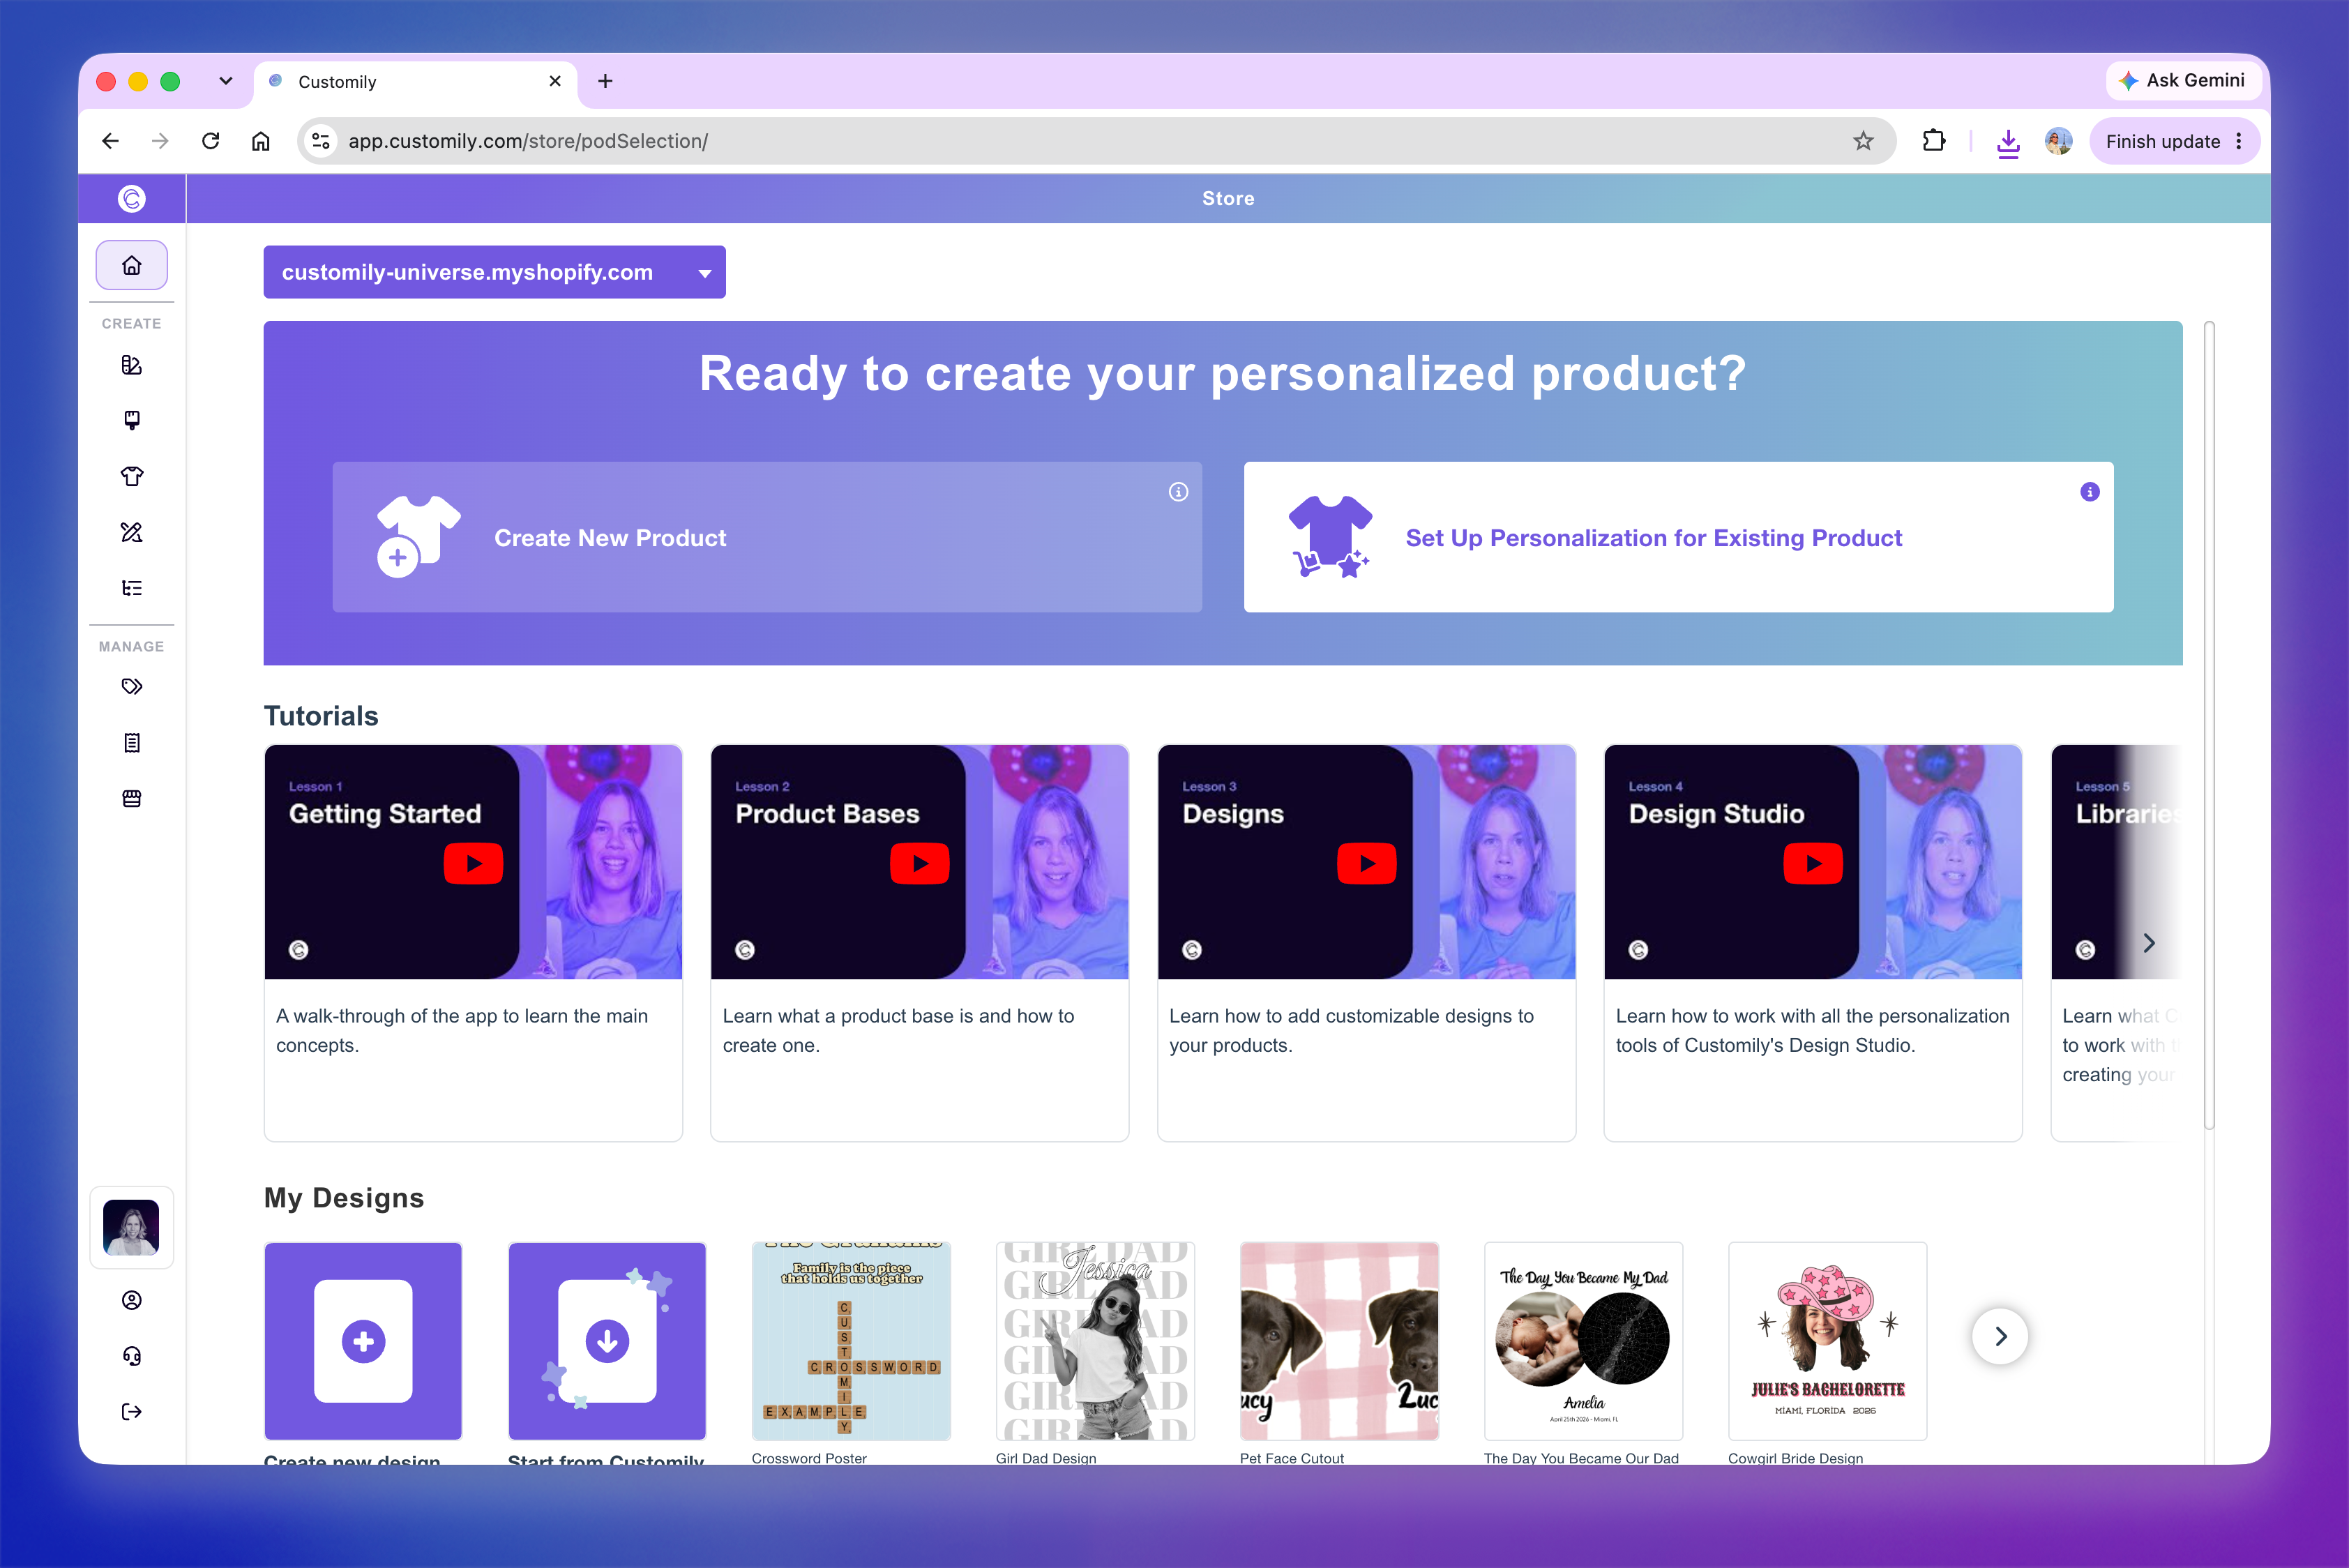
If you have multiple stores connected, select the correct store.
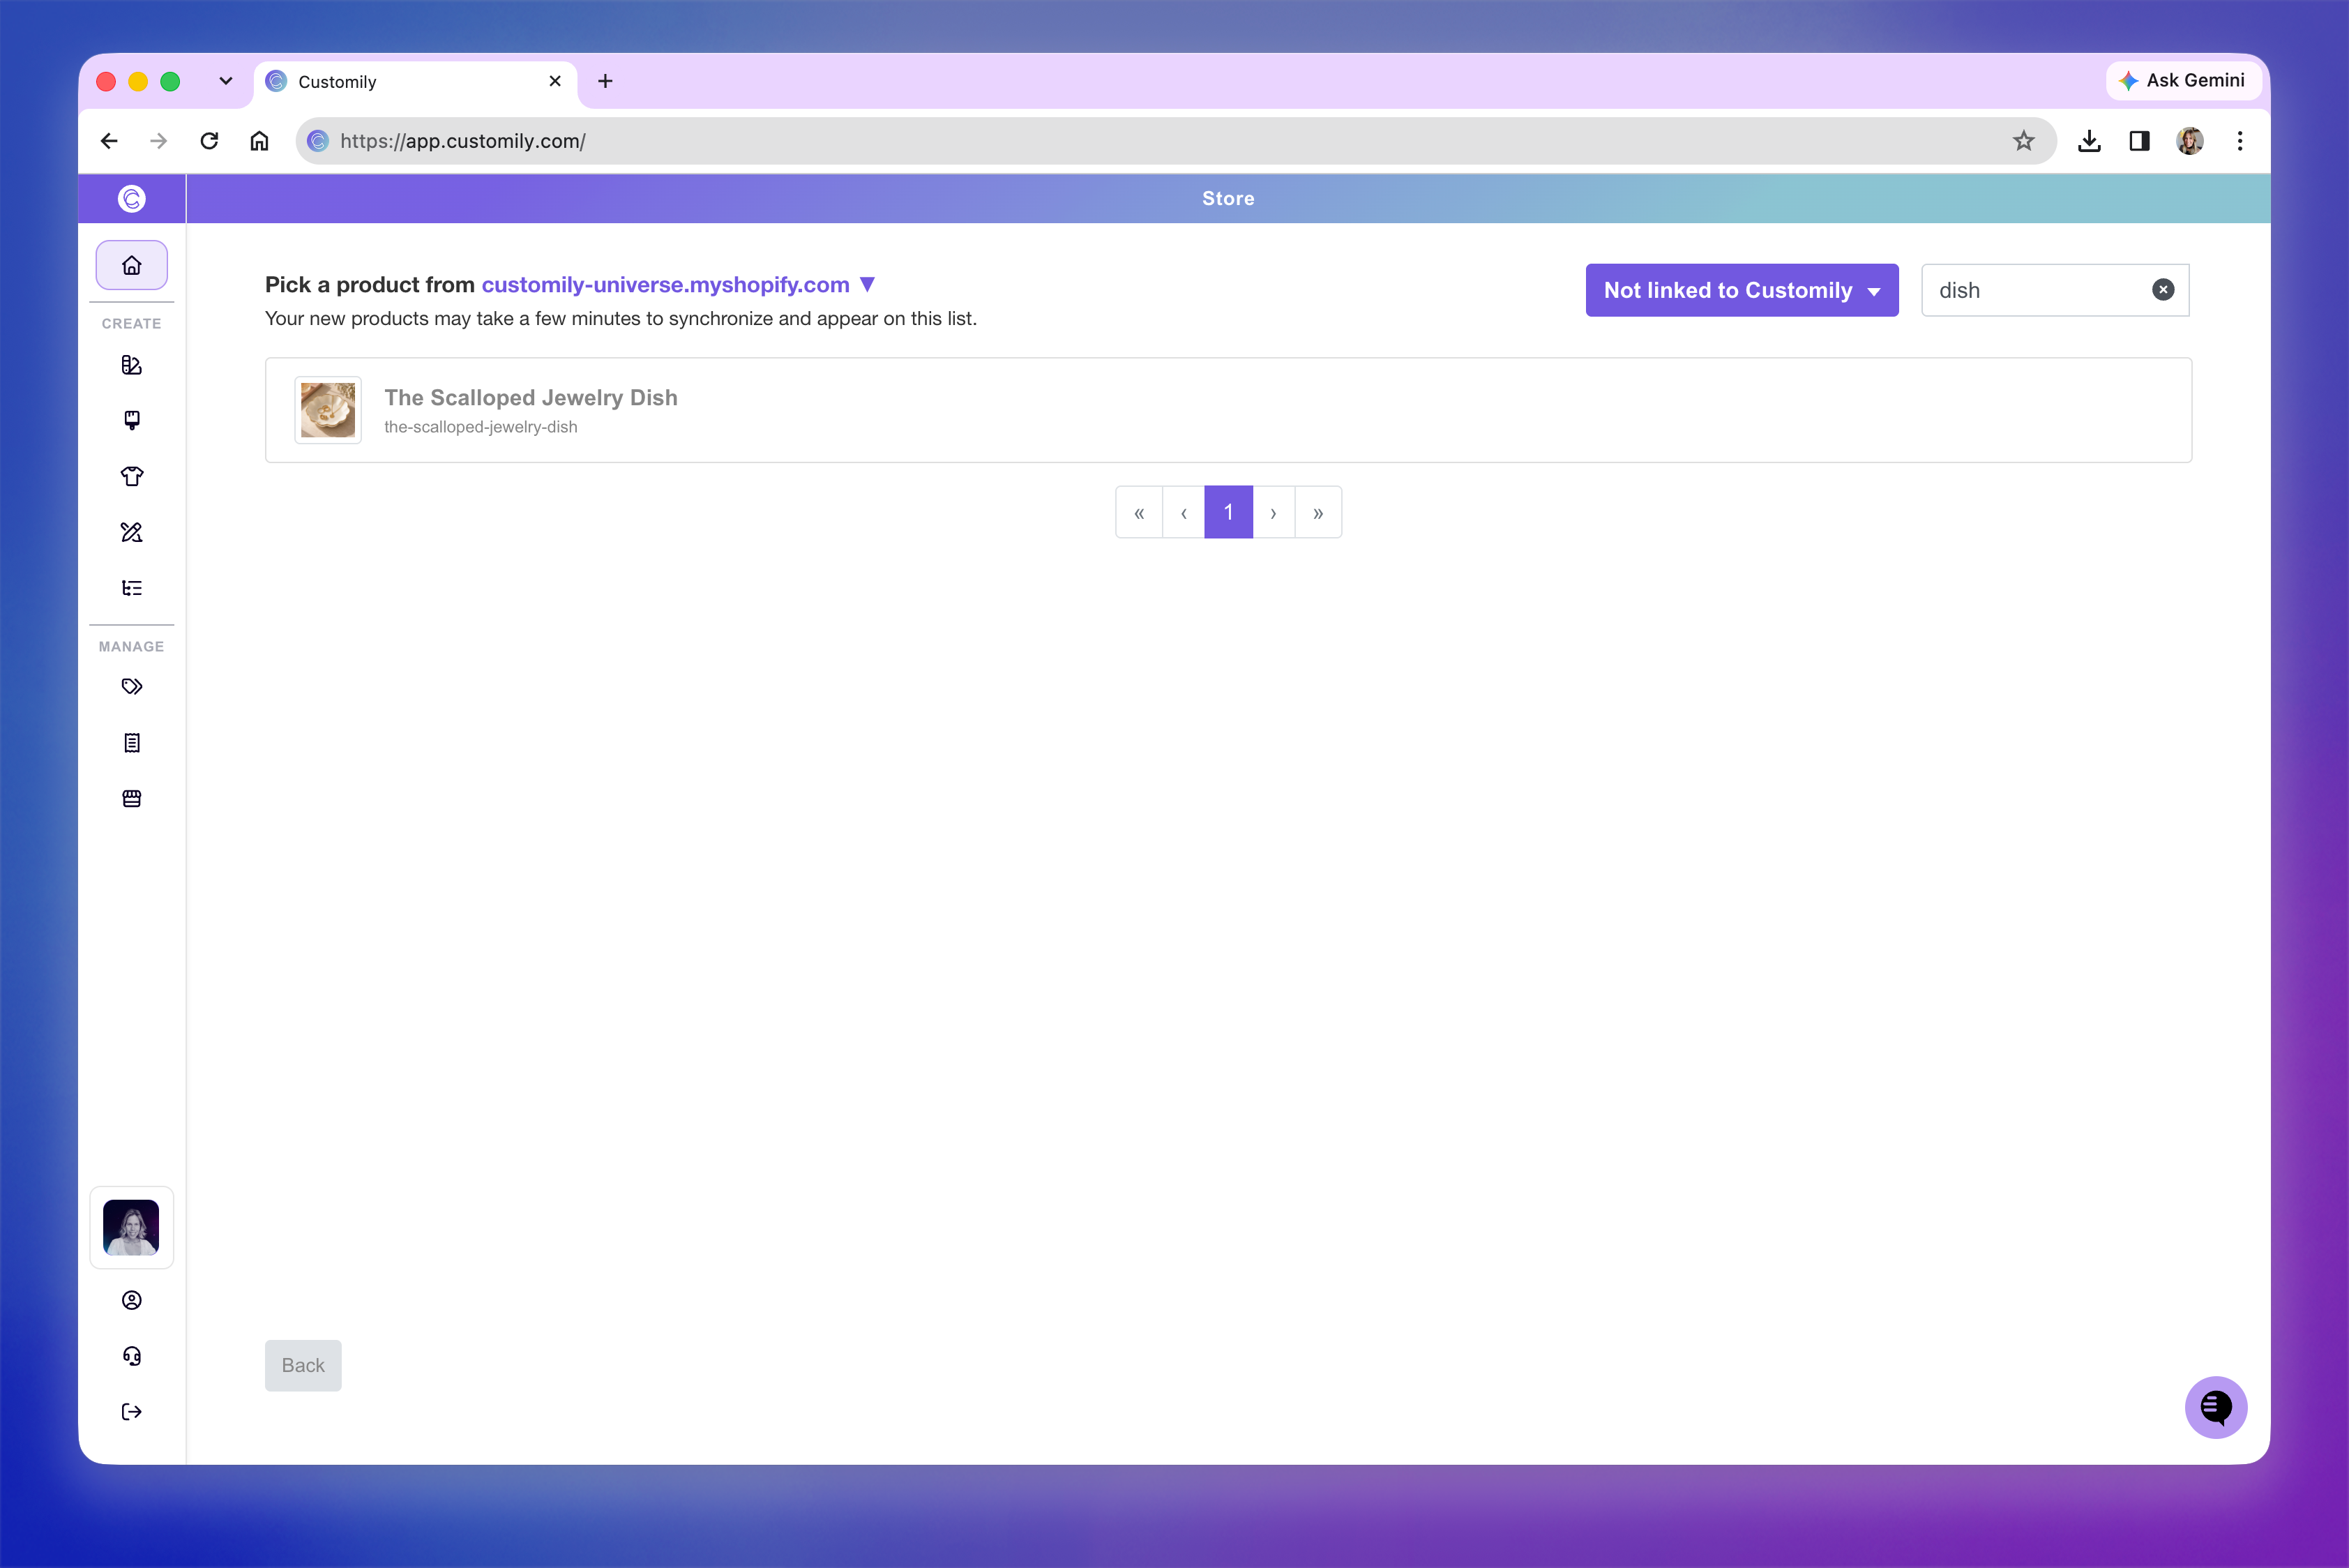
Use Search to find your product.
To narrow the list, select Not linked to Customily from the filter.
Click the product to continue.
2. Choose or create your Product Base
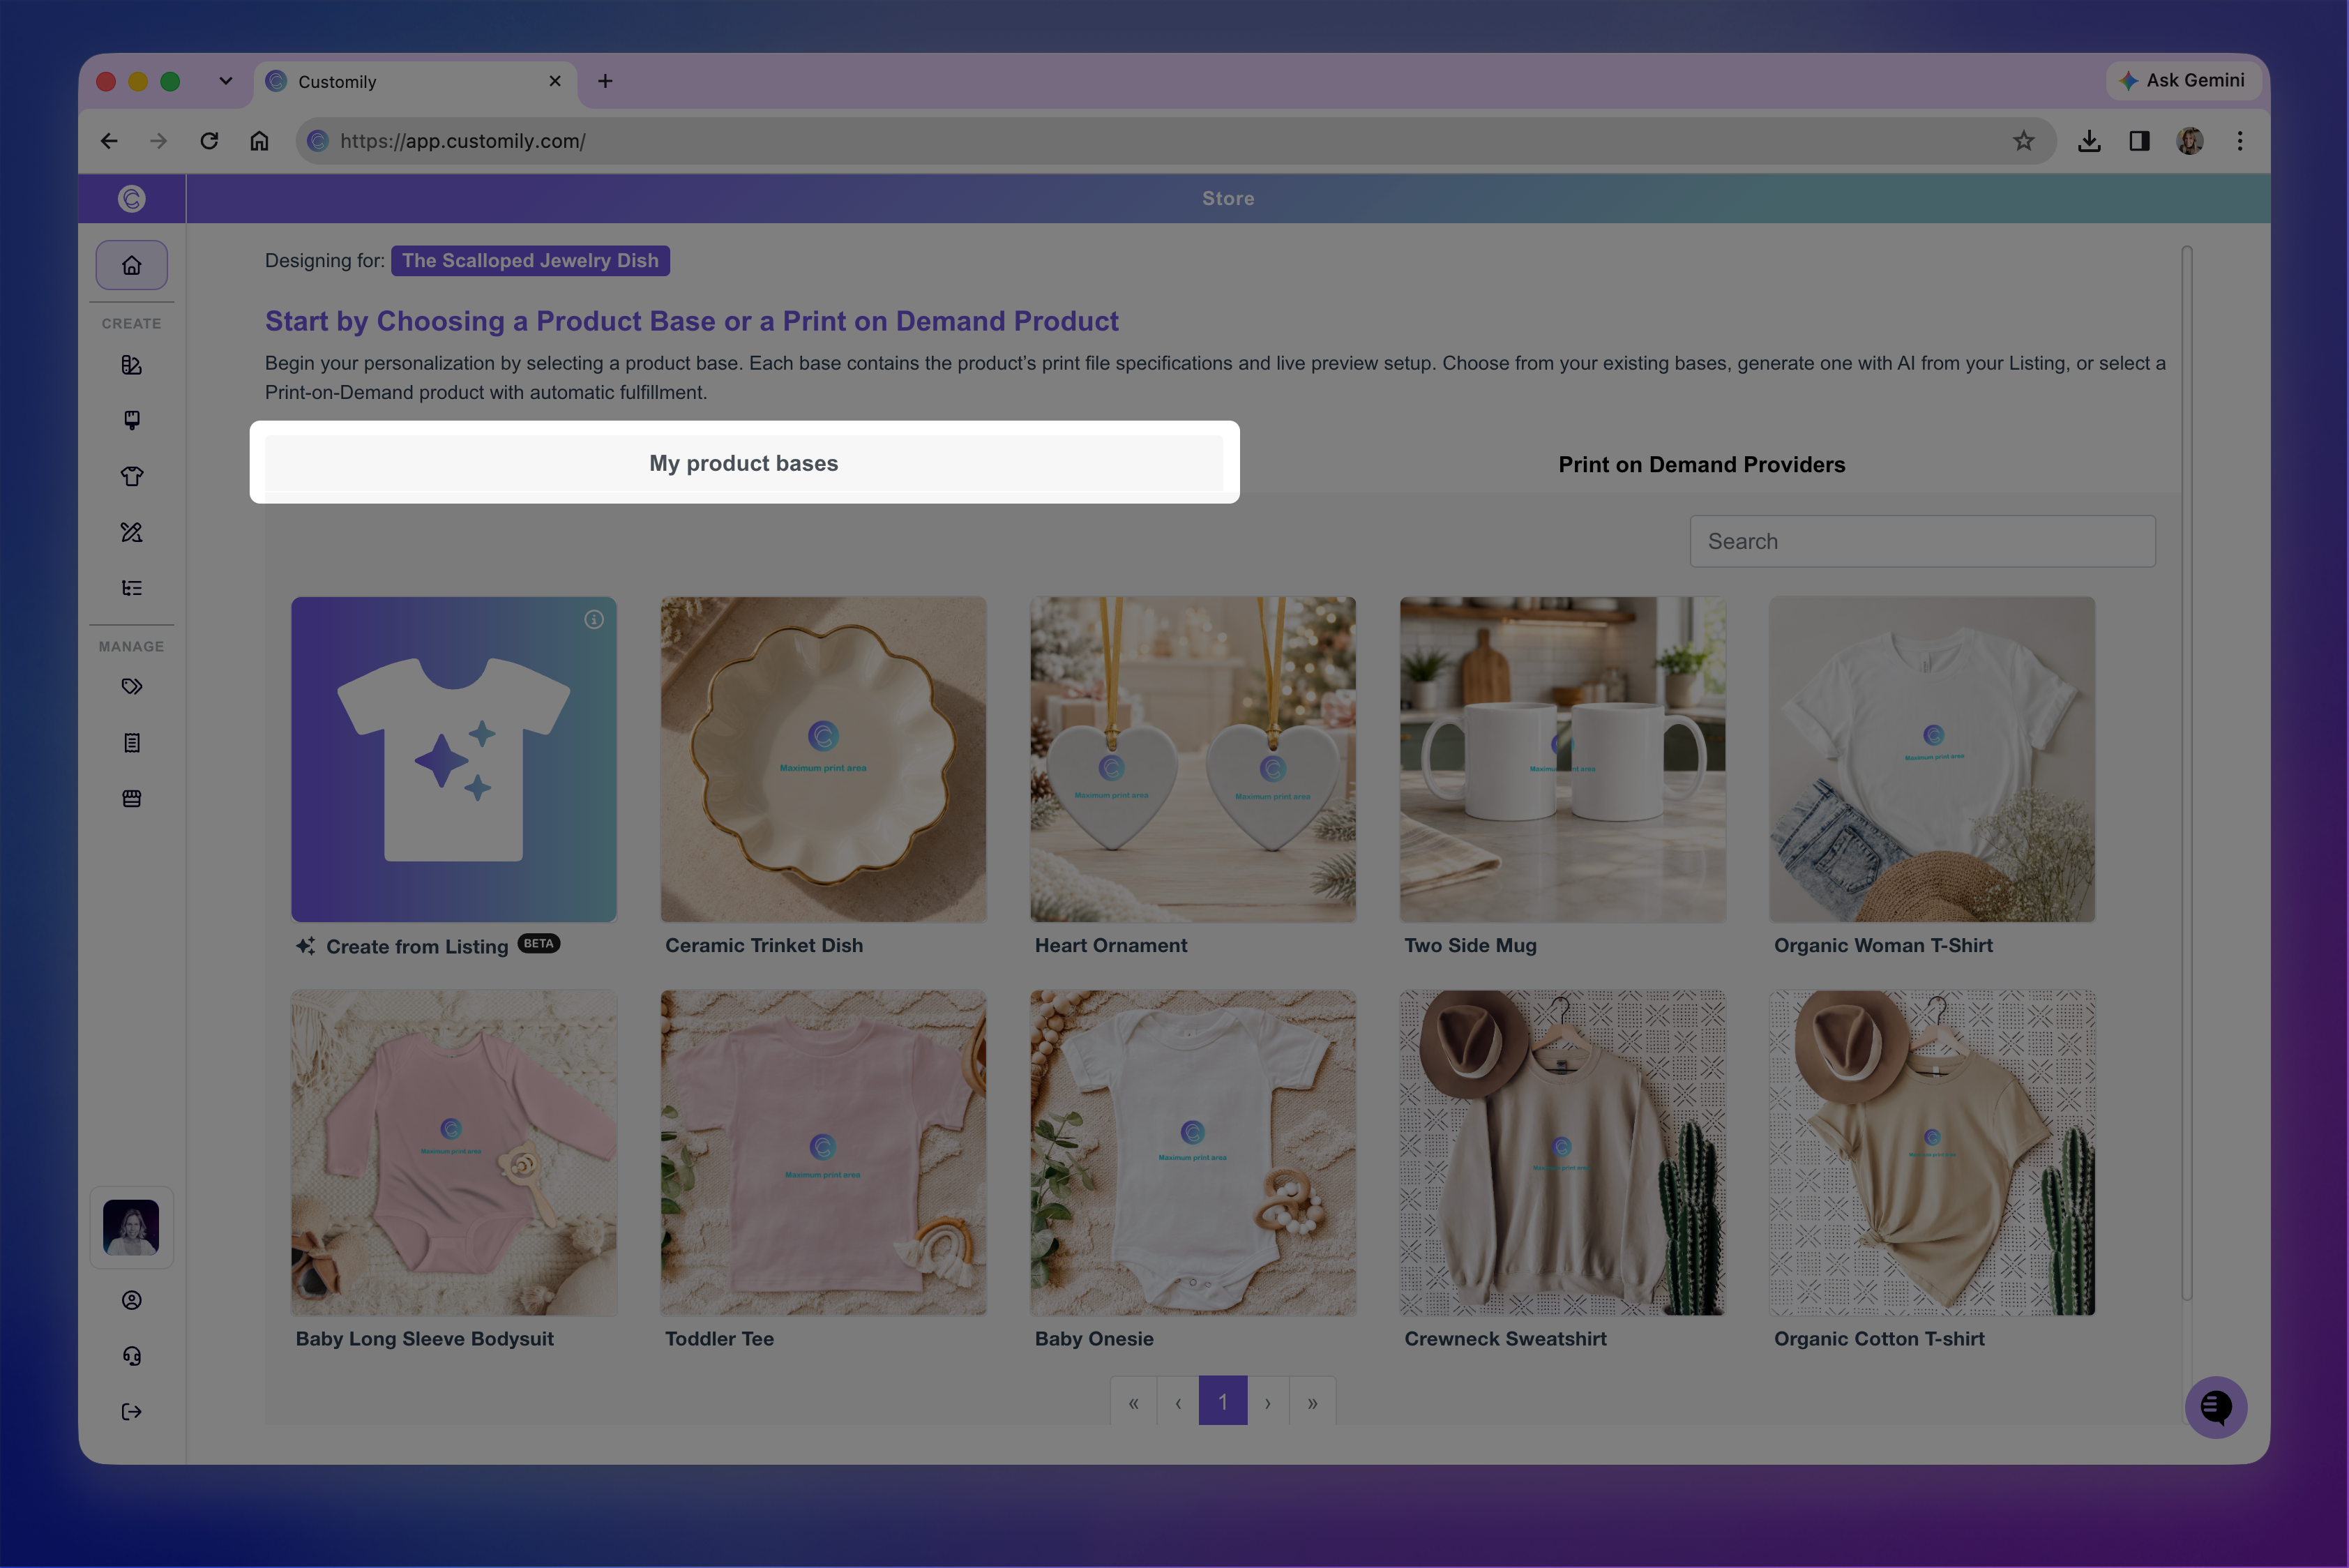
Select My product bases. You can use an existing Product Base or create one from your listing during setup.
Use an existing Product Base
Browse or search your Product Bases, then select the one that corresponds to your product.
Make sure it has the print areas and variants you need for the listing you selected.
Create a Product Base using AI
Click Create from Listing to create a Product Base using AI and your existing Shopify listing.
For the full process and how to review the result, see Create a Product Base from an existing product using AI.
Once your Product Base is ready, continue with the personalization setup.
3. Match your variants and choose the print area
Variant matching connects the variants in your Shopify listing to those in your Product Base, so Customily can use the correct preview and print file settings.
Match the variant names
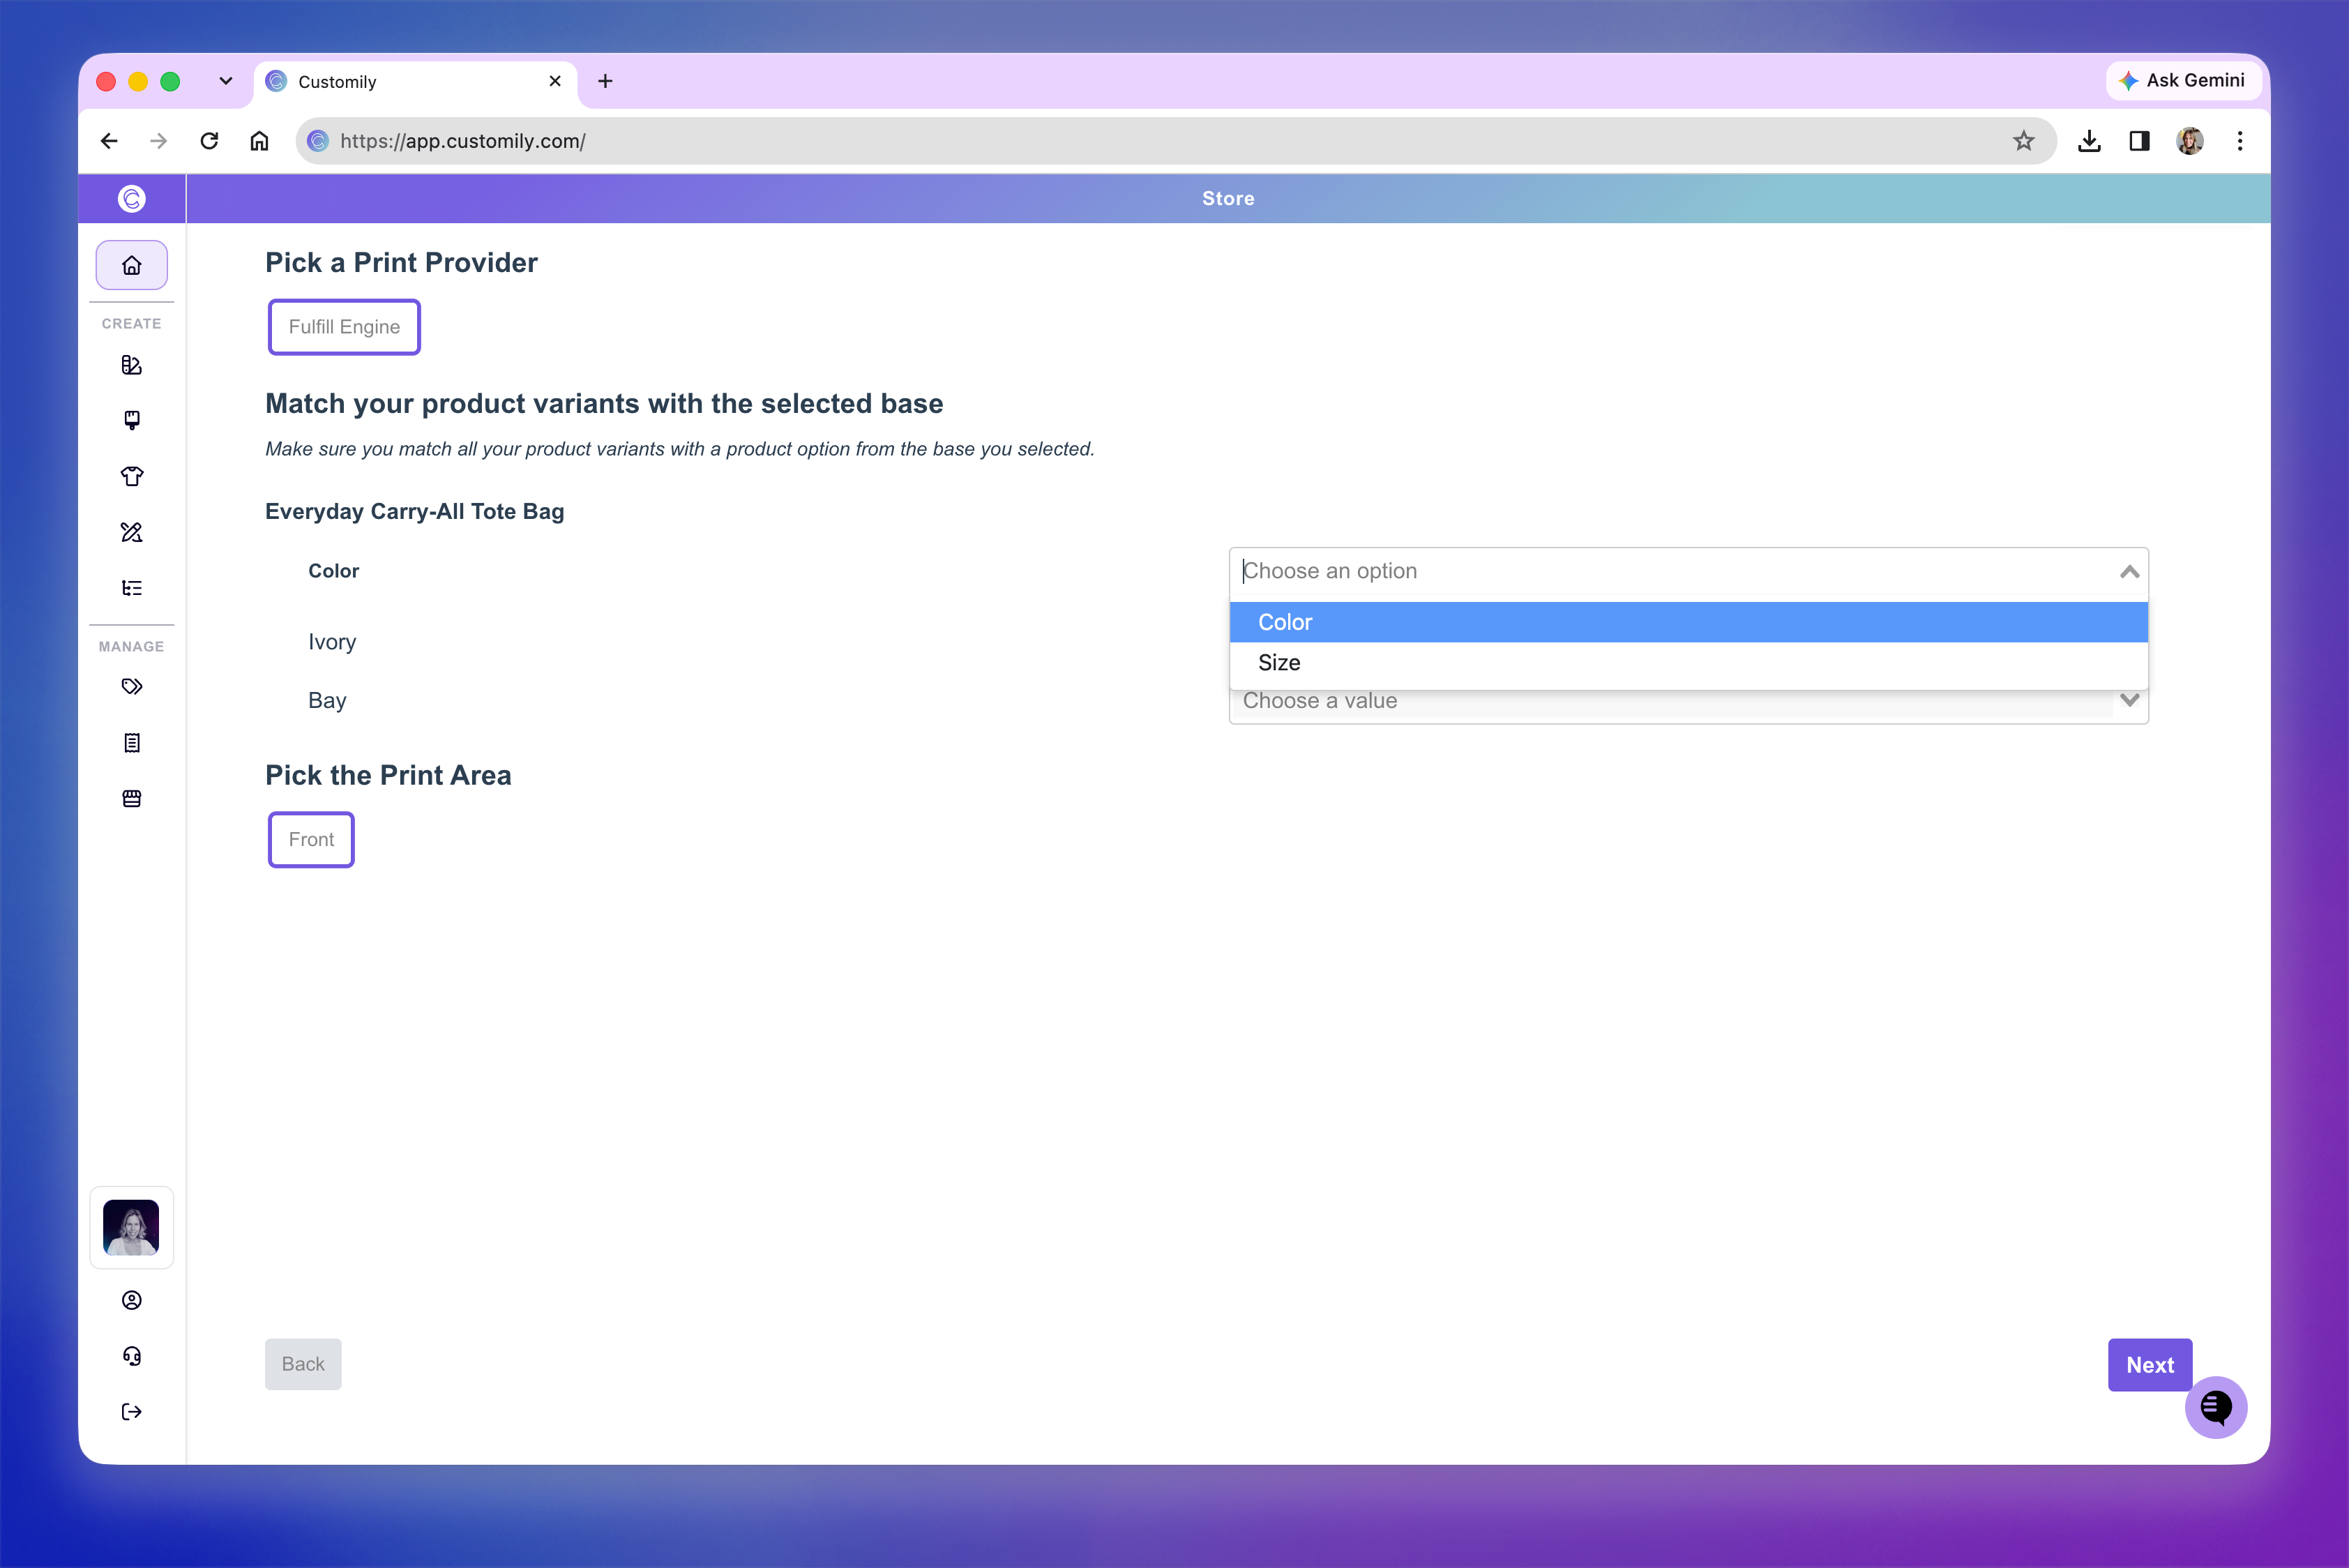
On the left, you’ll see the variant names from your Shopify product, such as Color and Size. On the right, use each Choose an option dropdown to select the corresponding variant from the product base.
For example:
Match your listing’s Color variant to the Product Base’s Color variant.
Match your listing’s Size variant to the Product Base’s Size variant.
The names don’t have to be identical, but they must refer to the same type of variant.
Match each variant value
Once you’ve matched a variant name, use Choose a value beside each option to select its equivalent in your Product Base.
For example, match White to the Product Base’s white color and S to its small size.
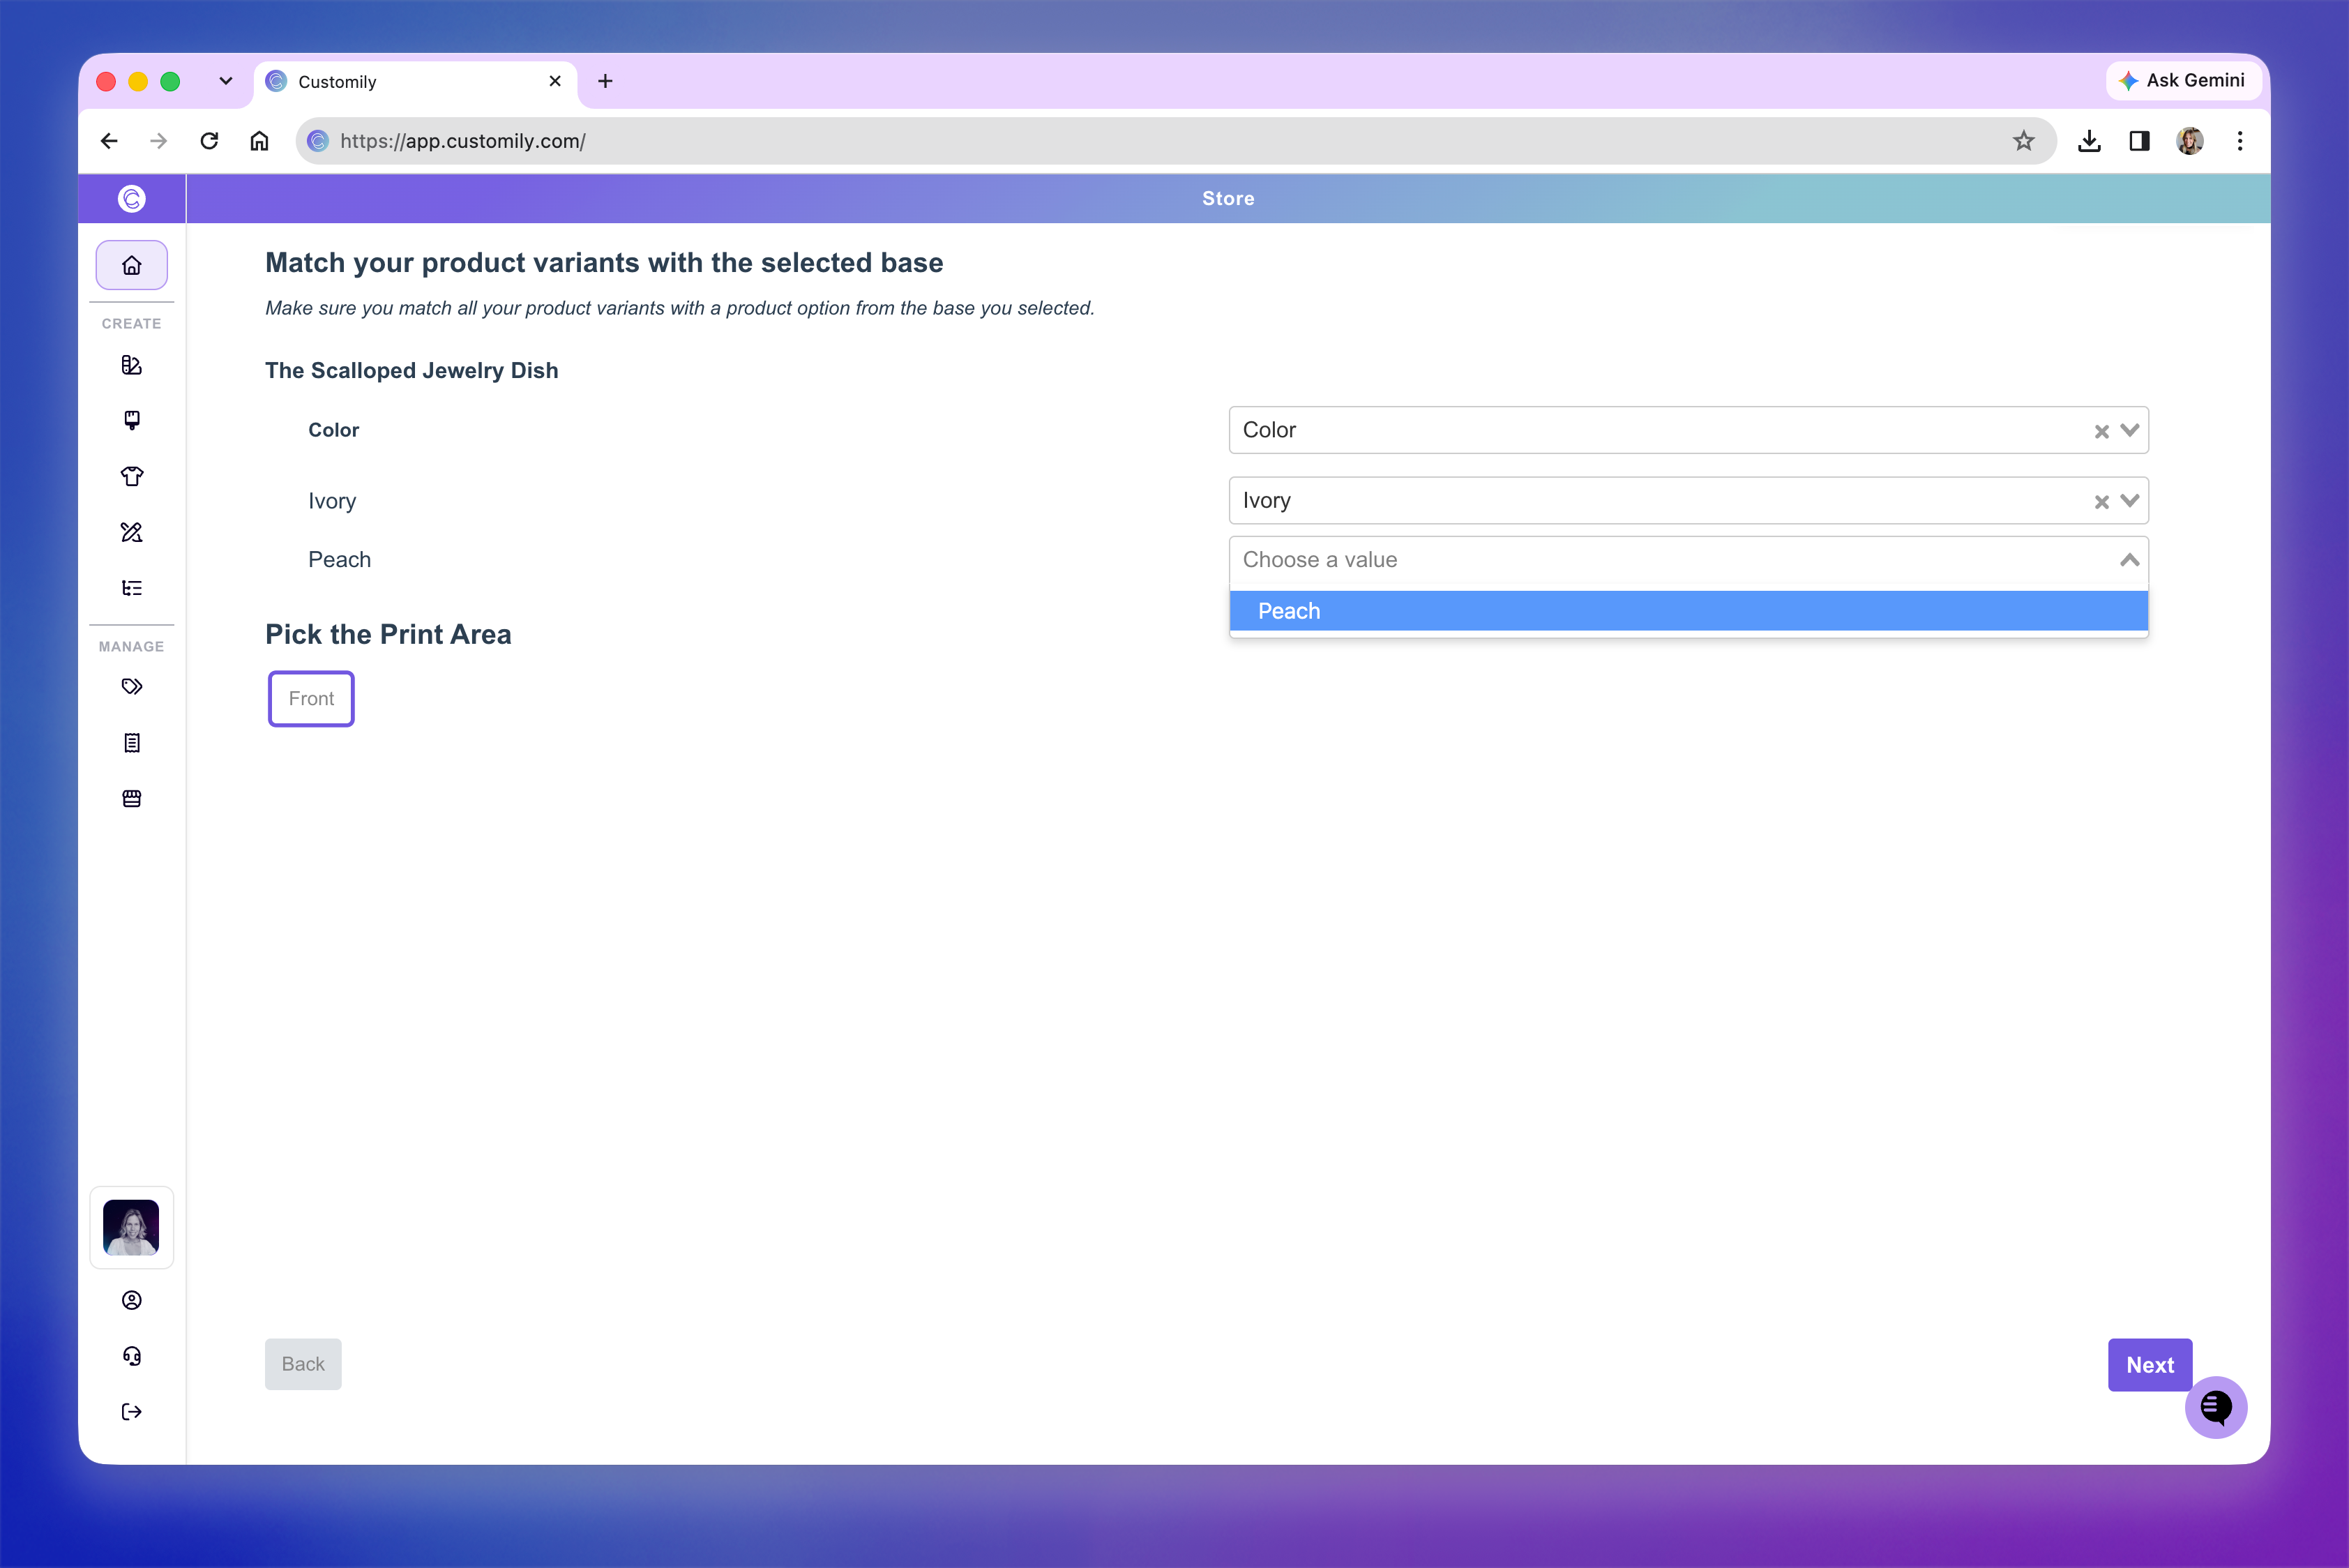
Repeat this for every value under every variant.
Note
Match all variants so Customily can use the correct preview and print file settings. For example, an unmatched color may prevent the preview from changing color when shoppers select it. If you see a warning about unmatched variants, click Let me fix that and complete the missing matches.
Choose the print area
Under Pick the Print Area, select where you want your Design to appear. The available print areas depend on your Product Base.
Click Next to continue.
4. Choose your Design
Choose a Design you’ve already created or select a ready-made Design from Customily’s Design Library.
Customily combines the Design with your Product Base and automatically creates the Template and Option Set for your listing.
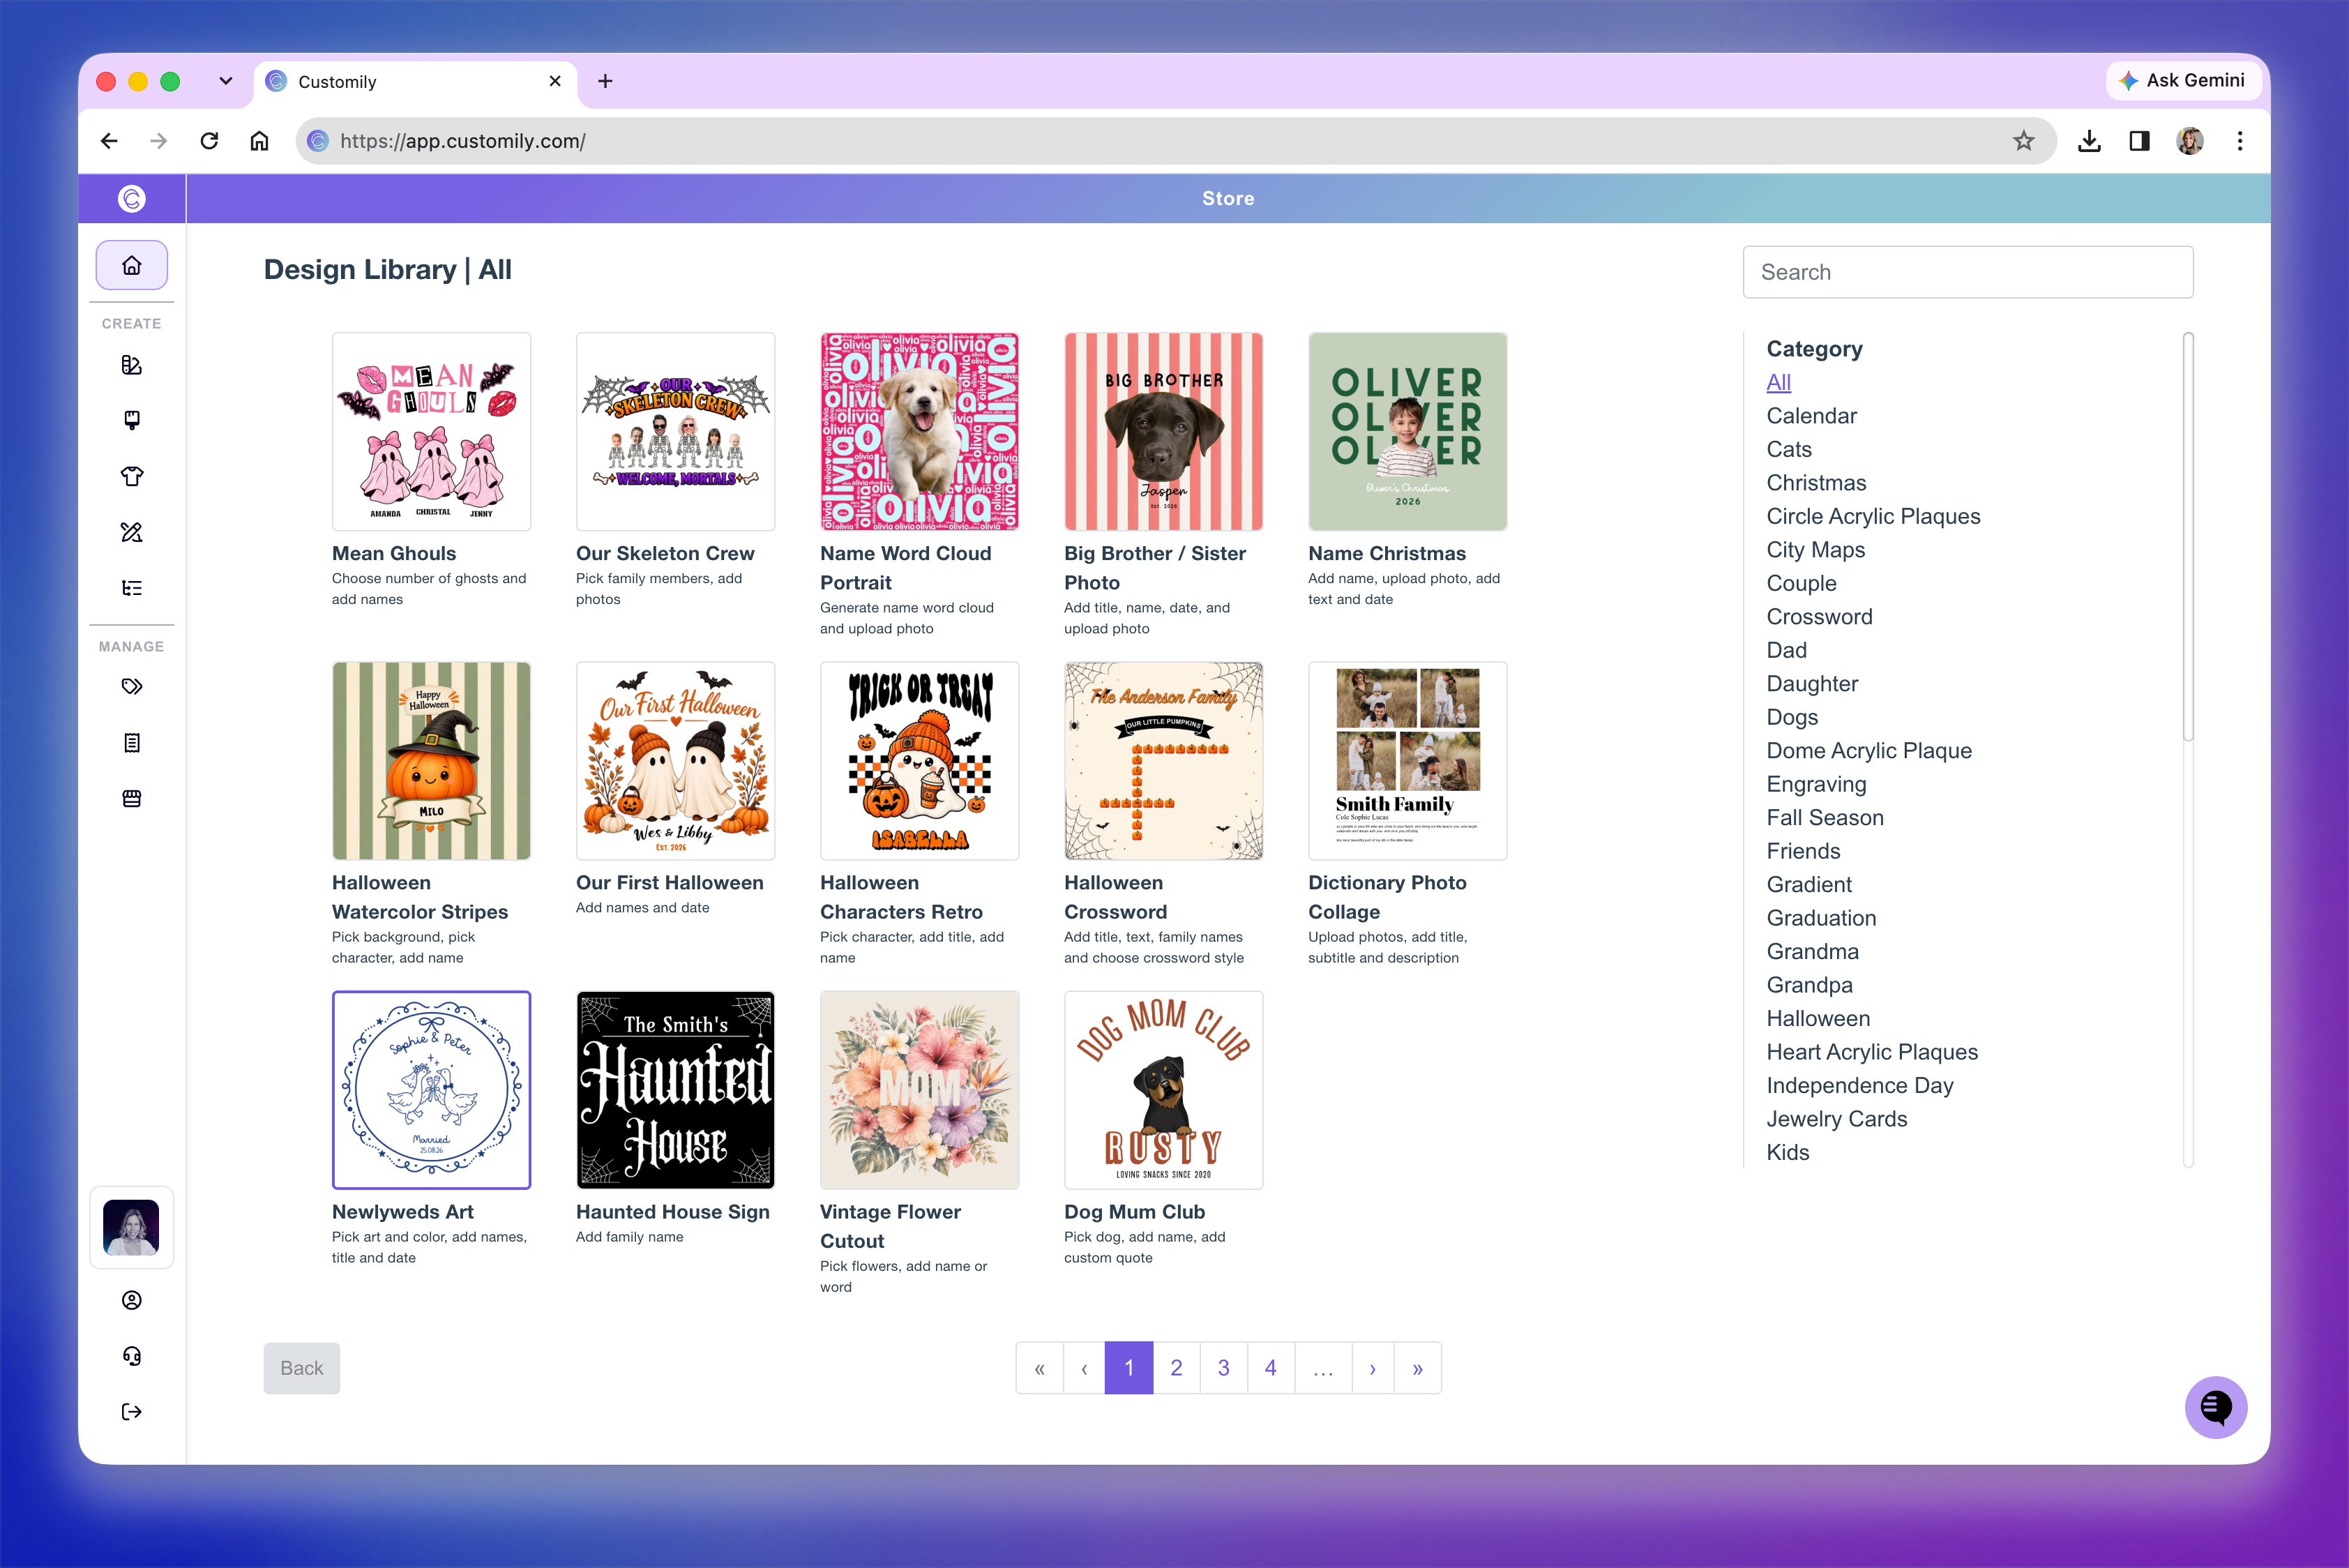
Note
You can’t adjust the designs placement during this flow. Customily centers the Design and sizes it to occupy most of the selected print area. To change its position or size afterward, edit the generated Template.
5. Preview the personalization and review your listing
Once setup is complete, you’ll see Preview Your Product Before Publishing. Here you can test the personalization and review your existing listing before finishing.
Test the live preview
Select different product variants.
Try the personalization options and check how the preview updates.
Click Edit Options if you want to adjust the personalization options.
You can also click Save as Product Image to add the personalized preview to your gallery, or Download to save the image.
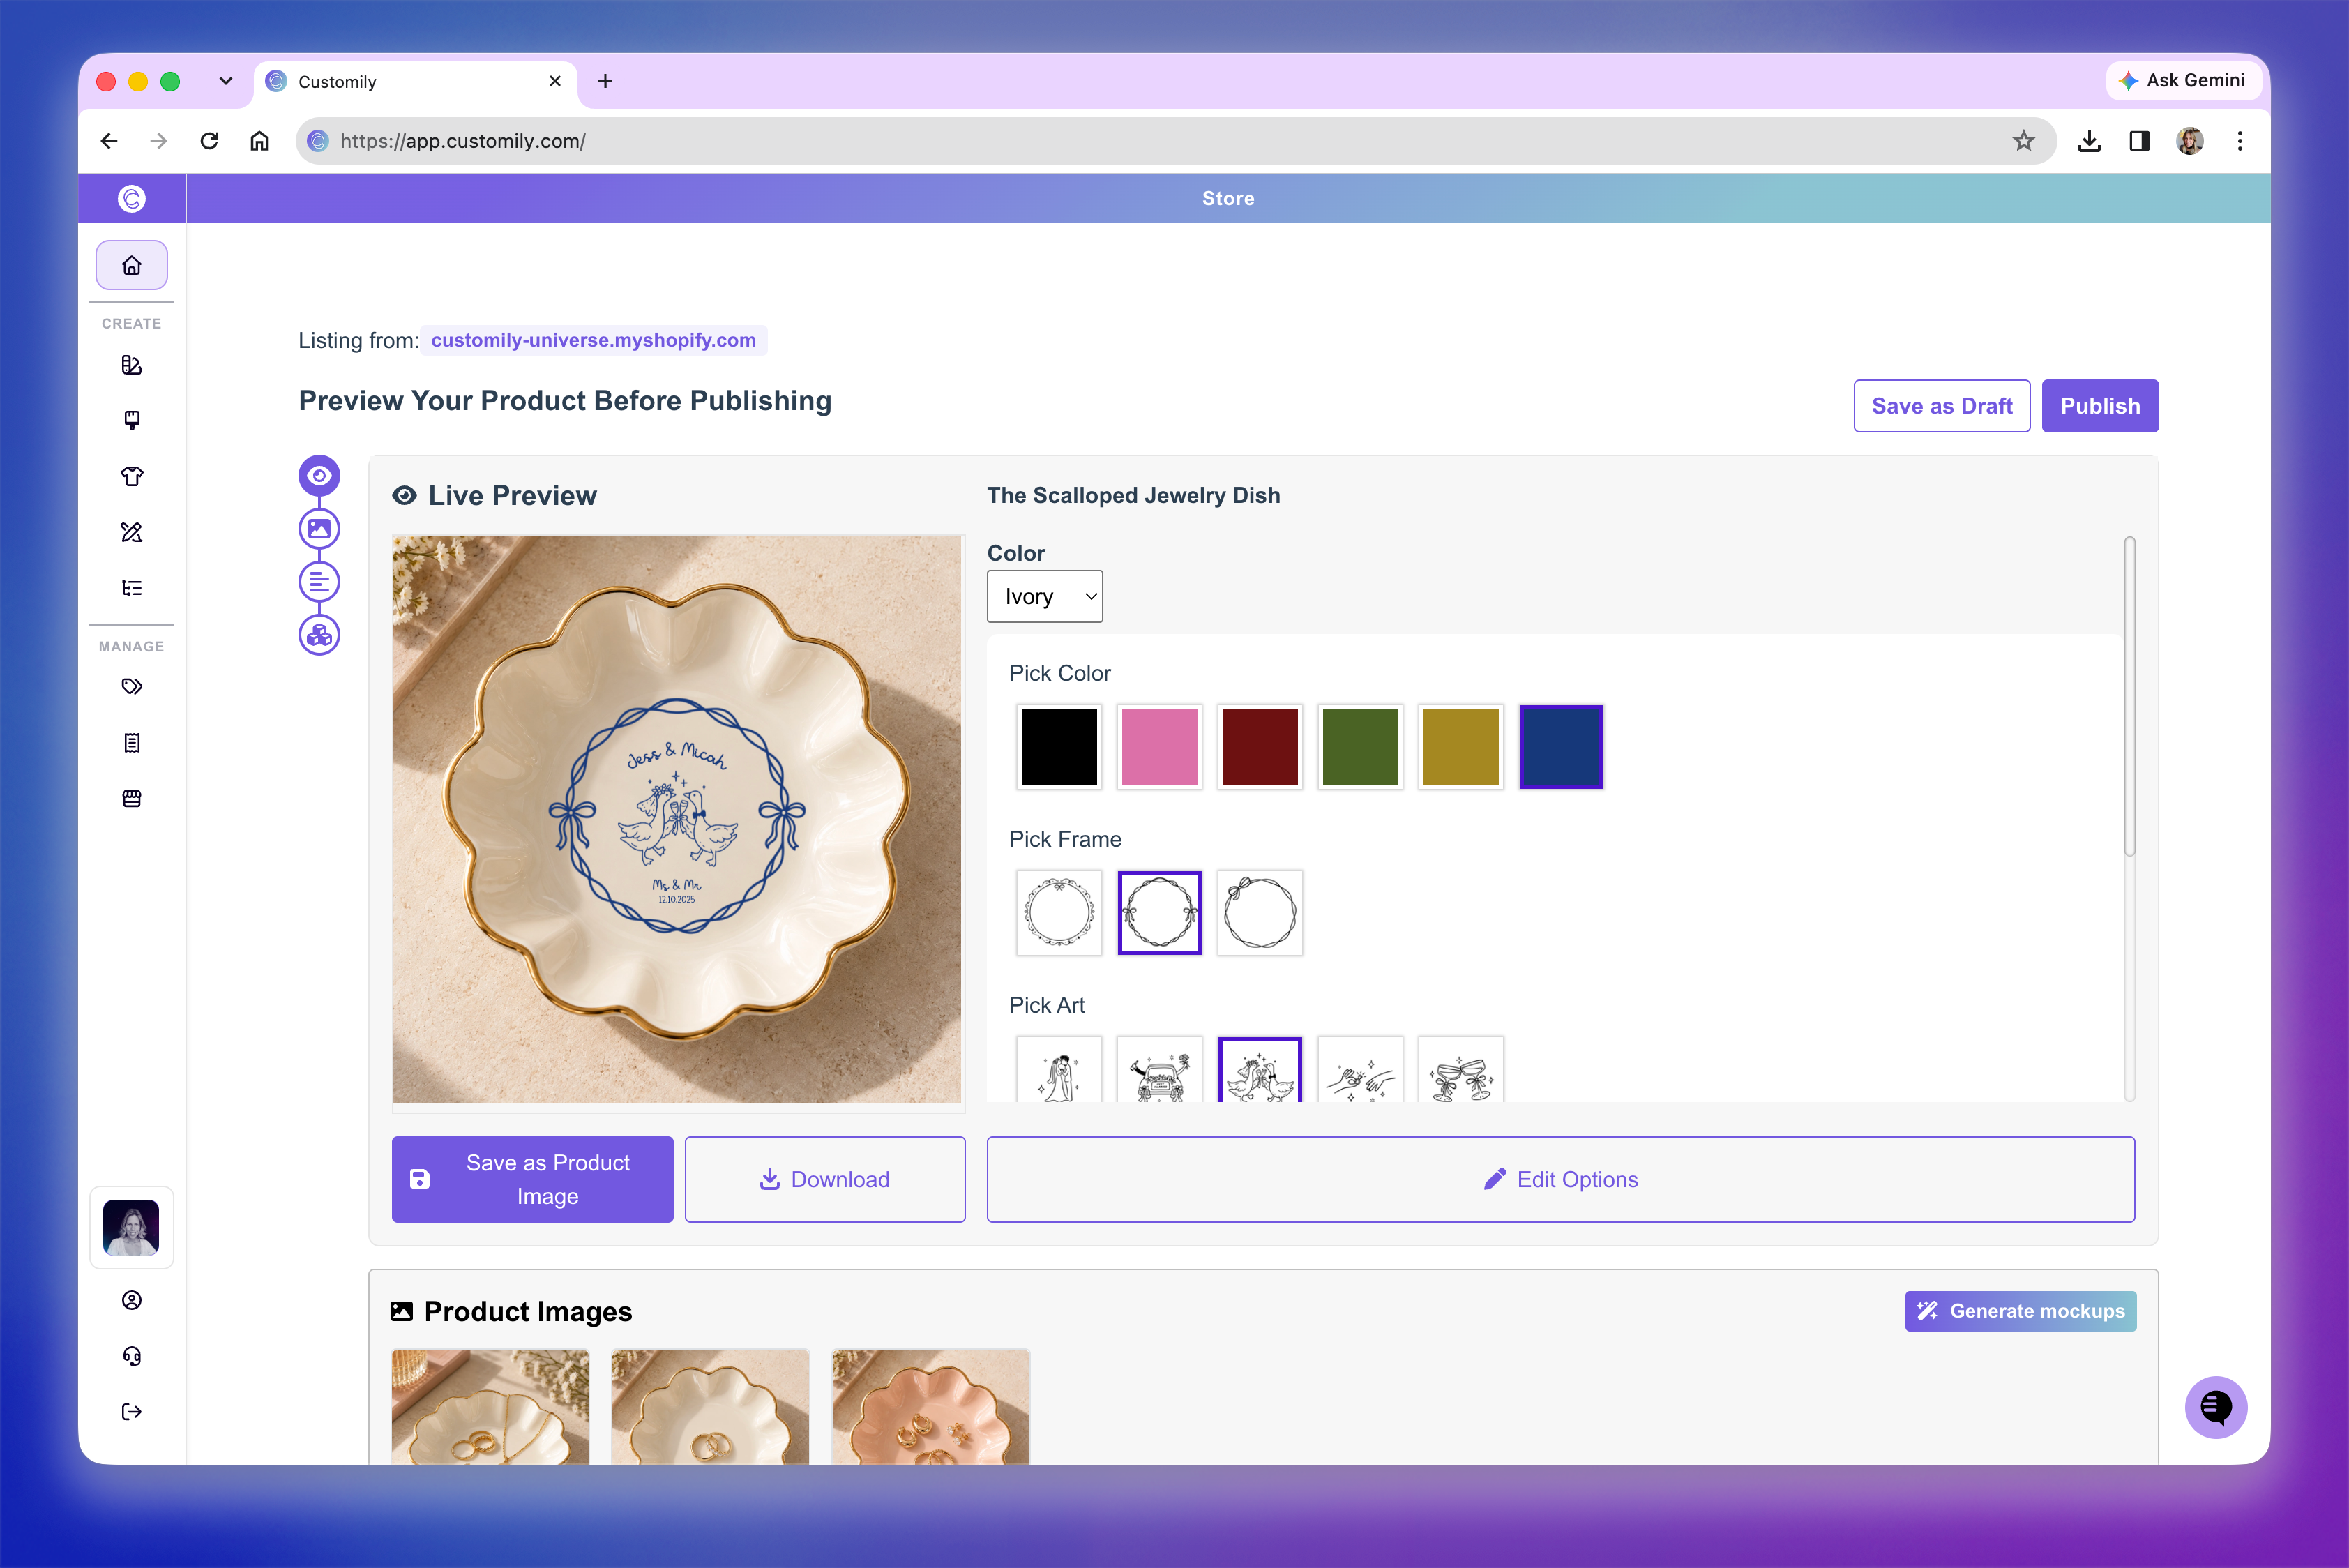
Review the product images
Under Product Images, review your existing gallery. You can also use Generate mockups to create additional images for the personalized product.
Review the listing details and variants
Check your product title, description, prices, and SKUs. Update anything you want to change before publishing.
6. Publish or save as a draft
Click Publish to save the personalization setup to your existing product listing. This updates the listing you selected; it doesn’t create a new product in your store.
Click Save as Draft if you want to finish later.
When you click Publish, the product opens in a new browser tab. Your current tab stays on the product configuration, where you can continue managing its personalization.