Set up cross-selling for personalized products
Last updated: October 6, 2026
Cross-selling lets you offer related personalized products after a shopper adds a product to their cart.
Customily can transfer the shopper's existing personalization to the related products, so they can add another personalized product without creating the design again from scratch.
Important
Cross-selling is currently available for Shopify stores only.
How cross-selling works
Cross-selling is configured using Selling Groups. Each Selling Group connects a trigger product with one or more related products you want to offer.
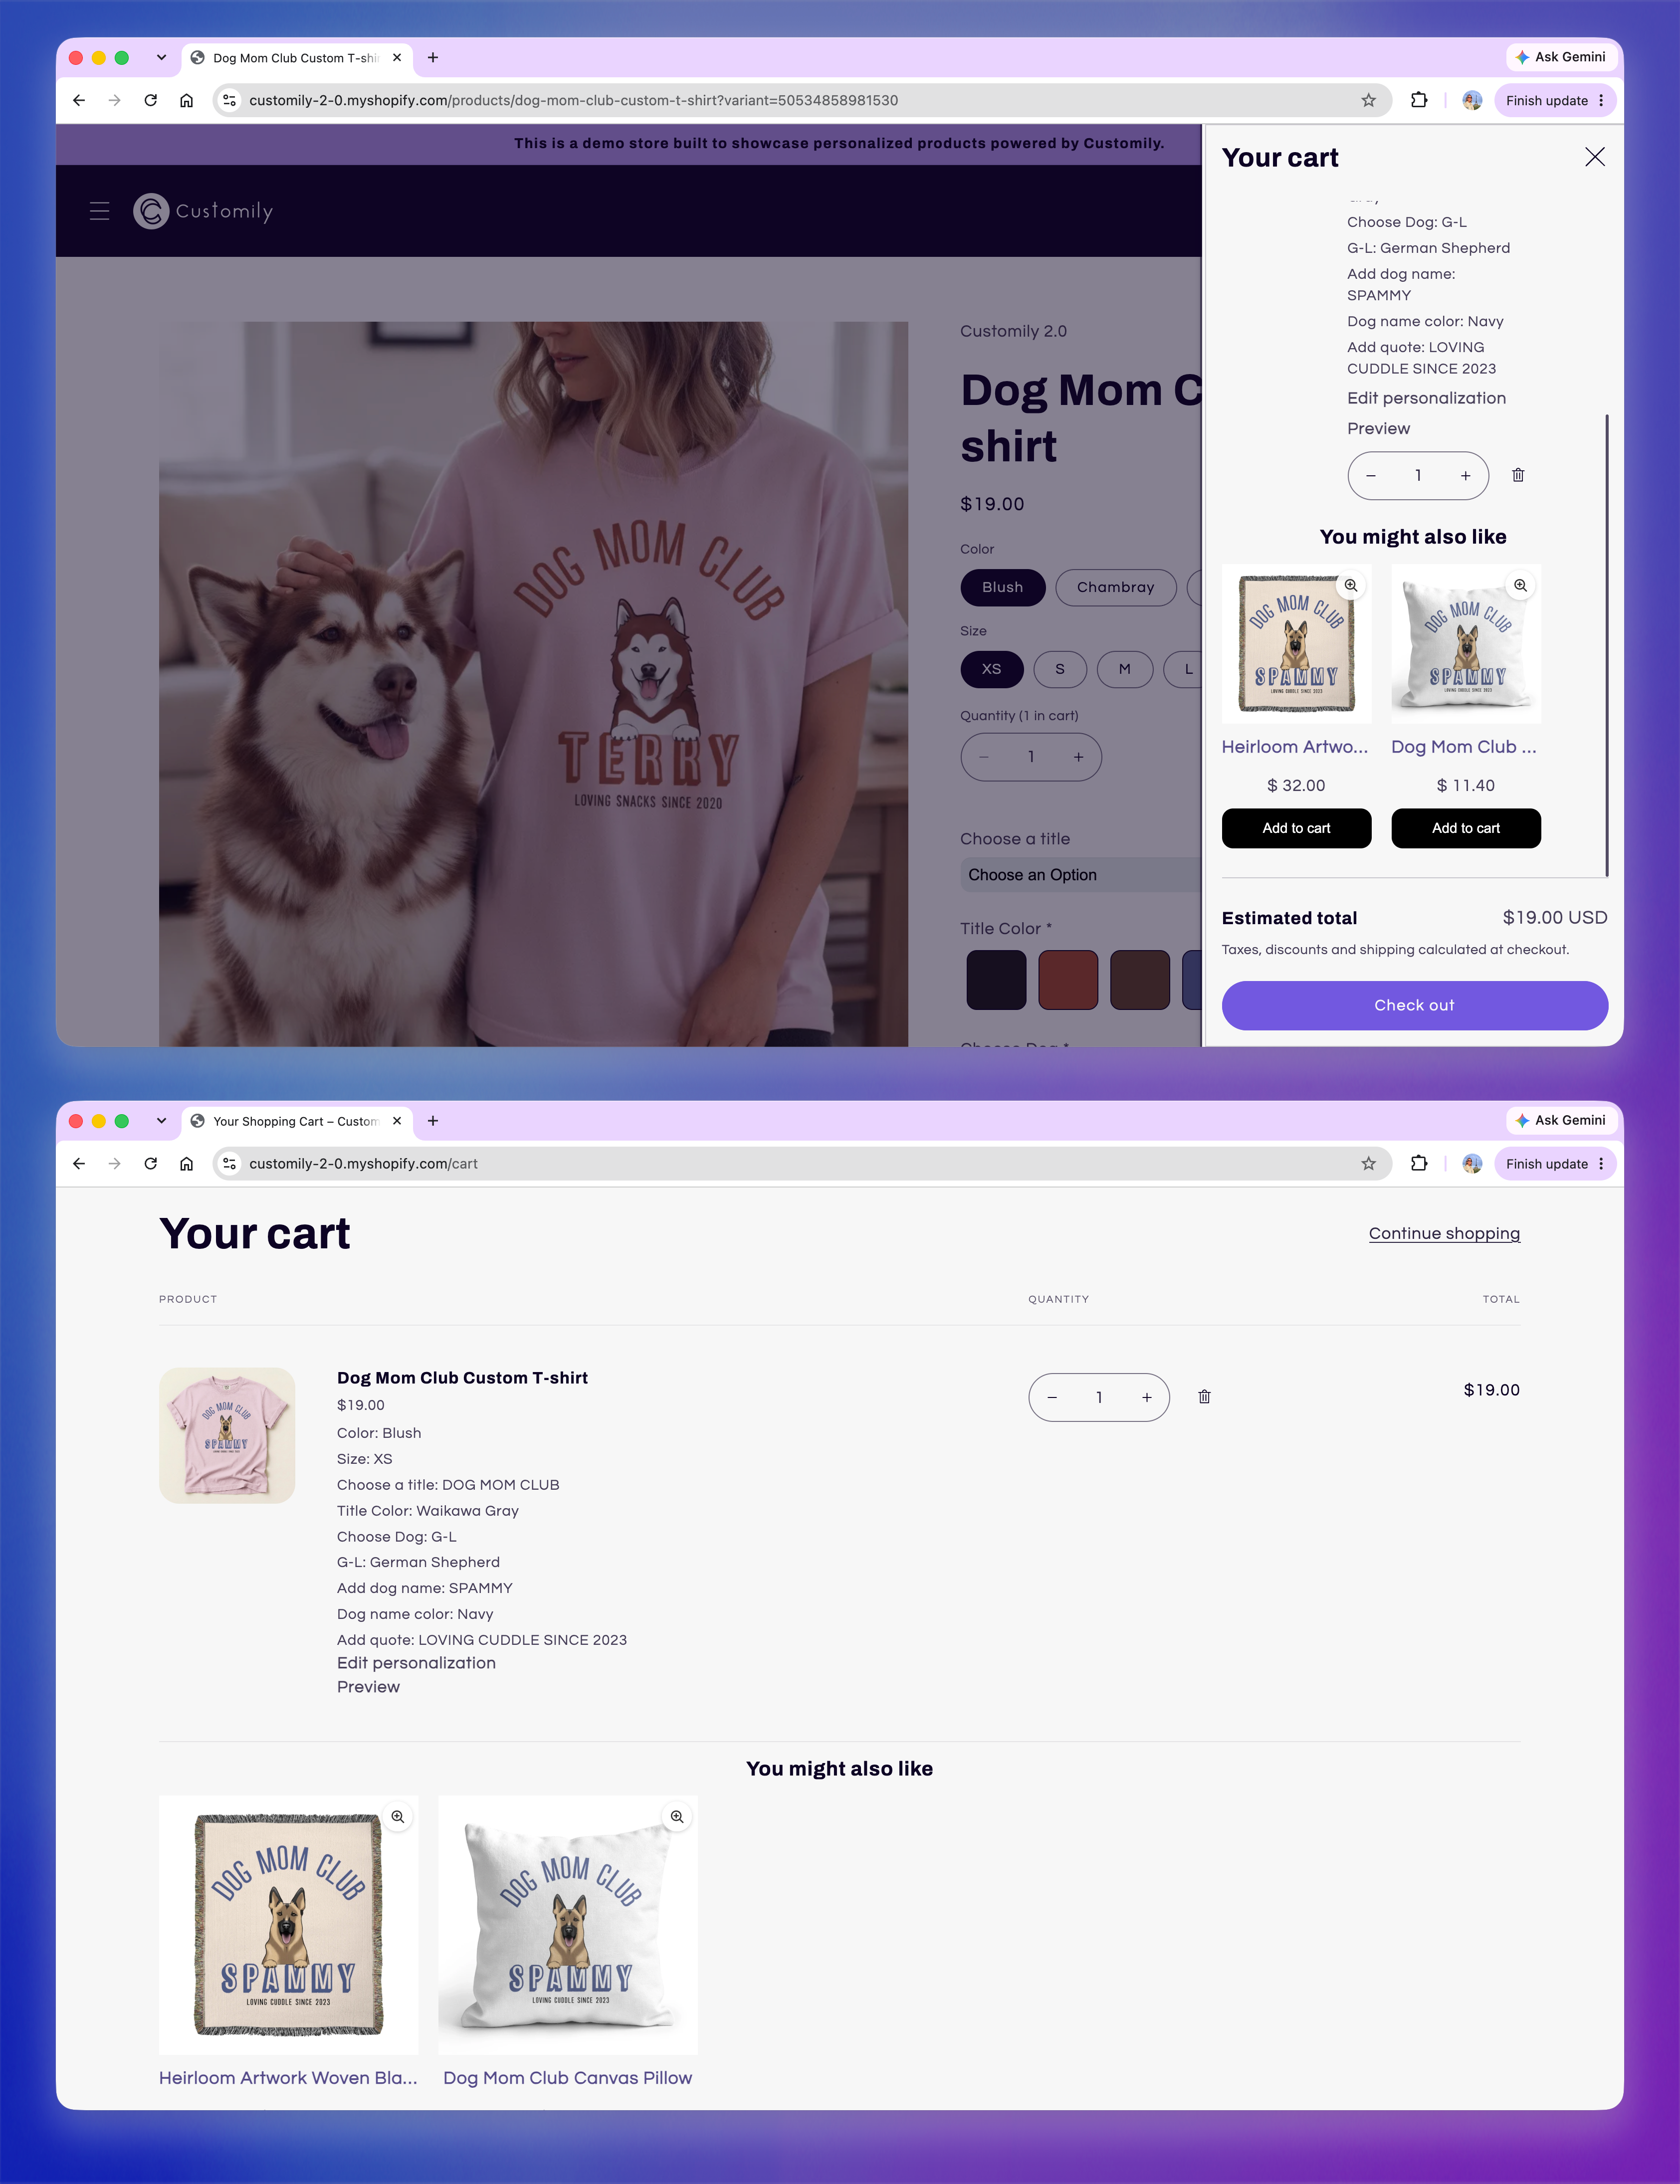
When a shopper personalizes the trigger product and adds it to their cart, the related products from the Selling Group are displayed as additional options. Their existing personalization is automatically applied to compatible related products.
For example, you could offer a personalized mug after a shopper adds a personalized T-shirt, using the same name, image, or other personalization they already entered.
Enable cross-selling in the cart
Go to Store Settings > Advanced Settings → Cart Items, then turn on Show Cross-Selling in the cart.
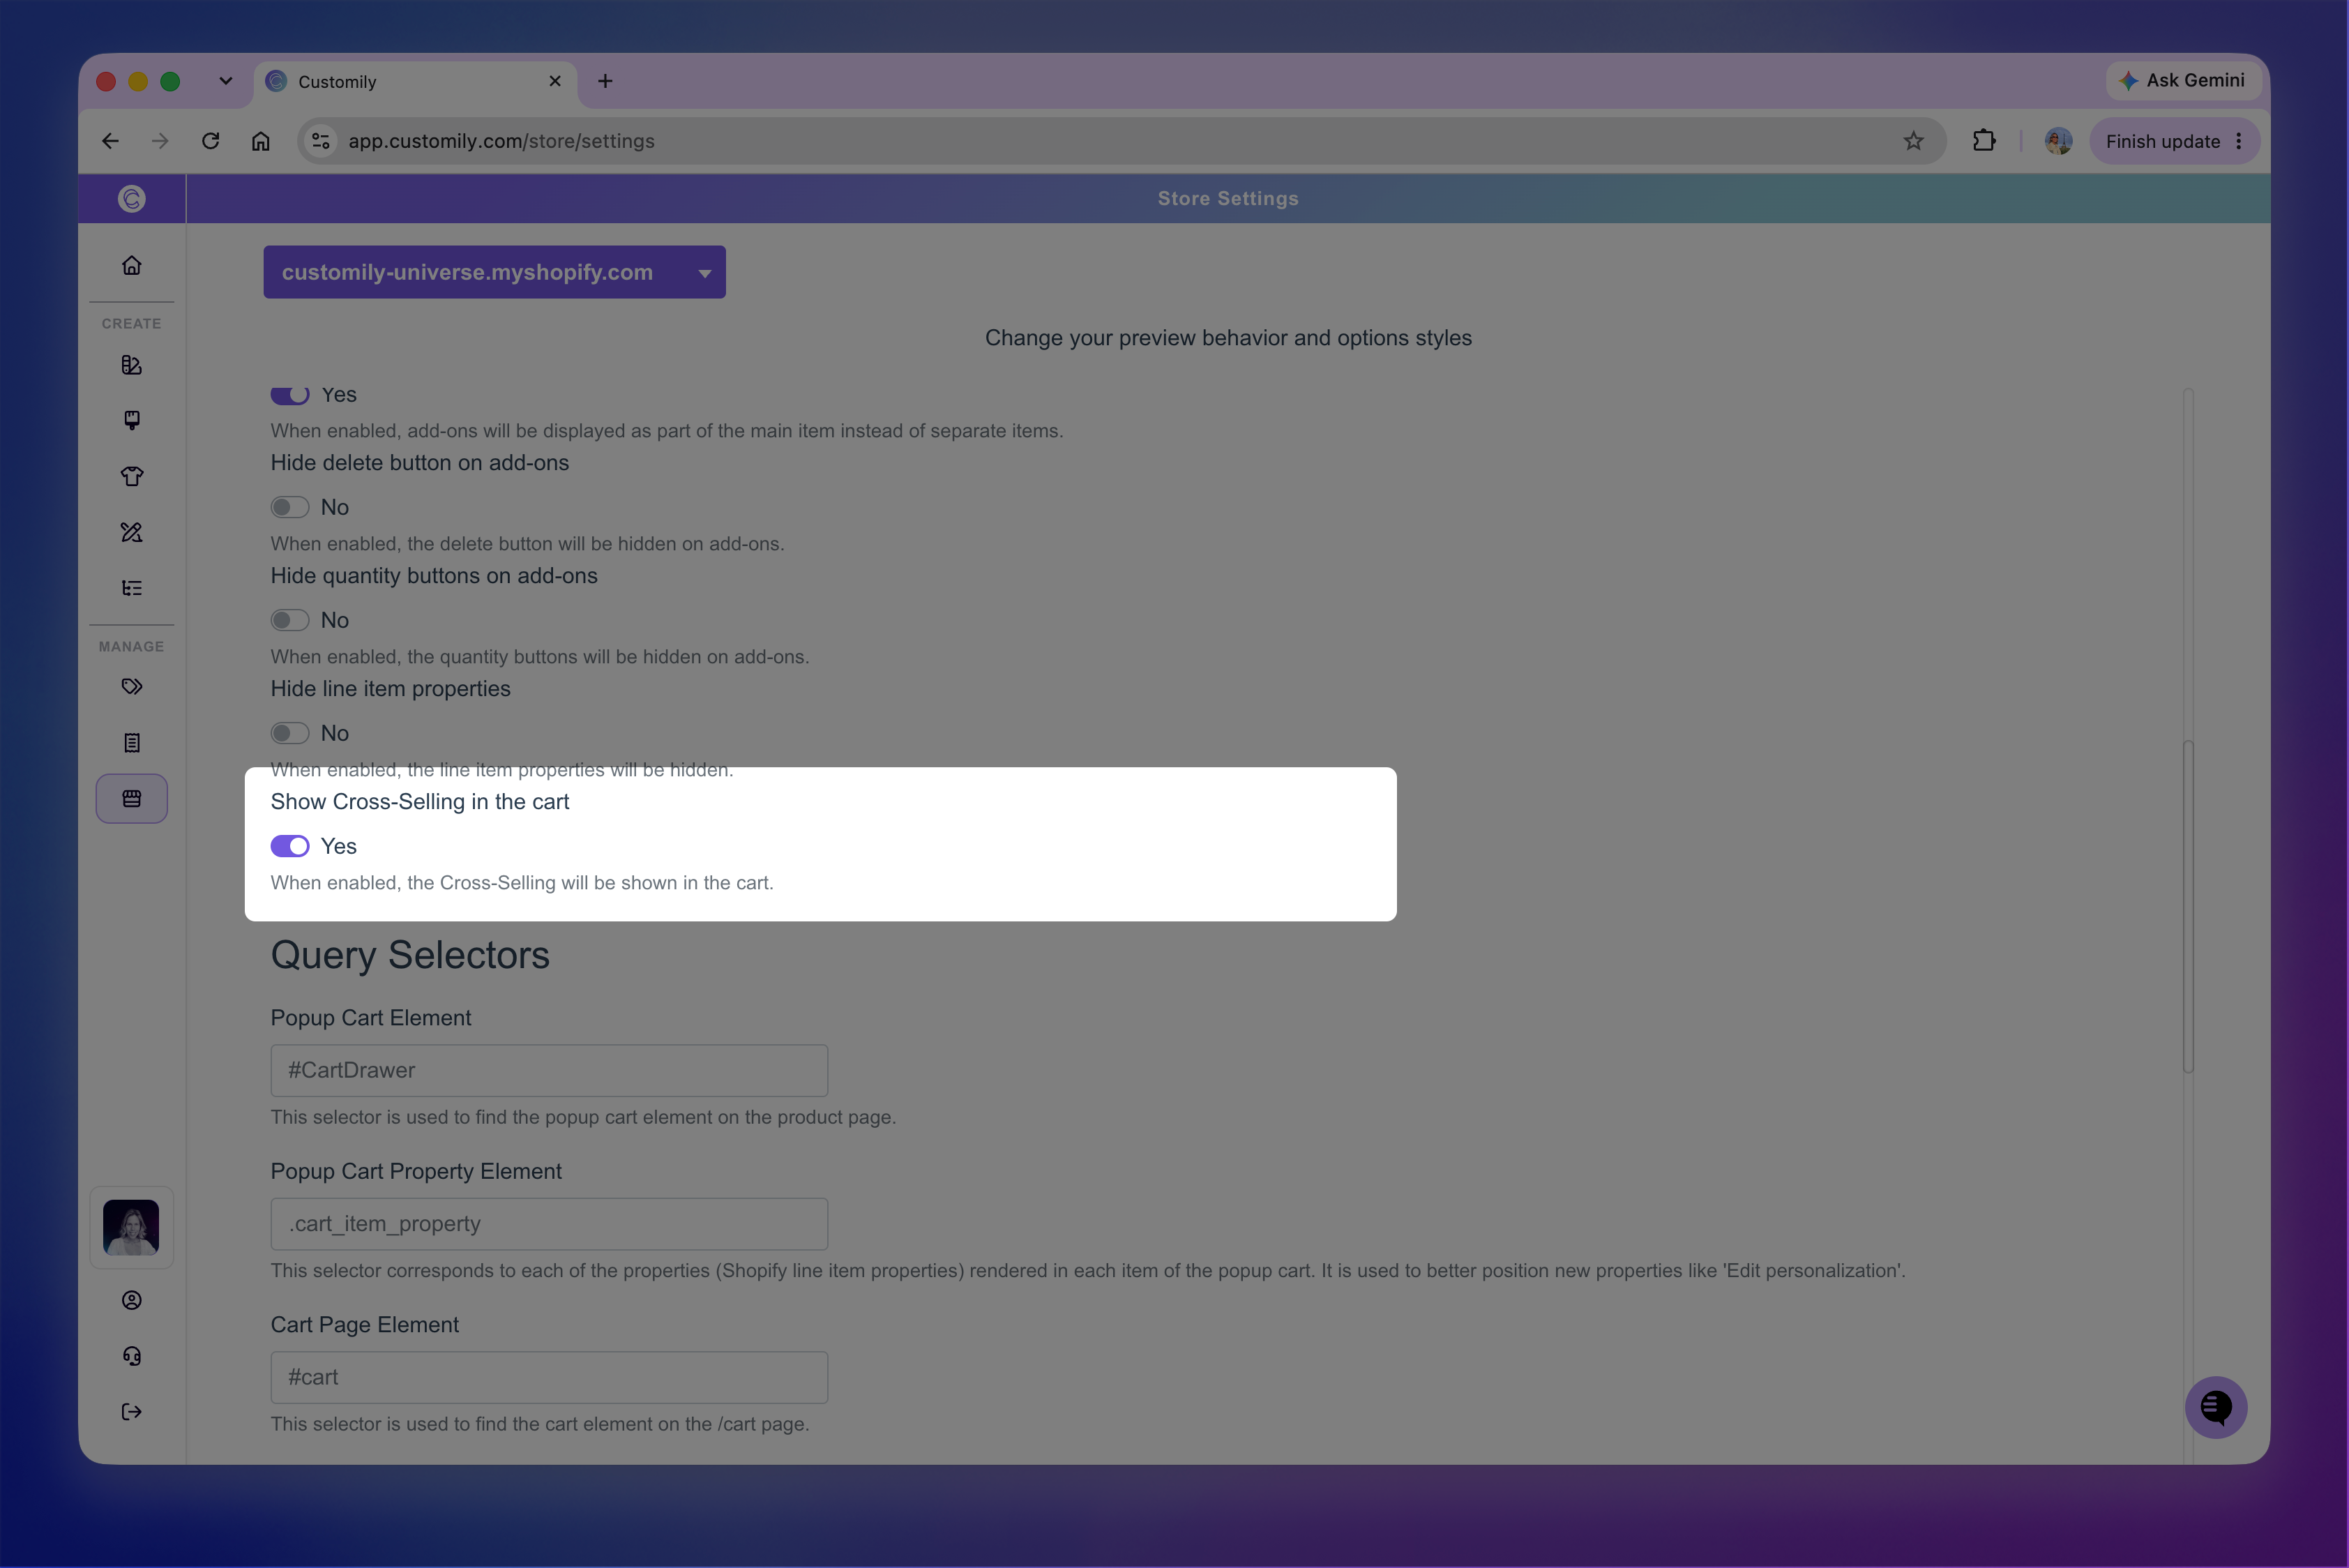
Save your changes for the new setting to take effect.
Create a Selling Group
Go to Products, open the ⋮ menu in the top-right corner, and select Manage selling groups.
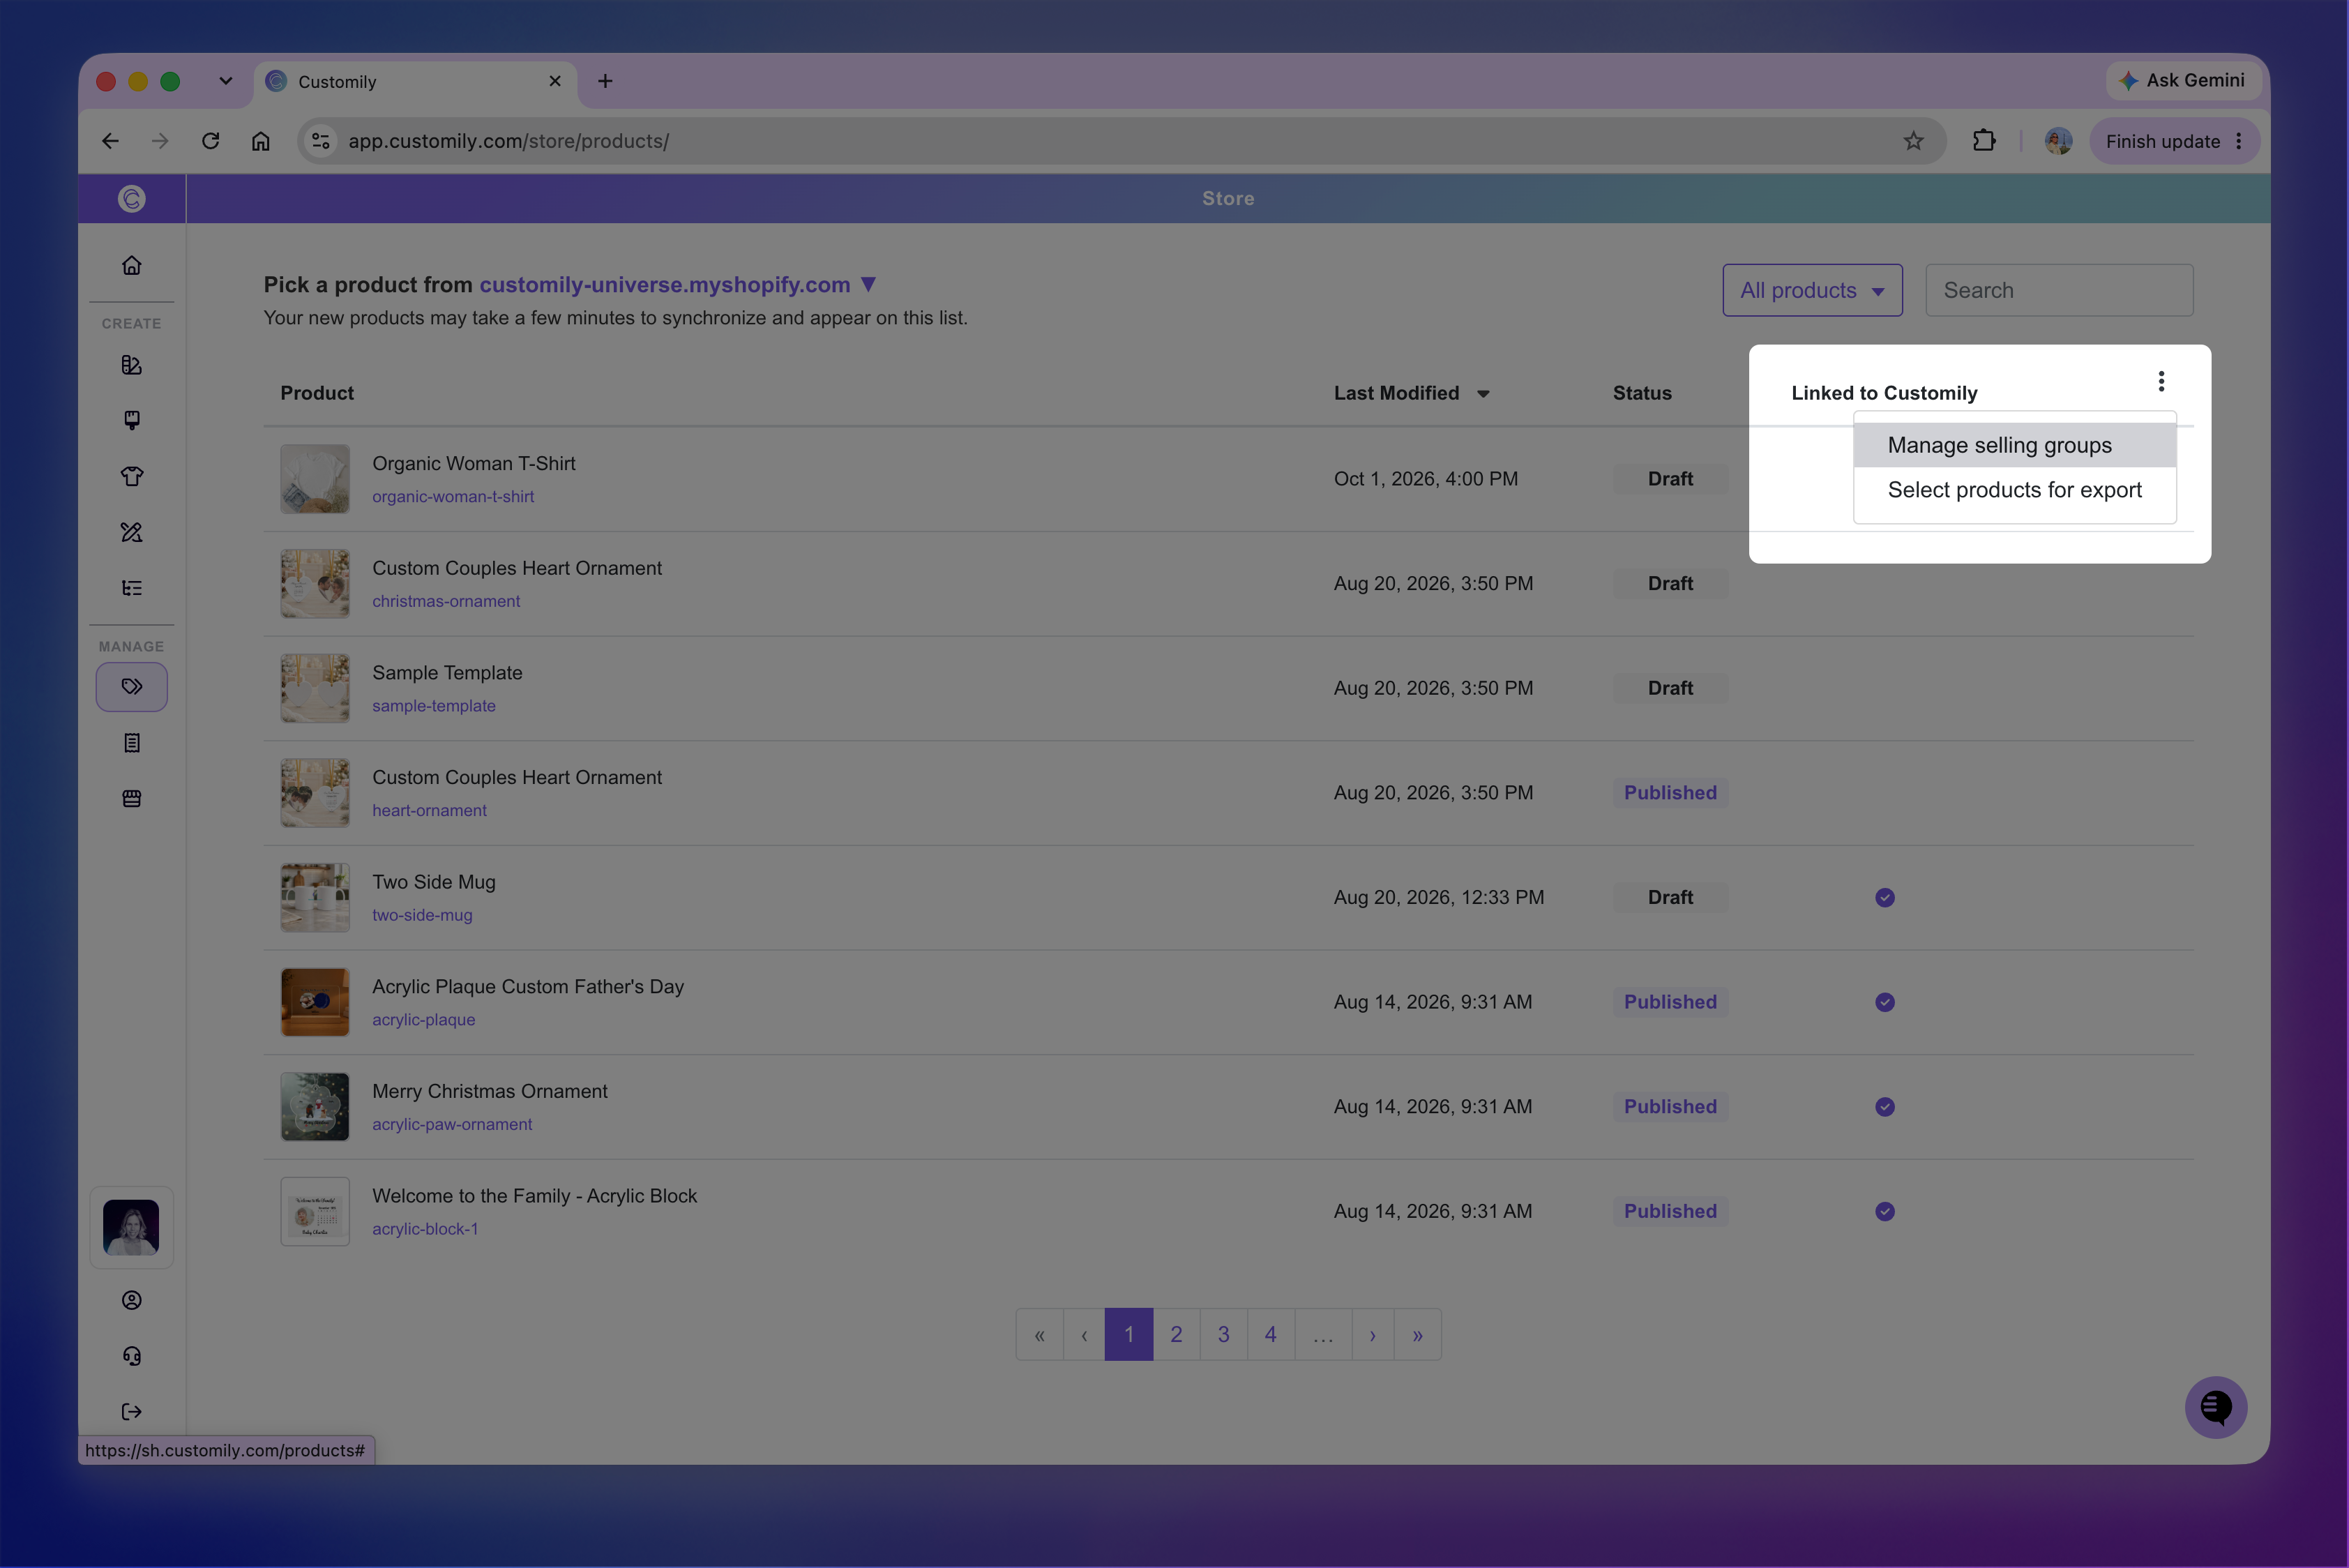
Click Create new selling group. Then:
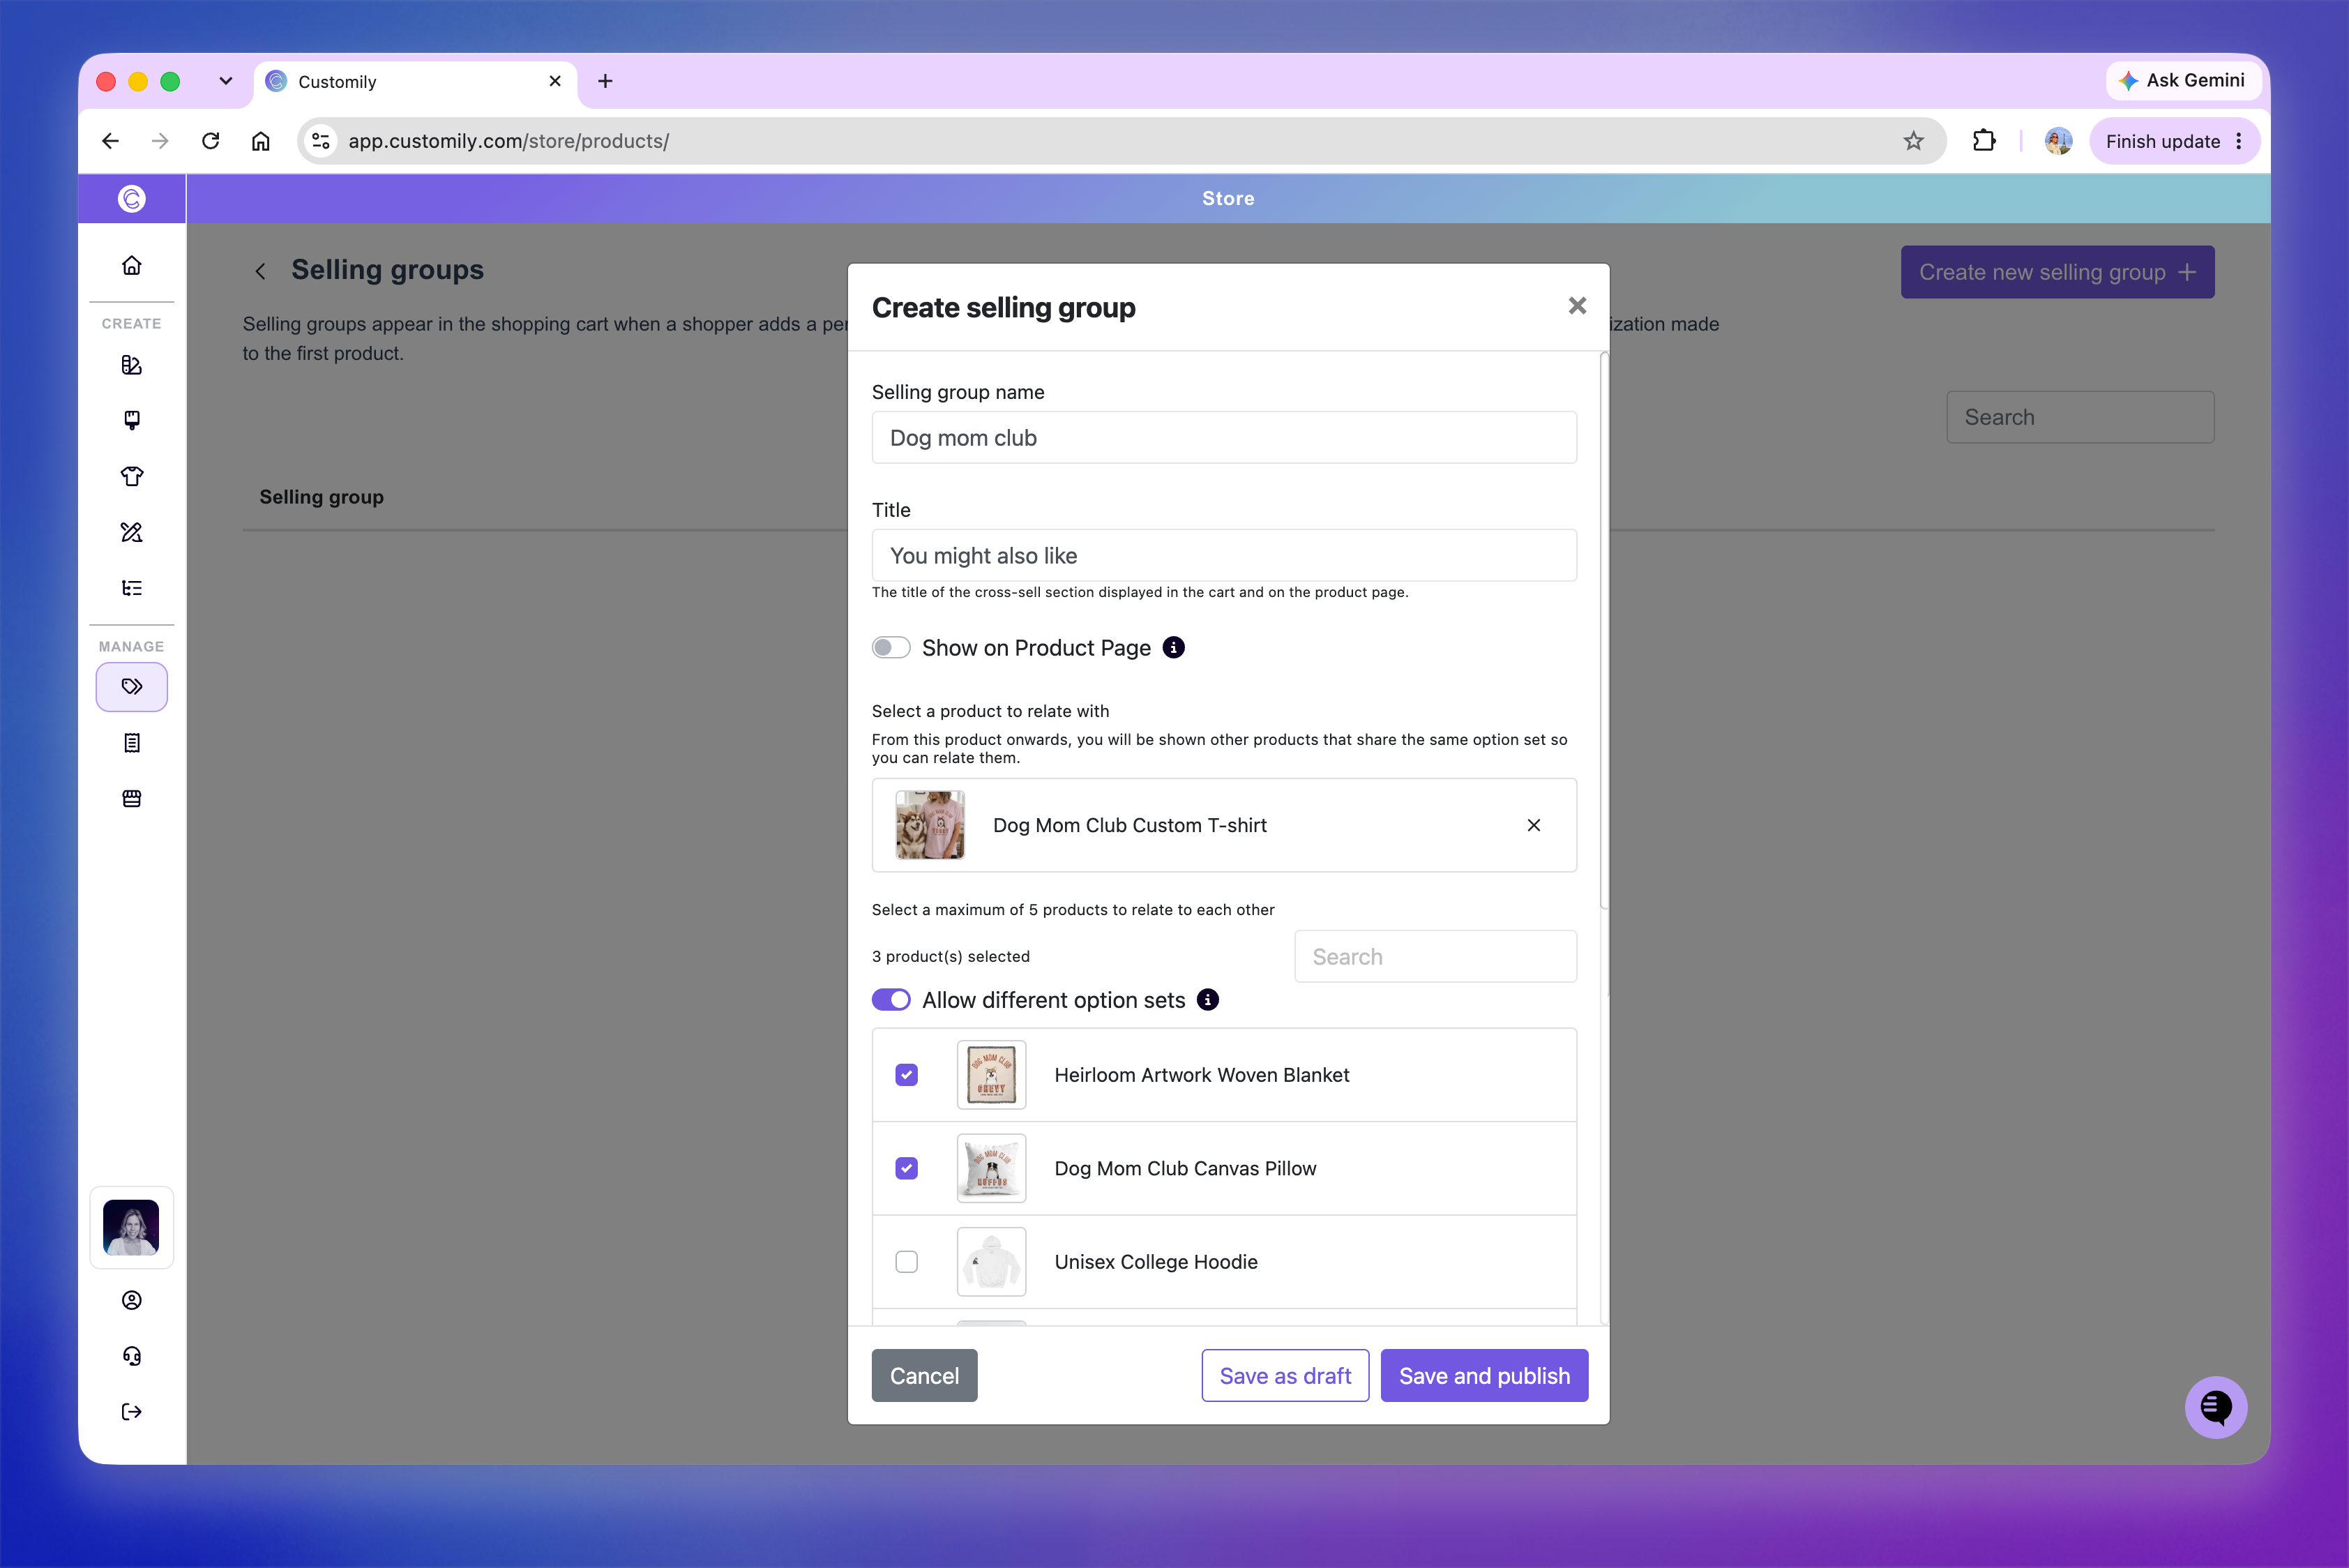
Enter a Selling group name. This is used internally to identify the group in Customily.
Enter a Title. This is the title shoppers will see above the cross-selling section.
Turn on Show on Product Page if you also want to display the cross-selling products on the product page.
Under Select a product to relate with, choose the main product for the Selling Group. This is the product whose personalization will be applied to the related products.
Select the related products you want to offer. By default, Customily only lists products that use the same Option Set as the main product.
If you want to offer products that use a different Option Set, turn on Allow different Option Sets. Customily will then let you select products that don't use the exact same Option Set.
Click Save and publish.
Important
When using Allow different Option Sets, make sure the personalization in the related products matches the personalization of the trigger product. The Option Sets don't need to be identical, but the options and personalization being transferred need to be compatible.
For example, you might have two similar products that use different Option Sets but both include the same name, image, and color personalization. These can work well together in a Selling Group.
If the related product expects different personalization or doesn't have the corresponding options, the shopper's existing personalization won't transfer correctly and the cross-selling experience won't make sense.
Show cross-selling on the product page
By default, cross-selling products are displayed in the cart after the shopper adds the trigger product.
Turn on Show on Product Page if you also want to display the related products directly on the trigger product's page, giving shoppers the opportunity to add them before going to the cart.
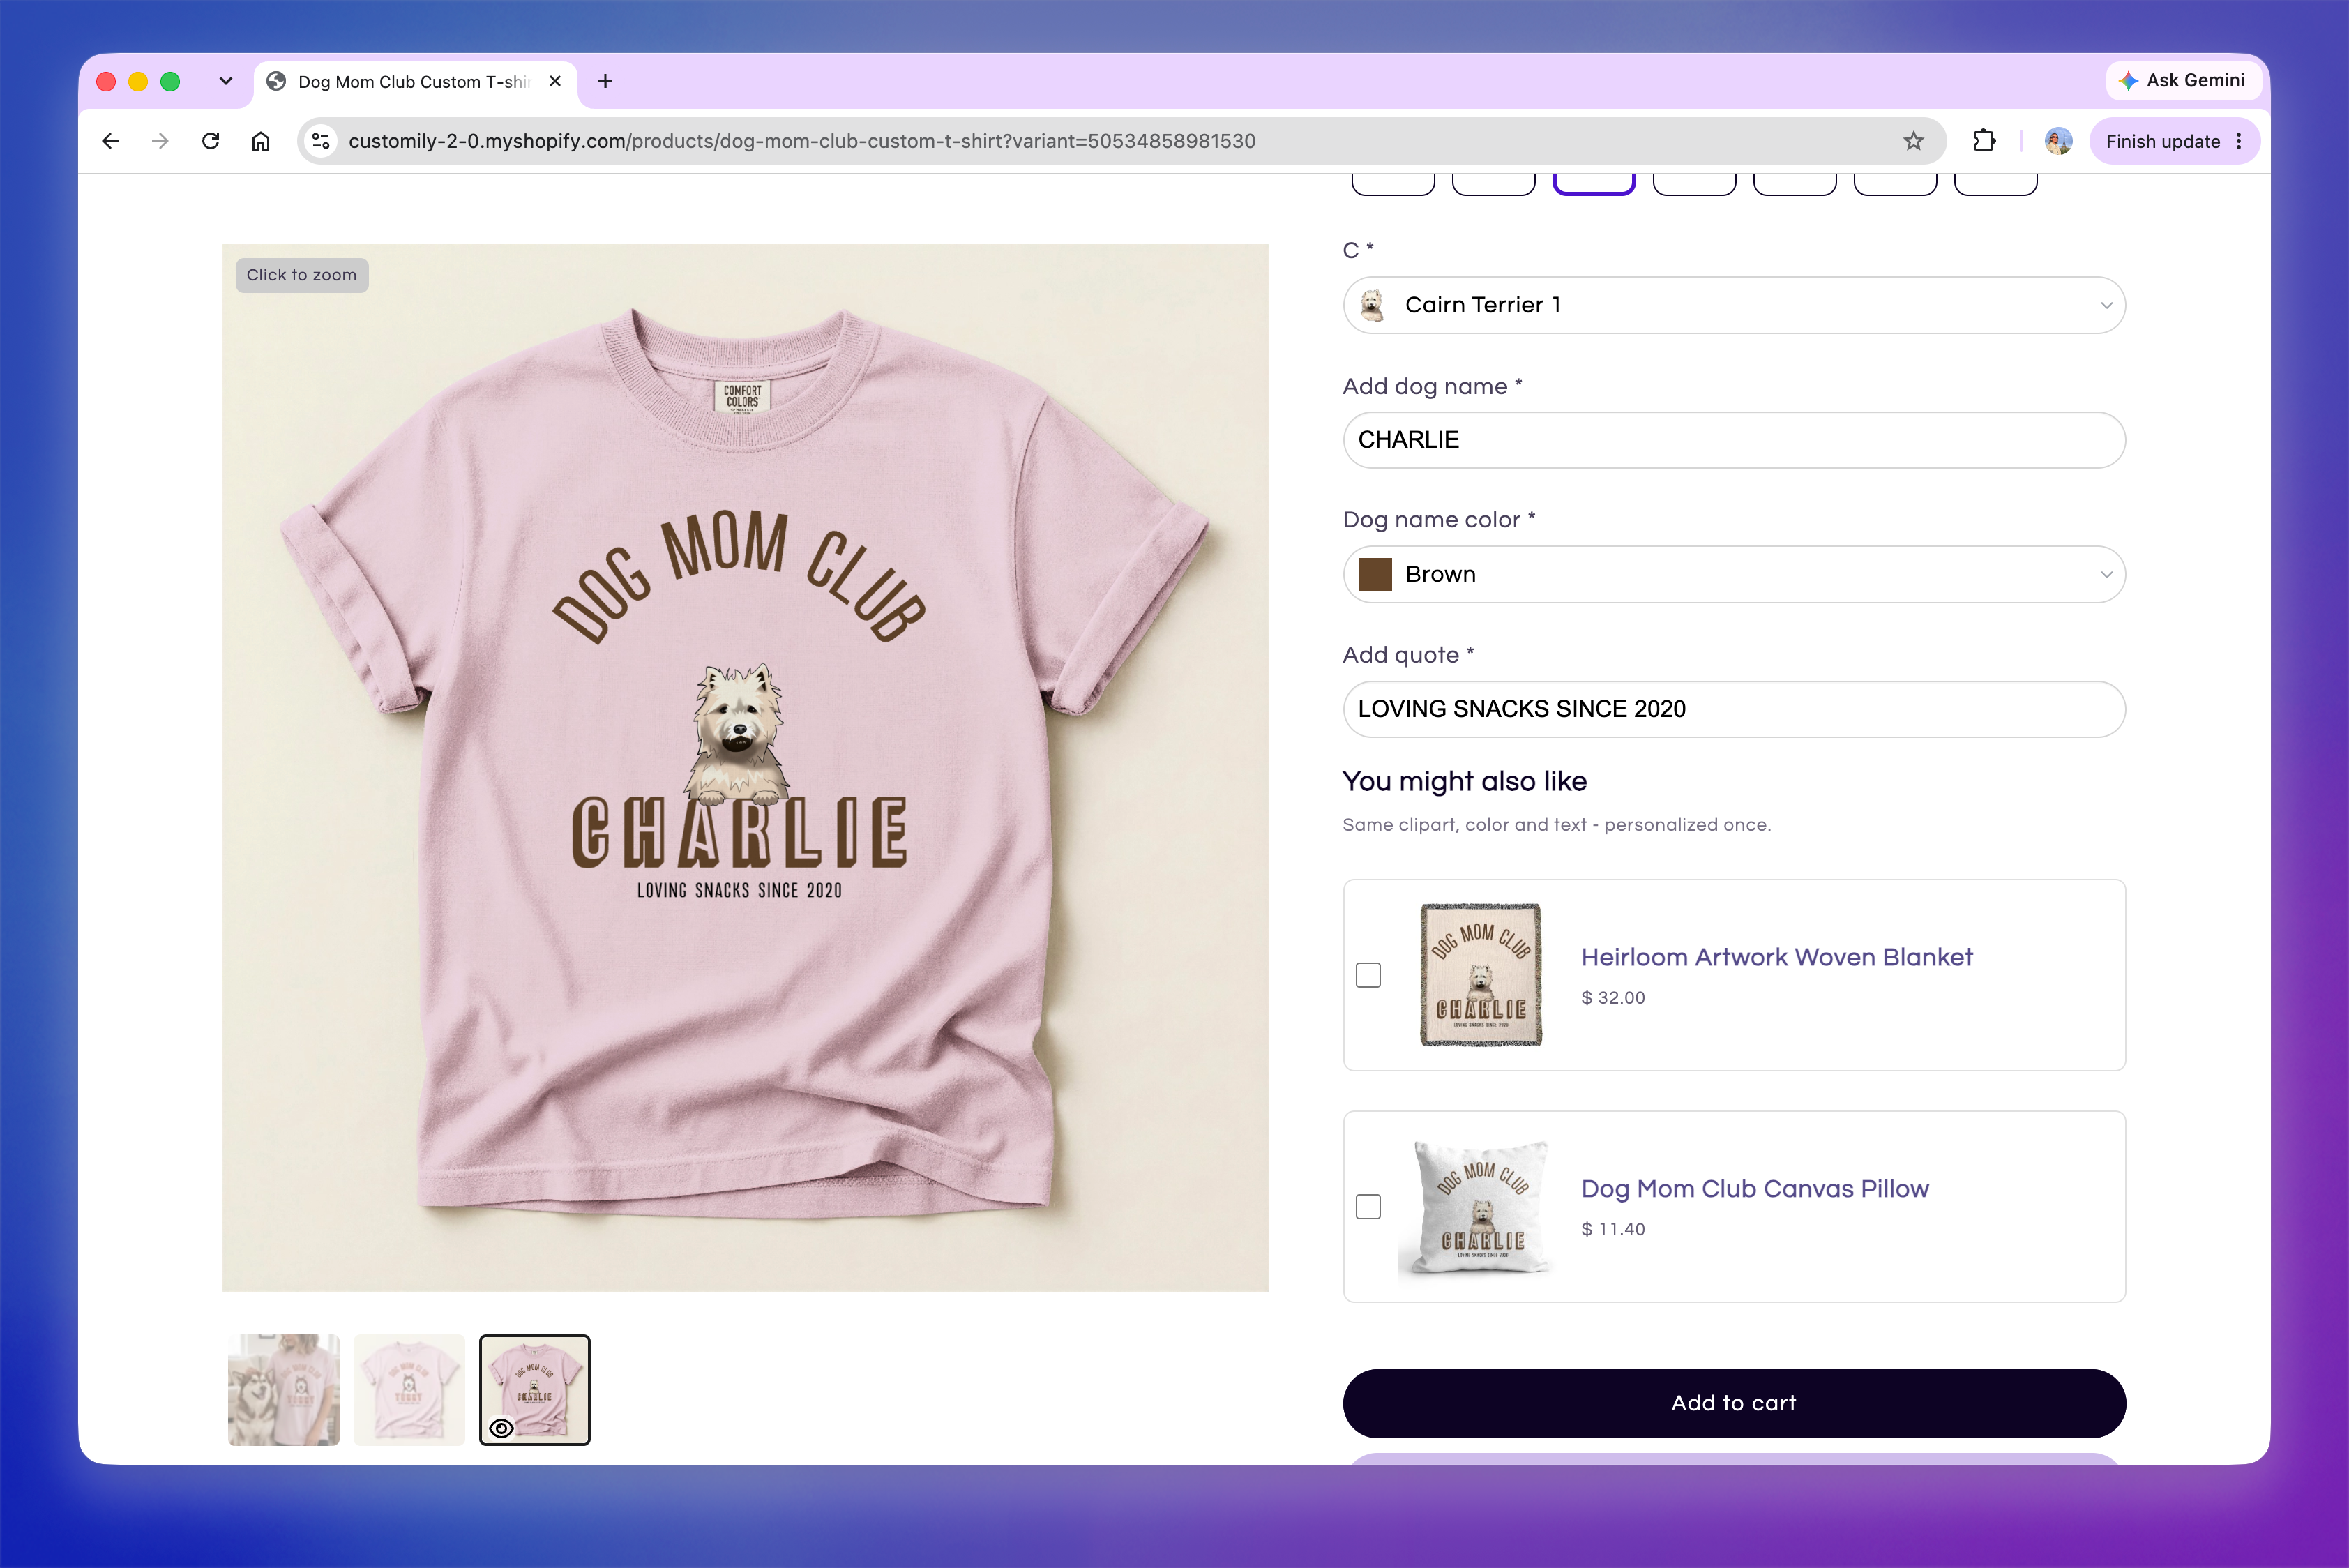
Customize the cross-selling section
You can customize the cross-selling section wherever it appears on your store. These styles apply to the cart page, cart drawer, and, if Show on Product Page is enabled, the product page.
Go to Store Settings > Styles → Cross-Selling section styles.
From here, you can customize:
Personalize cross-selling title — change the section title, text color, and font size.
Personalize product title — change the text color and font size of the related product titles.
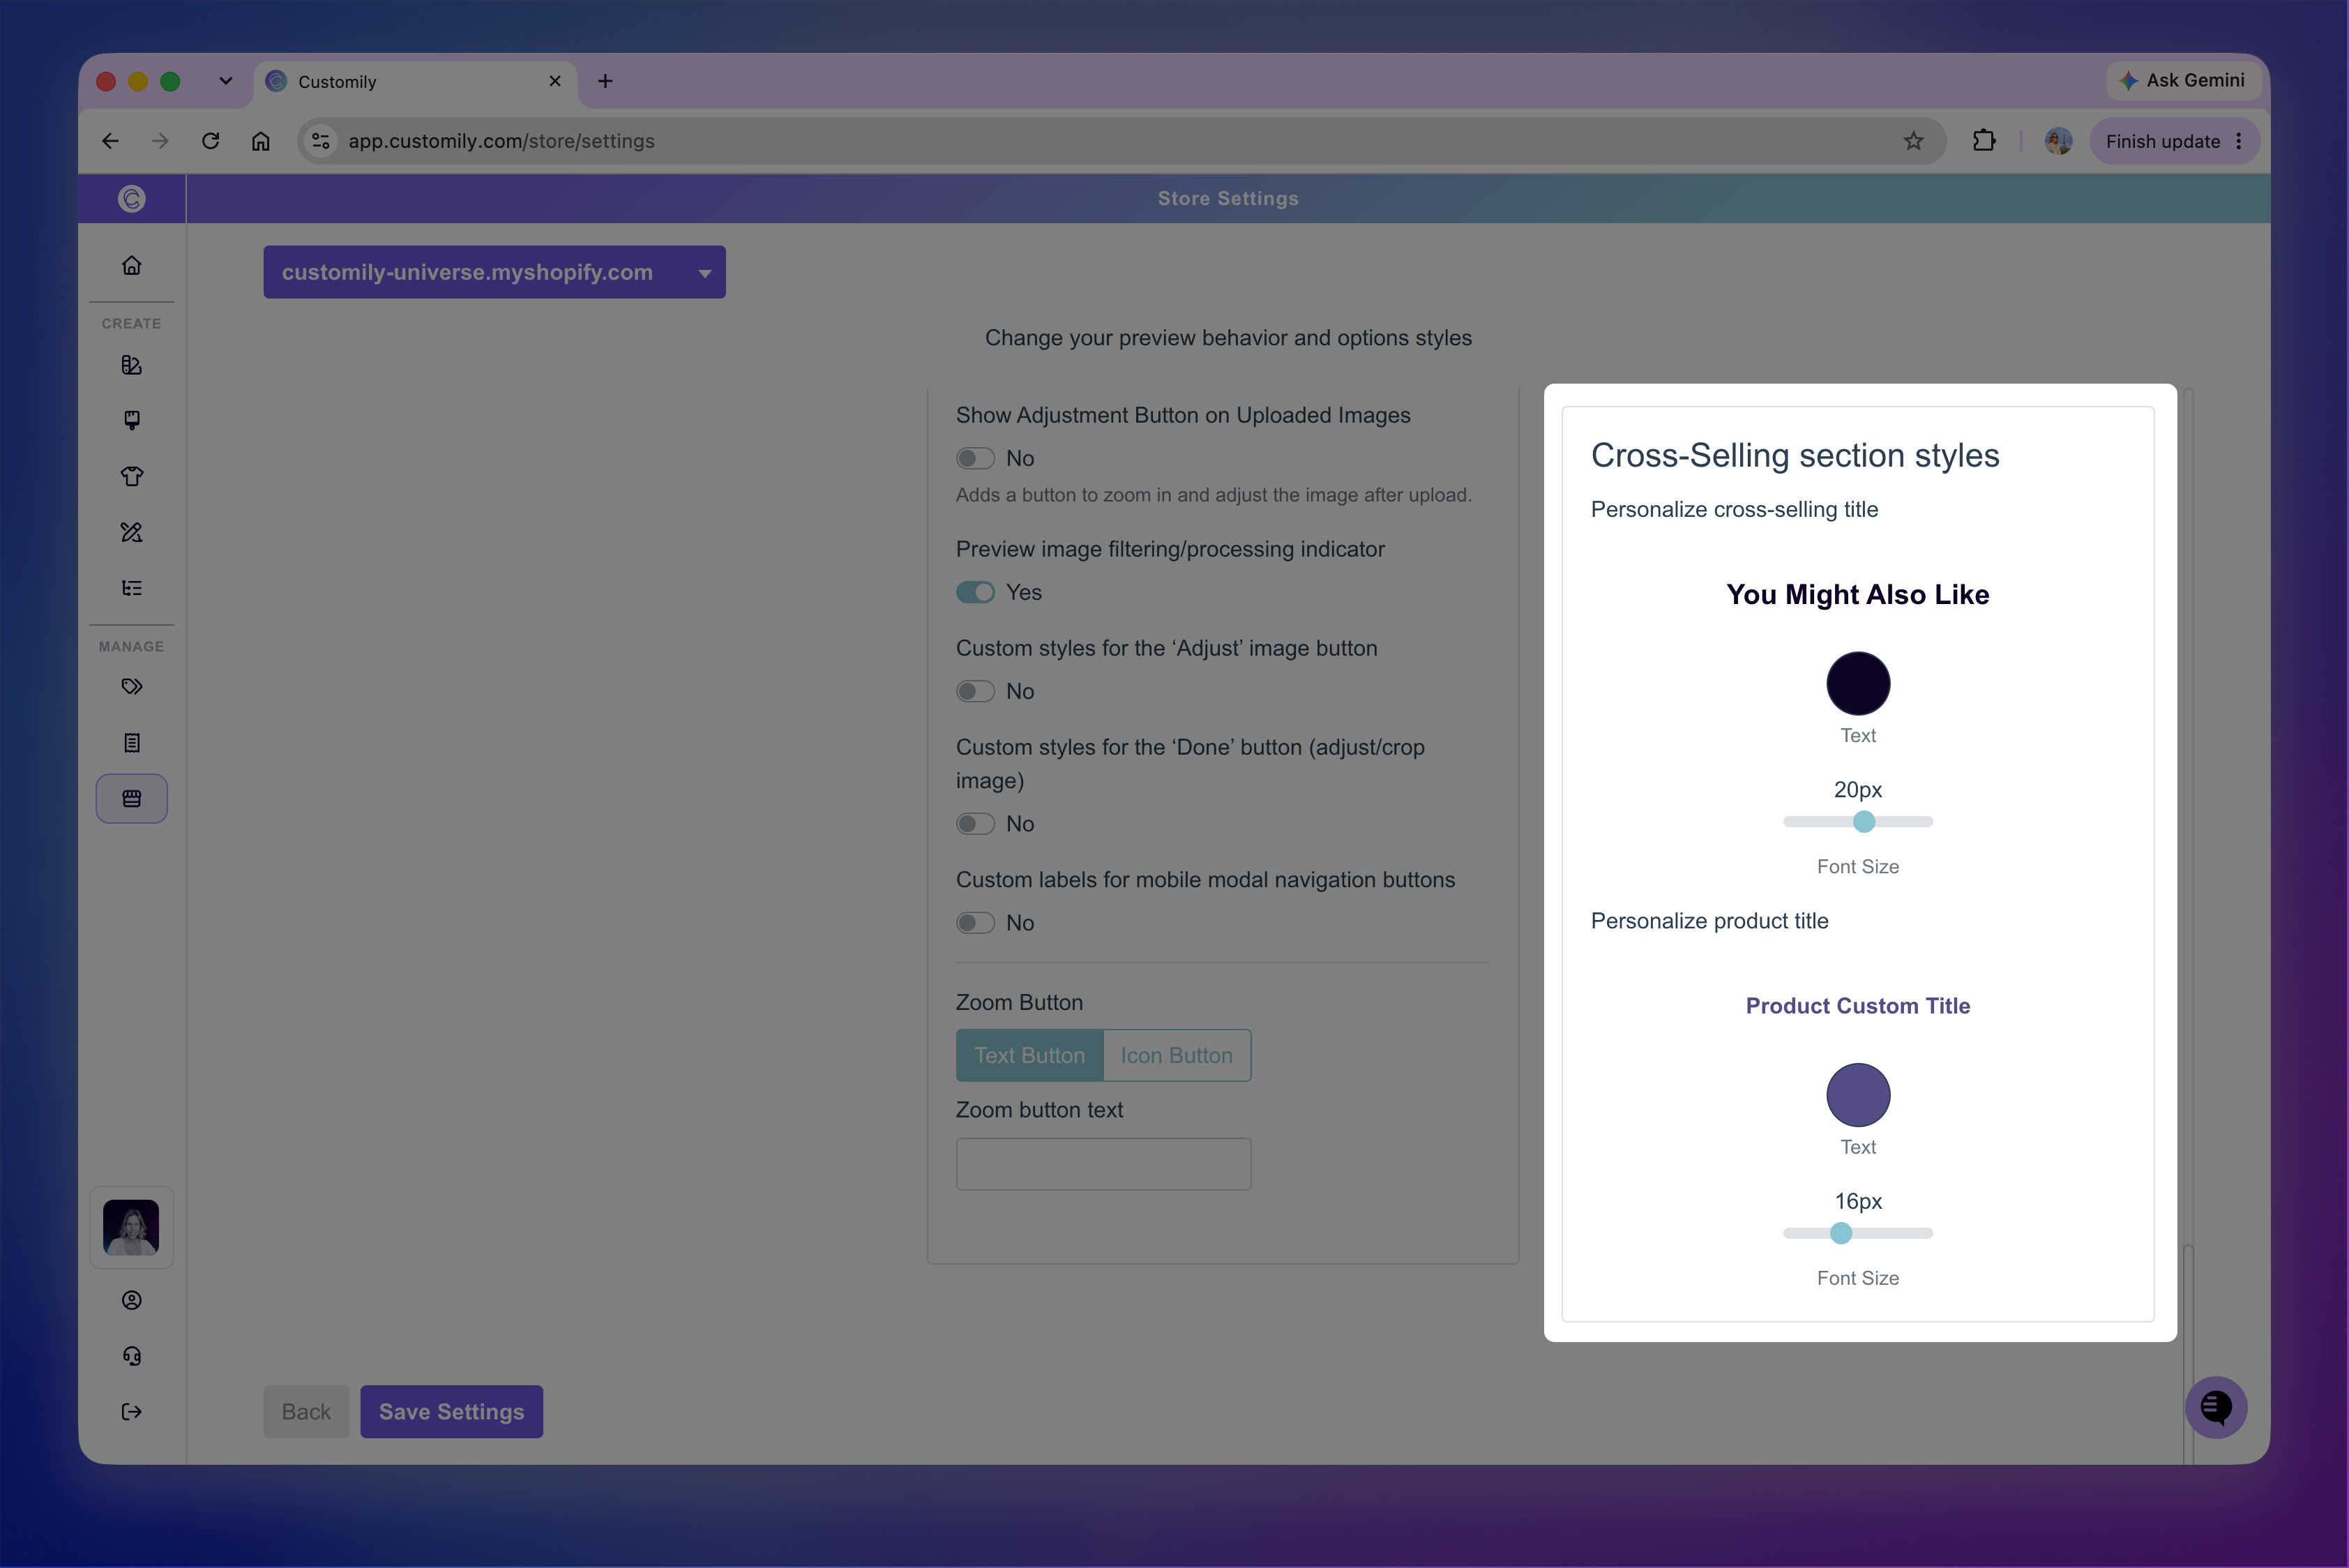
You can see the preview update as you customize the styles.
Save your changes for the new styles to take effect.