Customize the Add to Cart button
Last updated: October 1, 2026
Customize the text and appearance of the Add to Cart button, choose whether to display the product price, and control how the button is positioned alongside the quantity selector.
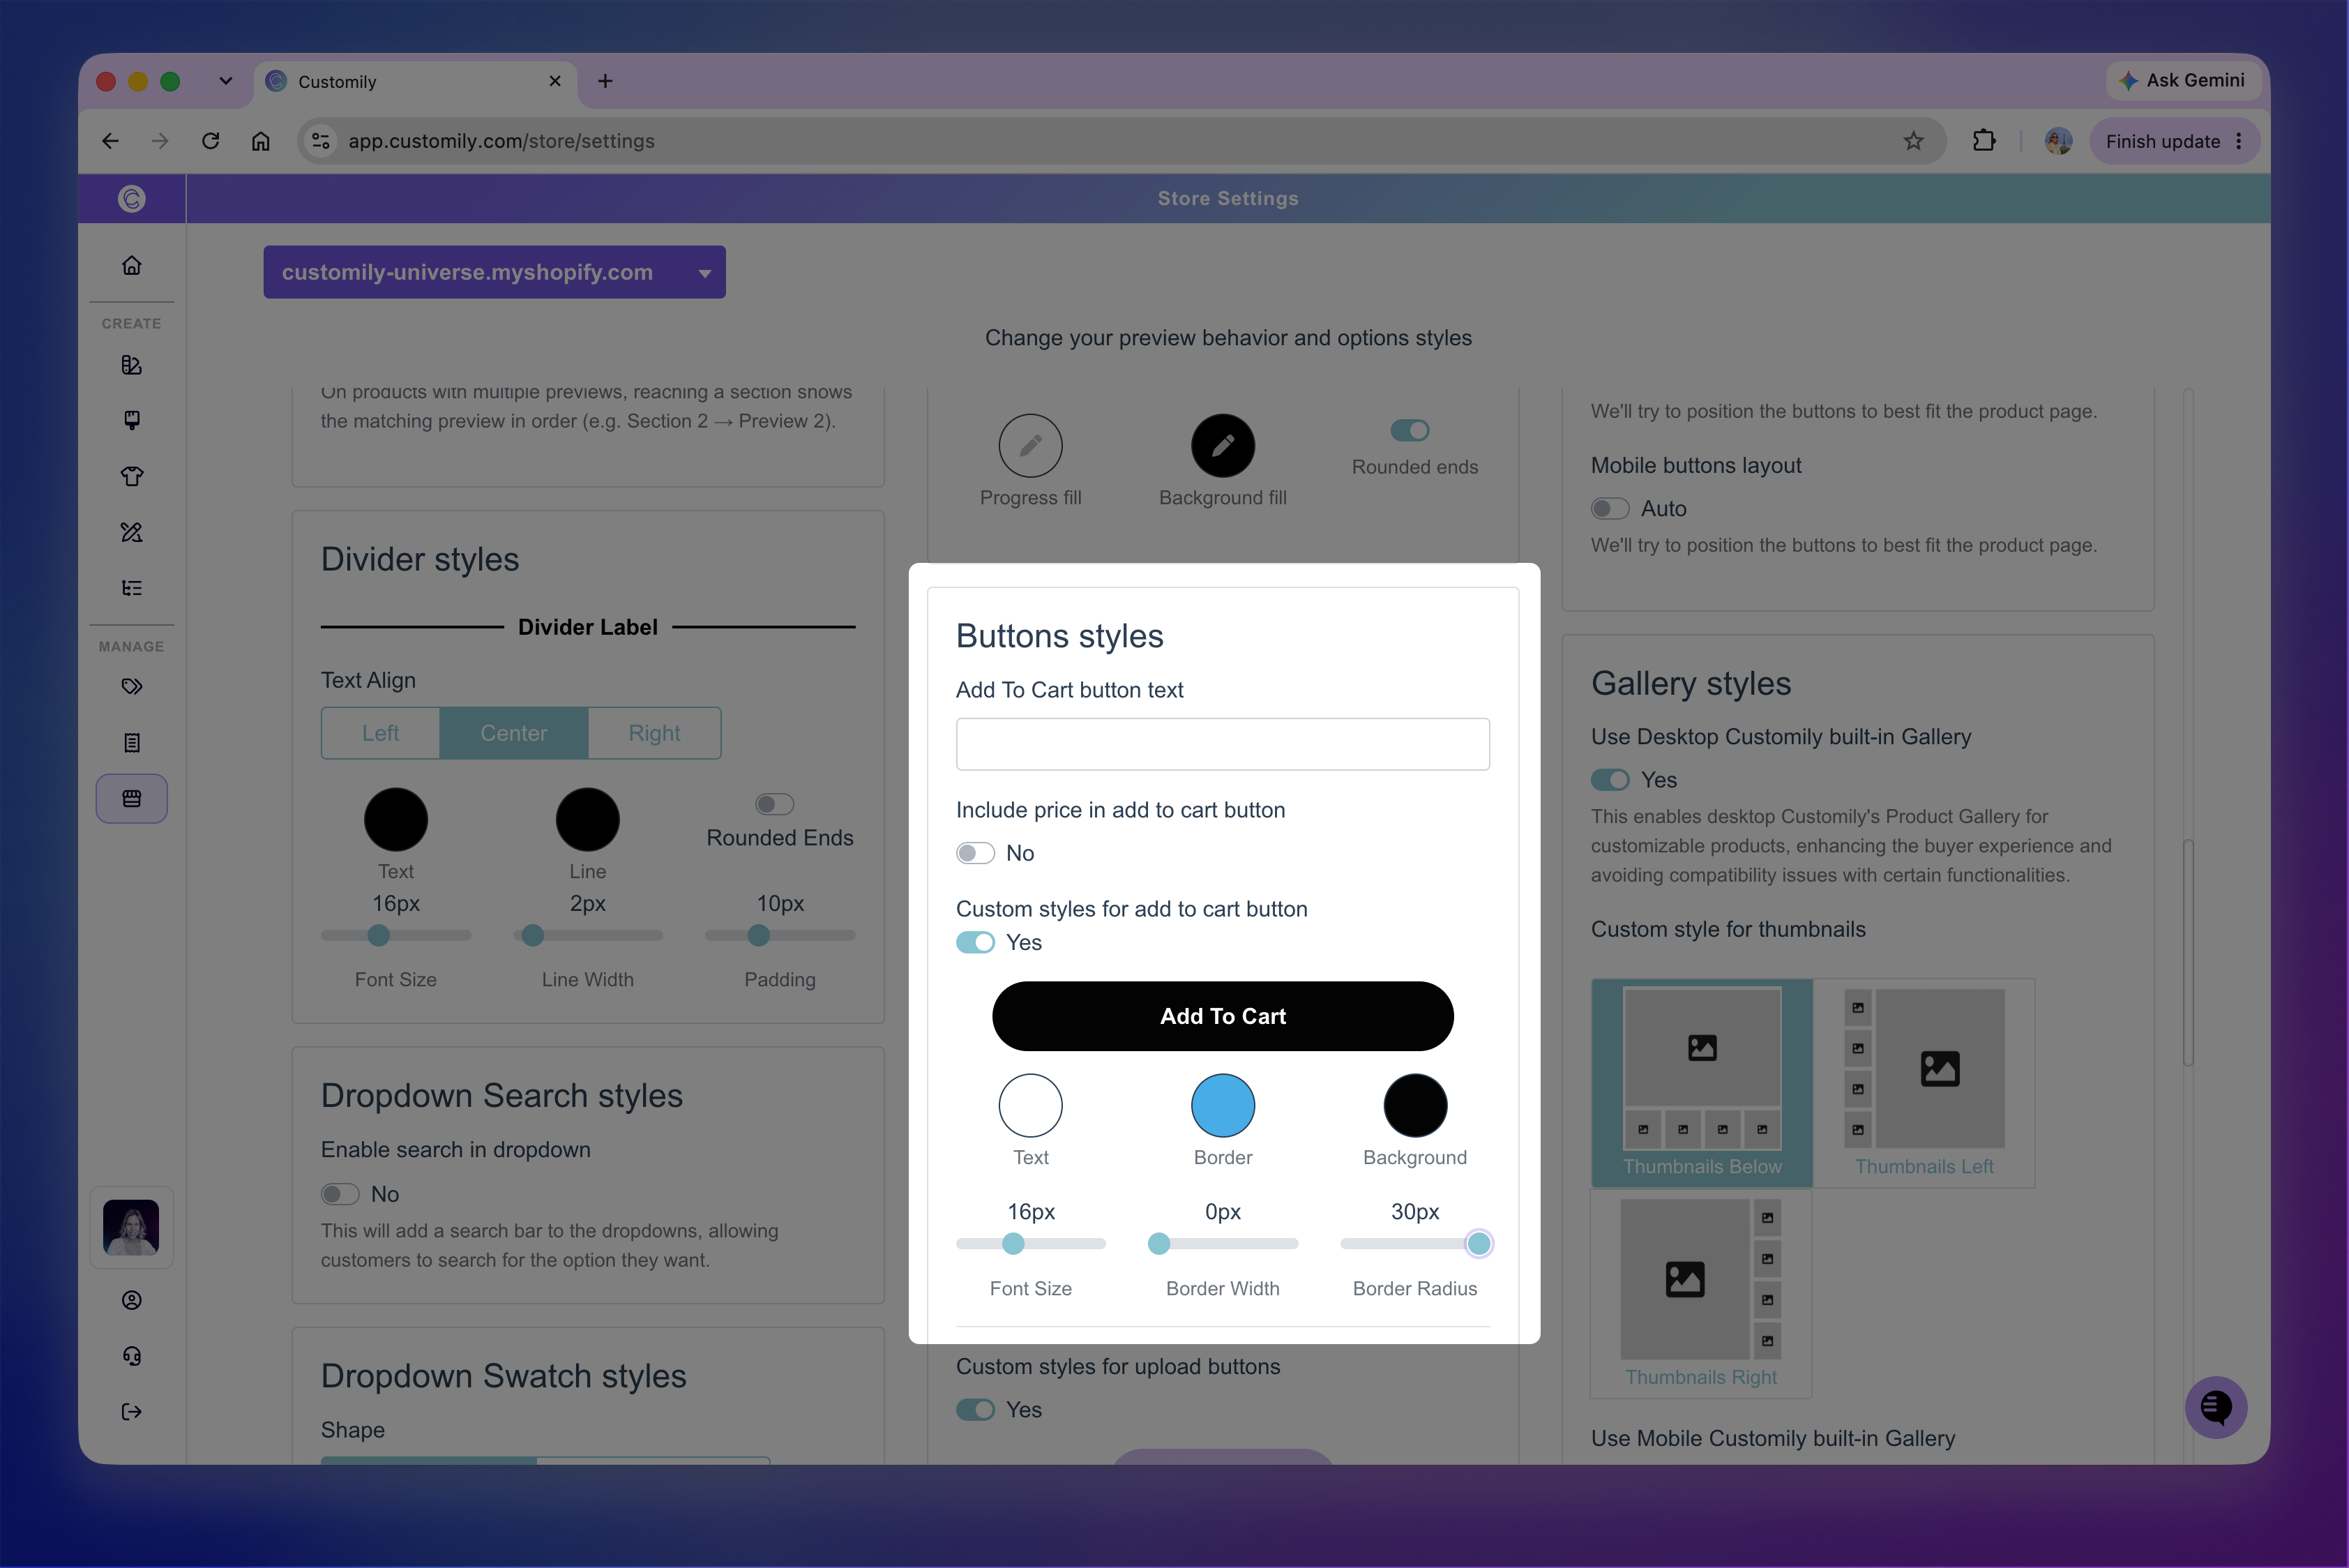
Customize the Add to Cart button appearance
Go to Store Settings > Styles to customize the content and appearance of the Add to Cart button.
Add To Cart button text: Changes the text displayed on the button.
Include price in add to cart button: Displays the product price directly in the button.
Custom styles for add to cart button: Lets you customize the text color, border color, background color, font size, border width, and border radius.
When custom styles are enabled, the preview in Store Settings updates as you make changes.
Customize the button and quantity layout
By default, Customily positions the Add to Cart button and your store's quantity selector automatically. If you want more control over how they're arranged, you can use a custom button layout.
Go to Store Settings > Styles → Buttons layout, then turn on Custom under Desktop buttons layout.
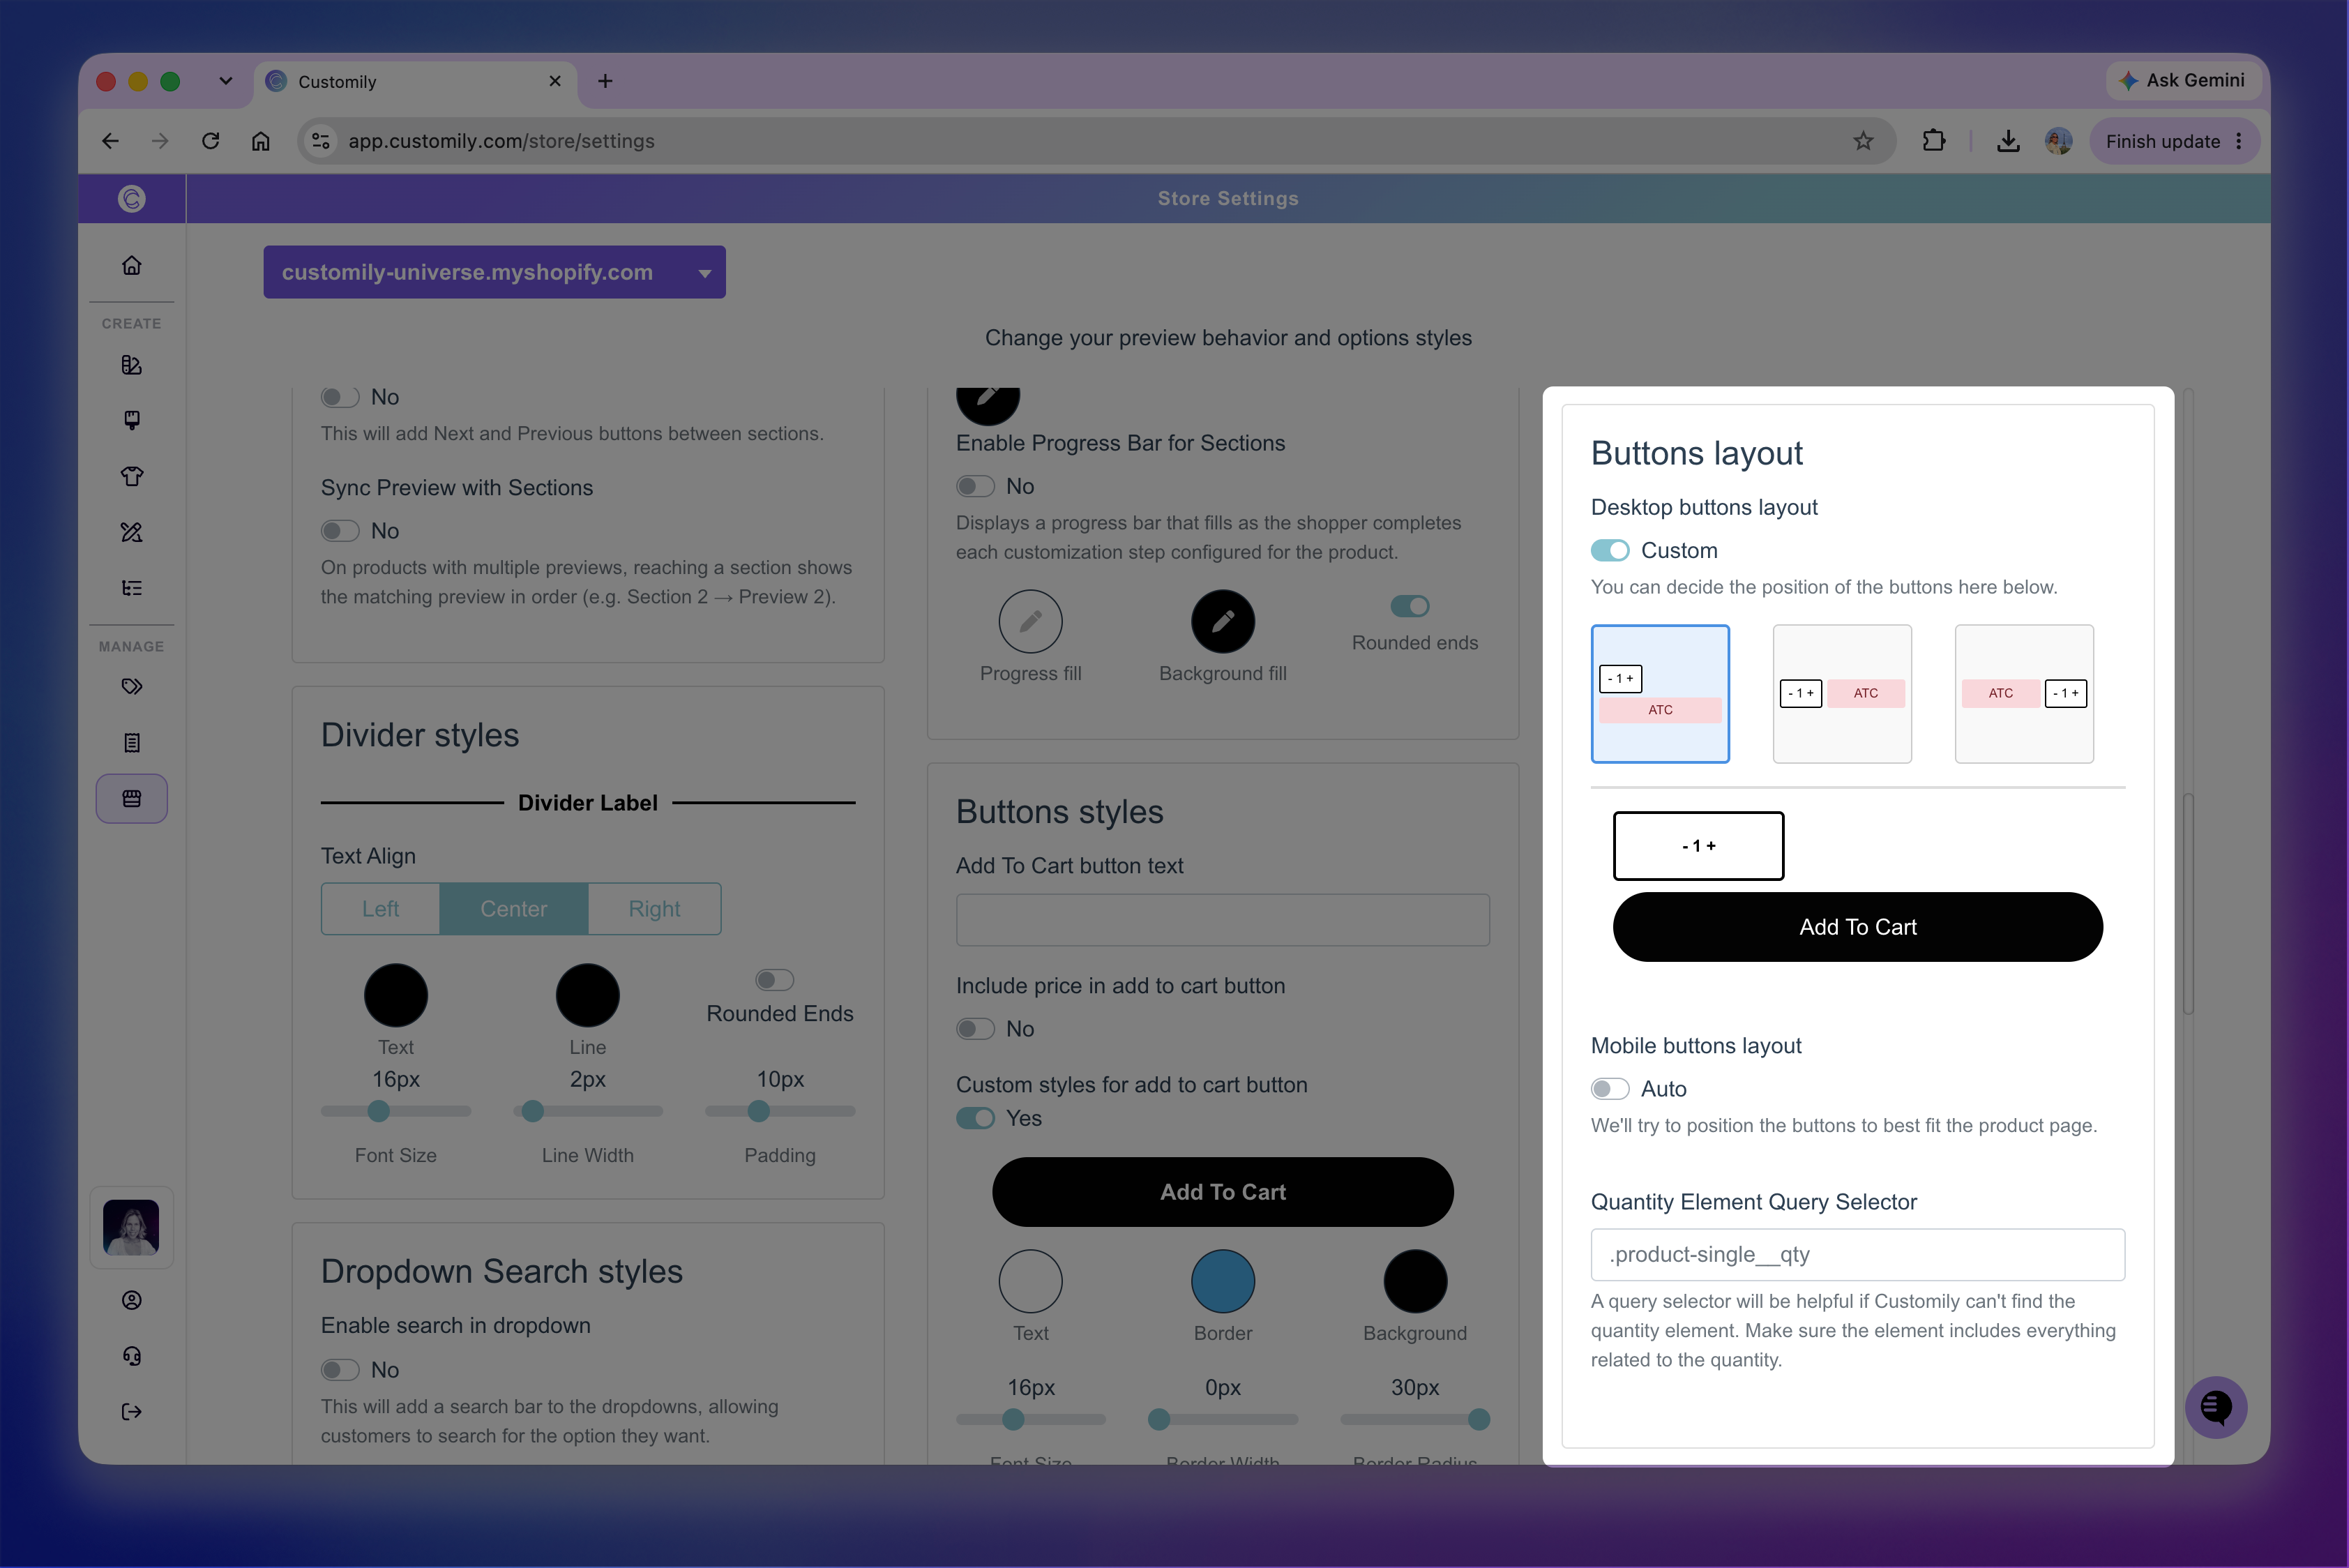
Desktop and mobile layouts are configured independently, so you can choose the arrangement that works best for each screen size.
For each device, you can choose from three arrangements:
place the quantity selector above the Add to Cart button
place it to the left
or place it to the right.
The preview below the layout options shows how the selected arrangement will look.
Specify your quantity selector
Customily needs to identify your store's quantity selector before it can include it in the custom layout. If it isn't detected automatically, enter its CSS selector under Quantity Element Query Selector.
The selector should target the element that contains the complete quantity control, including its decrease button, quantity value, and increase button.
To find the selector:
Open your product page in your browser.
Right-click the quantity selector and choose Inspect.
In the browser's developer tools, find the element that contains the complete quantity control, including the decrease button, quantity value, and increase button.
Look for a class or ID you can use as the selector. For example, a class such as
product-form__quantitywould be entered as.product-form__quantity.Paste the selector into Quantity Element Query Selector and check your product page to make sure the quantity control is positioned correctly.
Tip
Classes are often more reliable than IDs, since some themes generate IDs that change between products or page loads. Make sure the class you choose is specific enough to identify the quantity control.